Creating, Populating, and Managing a Contact List
A contact list can be used for email marketing, calling, exports, or just for use in general sales activities. There are multiple places you can create or append a list from within the system. You can do this from certain reports, searches, the contact page, or even the list itself. You can even update the list dynamically by associating a saved search to the list so any contact who matches the criteria will be added or removed from the list automatically.
In this document, we will review creating a new list and going over some of the different ways you can add contacts to it. Then, we will use the list in our system for email marketing and sales activities.
To view and manage all of your contact lists, go to Contacts > Contact Lists. To access this page, you need the User Permission Contact Lists. Here, you can use the search fields to find particular lists, or manually create a new list by using the +Create New List action in the upper right corner of the page.
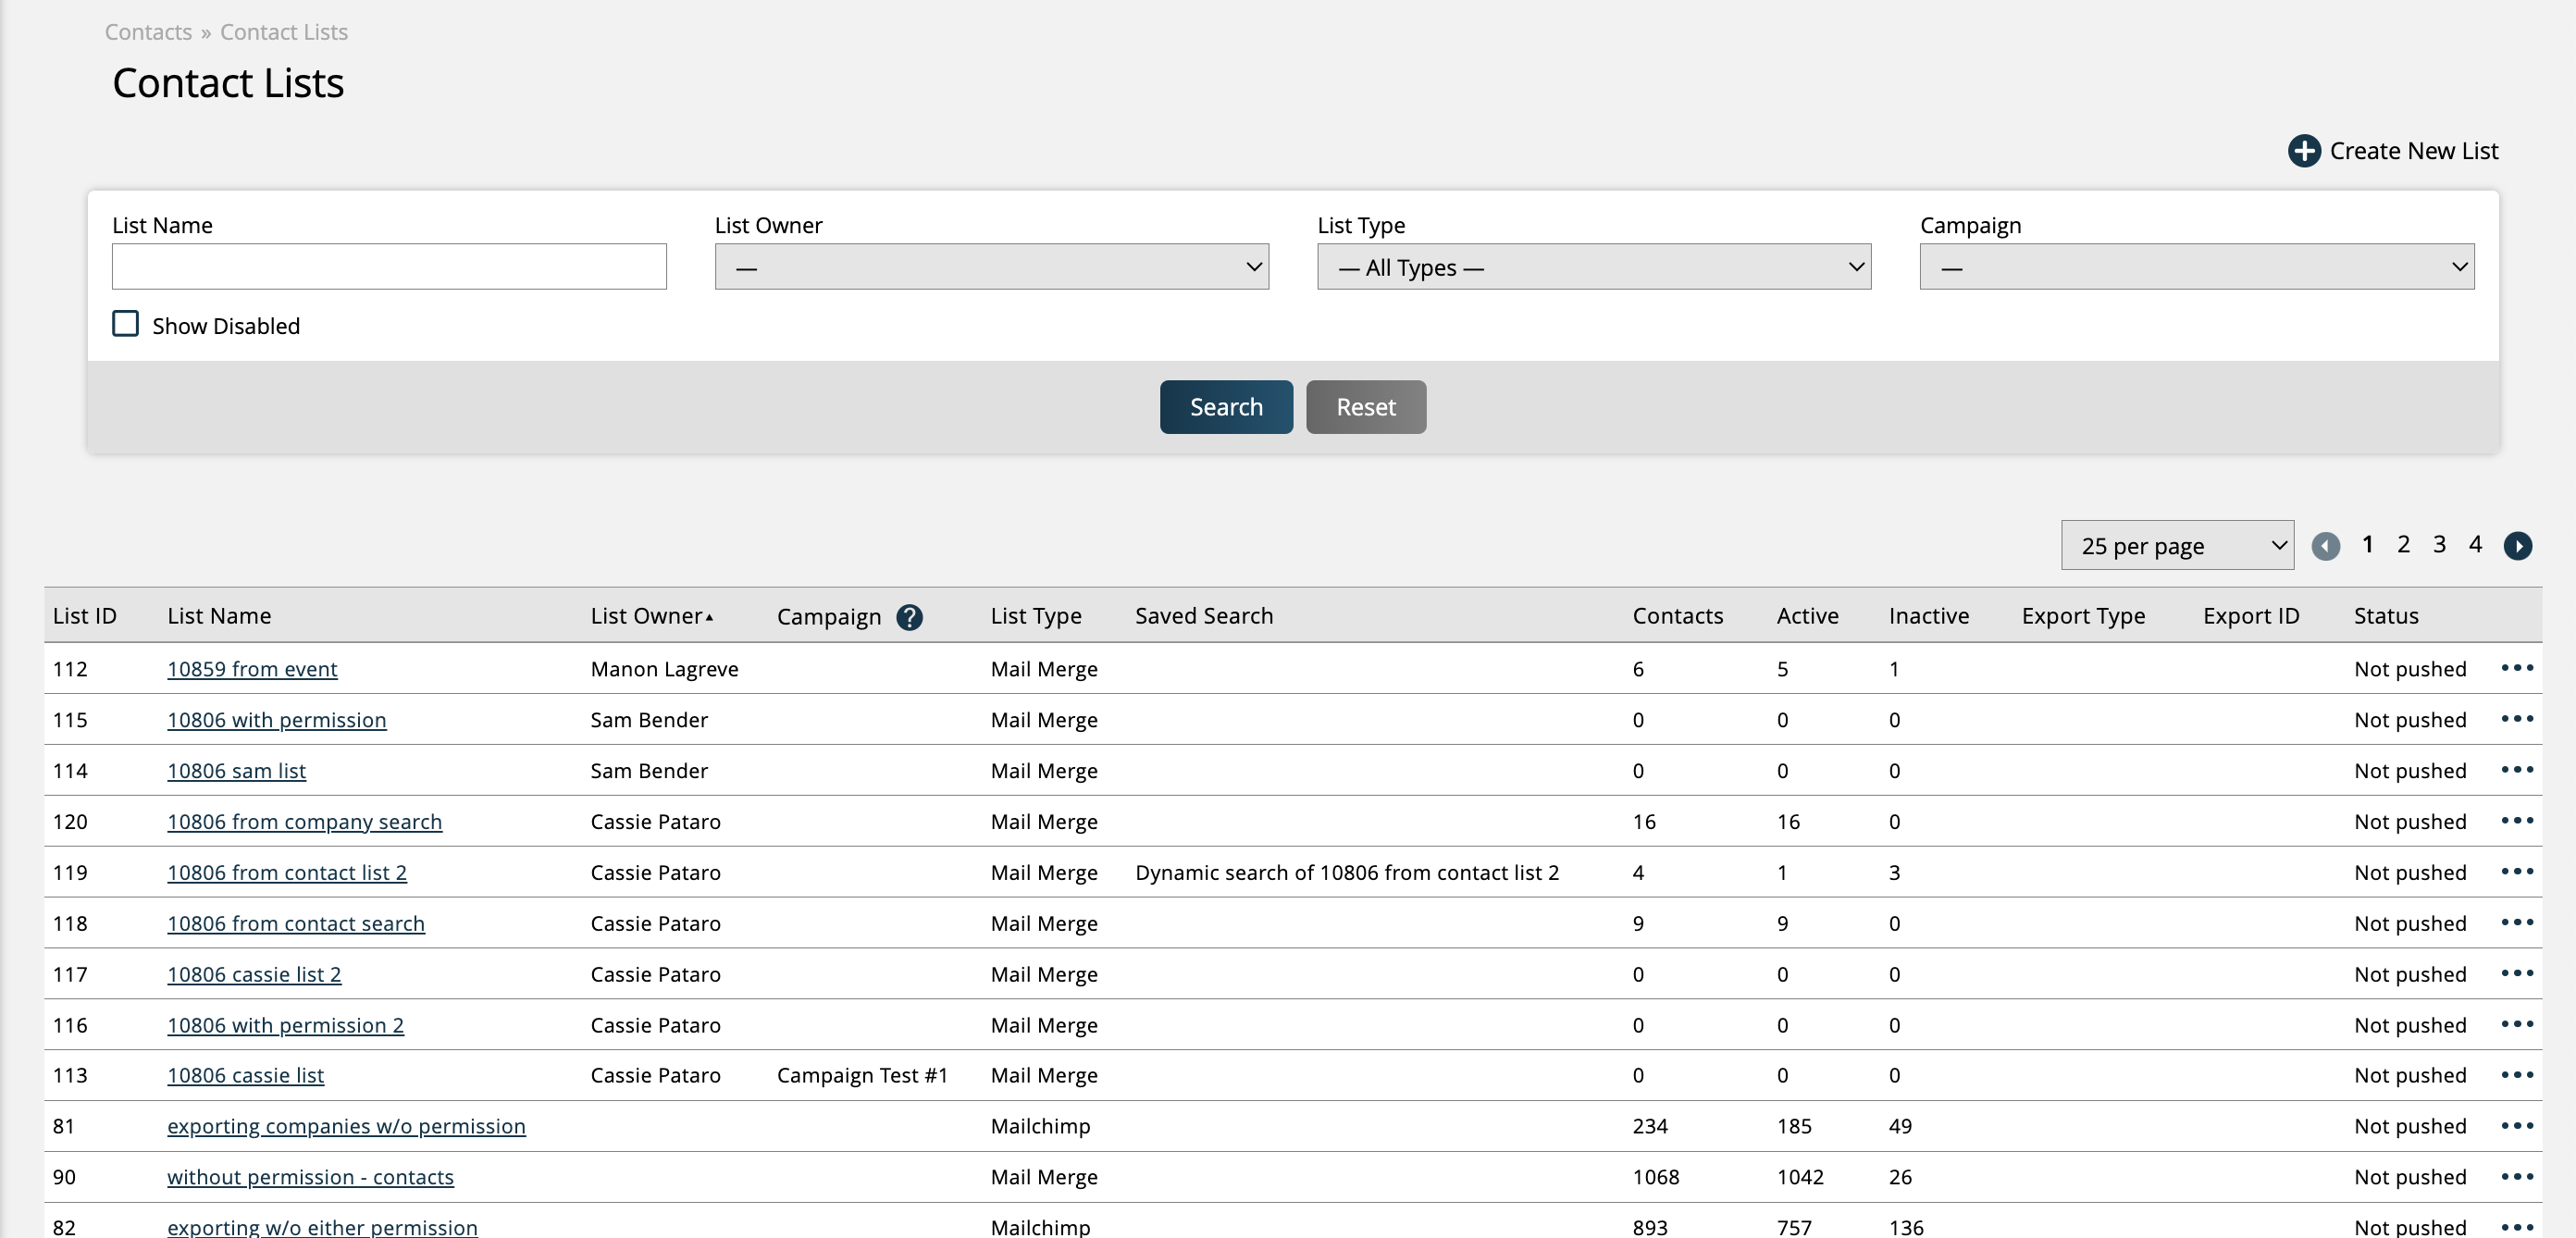
The lists that are available to you, and the options that show in the List Owner dropdown, are both dependent on whether or not you have the User Permission View All and Assign Contact Lists. Without this permission, you can view lists owned by yourself, and any users who report to you, as well as any lists that do not have a specified owner. You will not be able to see other users lists. With the permission, you can view all contact lists in your system, as well as edit the owner of each list.
To manually create a new list, click the +Create New List action. In the popup, you will need to specify a name for the list, as well as the Account Type if you have multiple options configured in your site. You can also tie the list to a Sales Campaign. By default, the user who creates the list will be set as the list owner. This can be edited later if needed.
When we click on the list, we will see all the actions we can do on it.
Edit List: If you need to make changes to your list such as renaming it, reassigning to a different owner, or adding an export ID, use the edit list action.
Add Contacts: Manually add contacts to the list by name.
Clone List: Create a new list with all the same contacts.
Remove Duplicates: You have to remove all duplicate emails before sending Mail Merge emails. Click on this action for the system to remove all duplicate email addresses. You can also do a manual removal of contacts as well.
Create Call List: Create a call list that you can keep for yourself or assign to another rep. A call list shows more contact details than the basic contact list.
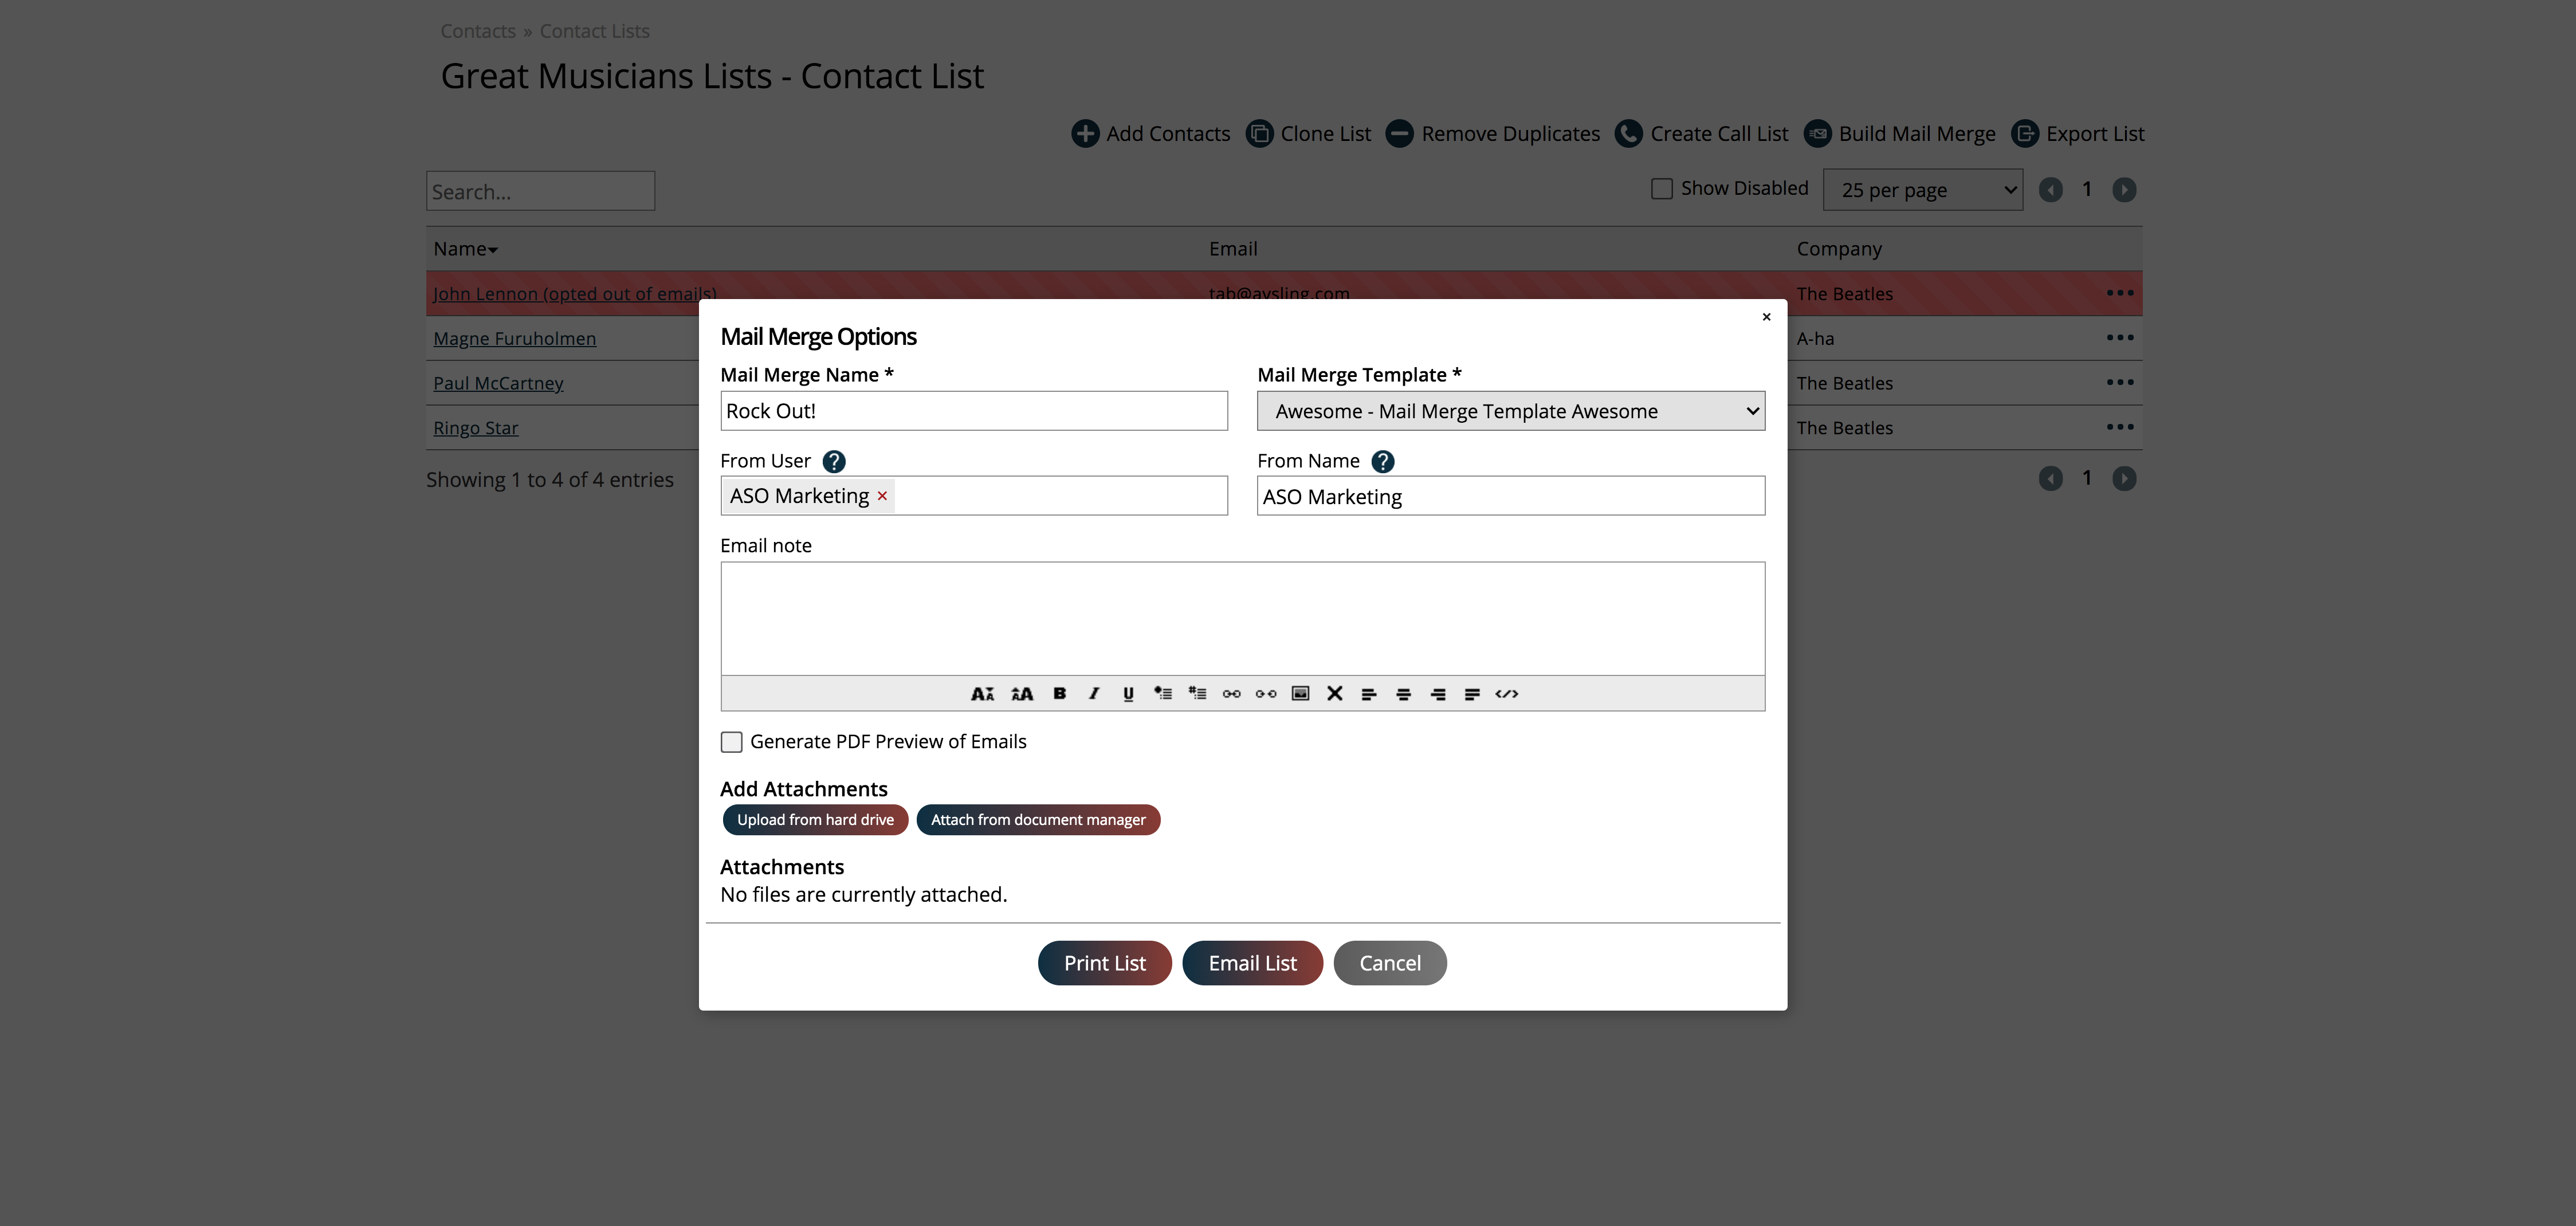
Build Mail Merge: Send a one-off email to the list of contacts. You can't have any duplicate emails on the list if you want to send a Mail Merge.
Add to Autodraft: This action is only available if you have the Astro integration enabled, and you have the User Permission ‘Autodrafts’. The action allows you to add an entire contact list to your Autodrafts. In the popup, you can either add the contacts to an existing Autodraft, or you can create a new one. For more information about this topic, check out the ‘Autodrafts’ help center document.
Export List: Create a CSV file with the contact's information.
Instead of manually adding each name to the list, we can dynamically populate the list using saved searches. When a saved search is added to a list, the system will automatically update your contact lists for cold calls and email marketing.
If you’re creating a new list, the simplest way to do this is to run a search on the Contact Search page. Then click the ‘Create Contact List’ button. In the popup, you can name your list, associate it with a campaign, and select which account to use. If you check the ‘Save Search as Dynamic Filter on List’ checkbox, the system will automatically save the search you used and associate it with your new list.
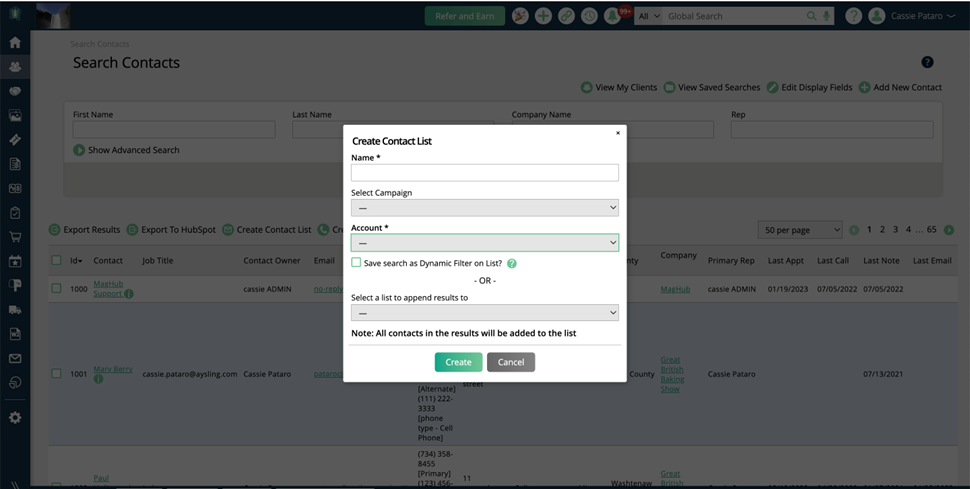
Alternatively, if you already have a contact list created, you can manually associate a new saved search. You first need to run and save a search. This can be done from many places in the site, but for contact lists, the most common place is the Contact Search page. Run a search with the desired criteria, and then use the ‘Save This Search’ action at the top of the table.
Once you have saved a search, go back to your contact list by going to Contacts > Contact Lists. Use the ellipsis icon to edit the list, and in the popup, choose your newly saved search from the Dynamic Search Filter dropdown list.
Now, whenever a contact fits the criteria of the search, the contact will be added to your list. If a contact no longer fits the criteria of the search, the contact will get marked as disabled on your list. The list will update approximately every 30 minutes.
We can also use the company search if we want to find contacts based on items like order sales, company category, or company dynamic attributes. But on the company search, you don't have the same flexibility to pick and choose which contacts to add. Any list created or that happened from a non-contact search or report requires you to select a contact from the company based on role: Primary, Billing, or Artwork.
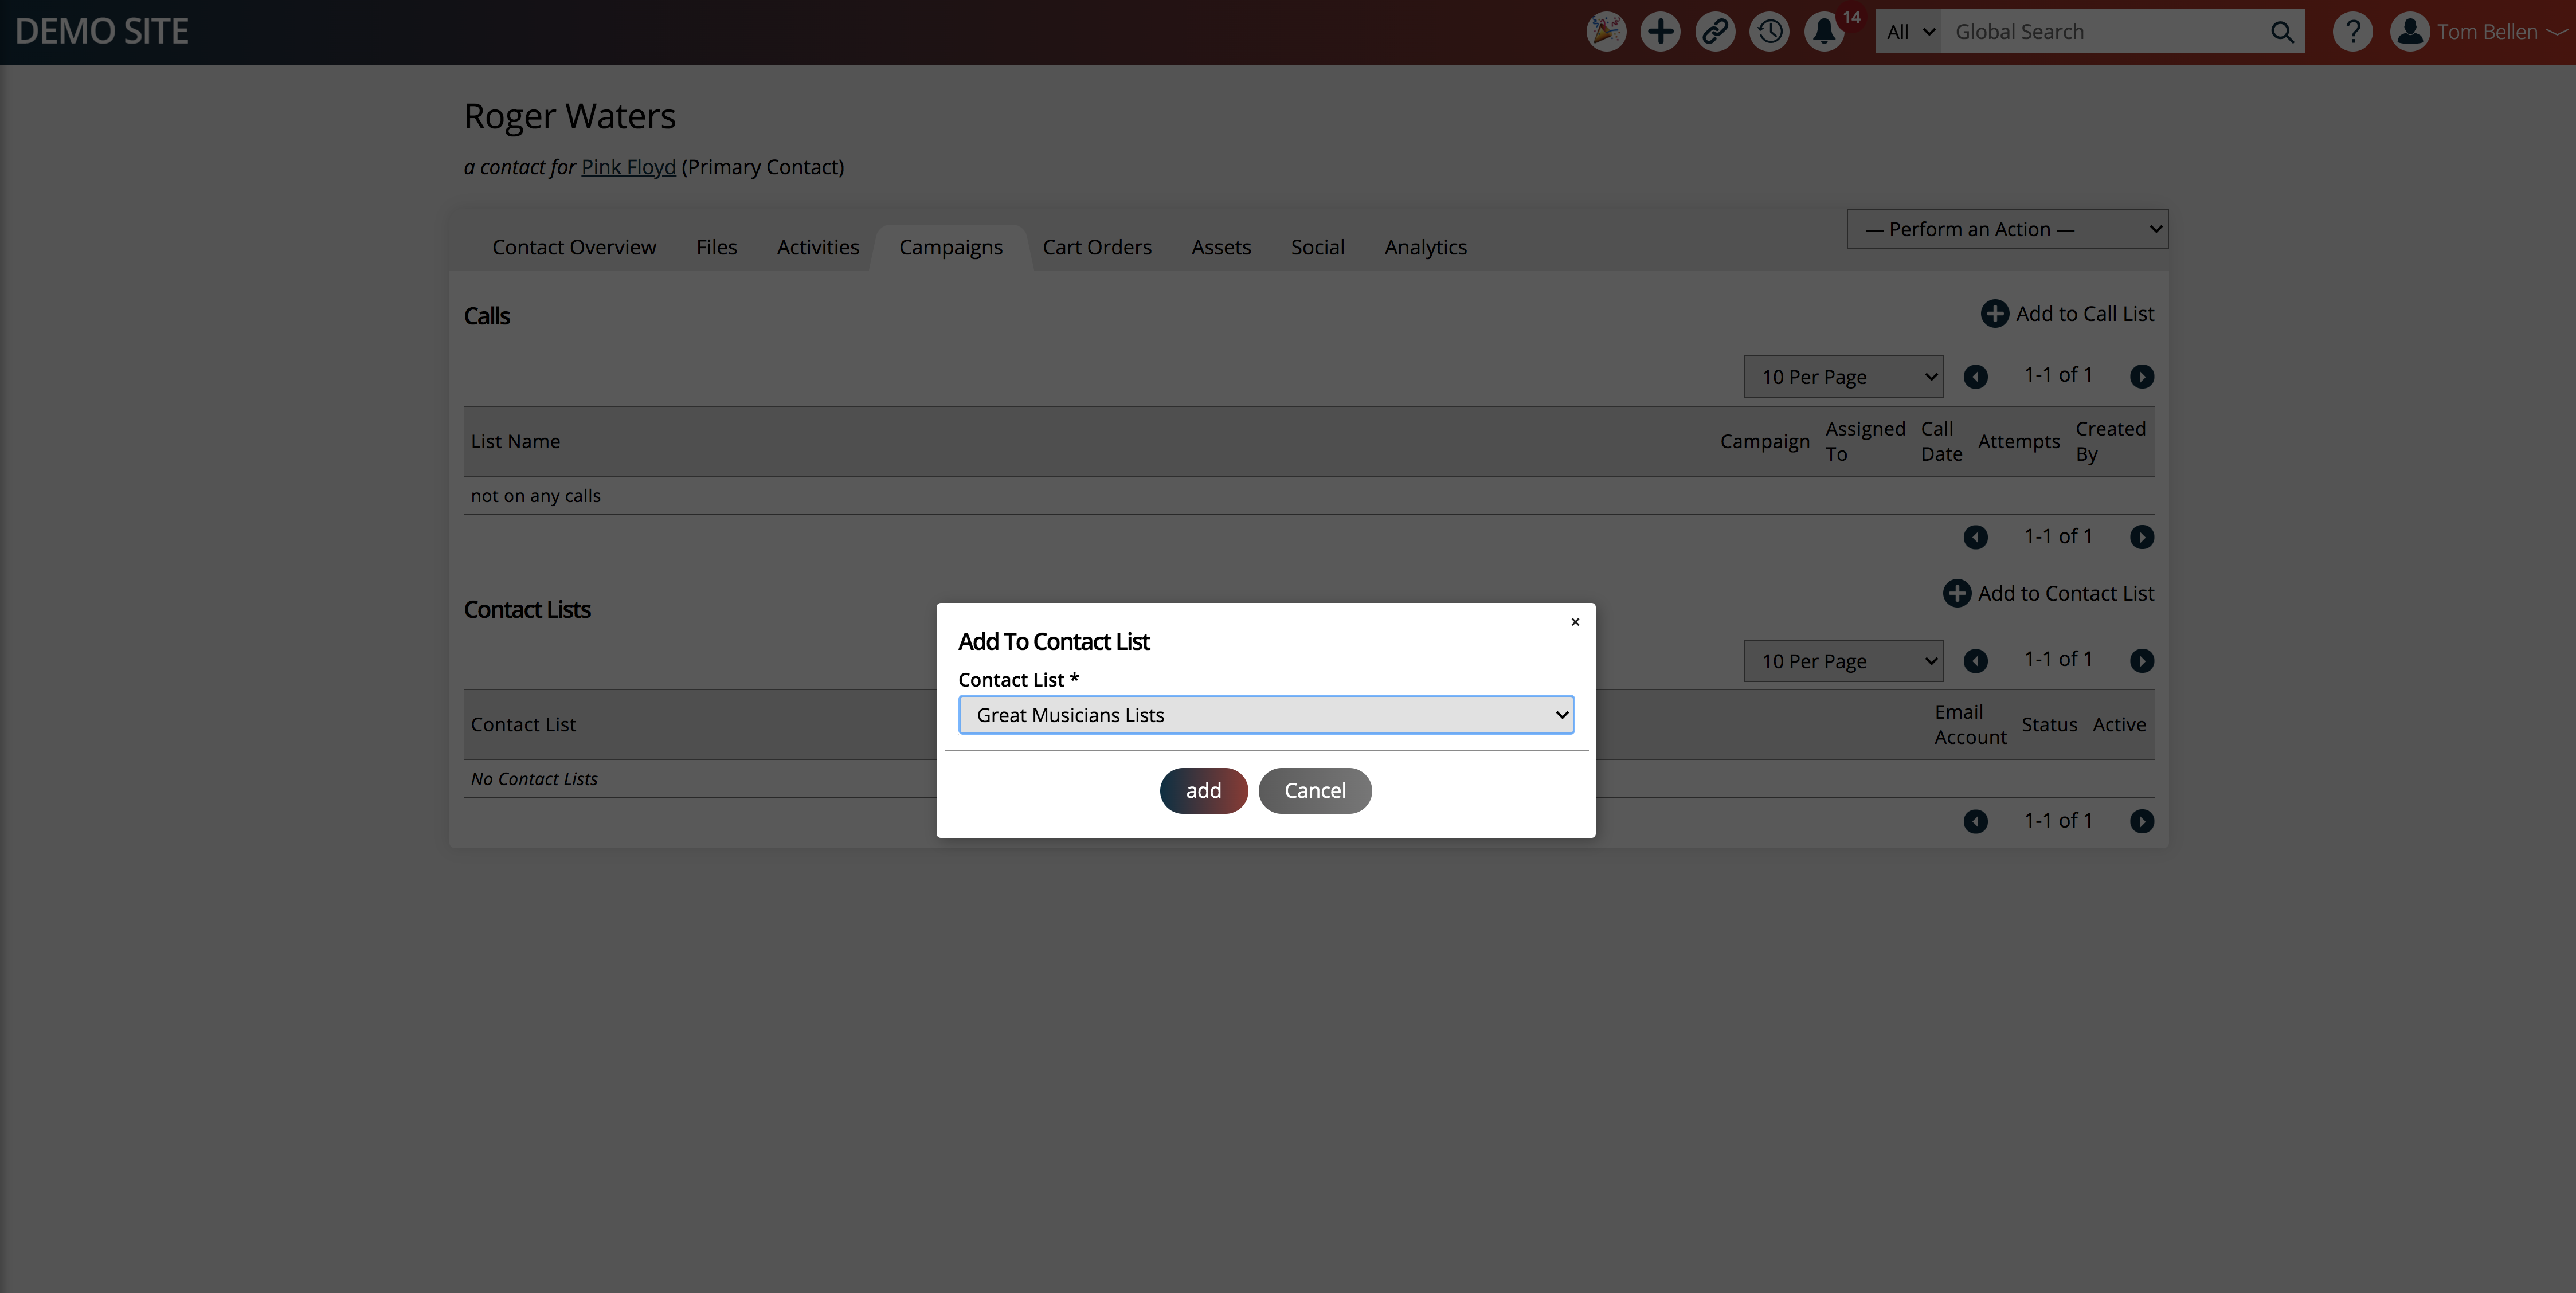
We can also add contacts to a list from the Campaigns tab of a contact. If you are working on a contact and realize they would be a good person to have on a list, go to the campaign tab and click on add to contact list. Choose the list and add them.
Now that we have a populated list, we can start working with it. Let's say we want to start by emailing everyone on the list. We could go to the Contact List and create a Mail Merge. This will send everyone on the list a template email from the system.
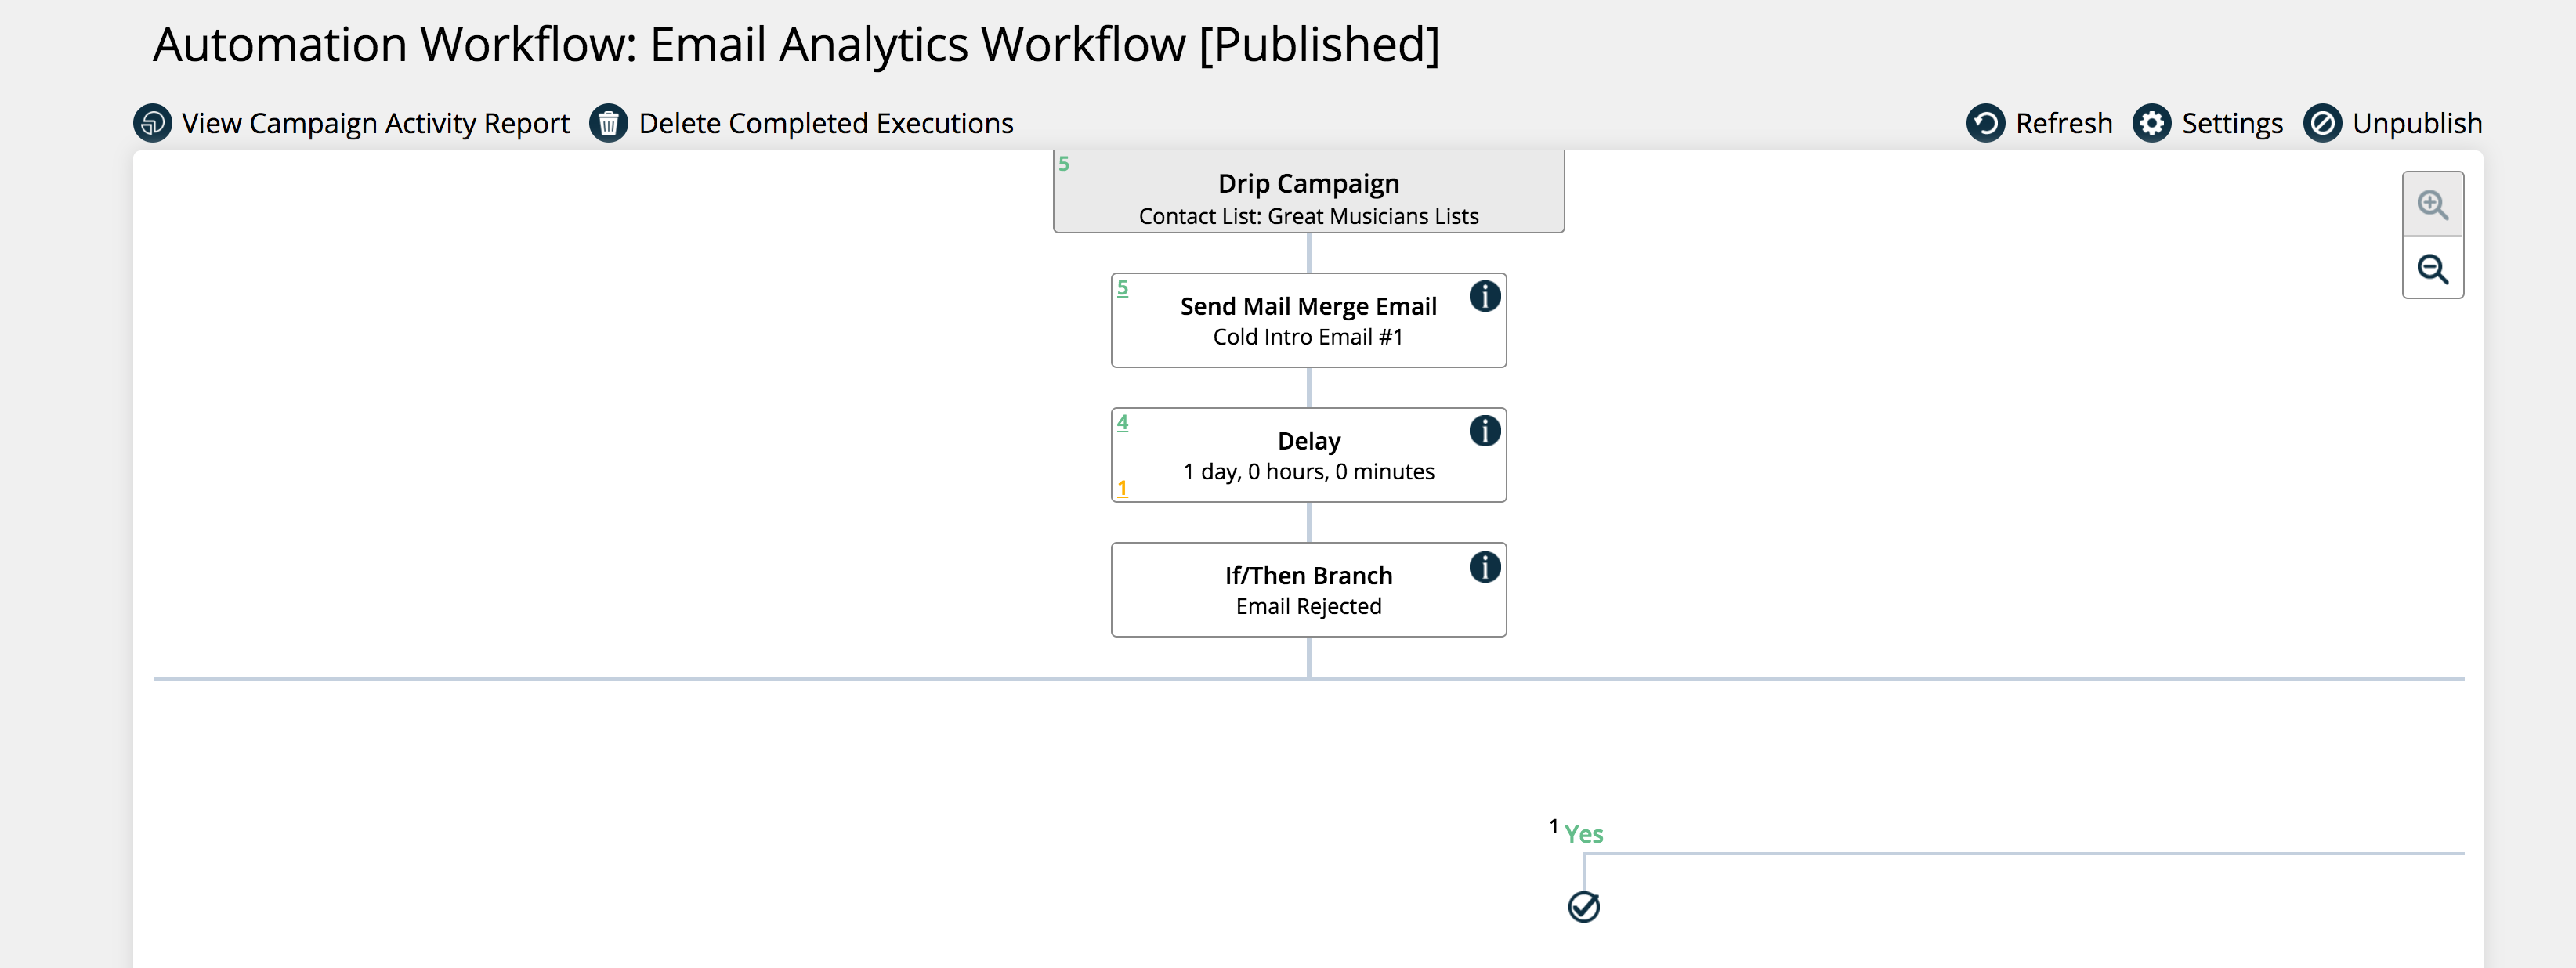
We can take it one step further by adding this list to a drip campaign. The drip campaign can use email analytics such as open/clicks to trigger new emails or activities to the contact.
If you are not into email, you can also create a call list from the contact by going to the contact list and creating a call list. You only need to do this if you want to assign the list to someone else to call and have them dial for dollars. Otherwise, the list will show up in your Call area under the My Prospect List spot. You can use this to quickly call contacts.

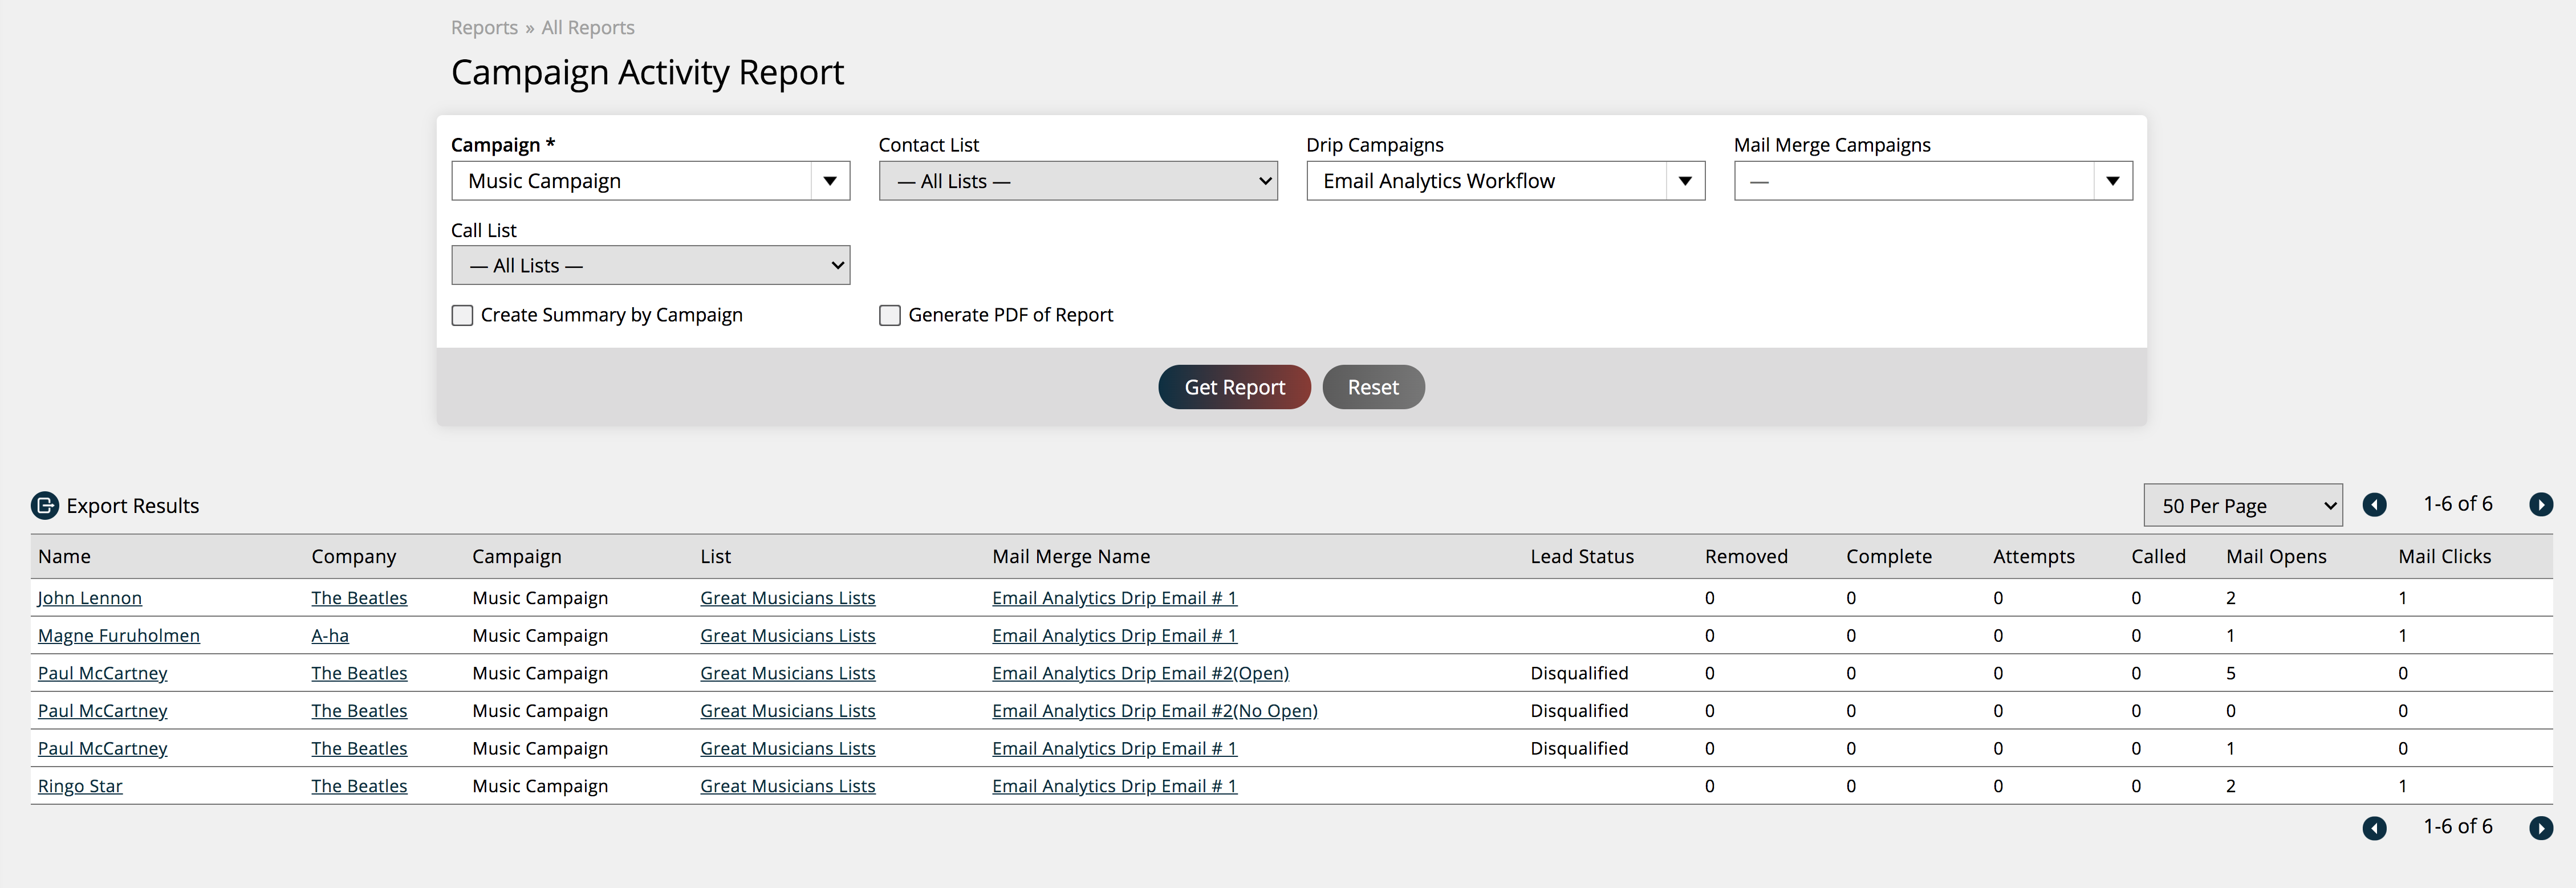
If you have tied the list to a Sales Campaign, you can see all of your activities in the Campaign Activity report. The report will show all the emails, calls, and activities you made and to whom. Campaigns are a greater way to keep track of not just one list but multiple lists in the system.
You can also clean up your list by changing the search query and using a new saved search or by manually removing contacts from the lists.
Updated 4/3/2024