Sending Announcements
You can easily send system-wide announcements to your team members, ensuring that important messages are visible to everyone. Once sent, the announcement will appear at the top of each user's screen. Additionally, you have the option to include the announcement on users' calendars—provided that the users have enabled the display of announcements in their calendar settings.
Permissions
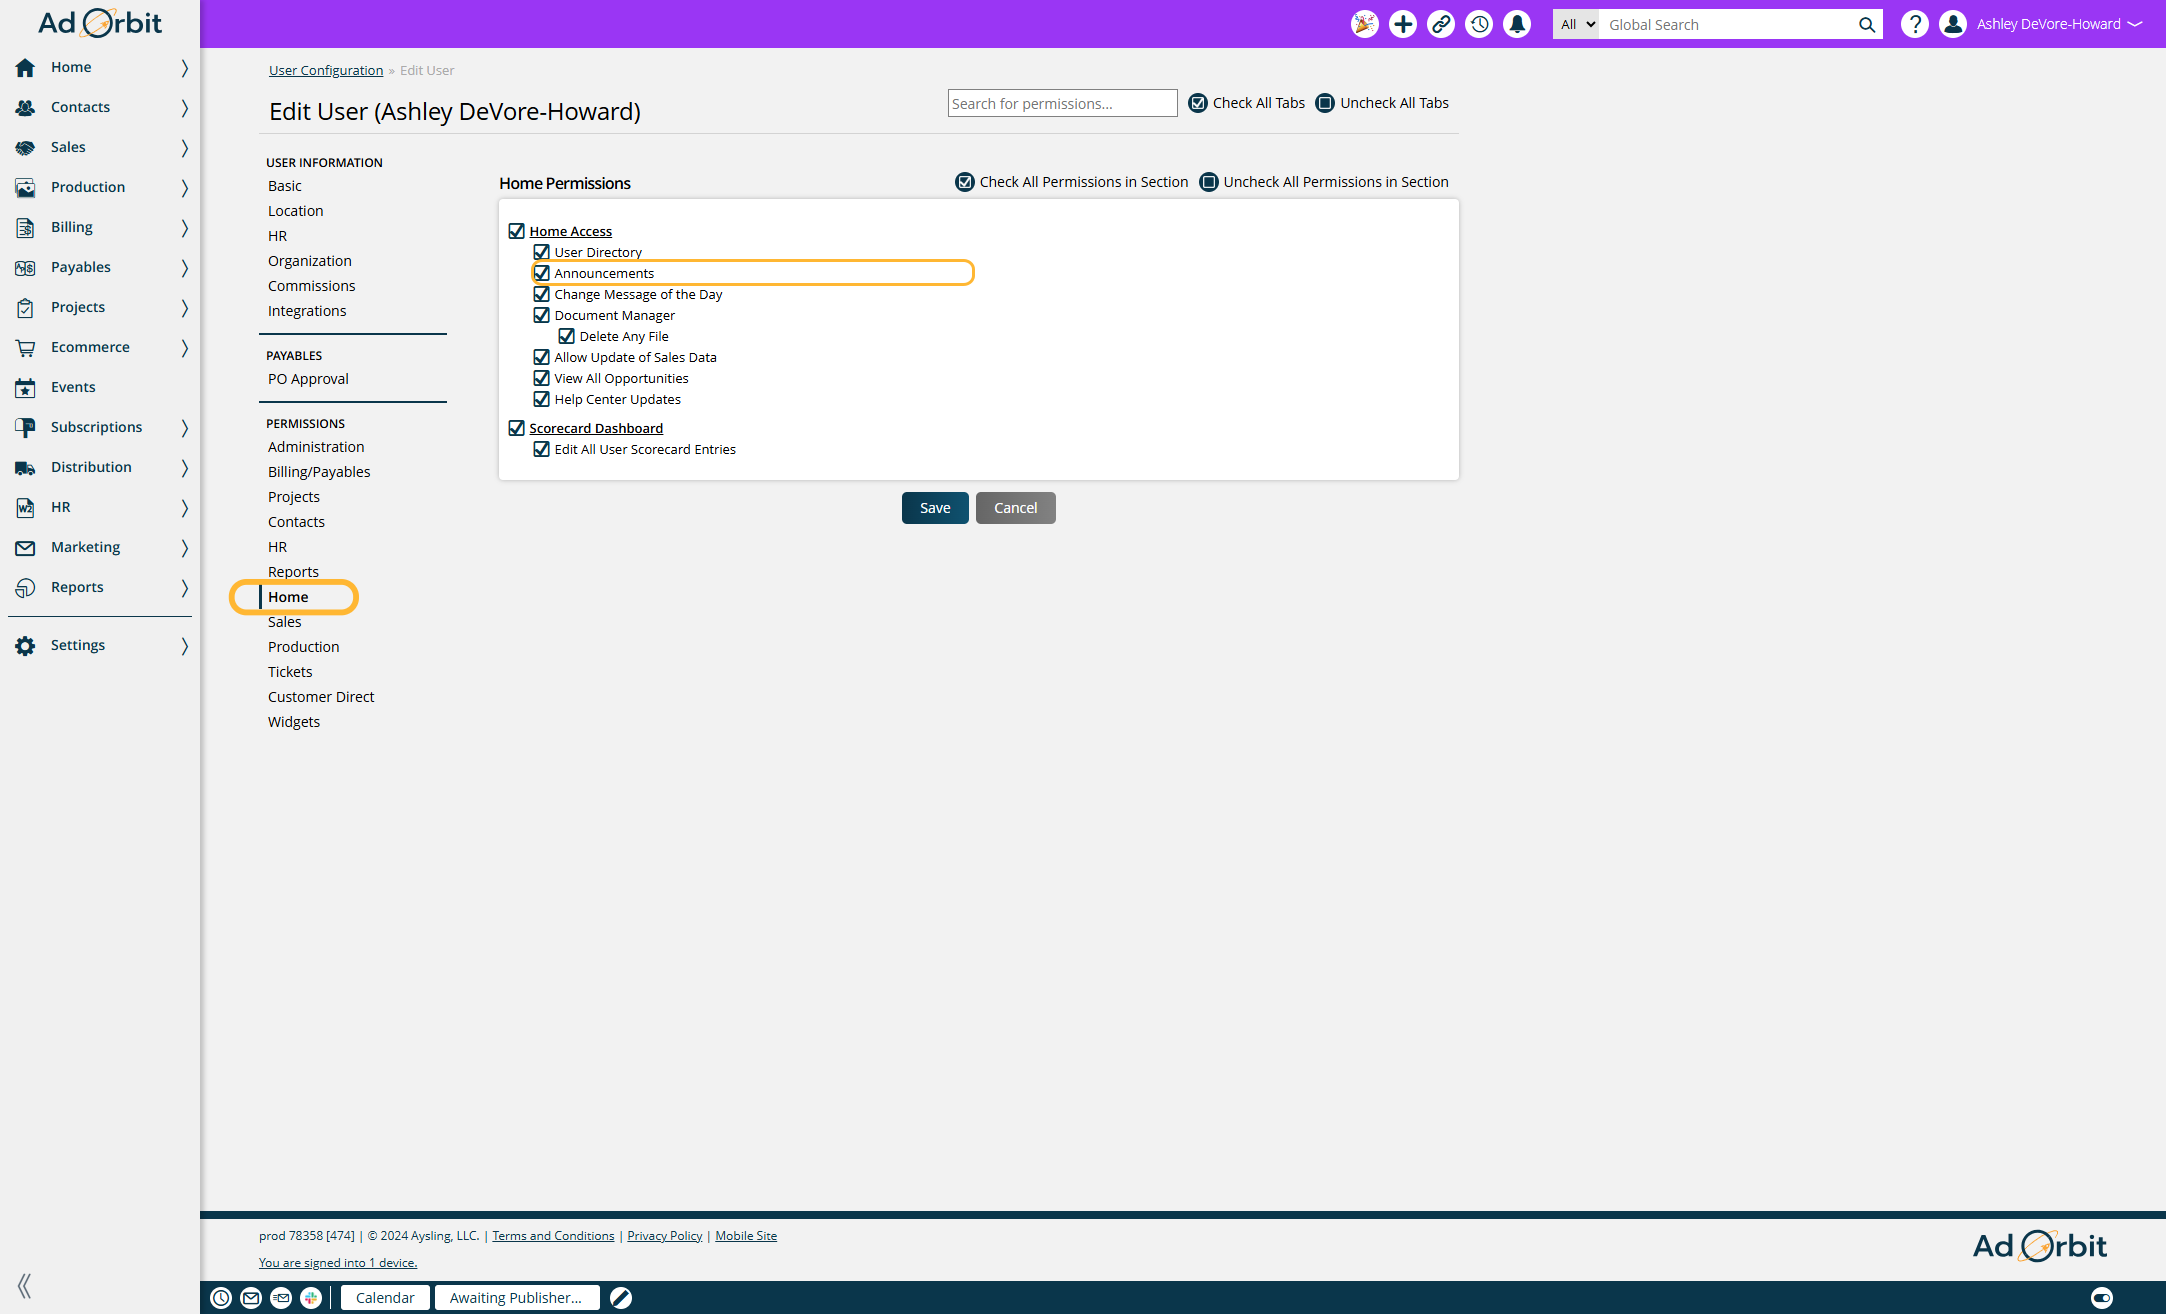
Before creating and sending an announcement, you need to have the User Permission for 'Announcements'. If you don’t have this permission, you'll need to ask an admin to grant it to you.
Go to Settings > Users > User Set Up. Select the user you want to update permissions for and add the permission 'Announcements' which is found under the Home section.
Creating and Sending Announcements
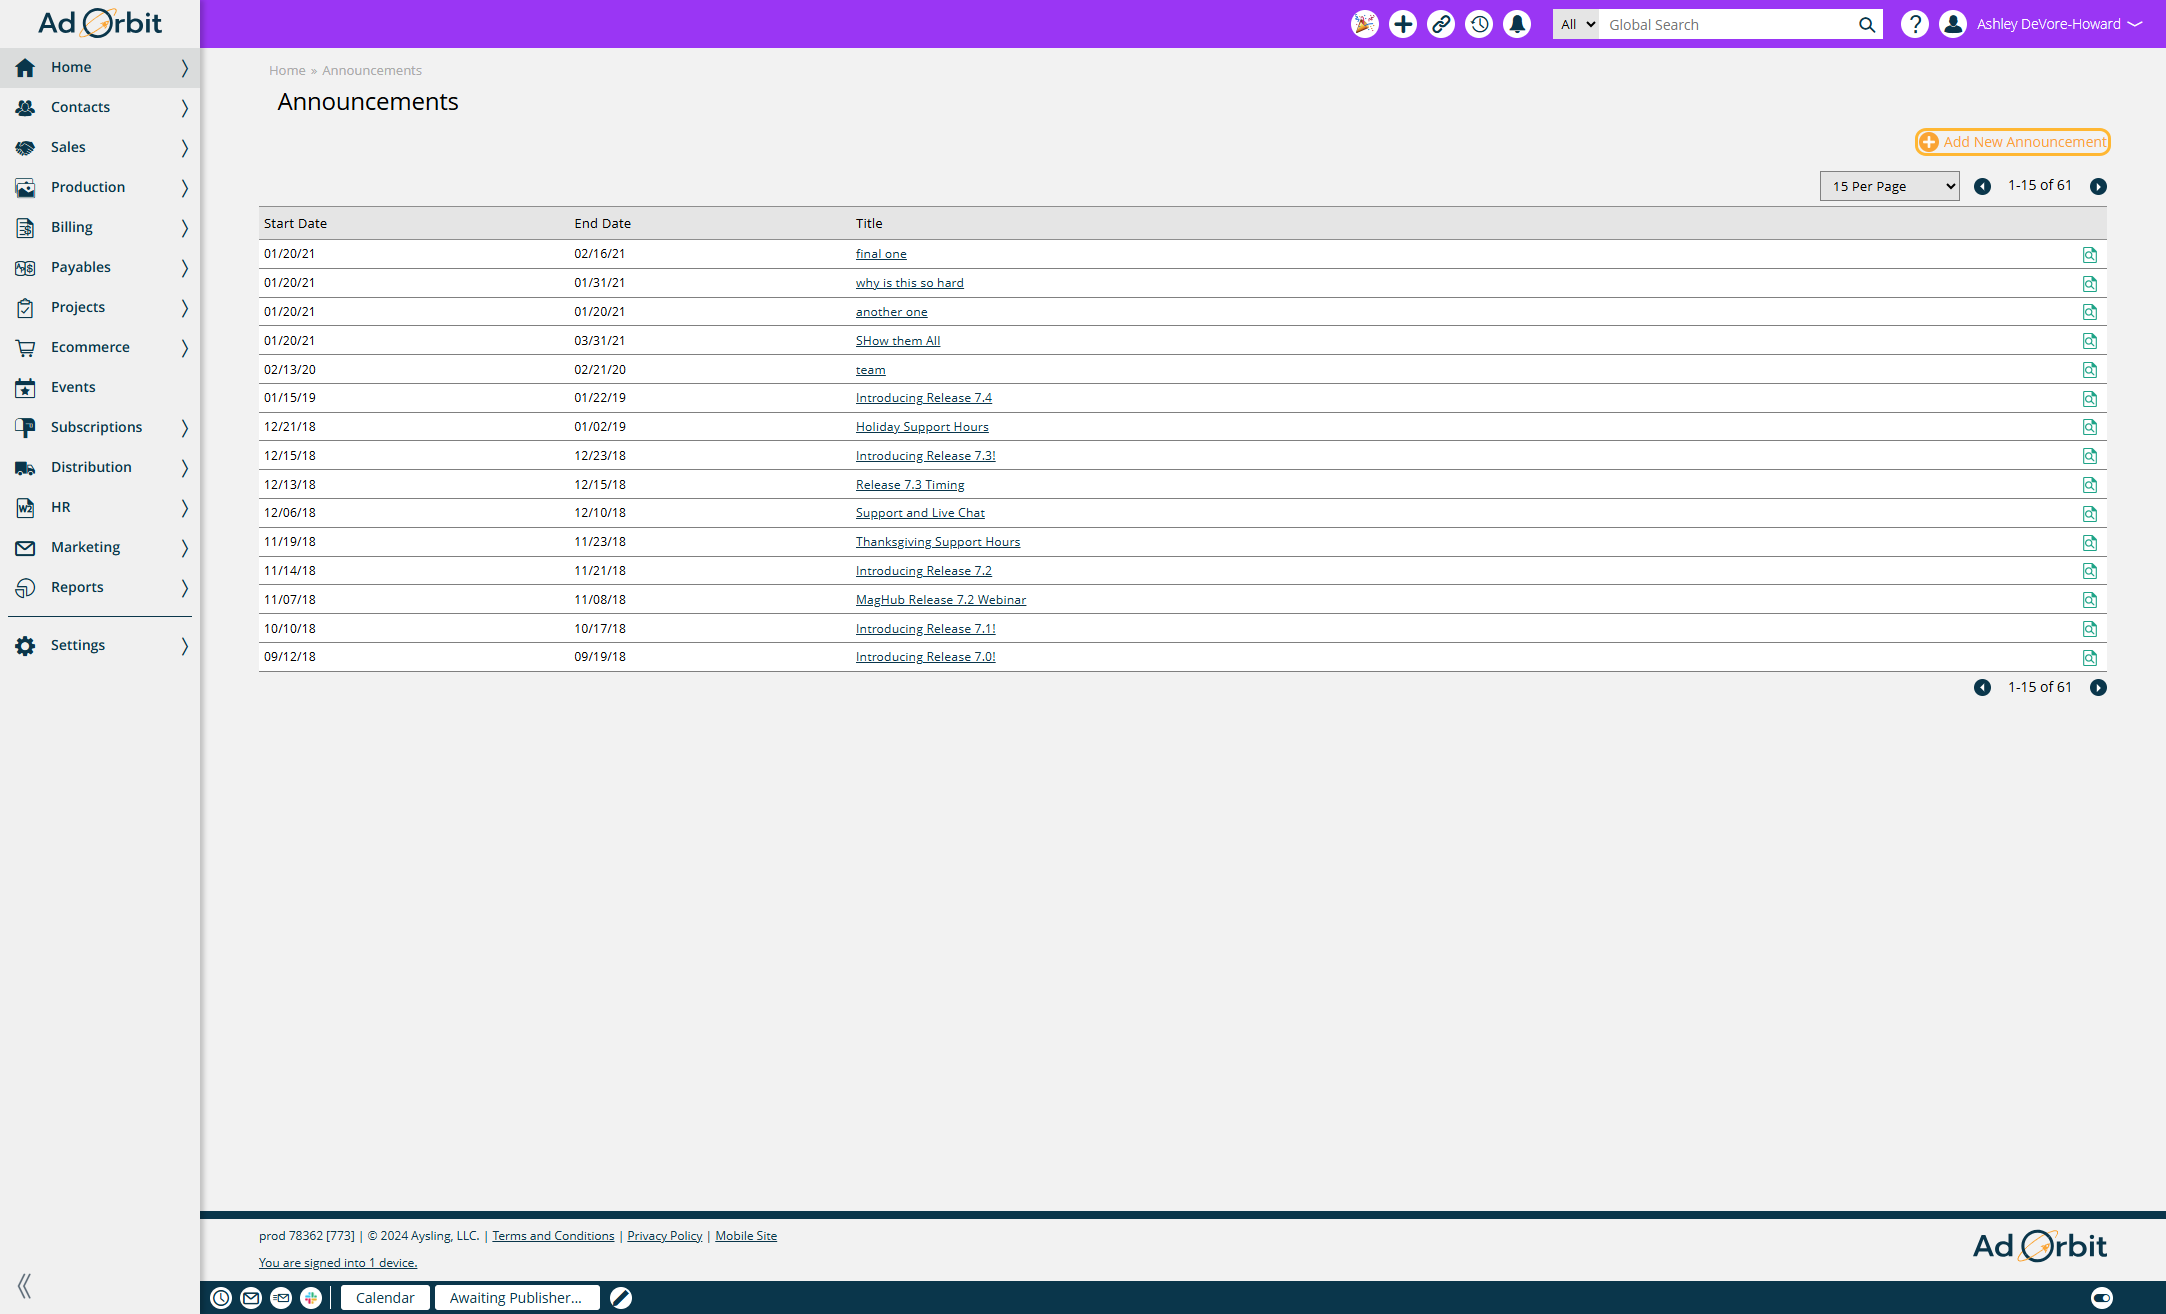
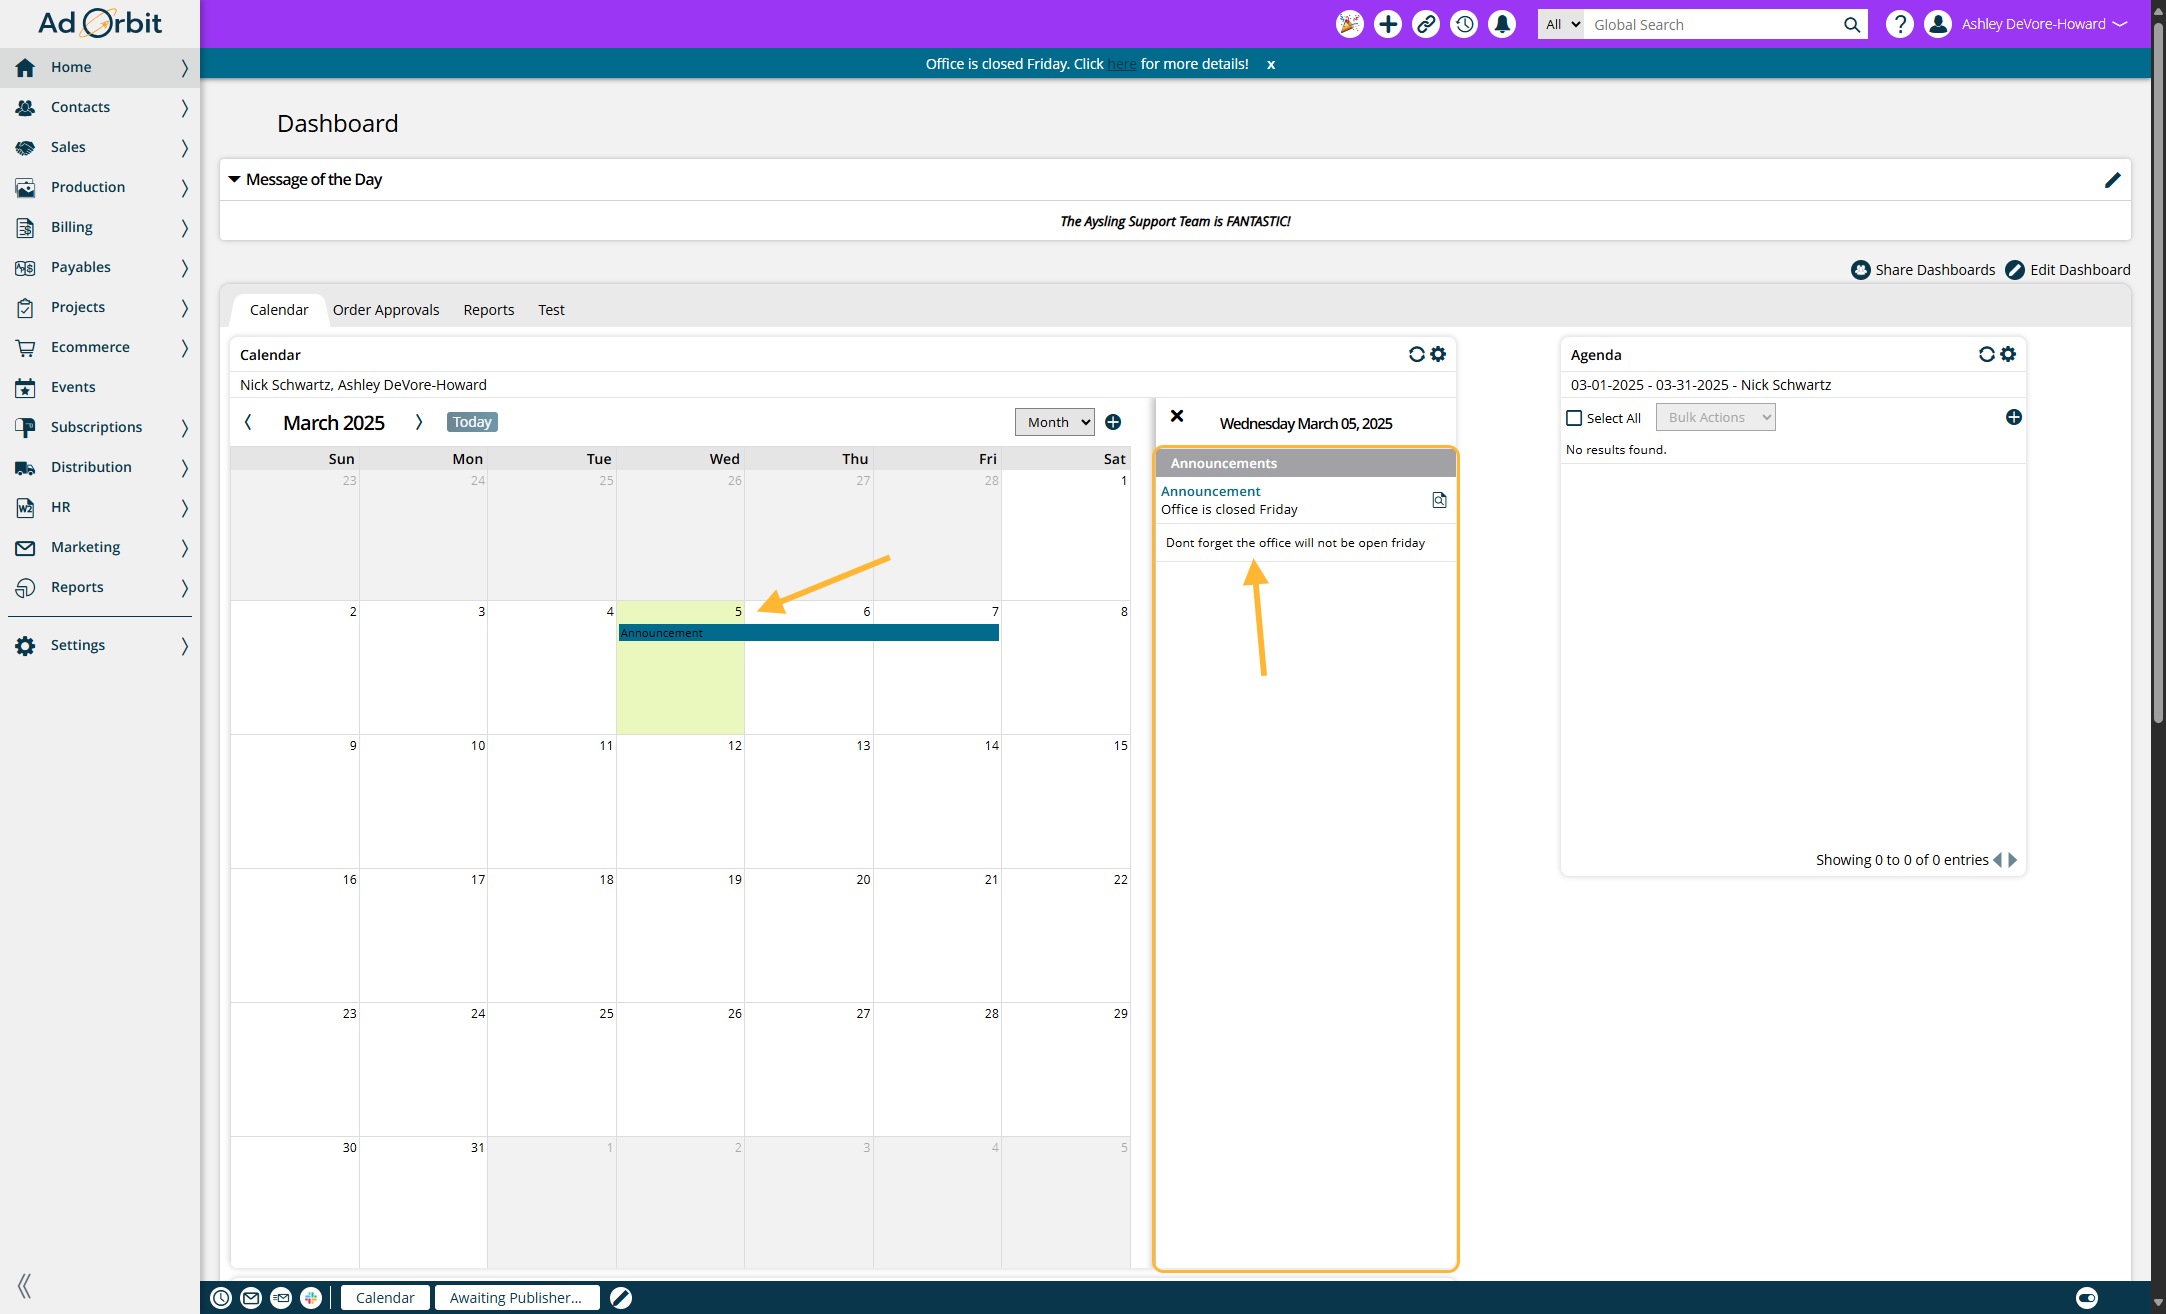
To create announcements, go to Home > Announcements.
Click on Add New Announcement
Enter a short Title for the announcement.
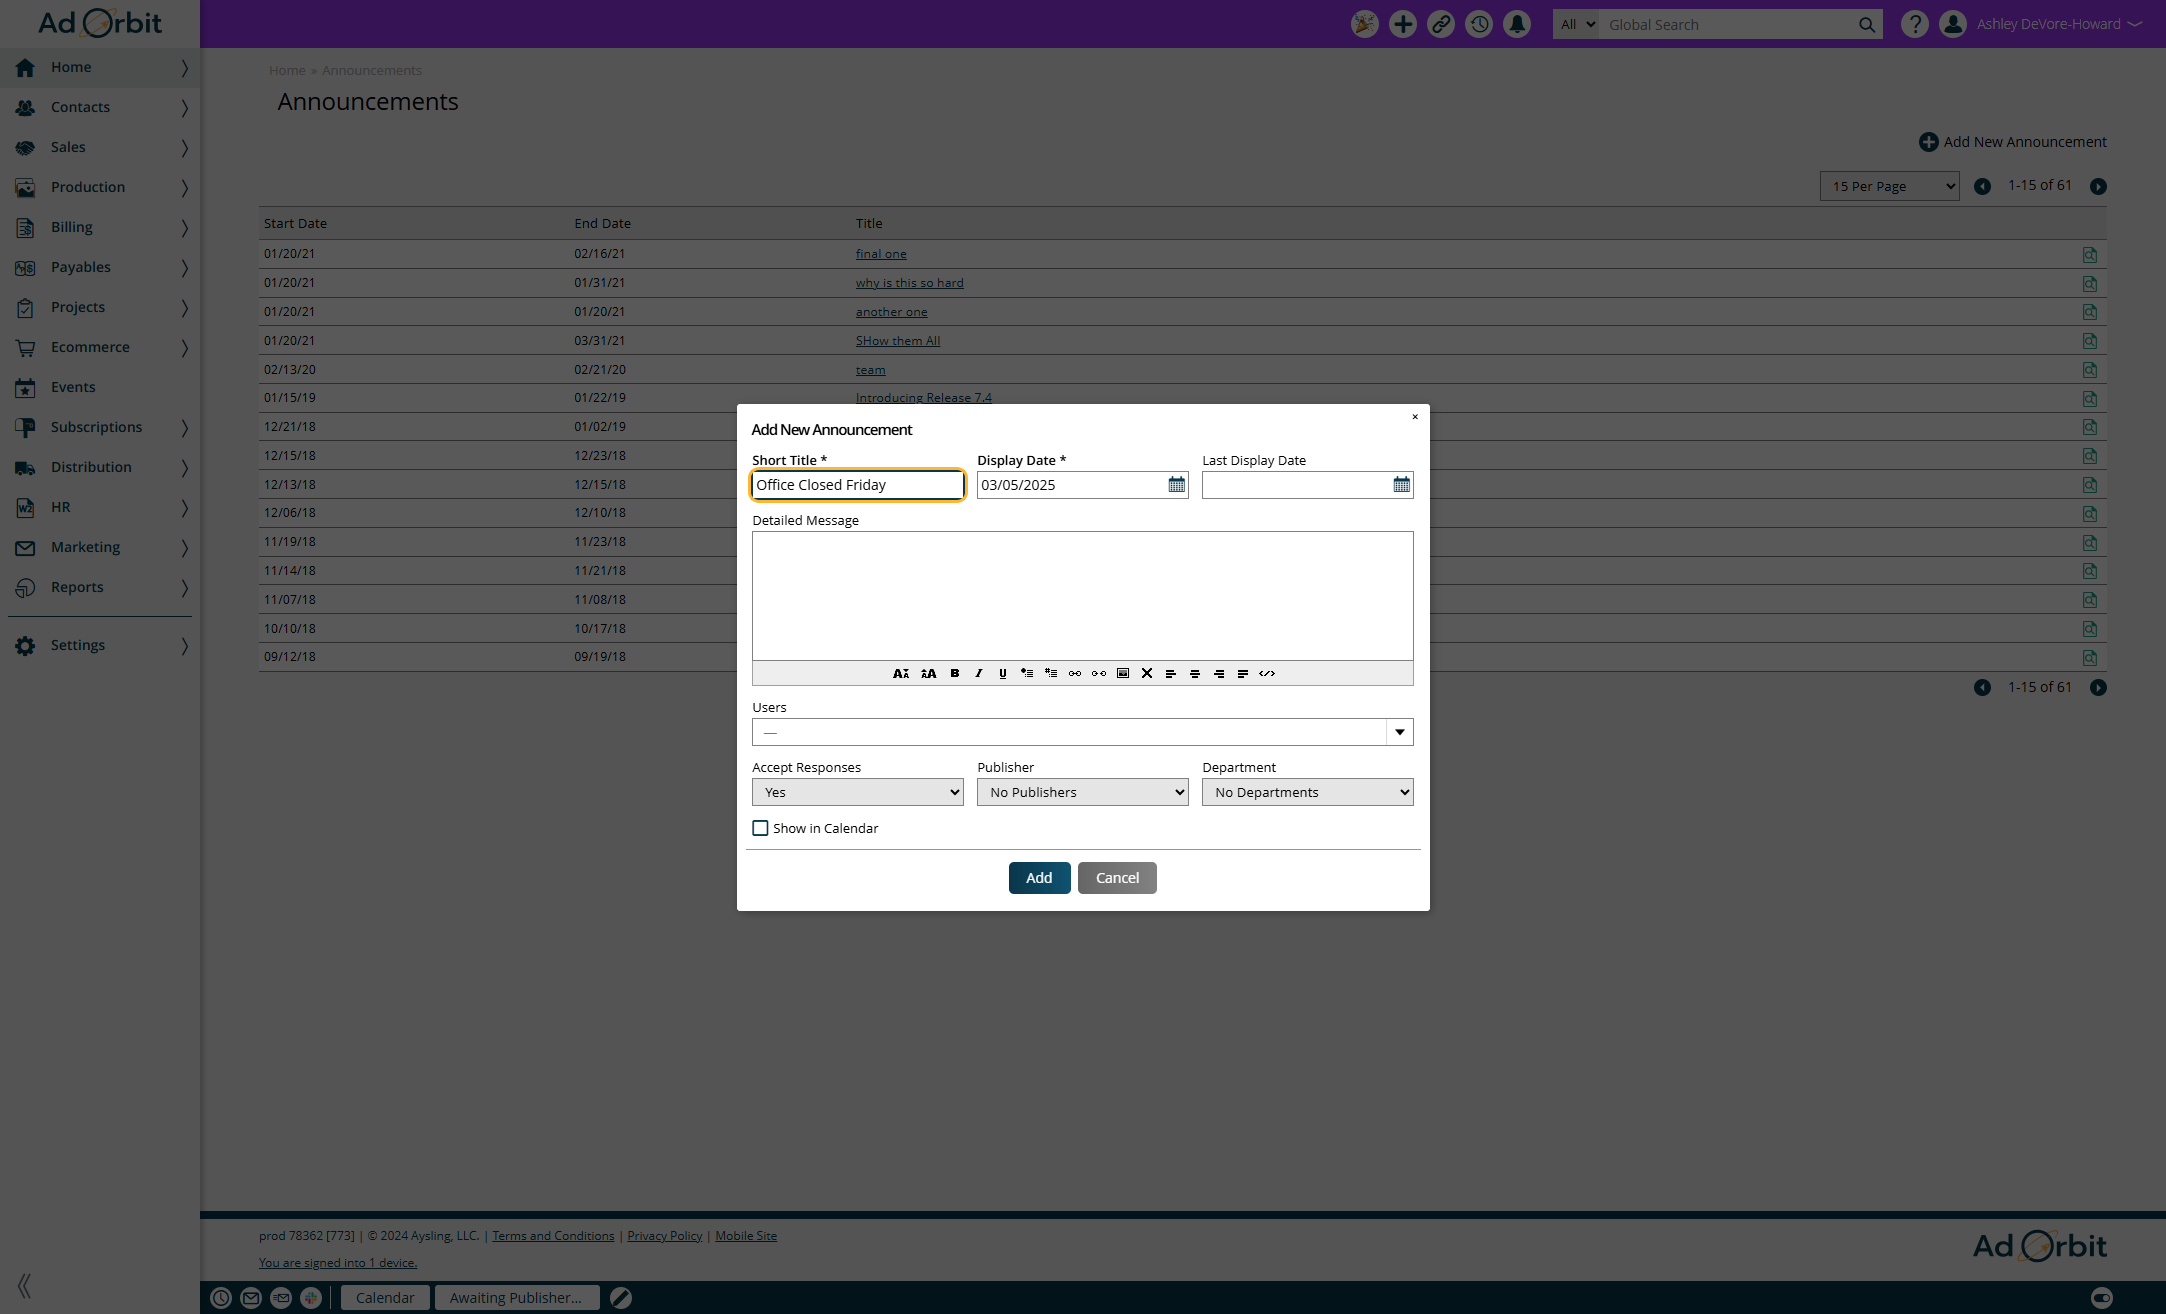
Select a timeframe for the announcement.
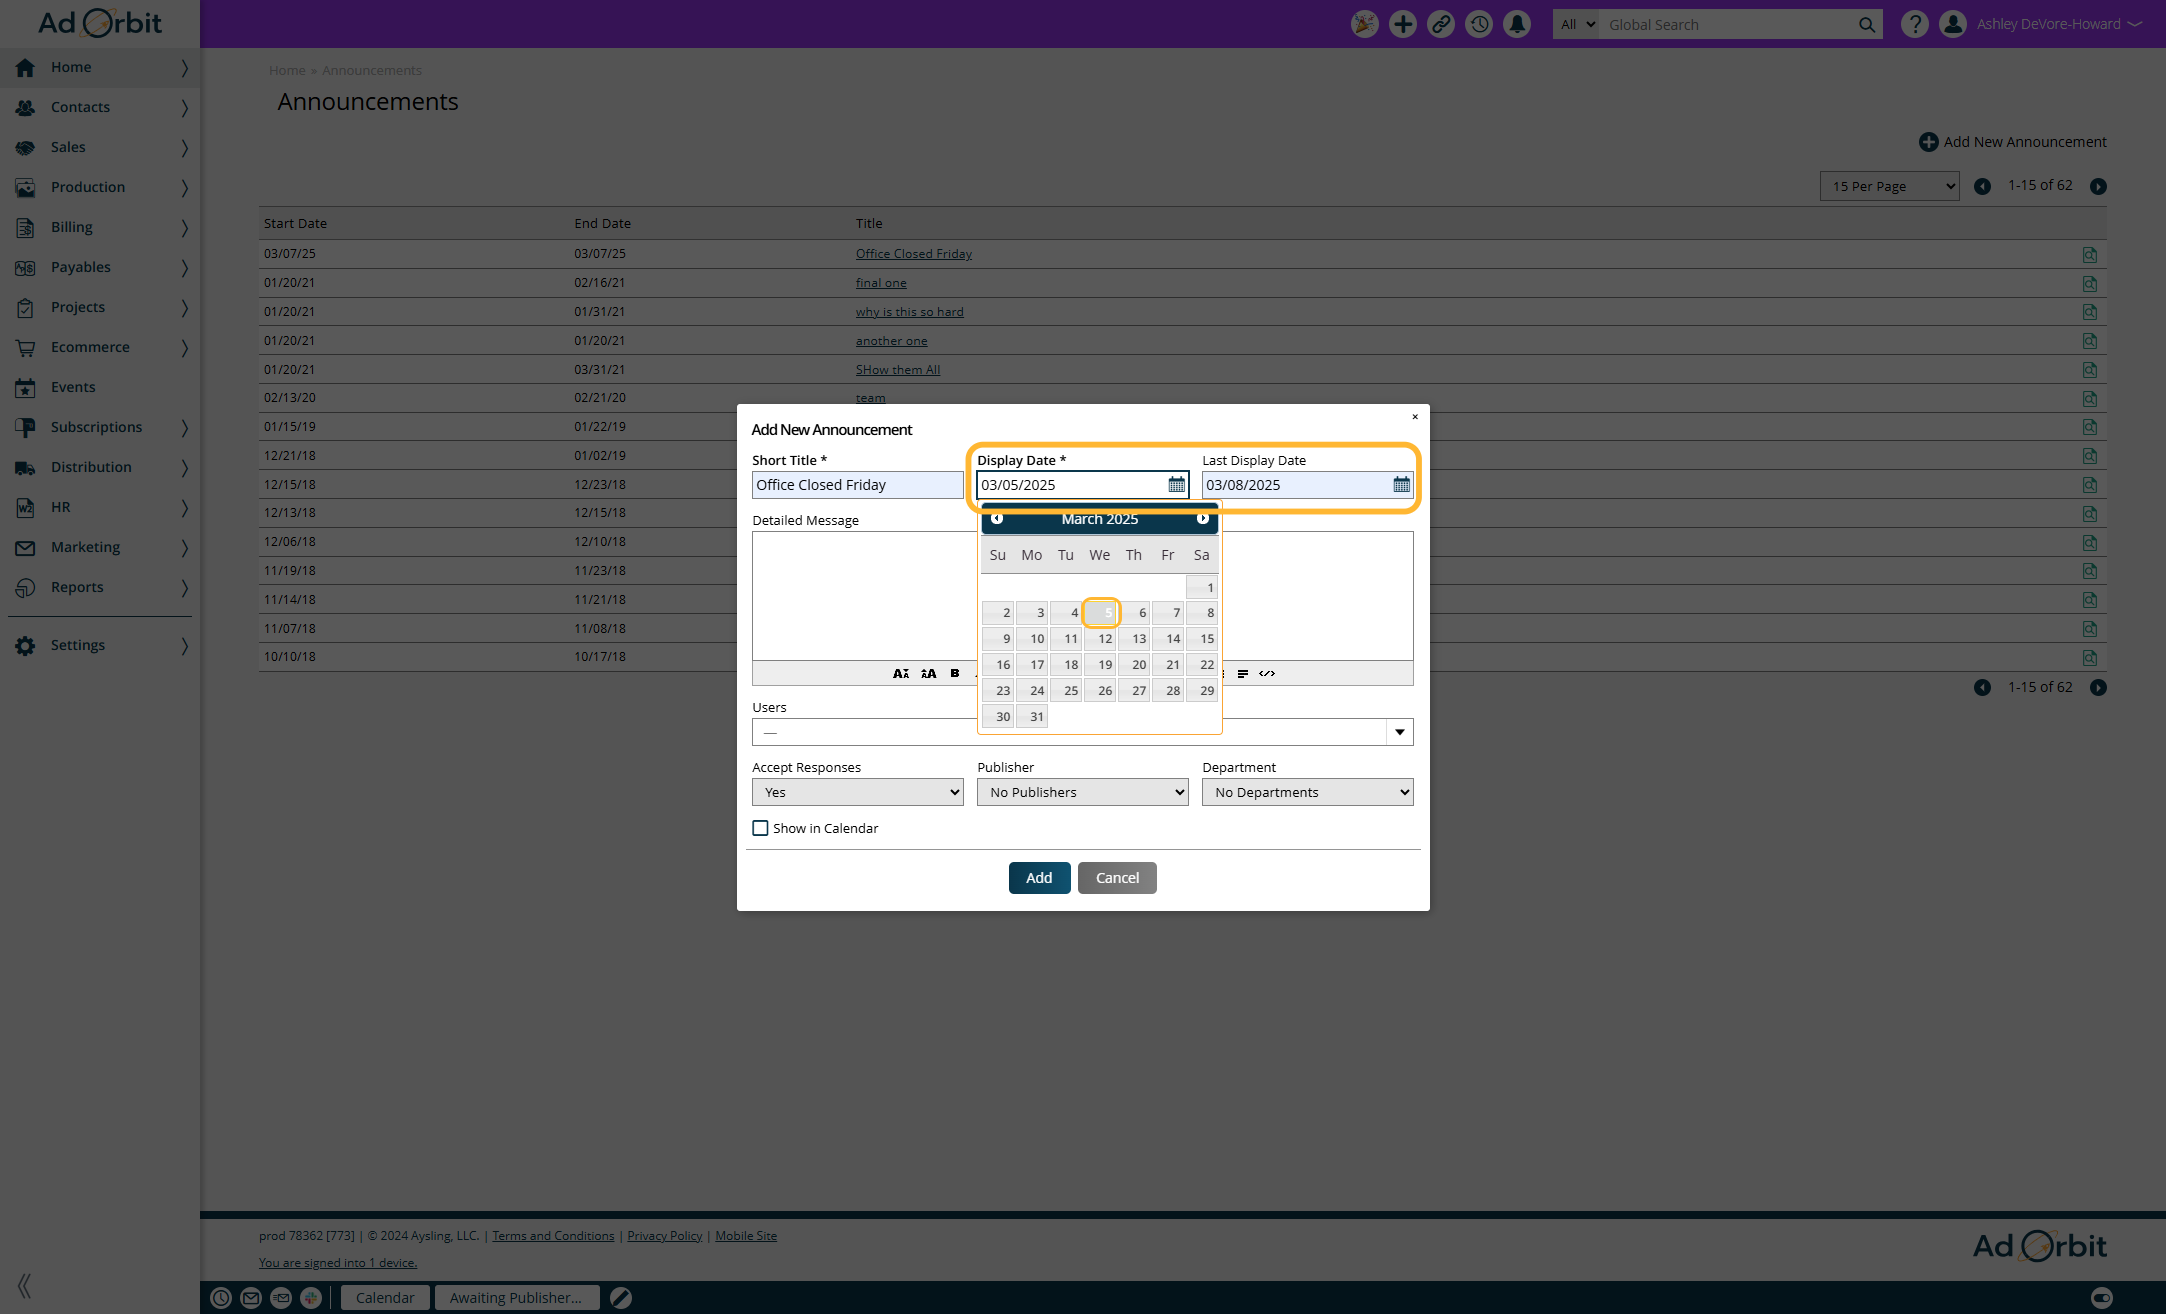
Choose the Display Date, which determines when the announcement will appear.
Optionally, set a Last Display Date to control how long the announcement will remain visible across users' screens and how many days it will show on the calendar.
If no Last Display Date is set, the announcement will be visible at the top of users' screens until it is manually dismissed, and will just be shown on the Display Date in the calendar widget.
If you need to provide more context for your announcement, you can add a Detailed Message.

This message will be visible to users once they click on the announcement. The Short Title will be displayed at the top of their screen, while the Detailed Message will appear once they click to expand it.
Choosing Recipients
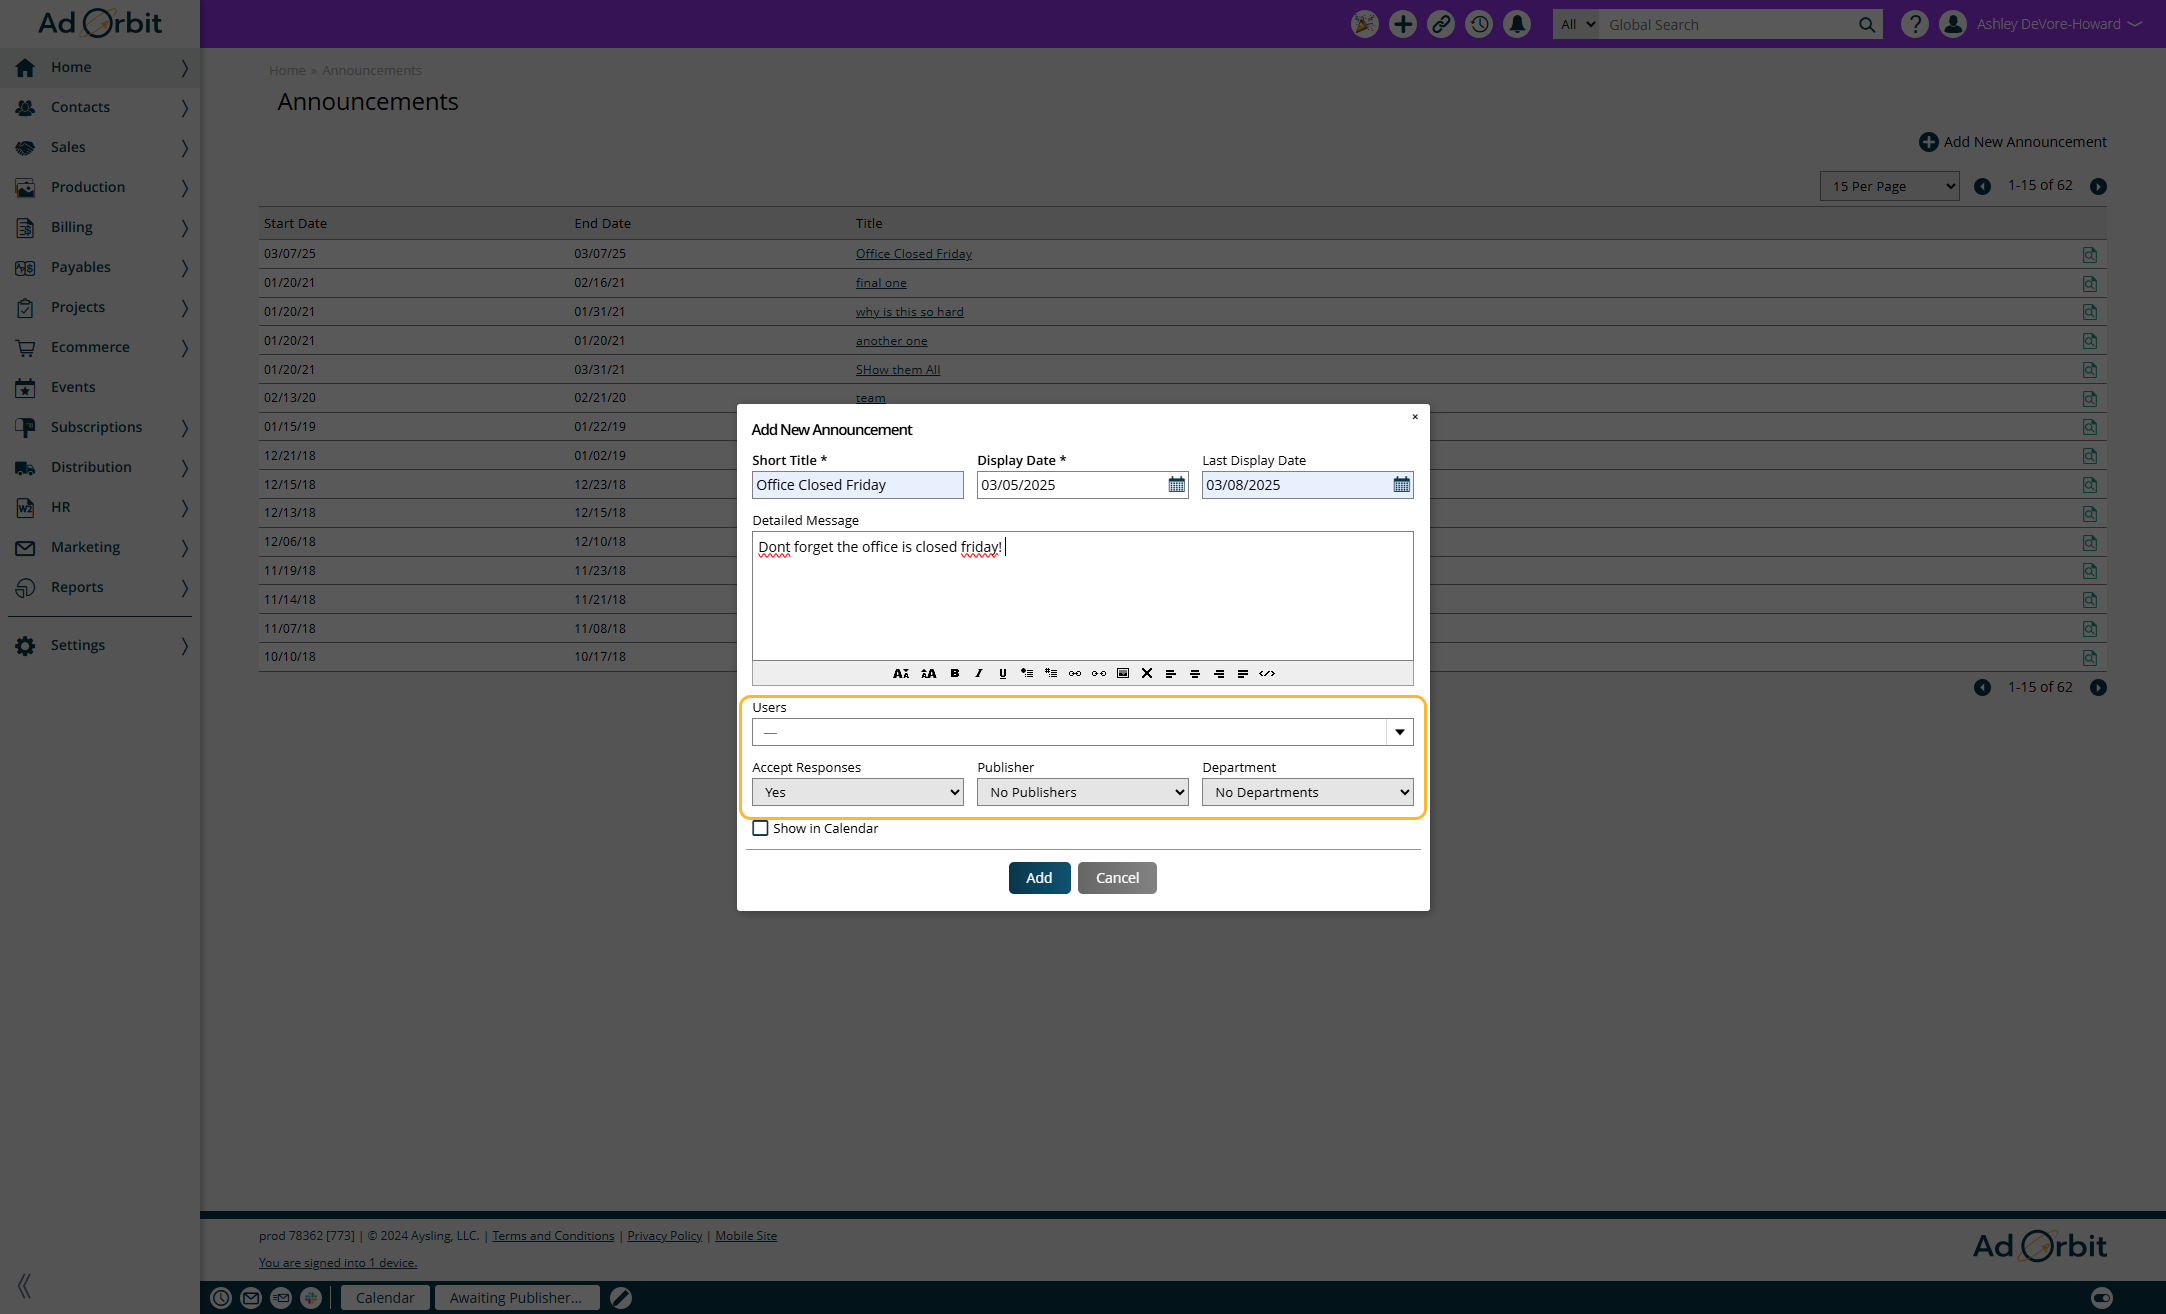
When selecting who should receive the announcement, consider the following options:
By default, the recipient settings are set to ‘No Publishers’ and ‘No Departments’. This means only users without a publisher or department will receive the announcement.
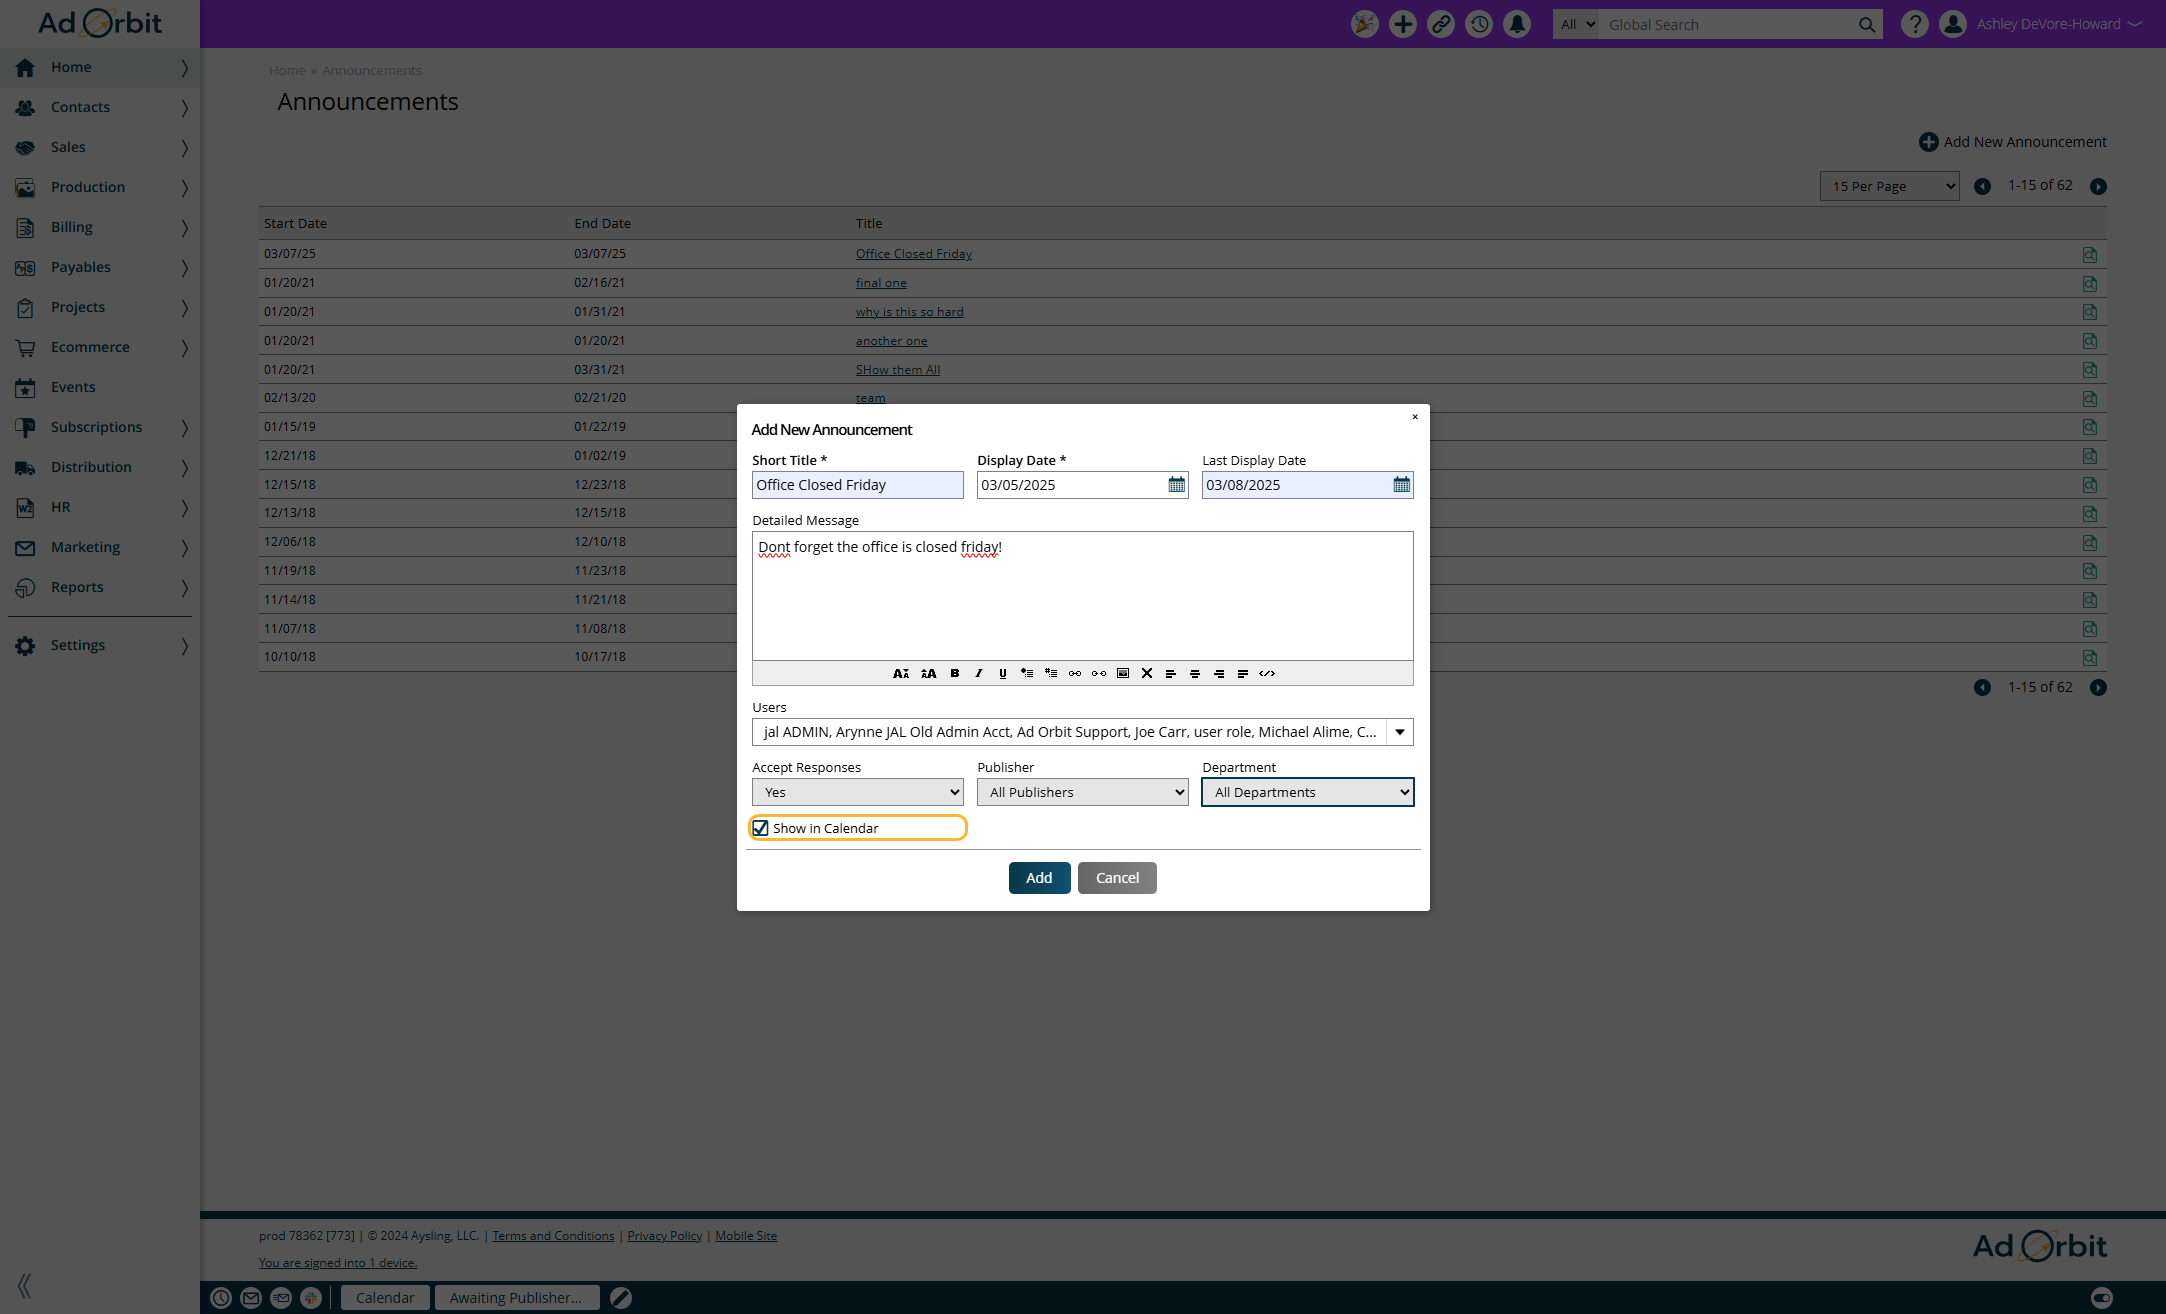
To send the announcement to all users, change these fields to 'All Publishers' and 'All Departments’.
You can also choose to send the announcement to specific publishers or departments. If you select this option, make sure to update the publisher and department fields accordingly.
If you prefer to send the announcement to individual users, simply select the users you want to notify, and adjust the publisher and department settings as needed.
If you would like this announcement to show up on the dashboard calendar widget, check show in calendar.
Viewing the Announcement
Once the announcement is sent, it will appear across the top of the screen for all recipients.
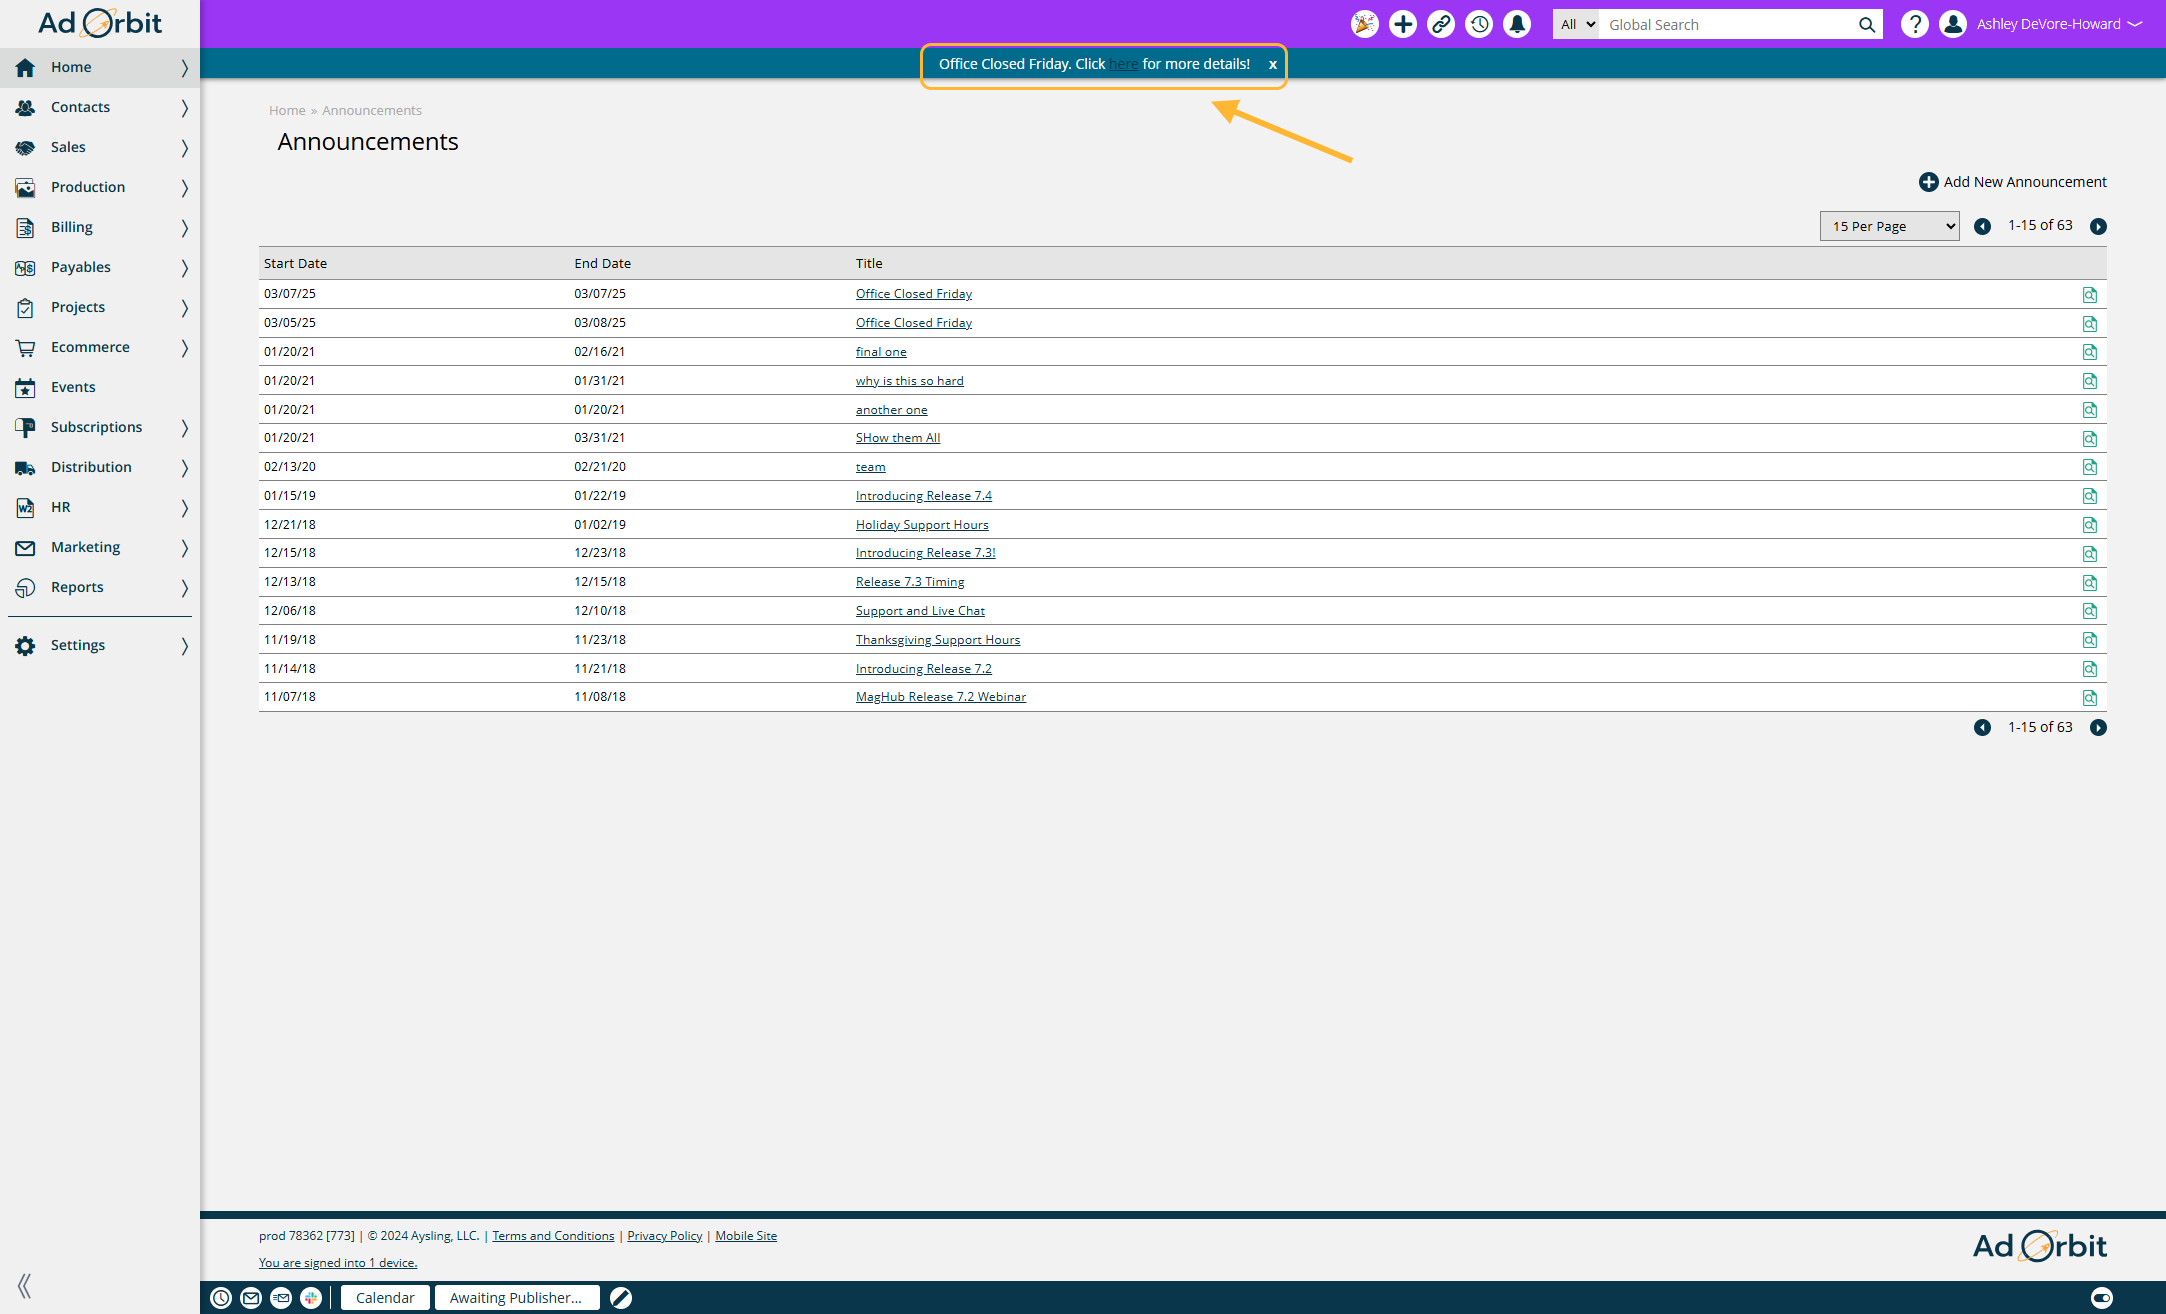
If users have their calendar widget set to Show Announcements (which can be found in the settings of the calendar widget), the announcement will also appear on their calendar. When a user clicks on the announcement—either from the calendar or the top of their screen—they will be able to view the full details.
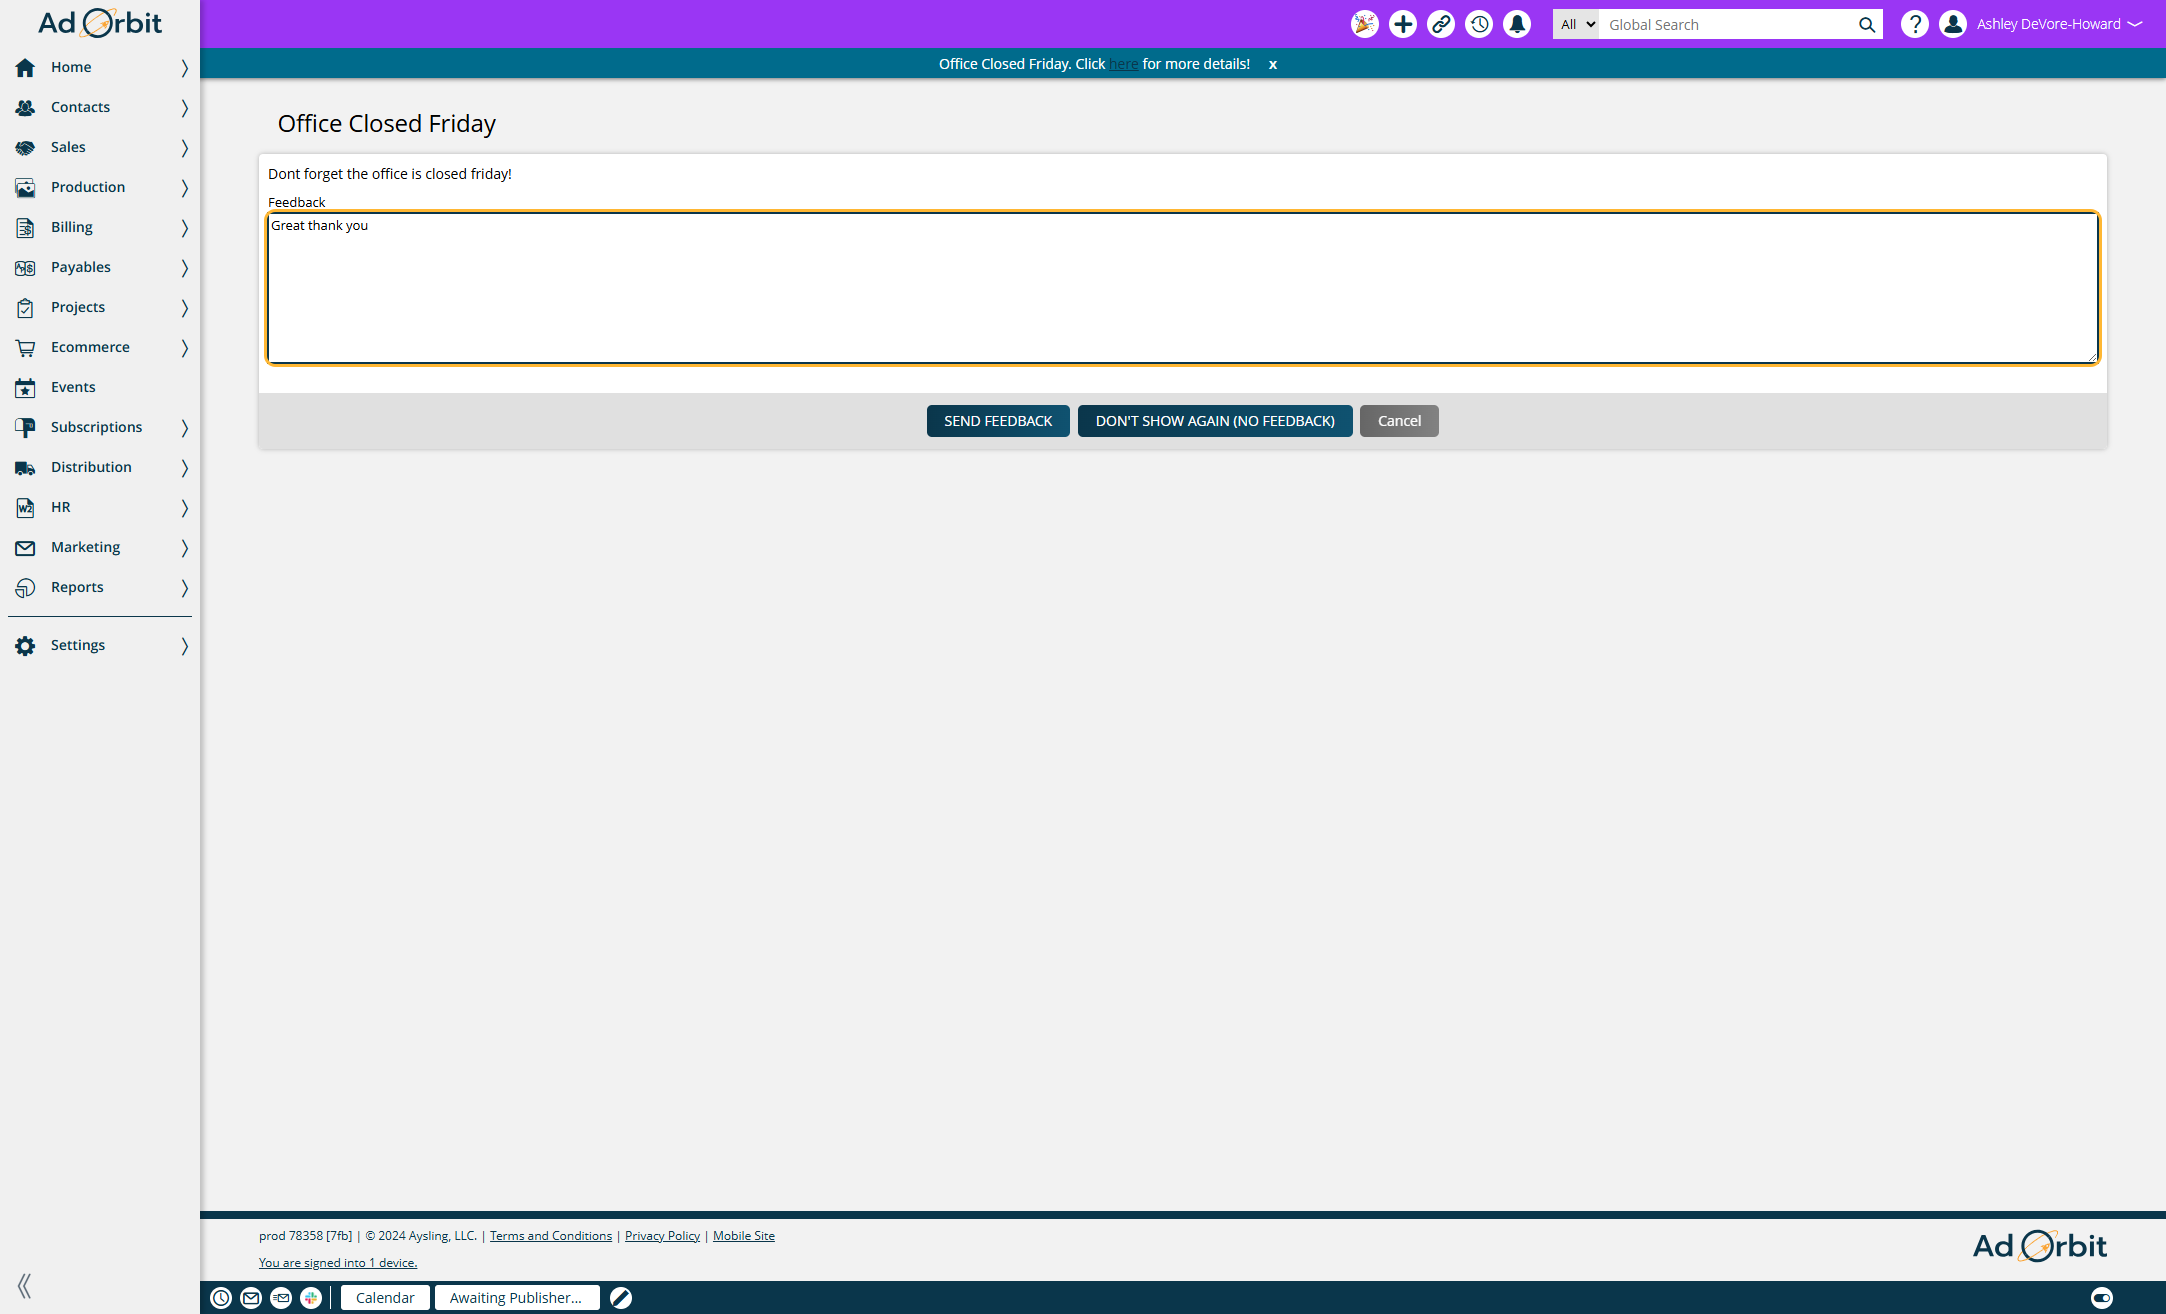
Accepting Responses
If you enable the Accept Responses option when creating the announcement, users will have the ability to provide feedback on the announcement. To view these responses, simply click the View Responses icon on the Announcements page. There, you will be able to see all feedback, along with the names of users who submitted comments.
Updated 3/6/2025