Microsoft Teams Integration
How to Set Up your Teams Integration
There are a few things you need to have in place before you can set up the Microsoft Teams Integration. First, you must have access to Microsoft Teams. Second, the Teams integration needs to be enabled in your system. If the Teams integration is not enabled, reach out to our support team.
Once you have a Microsoft Teams account, and the integration is enabled in your site, you will need the User Permission ‘Microsoft Teams’ to access the set-up page. With the permission, you can go to Settings > Integrations > Microsoft Teams to configure channels and notifications.
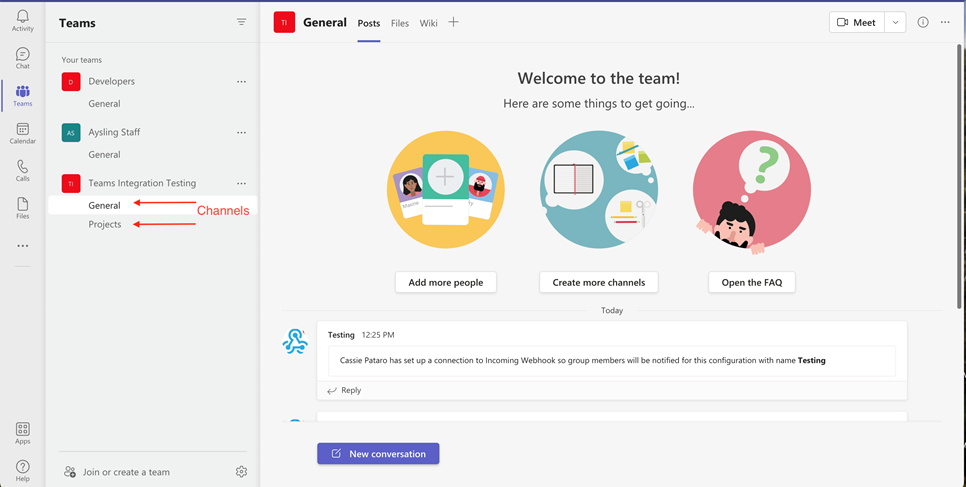
To add a new channel within the system, you need what is called a Webhook URL. To set up an Incoming Webhook, go to a Team channel in Microsoft. Underneath each Team in Microsoft are Teams channels listed. Every Team that gets created automatically gets a ‘General’ channel for instance, but your team may or may not have additional channels.
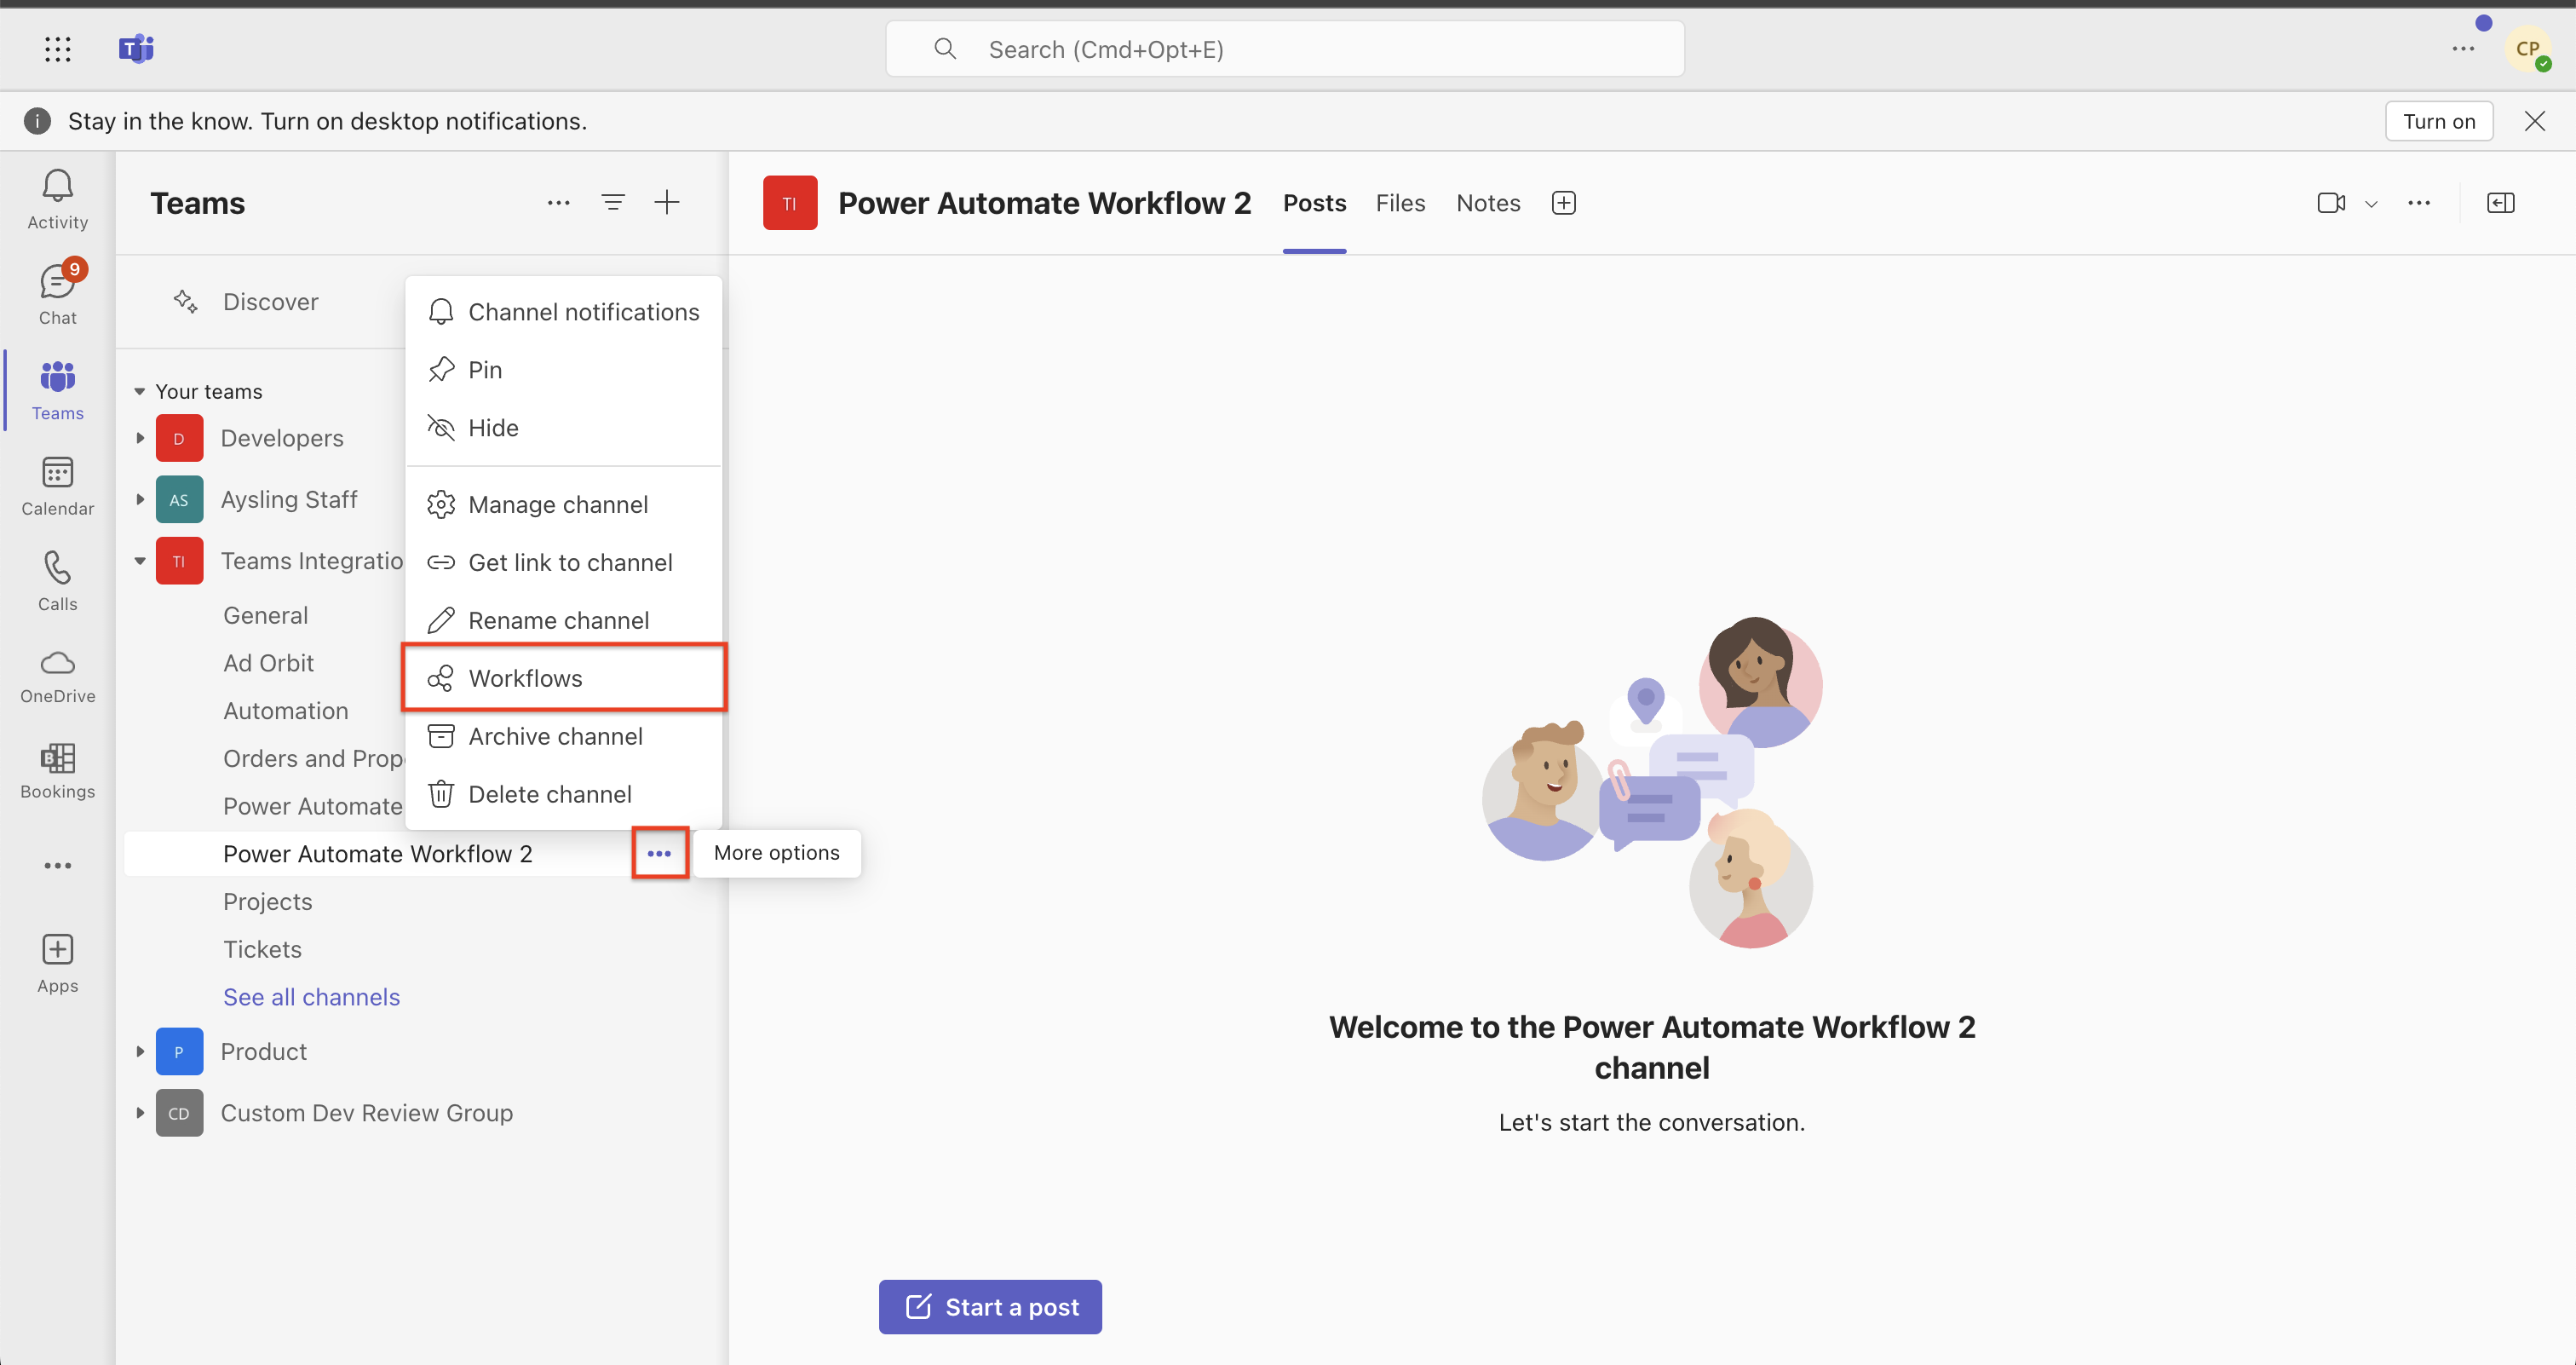
Click on the ellipsis icon next to the channel name you want to add the Webhook to, and choose the 'Workflows' option.
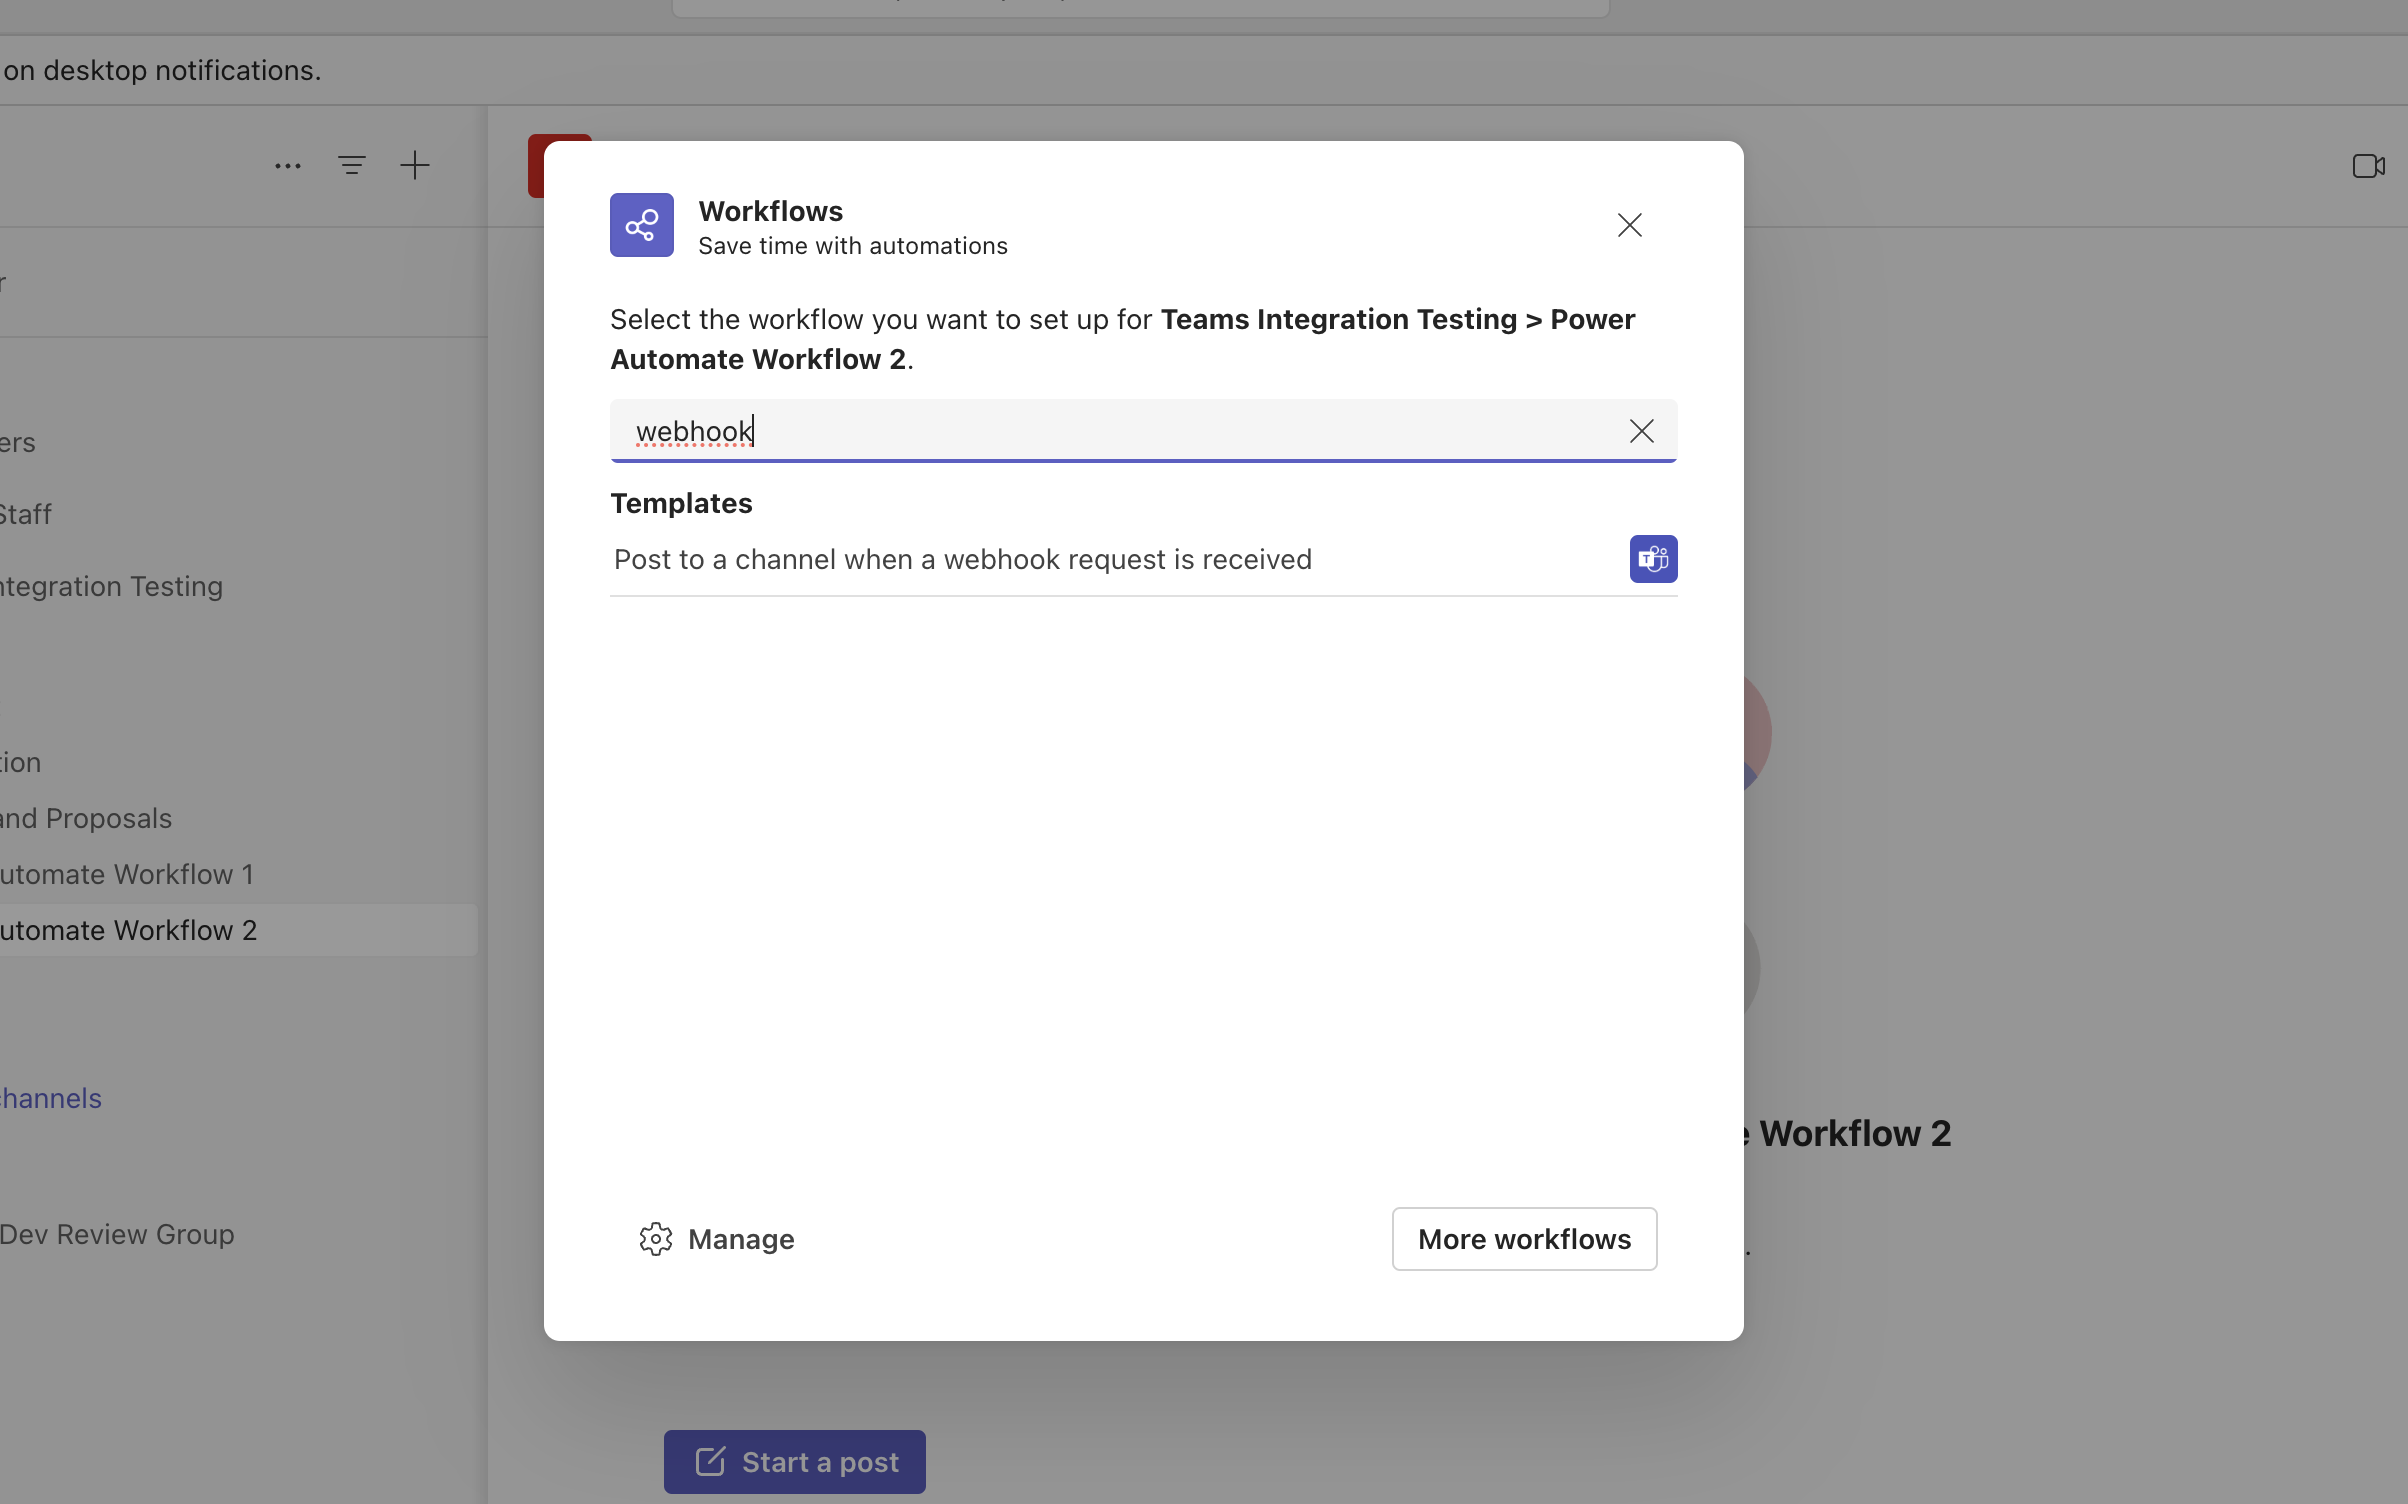
In the popup, type 'webhook' in the search field. In the results, click on the 'Post to a channel when a webhook request is received' option.
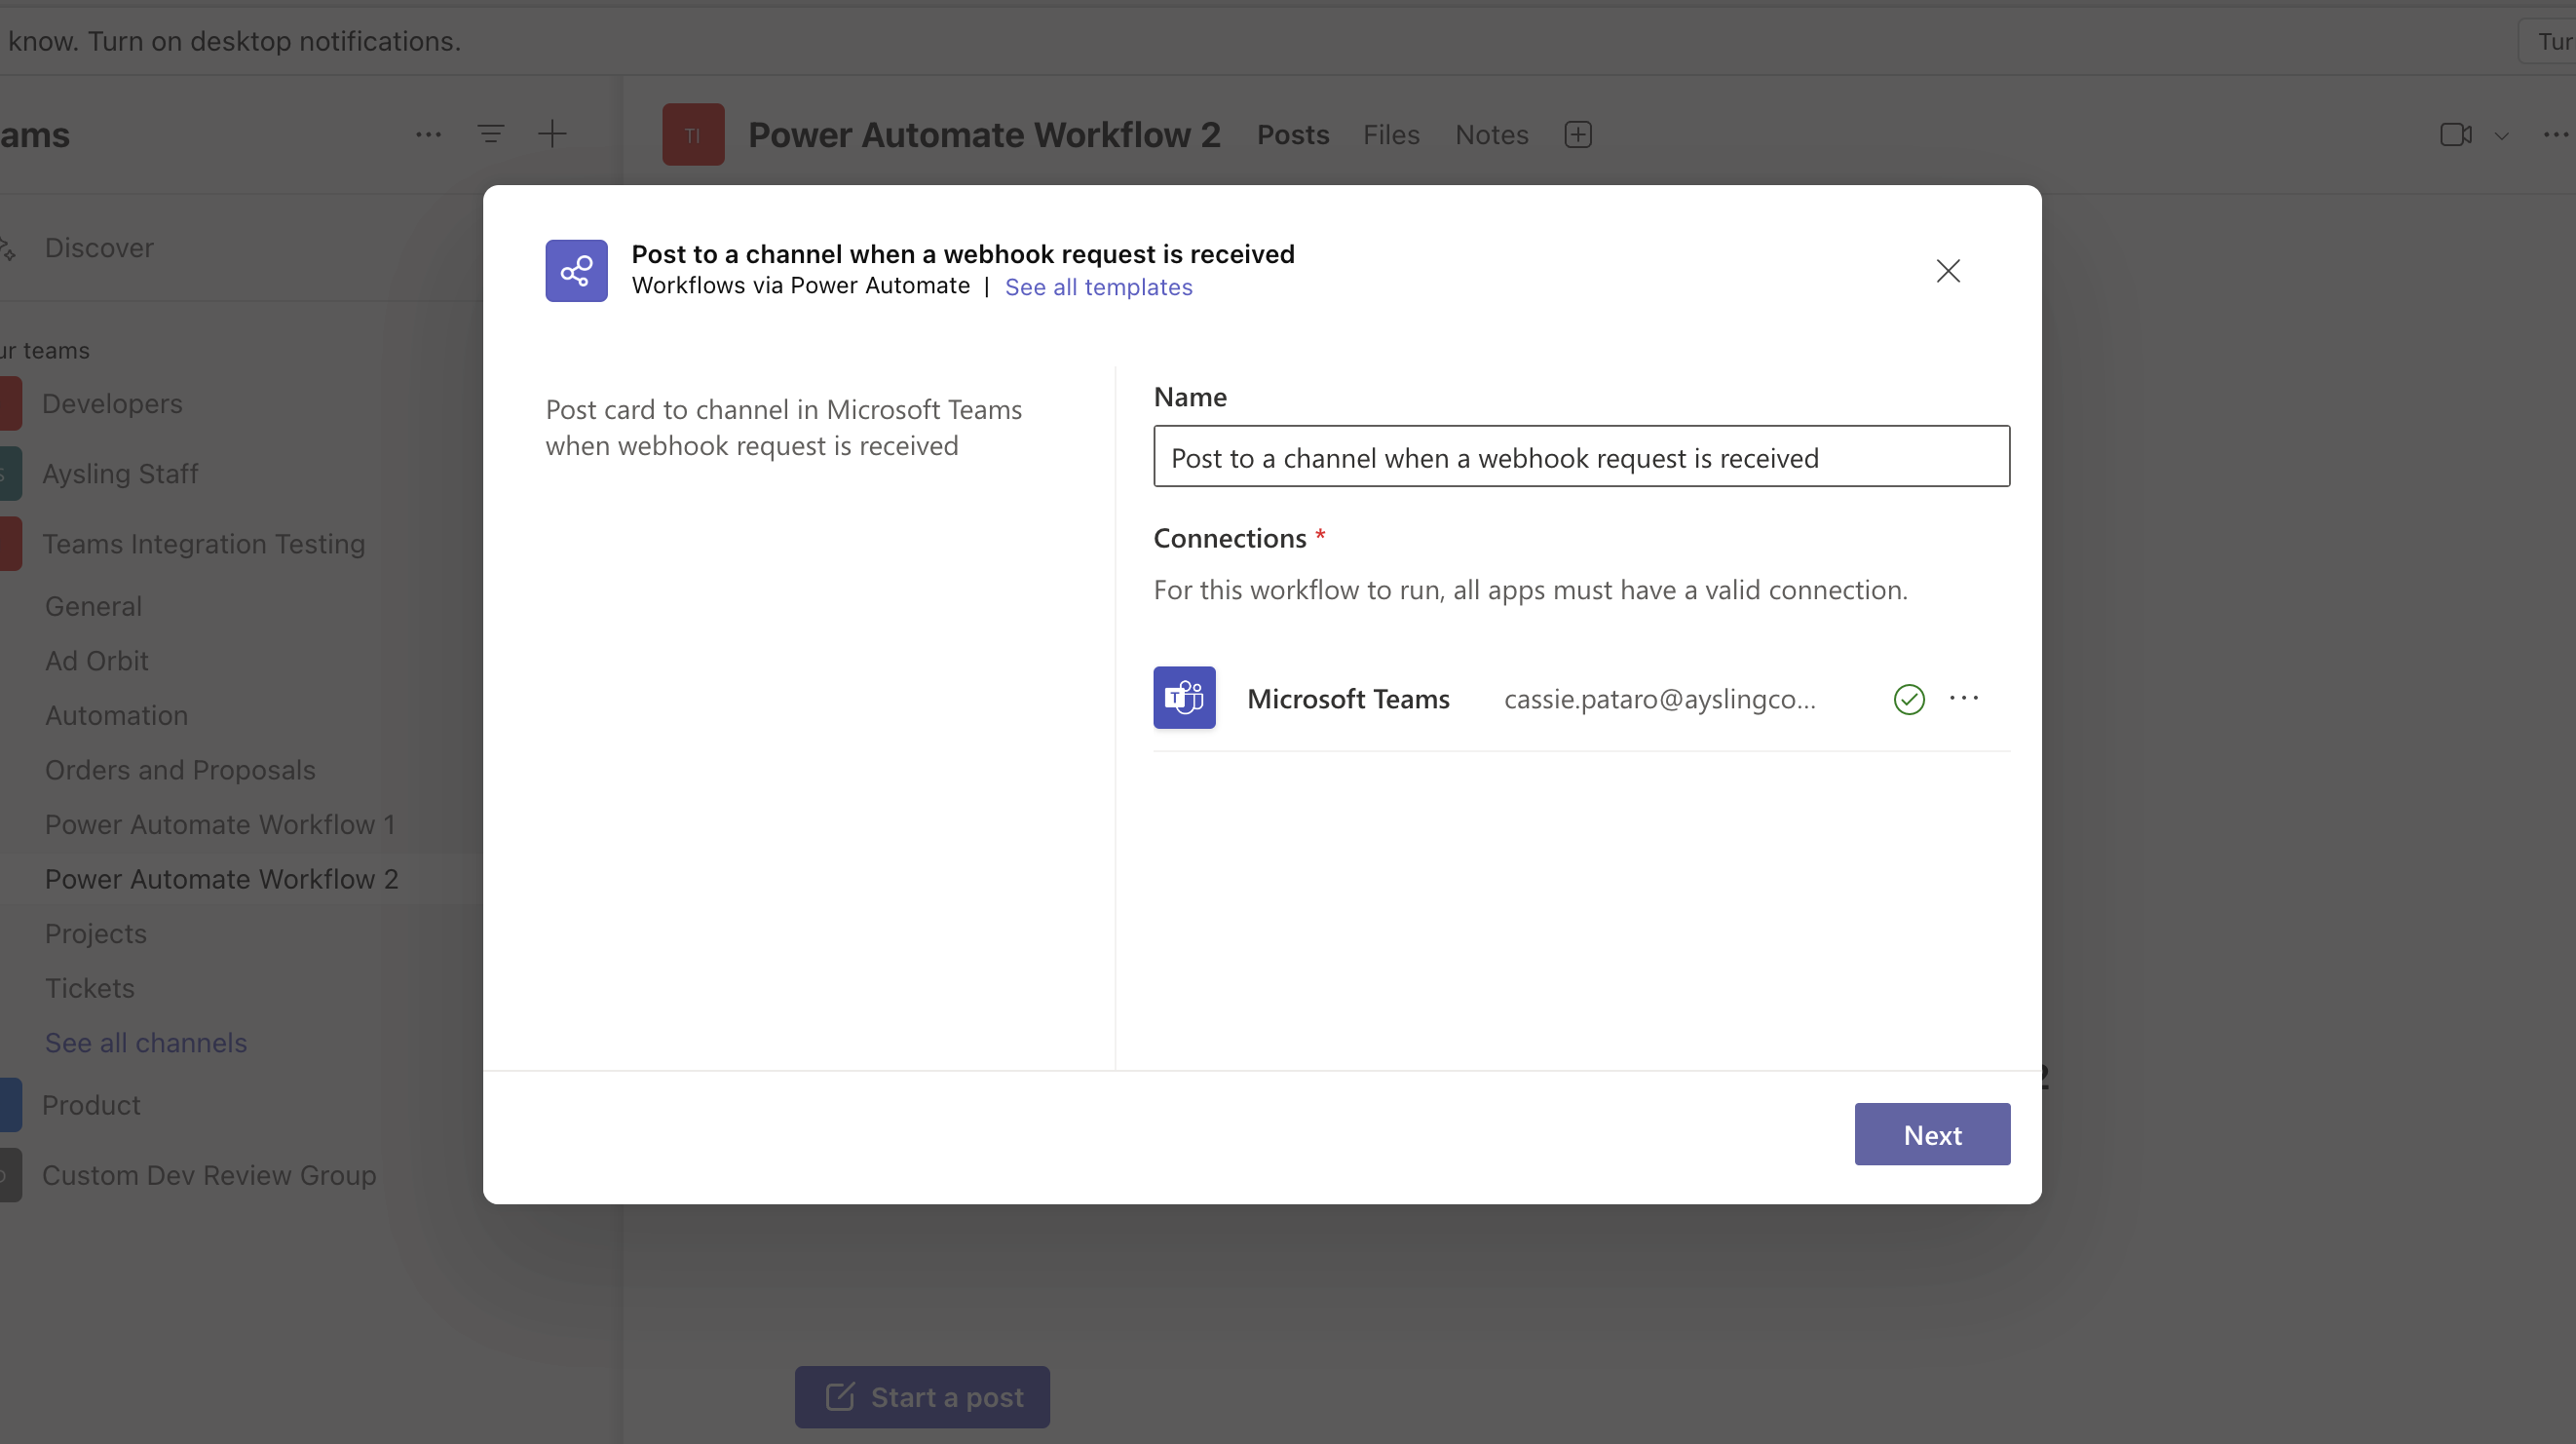
On the following page in the popup, you can choose to give your webhook a name. Click 'Next'.
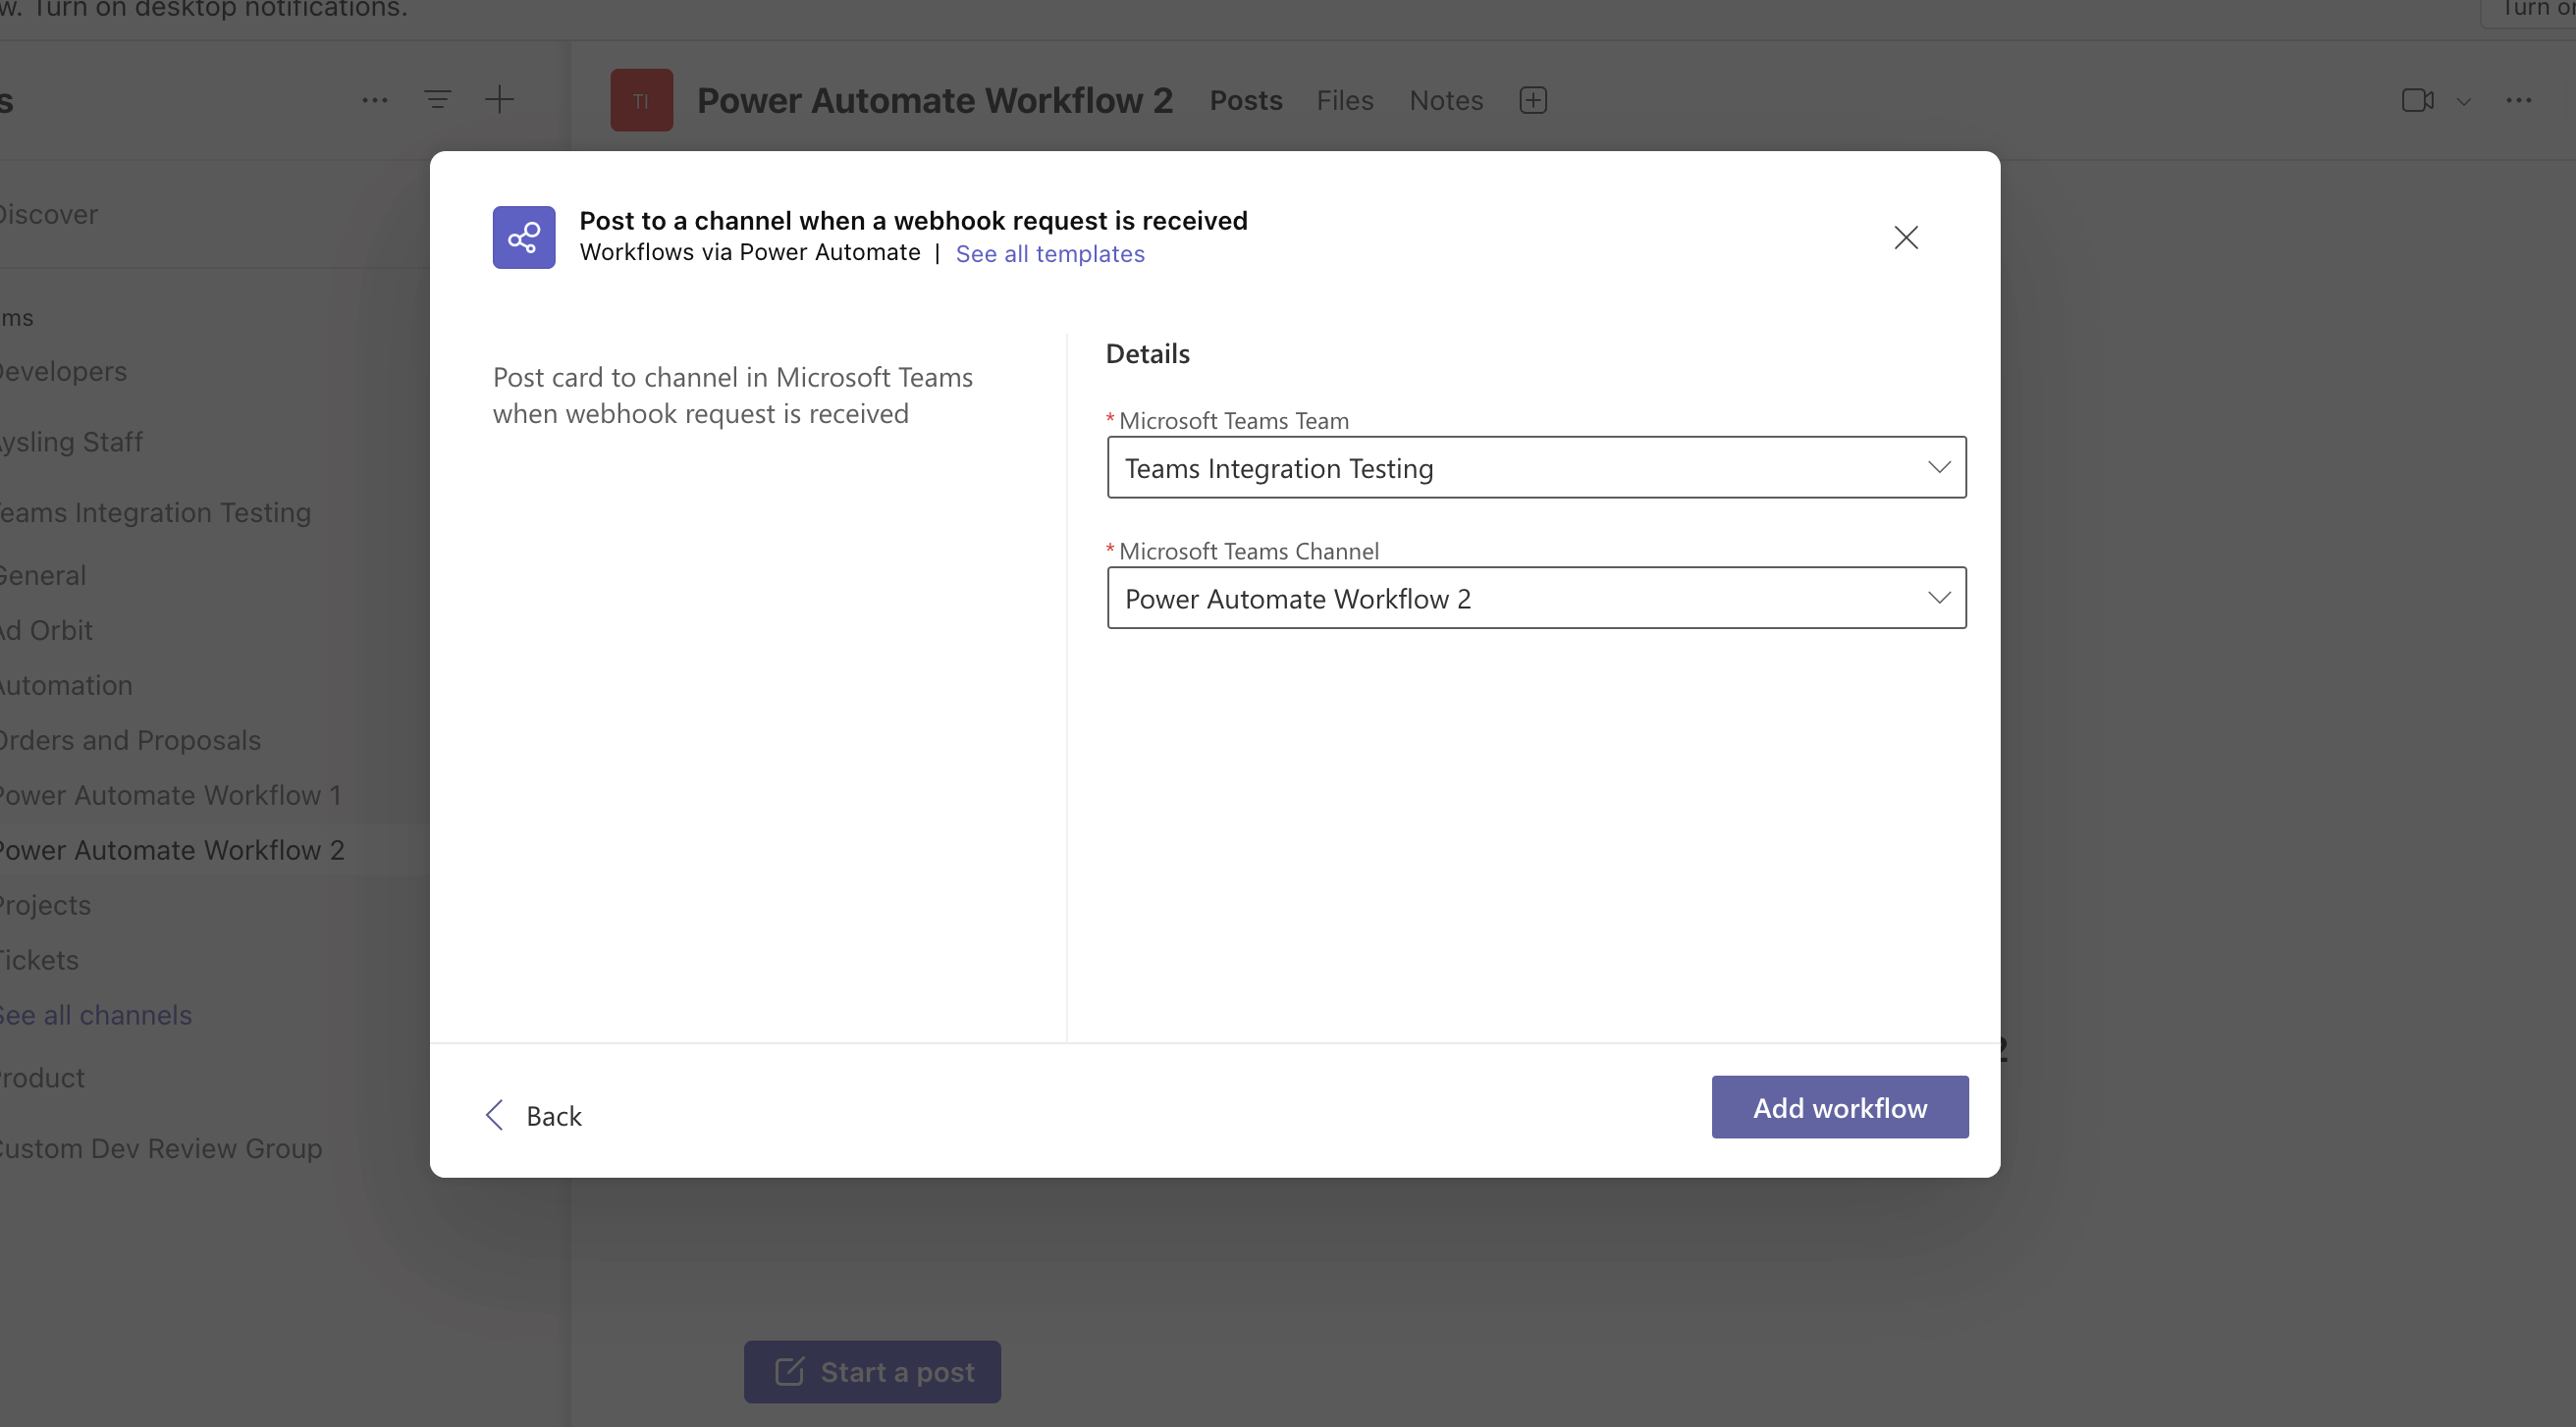
Confirm the details on the next page in the popup, and click 'Add Workflow'.
Note
The details section may take a moment to load. Wait until you see the options before attempting to continue.
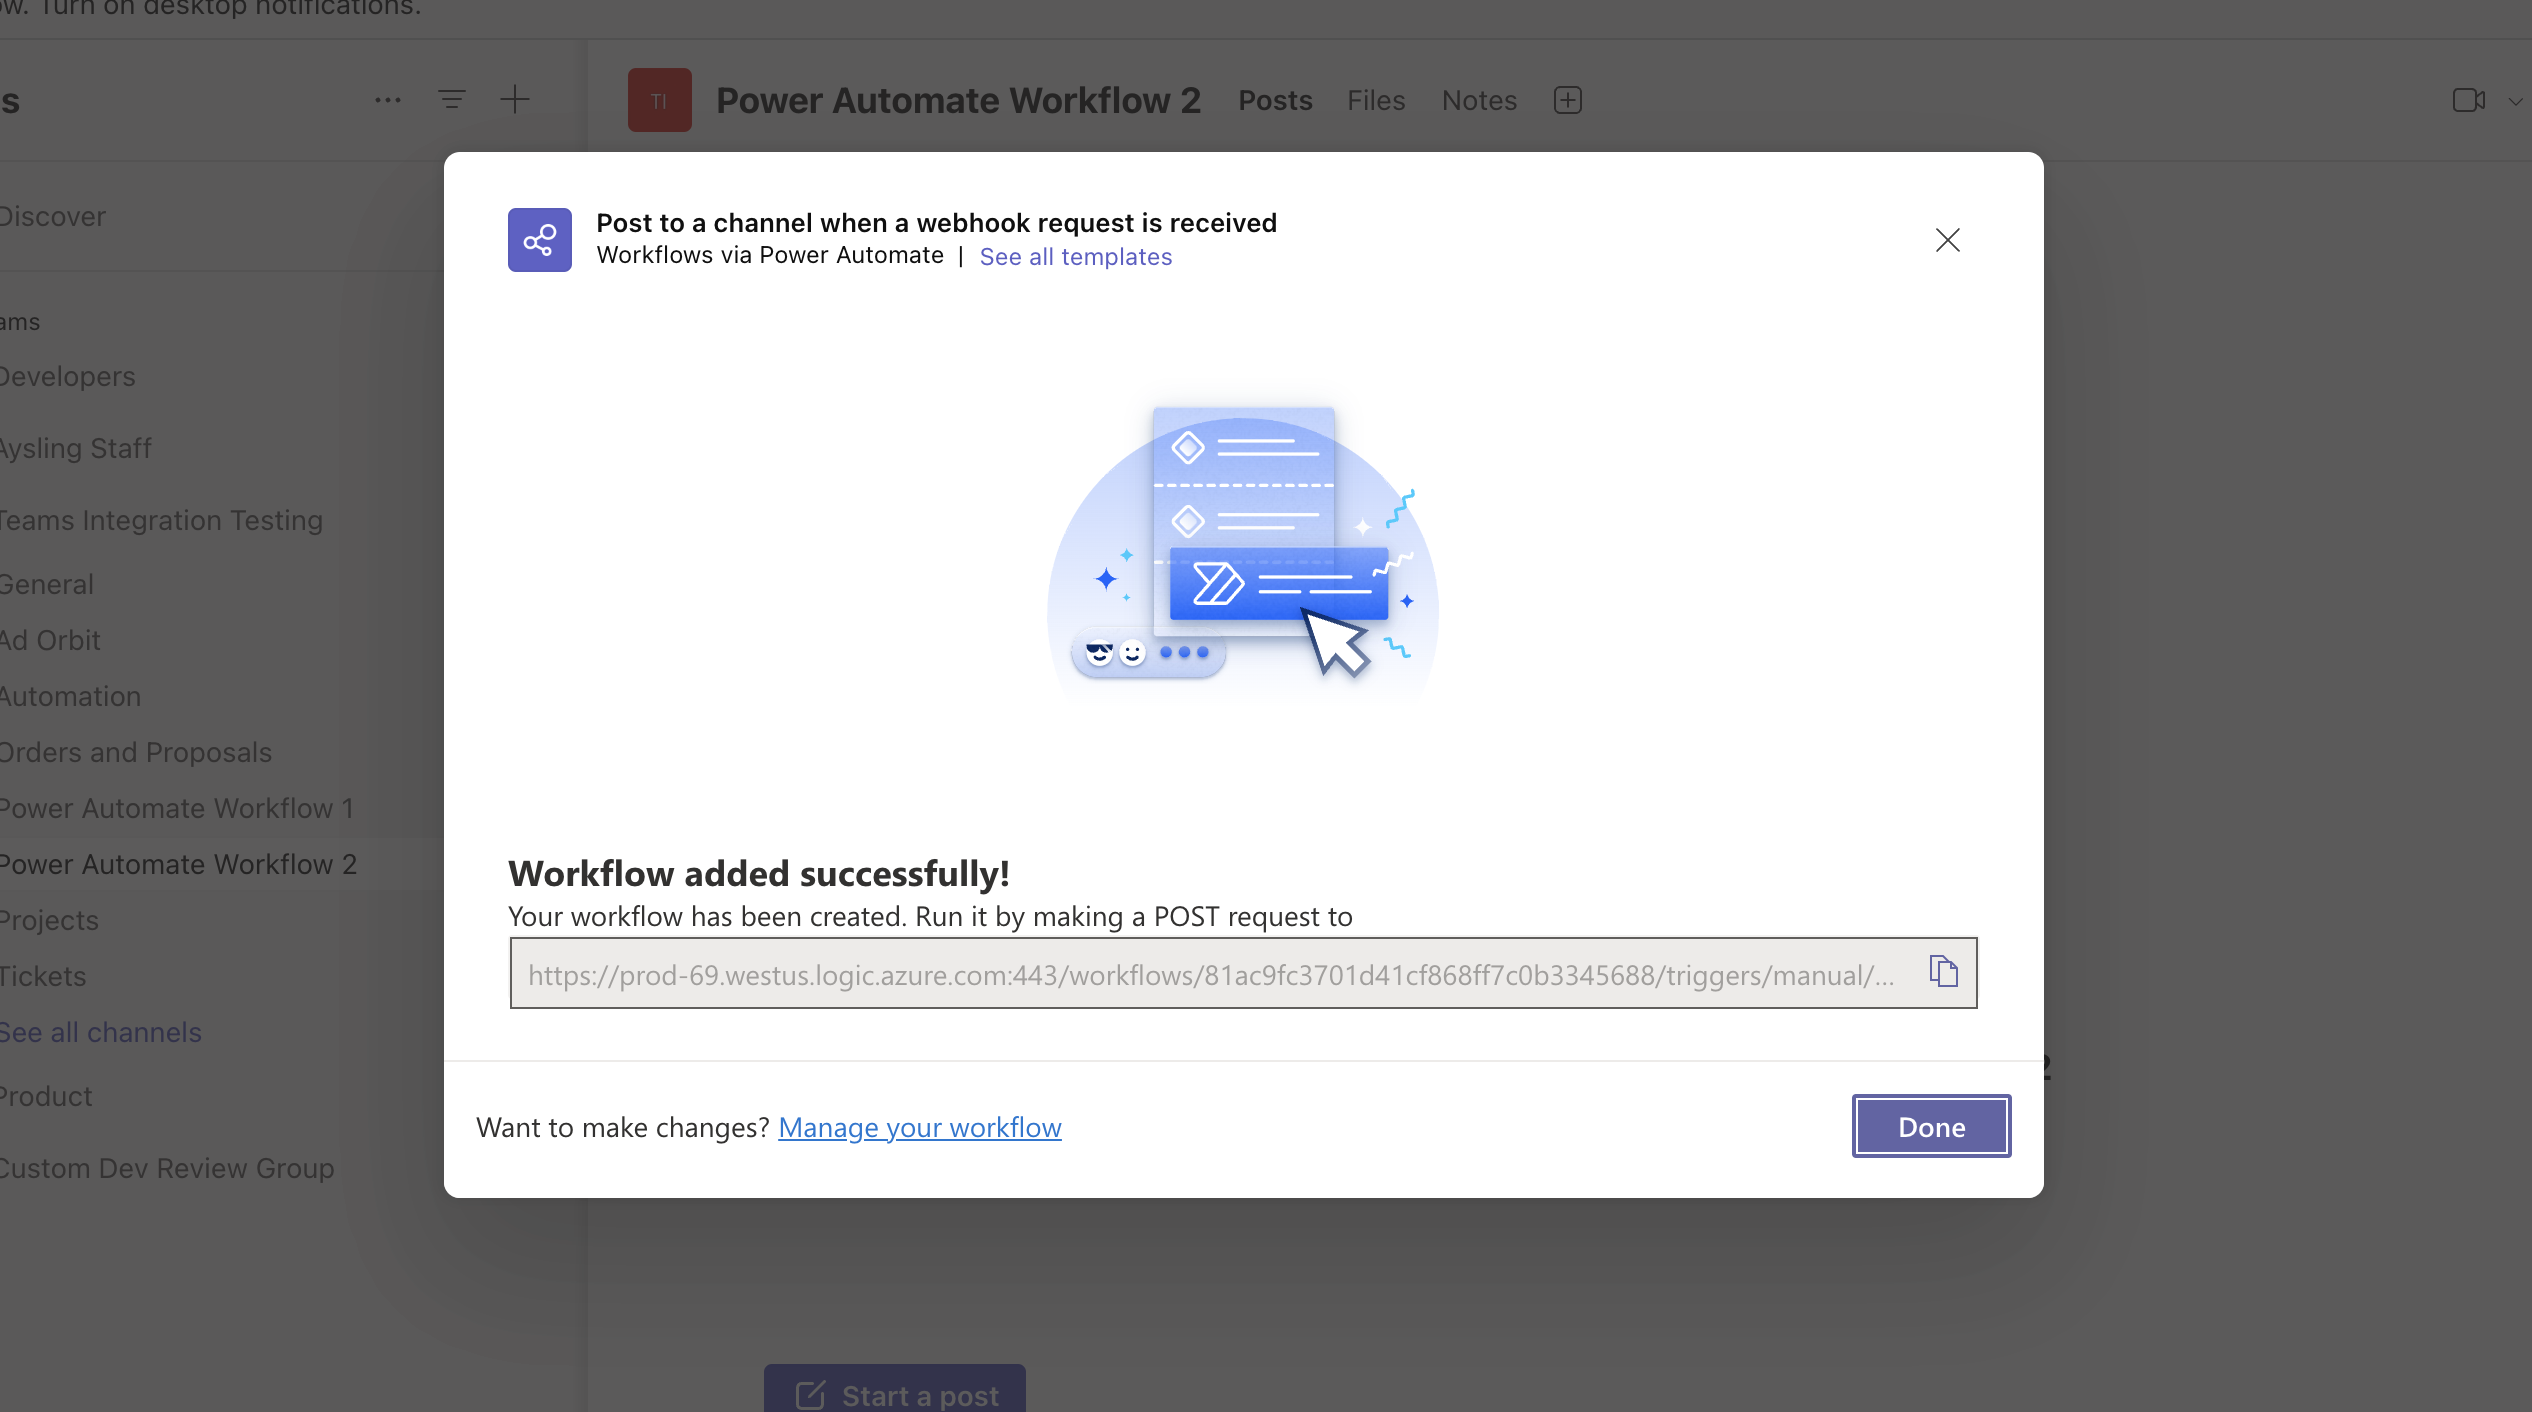
On the final page in the popup, you'll see the automatically generated ‘Webhook URL,’ which is what you will use to connect the channels between the two systems. Copy the URL to your clipboard.
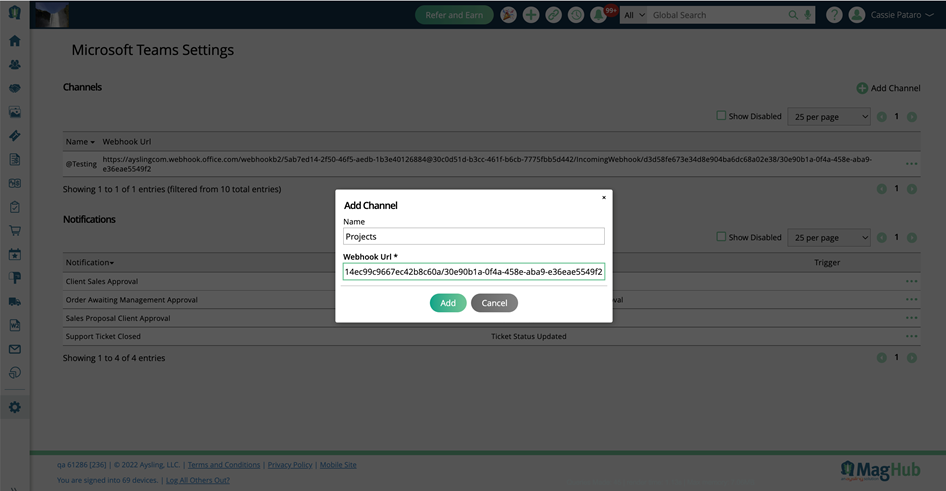
Now that you have a Webhook URL generated, navigate back to Settings > Integrations >Teams in Ad Orbit. Click the Add Channel button. In the popup, name your channel, and paste the Webhook URL. Click Add to create the channel.
Once you have added your channel, you can begin using it throughout the site. You can return to this page to add more channels, and edit, disable, or delete existing channels.
Note
You can disable but not delete channels that are being used somewhere on the site.
How to Use Teams
There are many ways you can take advantage of the Microsoft Teams integration in your system. Depending on how you set up your site, you can add Teams channels to automation workflows, trigger project task notifications, and send direct messages.
Send a Teams Message from your Dock
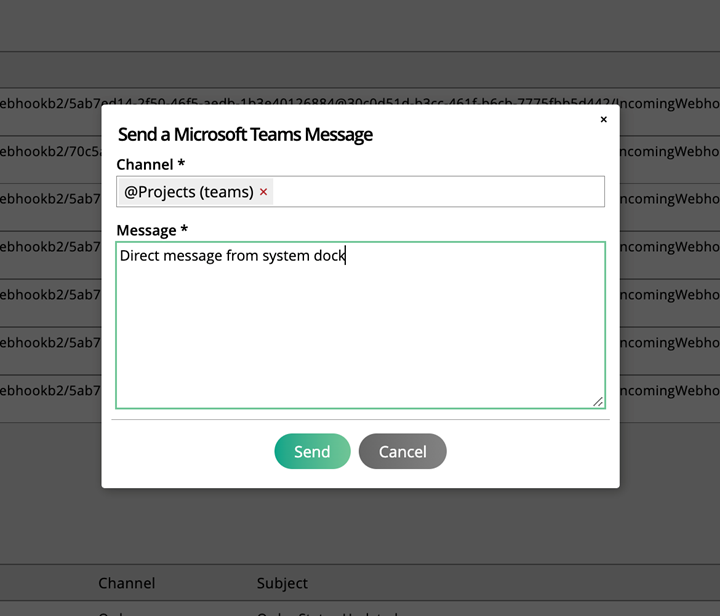
You can send a Teams message directly from your system dock by clicking on the Teams icon on the bottom left. To send the message, you will simply need to select a channel for the message to go to, enter the message, and click send.
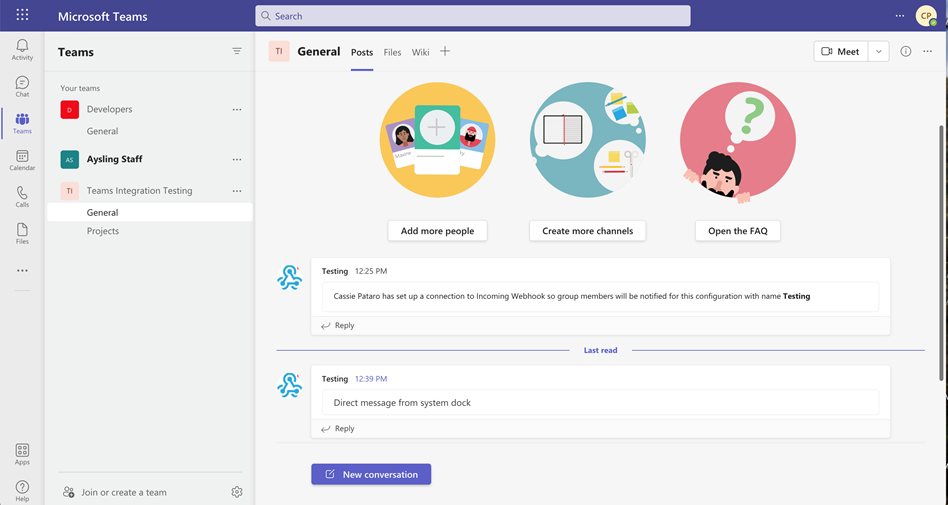
Notifications in Automation Workflows
You can generate automated Teams messages from within your automation workflows. When creating the workflow, select the Send Teams Message action type, and add the channel and the message you would like to be sent.
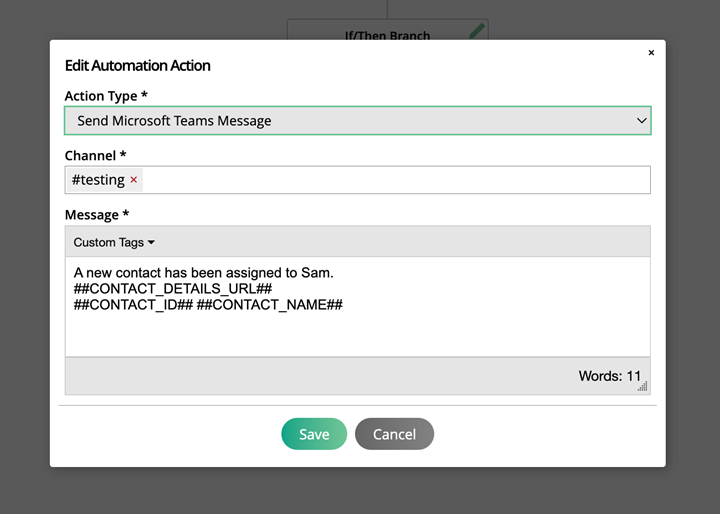
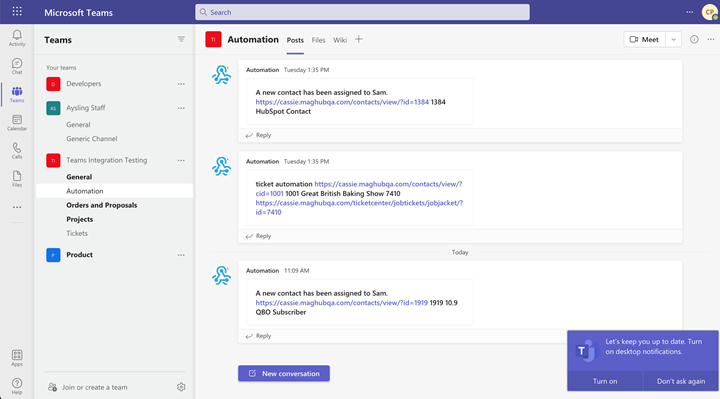
Send Teams Message is an action option in some automation workflows. You are also able to add custom tags to your message, which will make the messages more functional for your team. The tags that contain URLs provide a link to the associated page in your system, whether it is for a contact, company, order, or ticket. The custom tags that are available to choose from depend on the type of workflow.
Contact Workflows: Contact Details URL, Contact ID, Contact Name
Sales Workflows: Company Details URL, Company ID, Company Name, Order ID, Order URL
Ticket Workflows: Company Details URL, Company ID, Company Name, Ticket ID, Ticket URL
Note
For example, you can create an automation workflow with the dynamic attribute ‘Assigned To,' when new contacts come into your system, which would trigger the system to assign the contact to a rep. You could also send a Teams message to a channel, notifying them of a new contact. The message could include the Contact Details URL, Contact ID, and Contact Name, giving the team information about the new contact in addition to a link that will take them directly to that contact’s page.
System Generated Notifications
On the Microsoft Teams integration setup page, you will see a Notifications section. These Teams notifications are automatically triggered by specific actions within the system or within the Client Center. You can edit and disable these notifications by clicking on the ellipsis icon on the right side.
To use these notifications, you will need to direct them to a Teams channel. Click on the edit icon for the notification, and you will see a pop-up where you can associate a channel, edit the subject line, and change the color of the notification. You are only able to select one channel for each notification.
Client Sales Approval
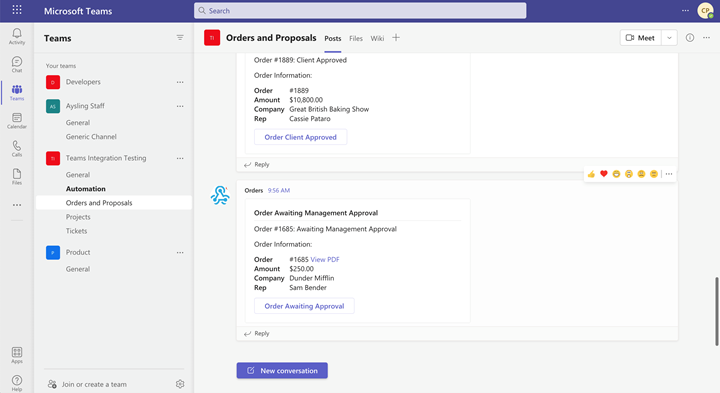
This notification is sent when an order is client approved, or an amendment to an order is client approved. The notification will contain the type of approval and information about the order. There is also a link in the message which will take you directly to the order PDF.
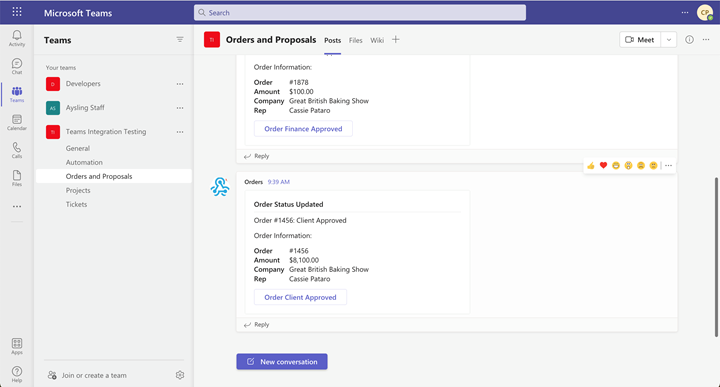
Order Awaiting Management Approval
This notification is sent when a rep submits an order for approval from a Company’s Pending Orders tab. The notification contains information about the order, as well as a link to both the order PDF and the approval page for that order.
Sales Proposal Client Approval
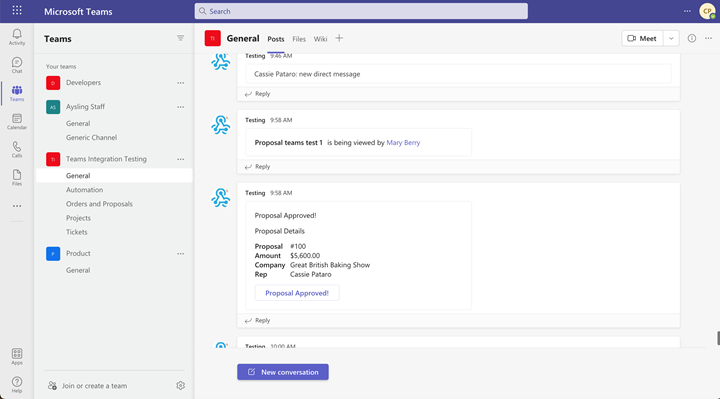
This notification is sent when a client approves a sales proposal. The notification contains information about the proposal, as well as a link to the page for that proposal on your site.
Support Ticket Closed
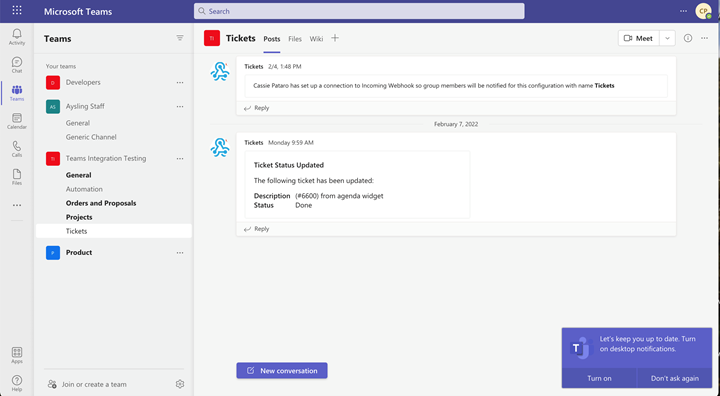
In addition to adding the channel for this notification, you must add Triggers. The notification is sent if a support ticket is marked as done, and it is a trigger for the notification. The options for triggers that you can choose from are determined by any Service Products you have that are marked as a Support Item. To view or edit your service products, navigate to Settings > Products > Service Products.
Direct Project and Proposal Notifications
Teams channels can be added directly to user accounts or vendor contacts so that the user or vendor can receive notifications about their projects and proposals.
Users
Navigate to Home > My Preferences to set your Teams channel. This allows you to receive notifications about your projects and proposals.
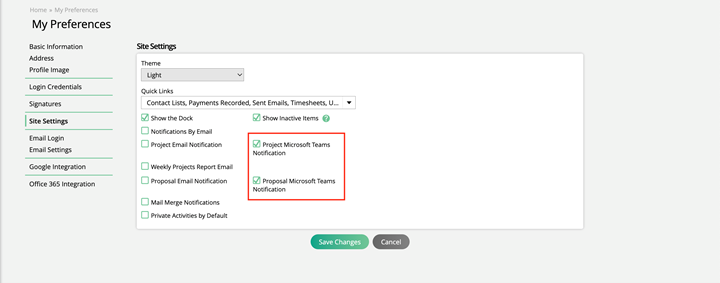
First you need to go to the Basic Information tab and enter a channel under Teams Channel. Then go to your Site Settings to enable Project and Proposal Notifications.

Project Notifications
If you enable this configuration, you will receive Teams messages for project task update reminders, if you are the user on that project task. This will be for all project tasks that you are assigned to, not just for a single project.
If you are a manager on a project, you will receive a message when a project task is marked as 100% completed, regardless of if you are the user assigned to the task or not.
Proposal Notifications
With this setting enabled, you will be notified when your contacts are viewing one of your proposals in their Client Center, and you will also receive a message if a proposal gets approved.
Vendor Contacts
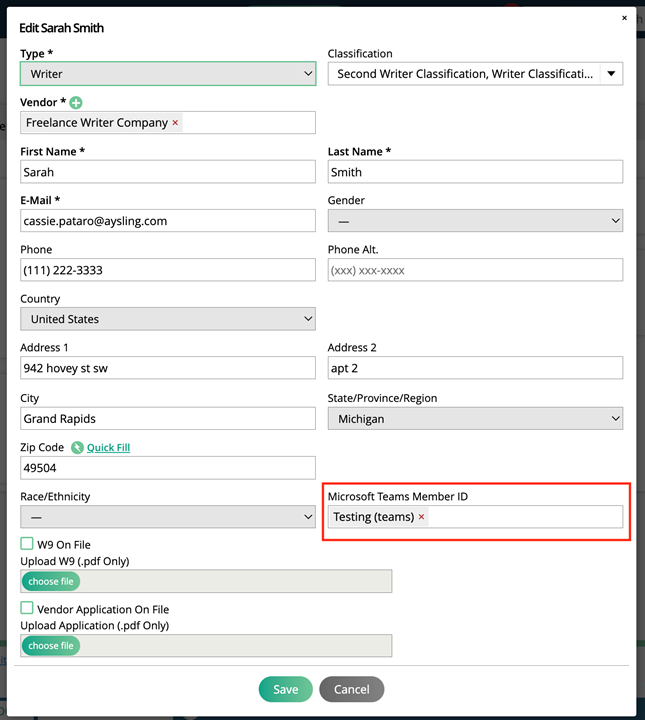
To add a Teams channel to a vendor contact, navigate to the vendor contact’s overview page in the system, and open the edit popup. Add a Teams channel into the Microsoft Teams Member ID field.
When added, the vendor contact will receive Teams messages for project task update reminders, if they are assigned to the task. This is for all project tasks that the vendor contact is assigned to, not just for a single project.
Note
This workflow is only applicable if the vendor contact has access to your Teams. If they don’t have access, then they won’t be able to see the messages sent by the system.
Project Notifications
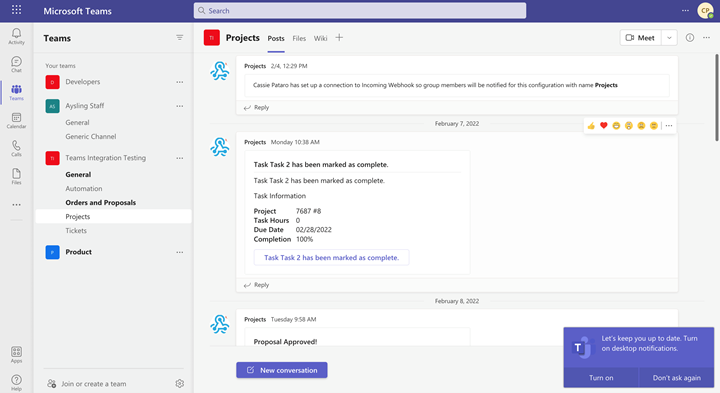
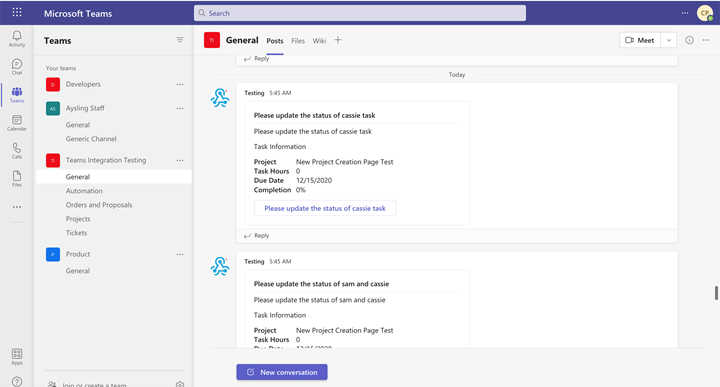
On the Project add/edit page, under the Notification Preferences section, you can add a Teams channel. This channel is used specifically for this project, and sends project task update reminders, and notifications of when project tasks are marked as 100%. Make sure to set the Update Reminder Frequency if you want to receive the task update reminders.

This is a good option if you want all participants of a project to receive notifications for the project. For example, you could create a channel in Teams specifically for that project and add all your project participants to it. Then, you could add that channel to the project, and all the participants will receive the task reminders and notifications when tasks are completed.
Important
Adding a channel to a specific project is different than using the project notifications from the My Preferences page. The project notifications set up under My Preferences are for a specific user for all projects they are a participant in, whereas the project’s Teams channel is only for that specific project and is set up to notify all the project members.