Create a New Contact
Contacts are the heart of the system. Contacts can be leads that come in, primary decision-makers, or the billing person at a company. When you create a contact, you can either associate them with a current company, create a new company, enable direct sales, create a cart order or keep them as a prospect and add them to a sales campaign.
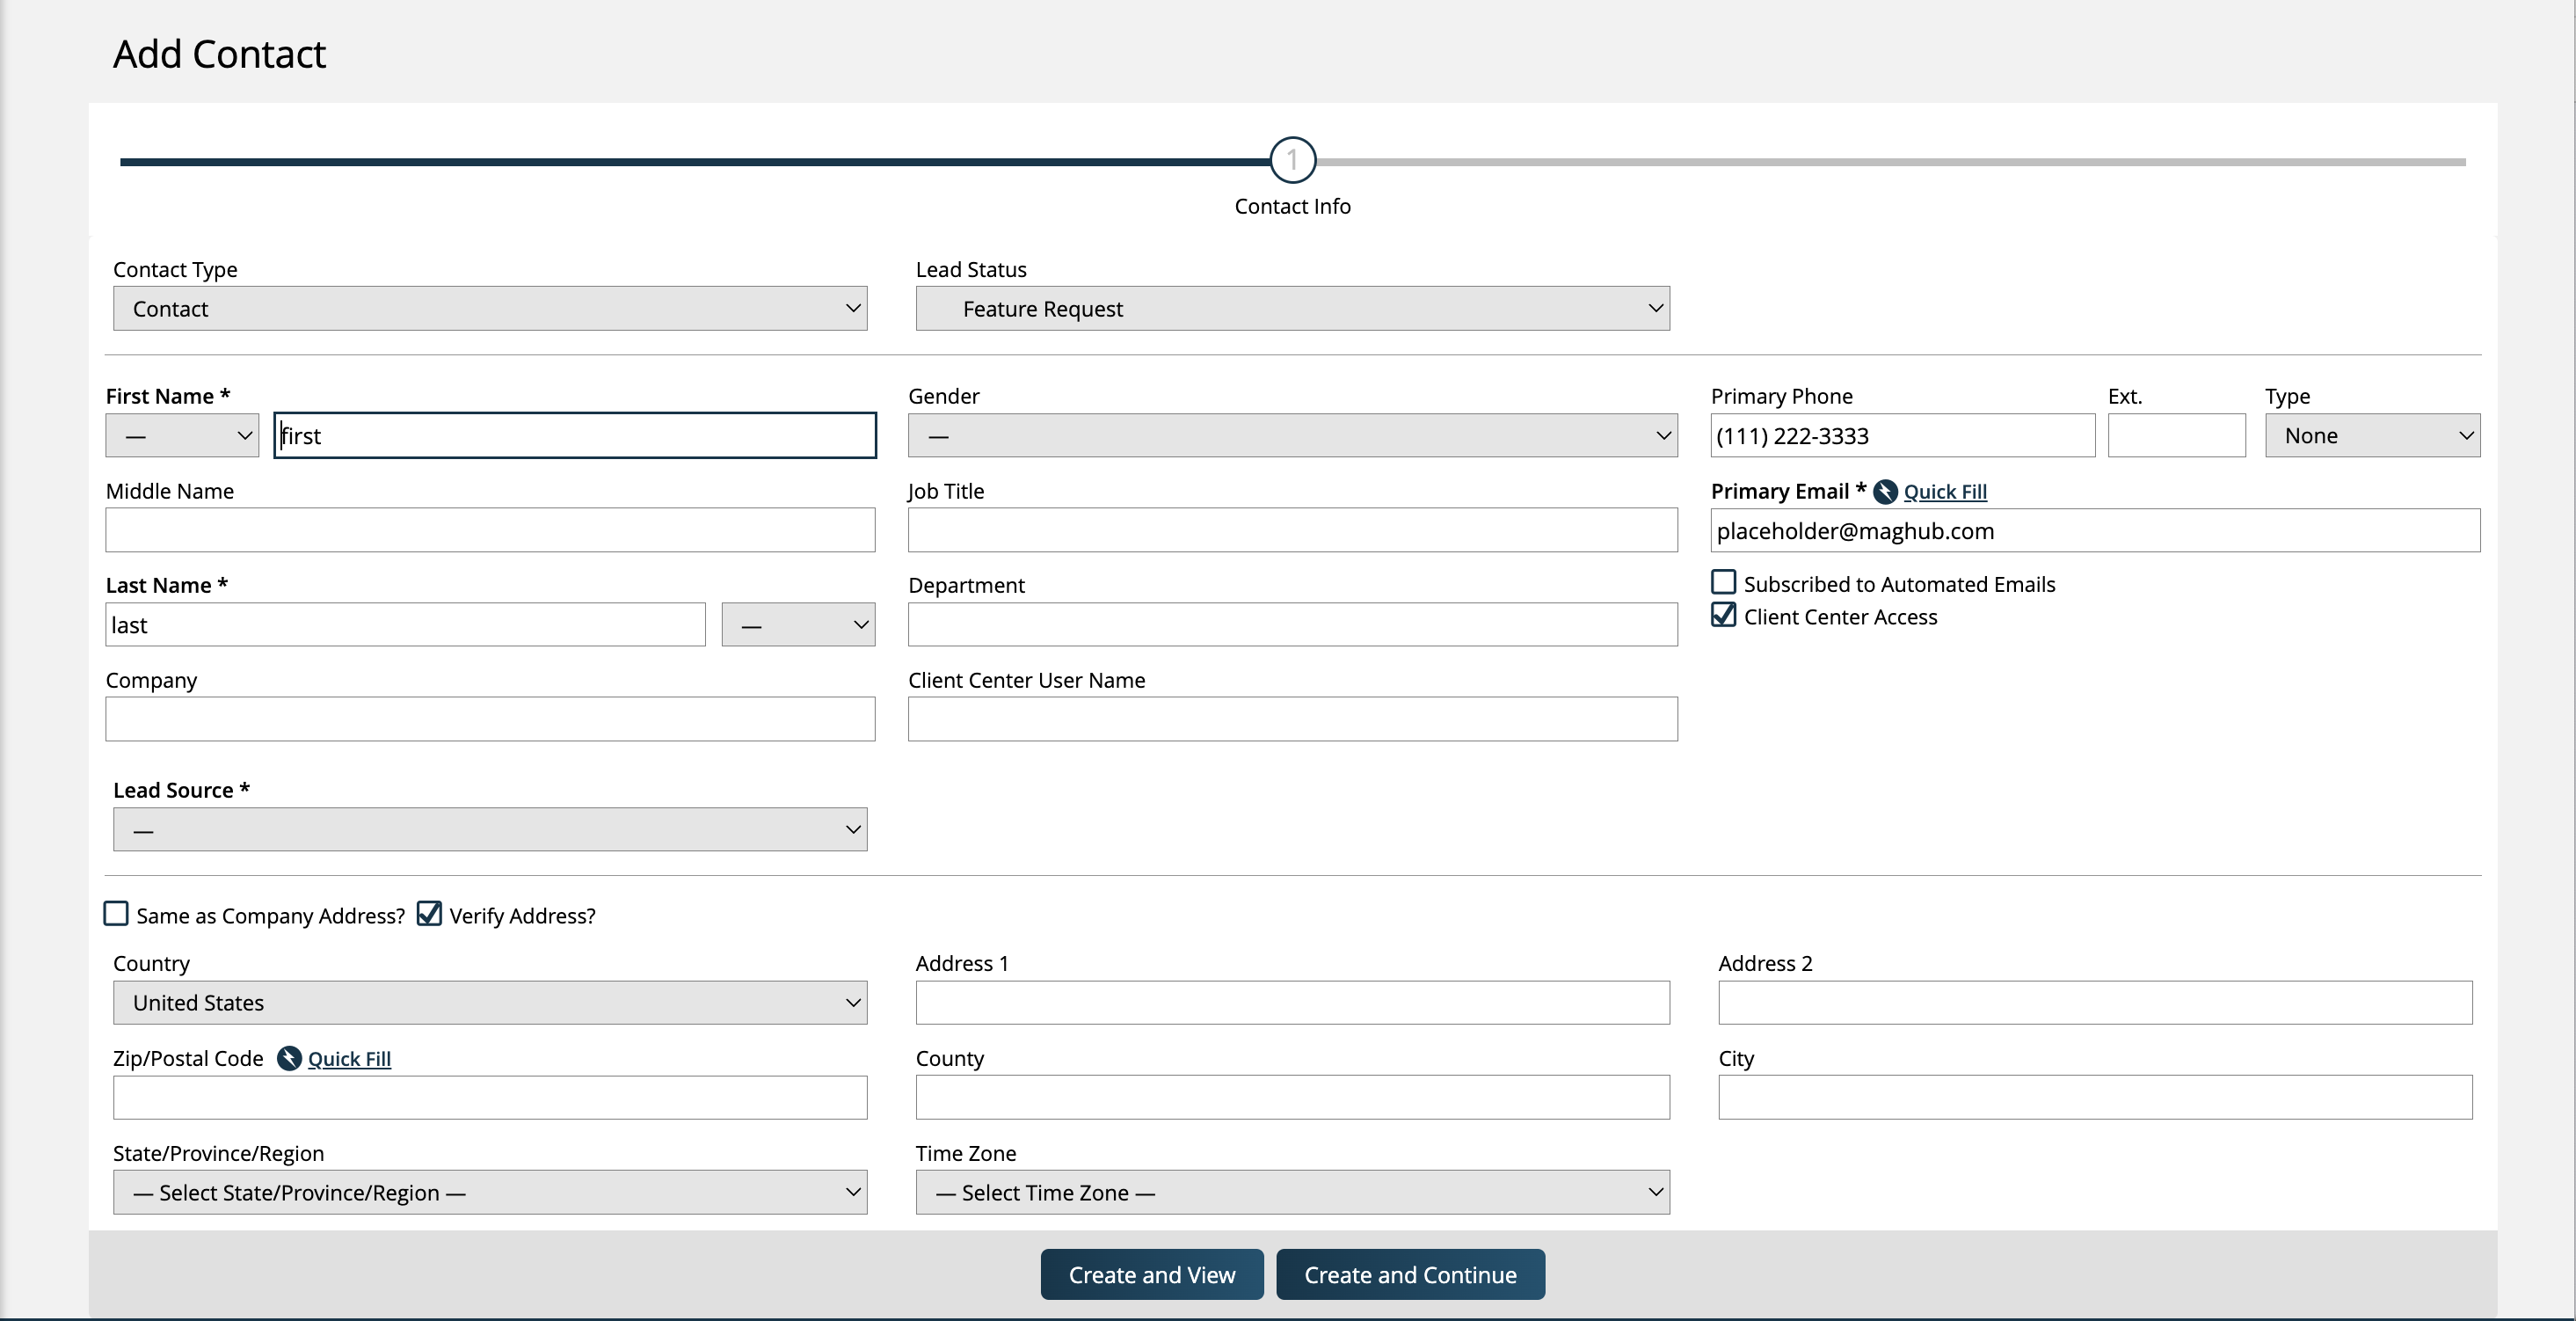
To create a new contact you need the user permission ‘Add Contact’. There are a few places throughout the site that you can create new contacts from. One option is to use the + icon at the top of the page and select the ‘Add Contact’ option. Another possibility is to go to Contacts > Contacts and click the + Add New Contact button at the top of the page. Either of these options will redirect you to the Add Contact page where you can begin entering information for your new contact. Check out the steps below to learn about each stage of creating a contact along with some additional information and helpful tips.

The system will always require that a contact have a first name, last name, and email address. You can configure your system to require other fields, including contact dynamic attributes.
Tip
You can use the quick fill on a contact's email address to find information about the contact based on Clearbit's data. When you click quick fill, you will get a popup that asks if you want to use Clearbit’s information to populate the contact record. If you choose to use the quick fill information, it will override what is already entered. Be careful! Your data may be more up to date than Clearbit!
Depending on which Contact Type you are using, different fields may be required. For instance, a Subscriber may need different fields than a standard Contact.
The company field on a contact may be required based on your site settings. When you start typing a company name, the system will show you a list of companies you may want to attached the contact to. If the company isn't in the system, you can click on Create company from Prospect Company Name? to quickly populate the required company details or keep the company just as a prospect company name.
Gender and Suffixes are optional fields. You can add more Suffixes and Genders in the Settings.
Subscribe to Automated Emails: Means your contact will receive system generated emails. If a contact requests you stop sending automated email, you can update the contact and remove the setting.
Tip
You can also bulk update this setting from the contact search.
By default, a new contact will have access to Client Center. Client Center allows a contact to view orders, invoices, payments, projects, and ticket data. You can disable a contact's access or update what they can view in Client Center by editing their permissions.
You may see other required fields if your system requires dynamic attributes or lead sources on contacts.
The system can be set up to verify a contact’s address information. When address verification is enabled in your site, you will see a ‘Verify?’ option above the contact’s address fields.
The ‘Verify?’ box will be checked by default, but you can choose to uncheck it to skip the verification process.
When you save the contact’s information, the system will see if the address you entered is accurate, and suggest changes if necessary. You can then choose to apply the recommended changes, which will update the address you entered, or ignore the suggestions and keep the original address.
If you accept the suggested changes, the system will mark the address as verified and display a mailbox icon and the date of verification.

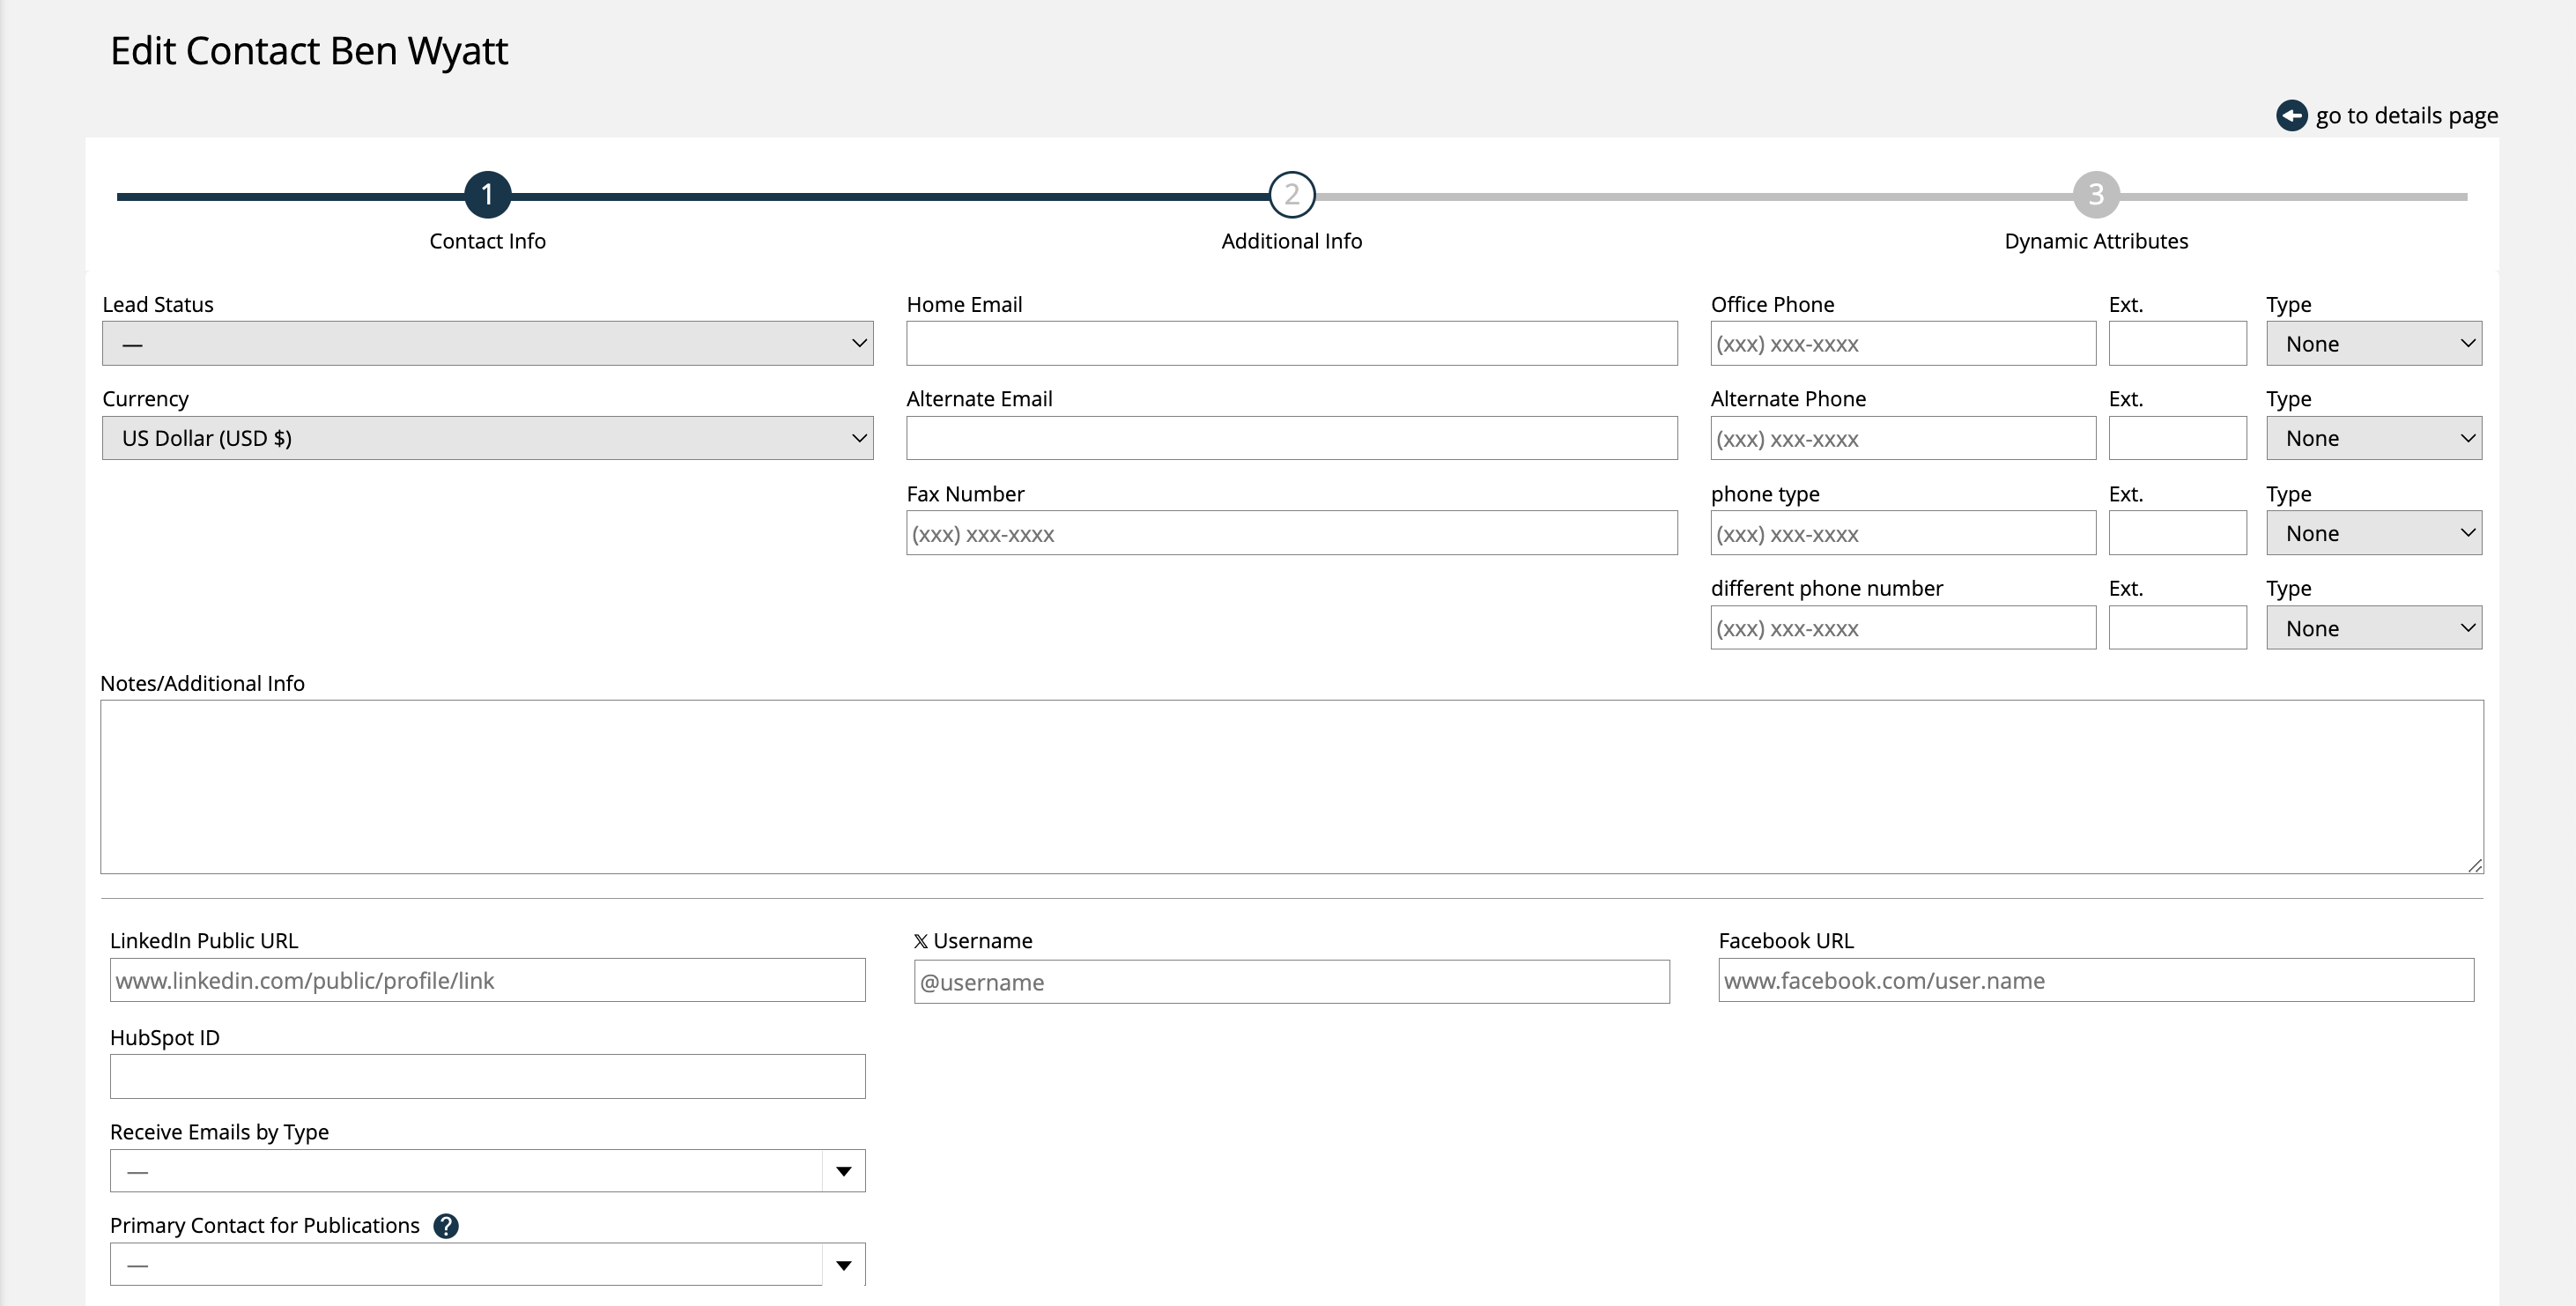
After the first step, your contact is created in the system. You can click on Go To Details page to view the contact or continue to add information for the contact
You can set the contact's lead source and status. Both of these fields can be used in automation workflows and the lead status report. You can set up new statuses and sources under Settings > Contacts.
A contact can have additional emails and phone number records. When BCCing an email in the system, the system will use any of the additional emails to add the record.
You can add more phone number types under Settings > Contacts > Phone Number Fields.
Tip
If you want to take advantage of our texting service, your contact must have at least one number set to the type of Cell Phone.
The receive emails for settings are important for companies with a lot of contacts. For example, you may want more than one person to receive invoice emails. Use this setting to determine what notifications a contact will receive from the system.
Contacts can currently be set to receive emails for Contracts, Invoices, Payments, Print Artwork, Digital Artwork, Digital Media Artwork, and Proof Requests. This setting is a multi-select, so one contact can receive emails for multiple items, such as Invoices and Payments. Below, we will go through the emails that a contact will get if they are set to receive emails for that type.
Contracts
The contact will be automatically selected on the send contract page. This page can be viewed if your orders are set to automatically Publisher approve, and at the end of the order creation process you use the Save and Send Order option.
The contact will be automatically selected in the send contract PDF popup for fully approved orders.
The contact will be automatically selected when sending a contract from the mobile app.
Invoices
The contact will receive automated invoice emails.
They will be automatically selected on the send invoice PDF page.
Payments
The contact will receive both the Payment Due Soon and Payment Overdue automated emails.
The contact will be included when sending bulk payment reminders from the invoice search page.
They will receive Electronic Payment Receipt emails.
Print, Digital, and Digital Media Artwork
When a contact is set to receive emails for print, digital, or digital media artwork, the types of emails they receive will be the same, but it will be dependent on artwork type. For instance, if the contact is only set to receive print artwork emails, and not digital or digital media, then they will only receive the following emails for print artwork.
They will receive automated artwork reminder emails.
The contact will receive manually sent individual artwork reminders, and manually sent grouped artwork reminders.
The contact will be automatically selected on tickets’ Compose Email pages when the Artwork Reminder email type is chosen
Proof Requests
The contact will be included when sending proof request emails from the Production Report.
The contact will be automatically selected on tickets’ Compose Email pages when the Proof Request email type is chosen.
Not only can you customize which types of emails your contacts receive, you can further narrow it down by specific publications. Use the setting ‘Receive emails for Publication(s)’ to pick and choose which publications your contact should receive emails for
If the contact is set to receive emails, but they do not have any publications chosen, then they will receive emails for every publication – it will not be restricted. Adding a publication means they will only be notified for that publication.
The setting is a multi-select, so your contacts can be set to receive emails for multiple publications, or just a single publication depending on what your needs are.
If there is an email that includes relevant information about multiple publications, as long as the contact is set to receive emails for one of the publications, they will receive the notification.
For example, let’s say your contact is set to receive Invoice emails for Pub A, but not Pub B. If an invoice gets emailed that only includes line items for Pub A on it, the contact will get the email. If an invoice gets emailed that includes line items from Pub A and line items from Pub B on it, the contact will still get the email. But, if an invoice gets emailed that only includes line items from Pub B, the contact will not receive the email.

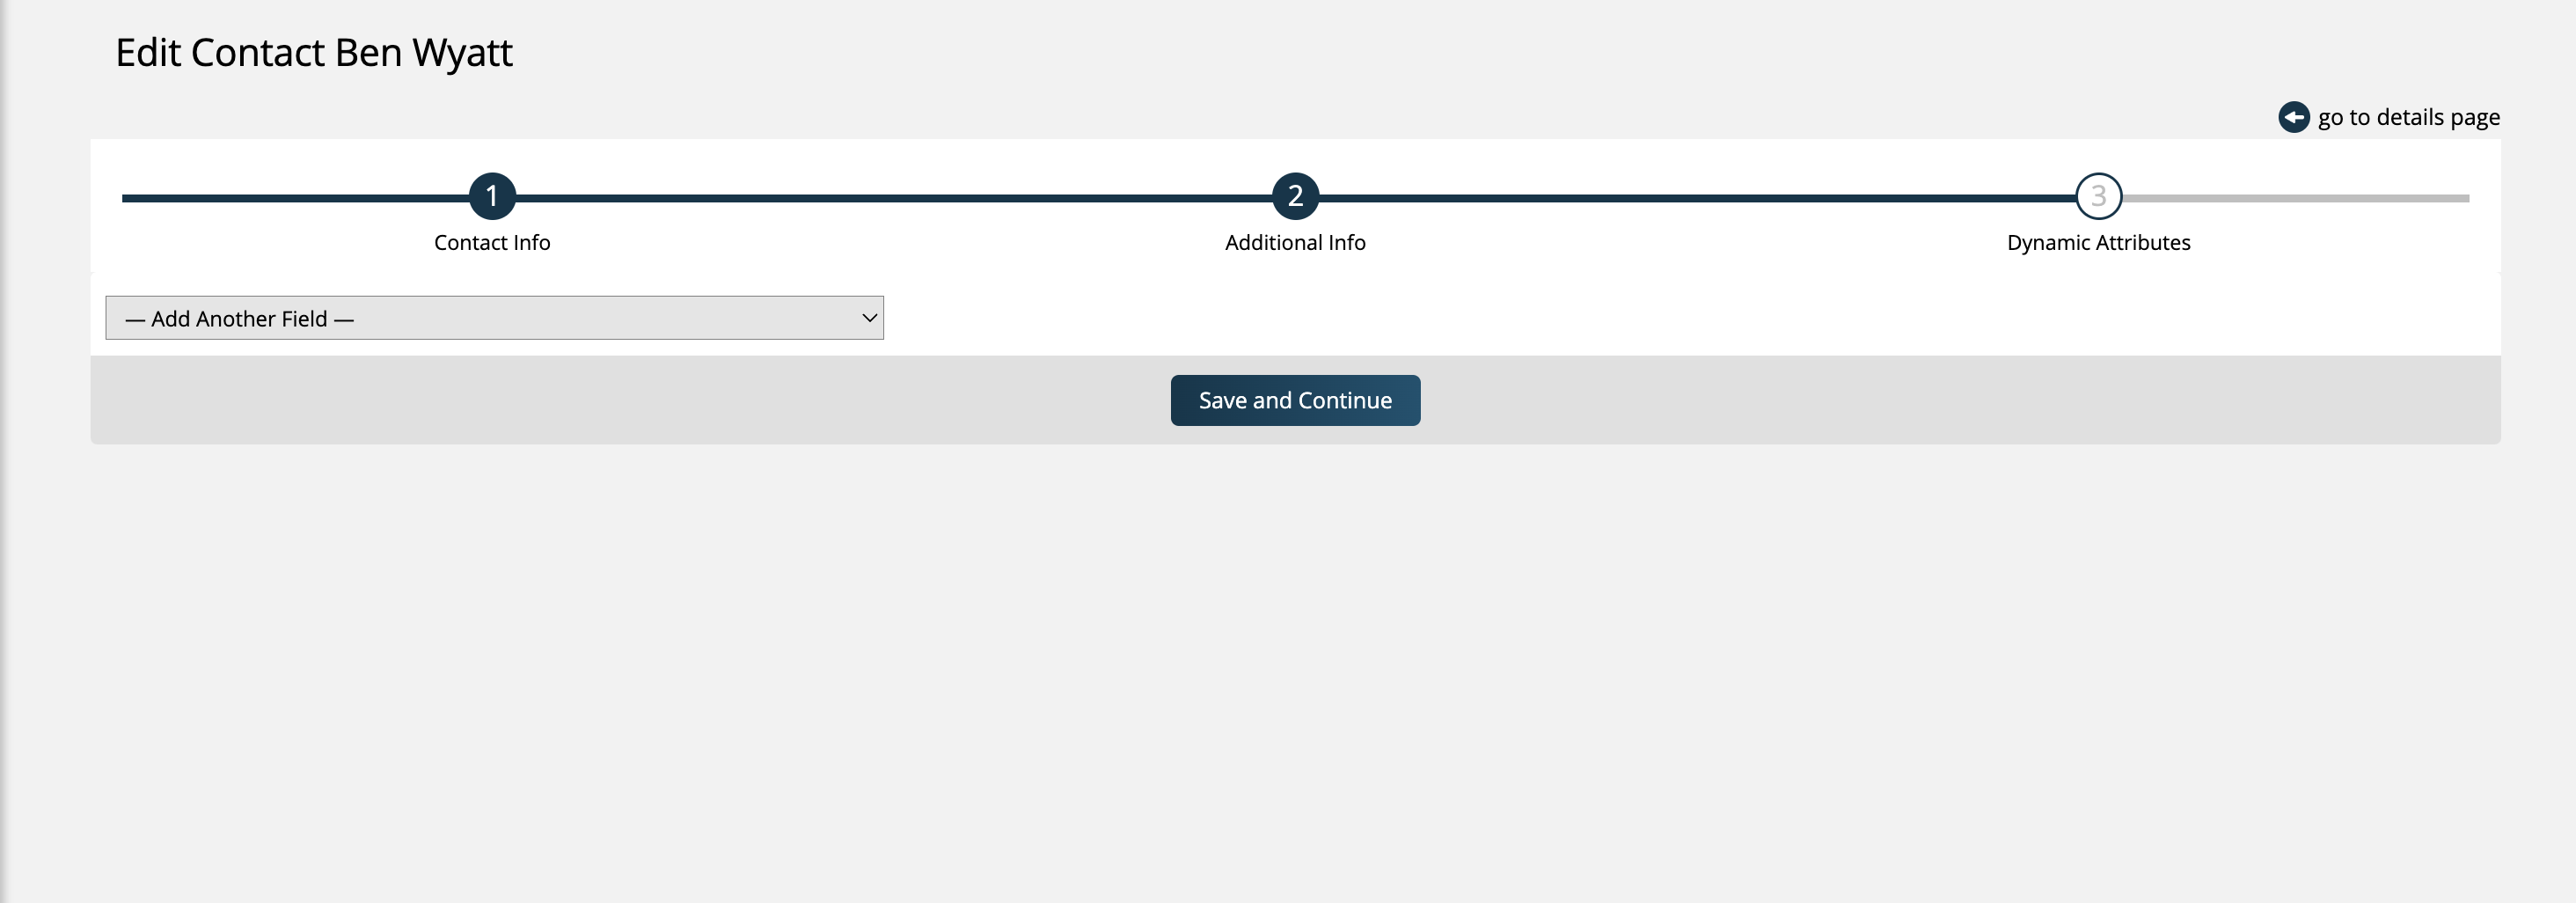
You may or may not see step three, Dynamic Attributes, depending on whether or not your system has any contact level dynamic attributes created. There are quite a few contact fields in our system to take advantage of, but you may need to expand on what you want to keep track of on your contact records, which is why we have dynamic attributes. You can learn more about dynamic attributes here.
Any non-required attributes will show up in step three, but if the field is required, you must enter it in step one.
You can use these attributes in searches and automation campaigns or just for reference.
Updated 6/14/2024