Set up your Stripe Account
You can connect your Stripe account to process Credit Card transactions through your system. If you do not have Stripe configured as your payment processor, please contact our support team. Once your credit authorizers are set to Stripe, you can link your bank accounts to Stripe, and begin processing payments.
There are a few important items to note for our Stripe integration:
Our Stripe integration does not currently support ACH transactions.
Your system must be set up to ‘vault all payments’ for the integration to work. This means that all card payment information is stored in Stripe and our system will not have any card data. You will need to contact Stripe if you have any questions about a customer’s credit card information.
Stripe supports additional payment methods that our other processors do not, including Diners Club, JCB, and UnionPay. If you wish to use any of these methods with the Stripe integration, go to Settings > Billing > Payment Methods. On this page, use the edit icon on the payment method you want to enable, and set the ‘Accept Payment Method’ setting to ‘yes.’
How to Connect
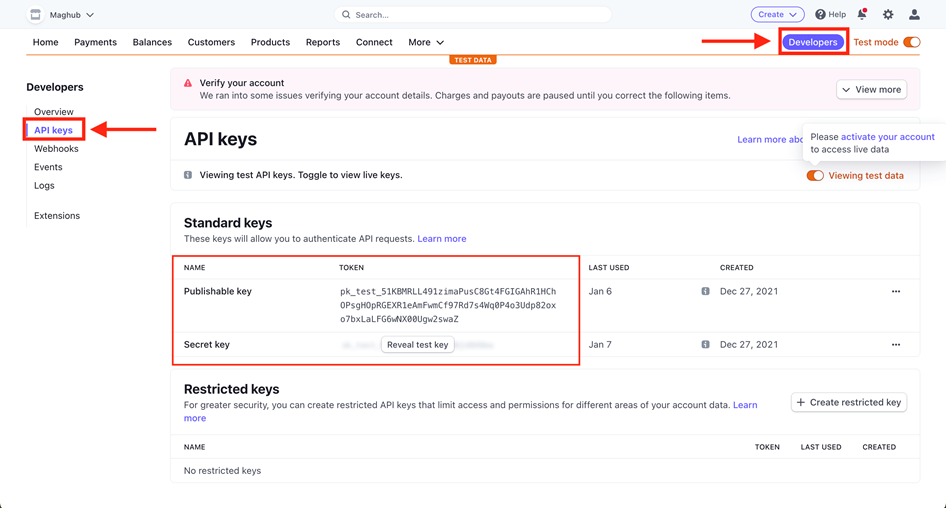
You will need to get your Stripe Publishable Key and Stripe Secret Key from Stripe to sync the systems. Log into your Stripe account and navigate to the Developers tab. Click on the API Keys section to find your Publishable and Secret Keys.
Note
To access this page, you need to have either an administrative or developer role within Stripe.

Once you have your keys from Stripe, there are two ways to connect the payment processor to your site: create a Bank Account and add the information yourself or give the keys to our support team to enter them for you in your internal settings. If you only have a single processor and account, having them internal can make sure no one accidentally makes a change.
Warning
Before entering your information, please contact your support/project manager to make sure your system is set up for payment processing. Stripe only supports Credit Card transactions, not ACH. These settings are turned on separately.
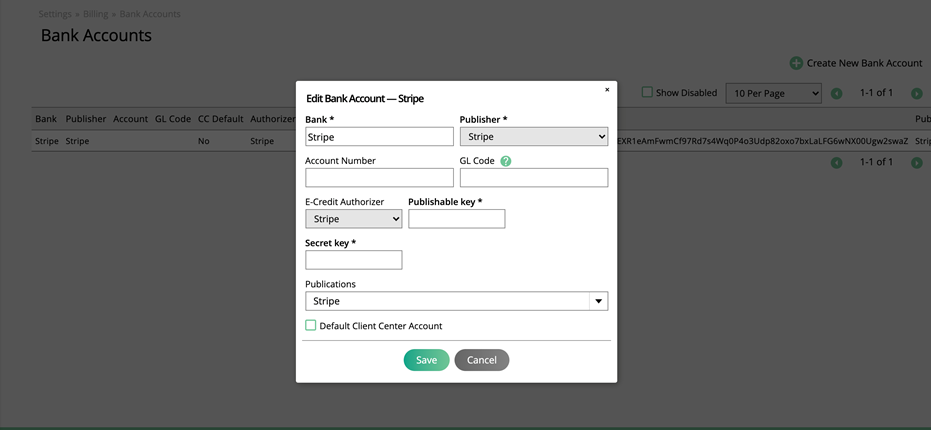
To connect the account yourself, go to Settings > Billing > Bank Accounts, and either add a new Bank Account or edit an existing one. In the add/edit popup, choose Stripe as the E-Credit Authorizer, and enter the keys you retrieved from your Stripe account.

To have our support team set up the integration for you, submit a support ticket and provide your Stripe Publishable and Stripe Secret Keys. We can then add the information for you into your internal system configurations.
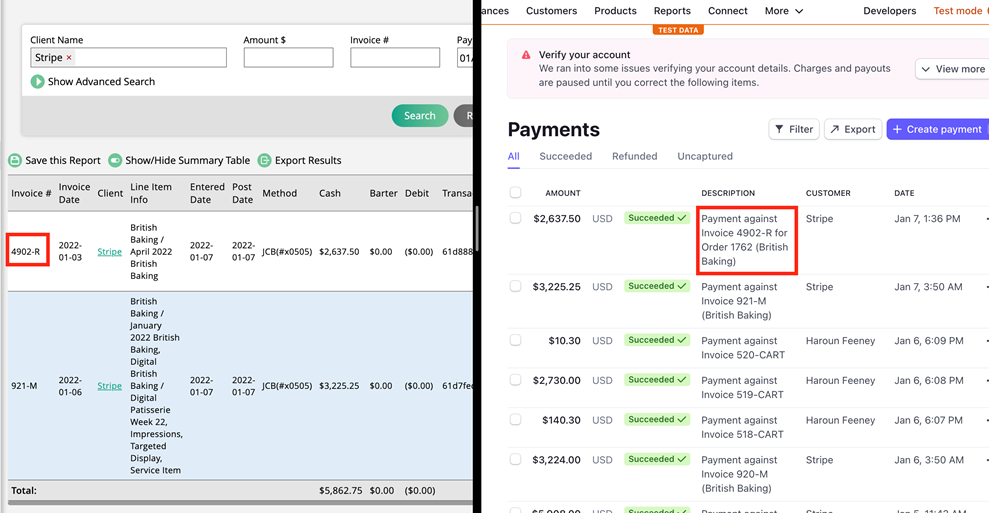
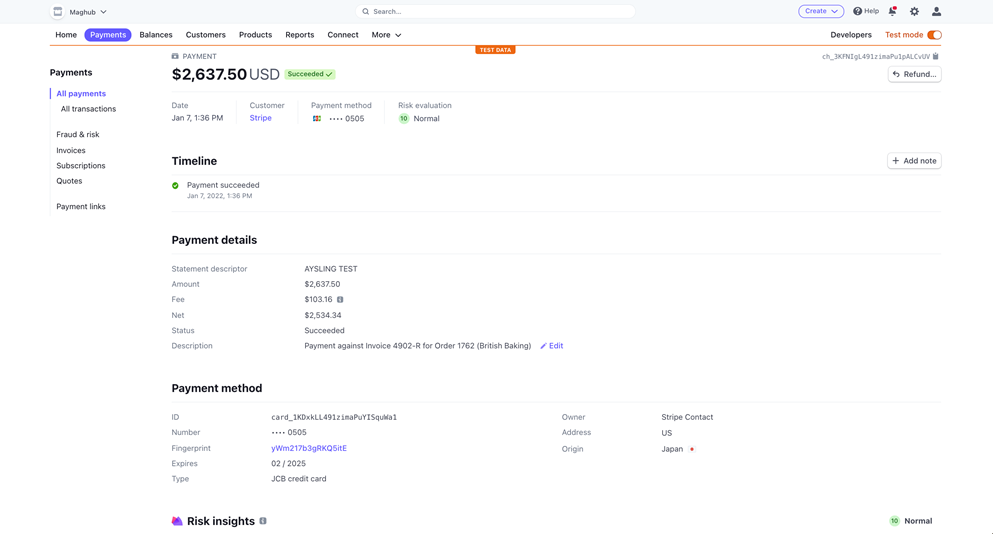
Payments processed in your instance will show up in Stripe, where you can view and interact with the processed transactions. Clicking on a transaction in Stripe will display more details about the transaction, such as the order, payment, and customer billing information.


Transactions will be settled nightly in Stripe. Before a transaction has been settled, you will be able to void a transaction from within the system, which will be reflected in Stripe. After a transaction has been settled, you will no longer be able to void it from within the system, but you can refund the payment from the system by going to the payments page and clicking on the refund action.
Important
When you enter a card number inside of the system, you are putting the number directly into Stripe. The input field may appear different than other inputs in the system, and it is because it belongs to Stripe. After the card numbers are entered, some numbers will change to an * to hide the card information.