Enter an Ecommerce Back Office Order into the System
Users have the ability to create Ecommerce orders from within the system, rather than having a customer enter them on the ecommerce storefront. You must have ecommerce enabled and published products to start entering back-office ecommerce orders. To use the back office order entry feature, follow the steps outlined below.
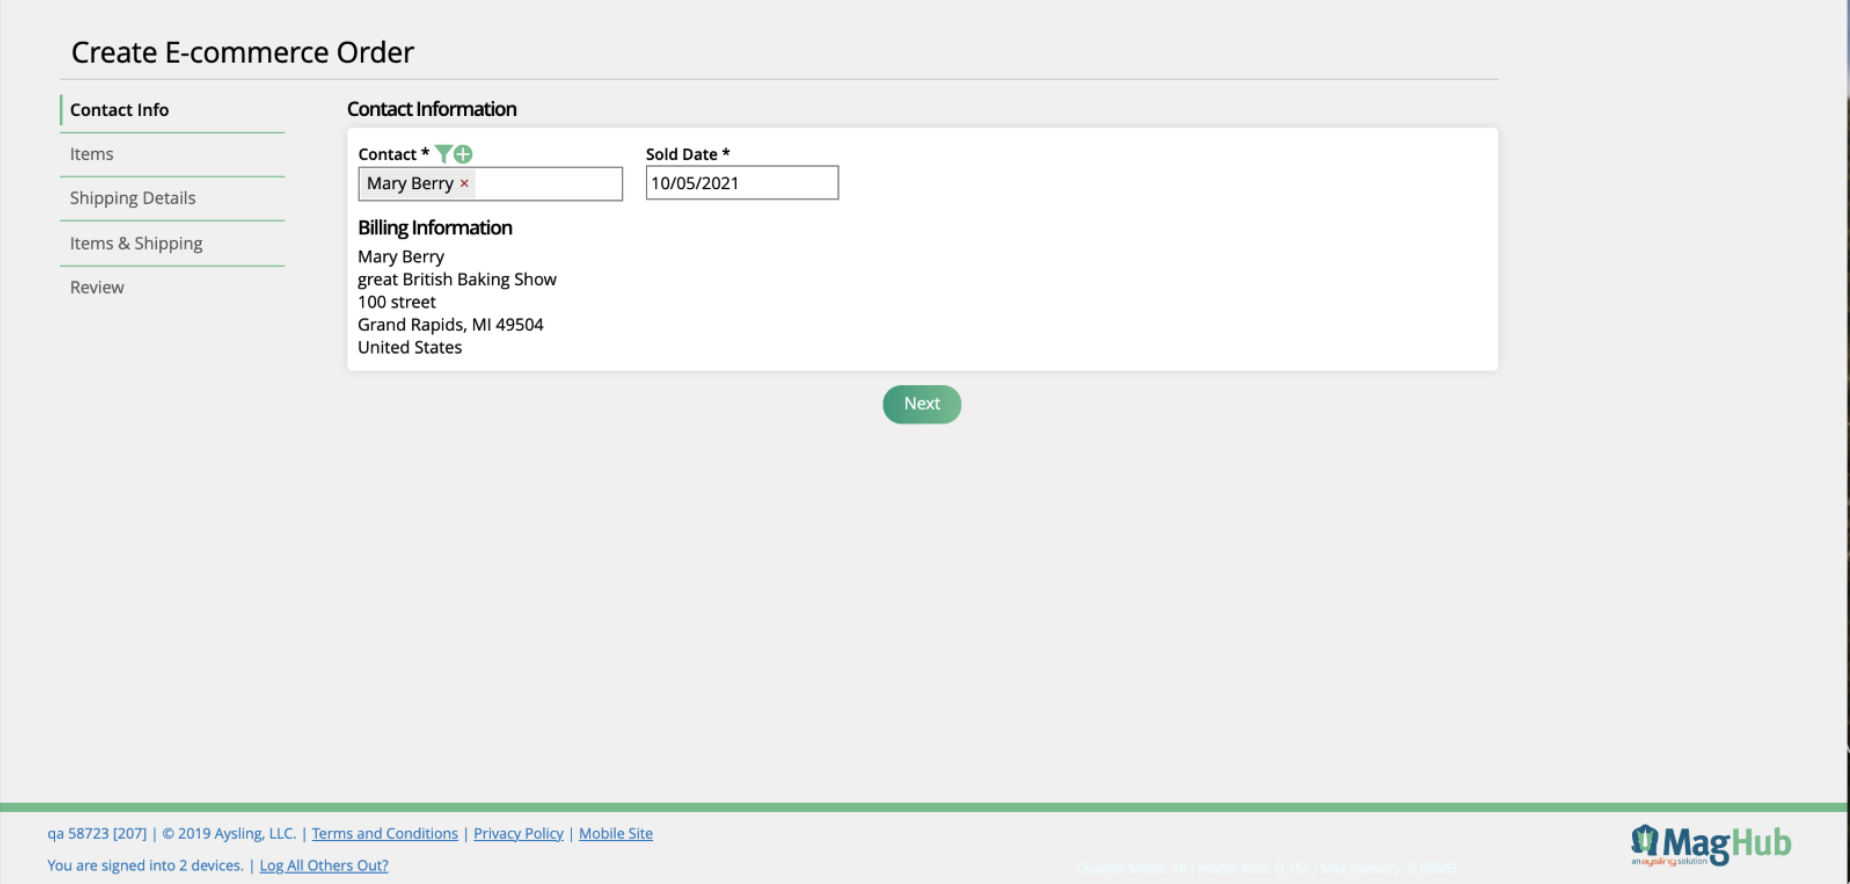
Click the + icon on the top menu and select Add Cart Order. To begin, you will need to select a contact for the order. You can either type in the name of the contact, use the filter icon to find a contact, or create a new contact.
The contact must have address information for you to proceed with the order. If they have address information, their address will display under their name, and you can continue with the order.

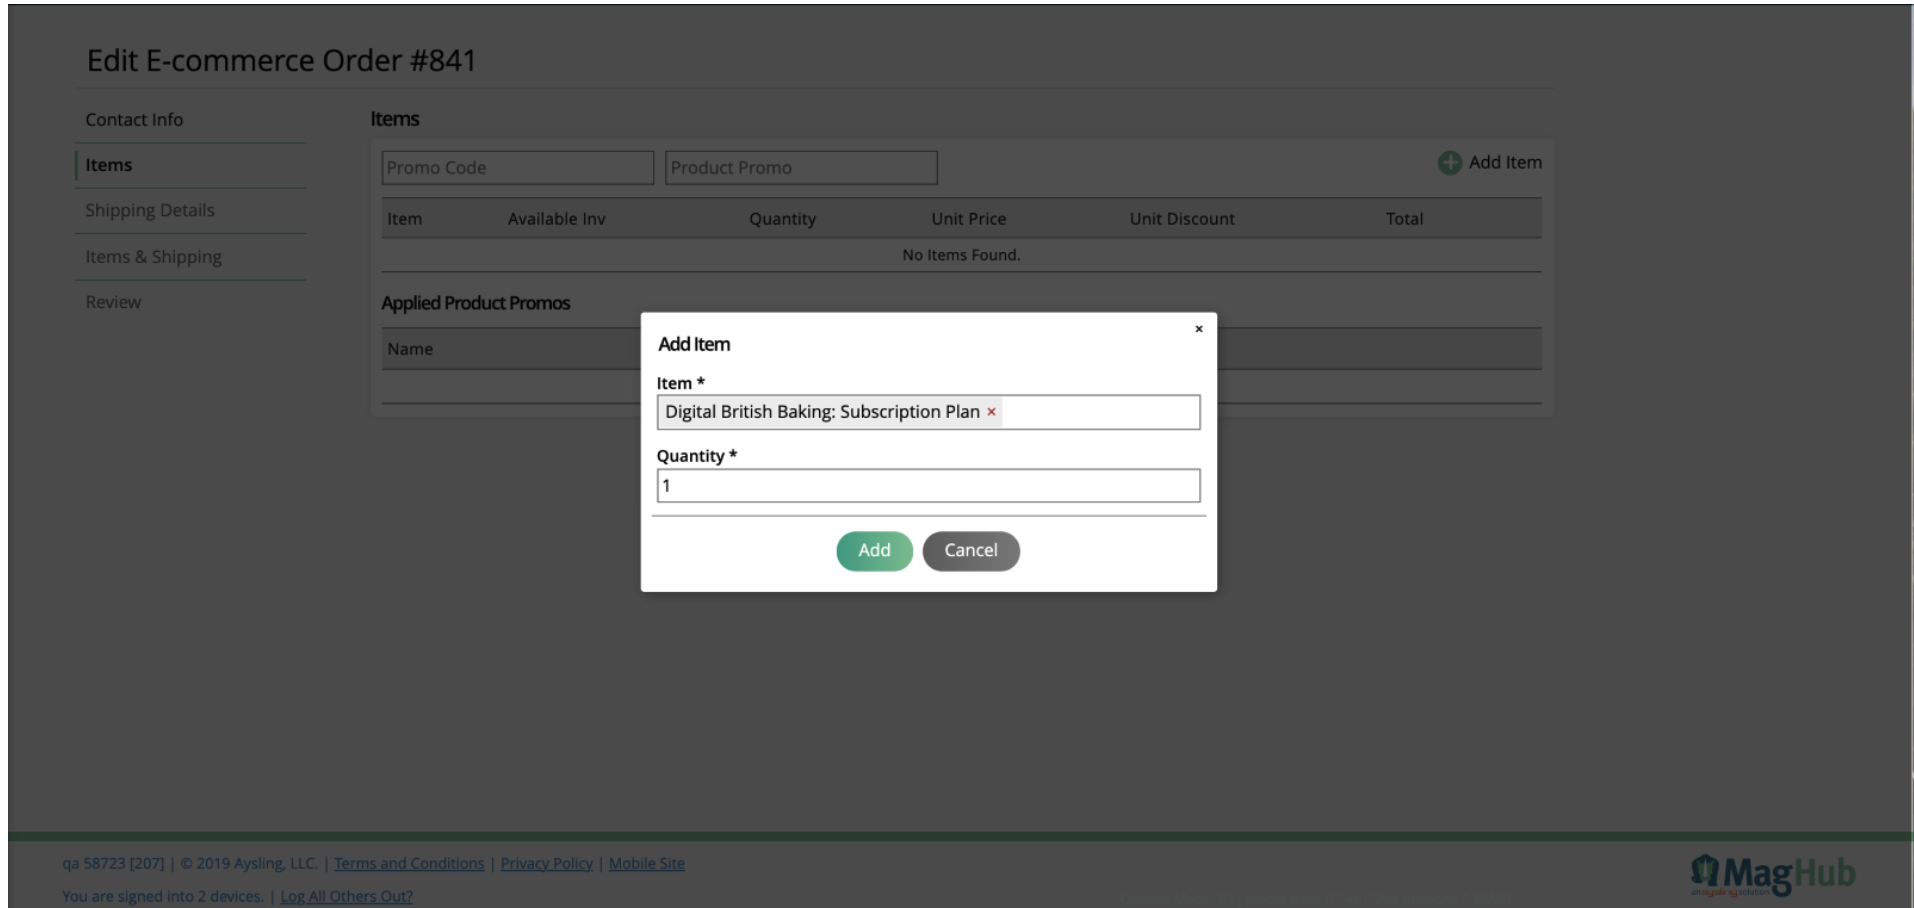
On the Items tab, you can add multiple line items to the order by clicking on the + Add Item button. In the popup, select your product and set the quantity. If the item has product options or variants, you may need to select those as well before it can be added to the order.

You can also add items to the order by entering an item level promo code or selecting a product promotion. The system will automatically add the line items tied to the promotions, including any product discounts.
Note
If the promotion is removed, all items tied to the promotion will also be removed.
The ellipsis icons on each item can be used to edit or remove the items on the order.
With all of your line items on the order, click save to move on to the shipping information. If there are any items on the order that require shipping, then you will be brought to the Shipping Details tab. On the other hand, if there are no items on the order that need to be shipped, the system will skip you ahead to the Review step.
On the Shipping Details tab, the contact’s address will be set as the default shipping address. You can also choose to enter new address information to use rather than the contact’s primary address in the system. When you have the correct shipping address information entered, click next.

Note
You can also select ‘Ship Items to Multiple Addresses’ if you need to split the order into multiple shipments. This option will display if there are multiple items that require shipping on the order. If you use this option, you will need to choose the shipping address for each item on the order.
Click Next once an address(es) is selected. Select a shipping speed on the Items and Shipping page. You must select a shipping speed for each different shipping address on the order.

Note
If you are shipping the items on the order to multiple addresses, there is also the option to mark items on the order as a gift.
Lastly, the Review tab will allow you to review the order information and make sure everything is correct before submitting the order. This page will show the contact and address information, the line items on the order, any applied promotions, and the order total.

Note
You can also enter an order discount promo code here, or a free shipping promo code. The system will apply the discounts to the order
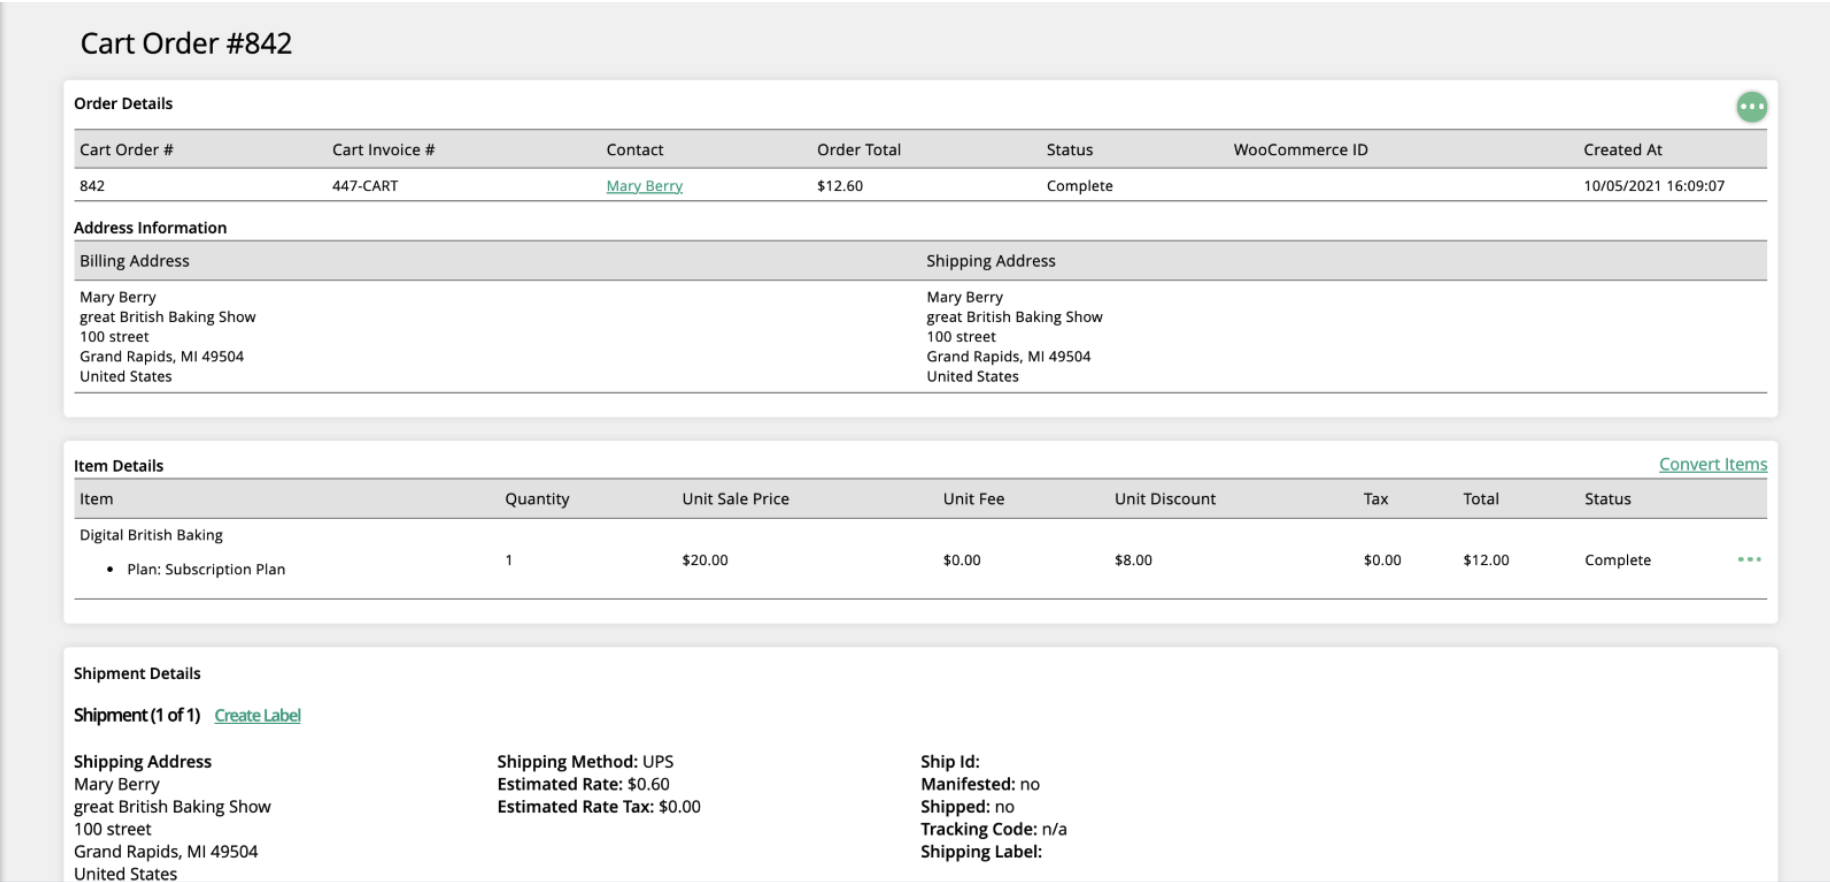
When the order is placed, you will be redirected to the Cart Order Details page, which displays all of the order information including shipping and line item information, as well as order status history.

If there are any items on the order that need to be shipped, the order status will show up as processing. If there are no items that need to be shipped, then it will automatically be marked with a status of complete when you place the order.
Note
This details page can be referenced again by navigating to Ecommerce > Orders, and clicking the ‘View Order’ action on a specific order.