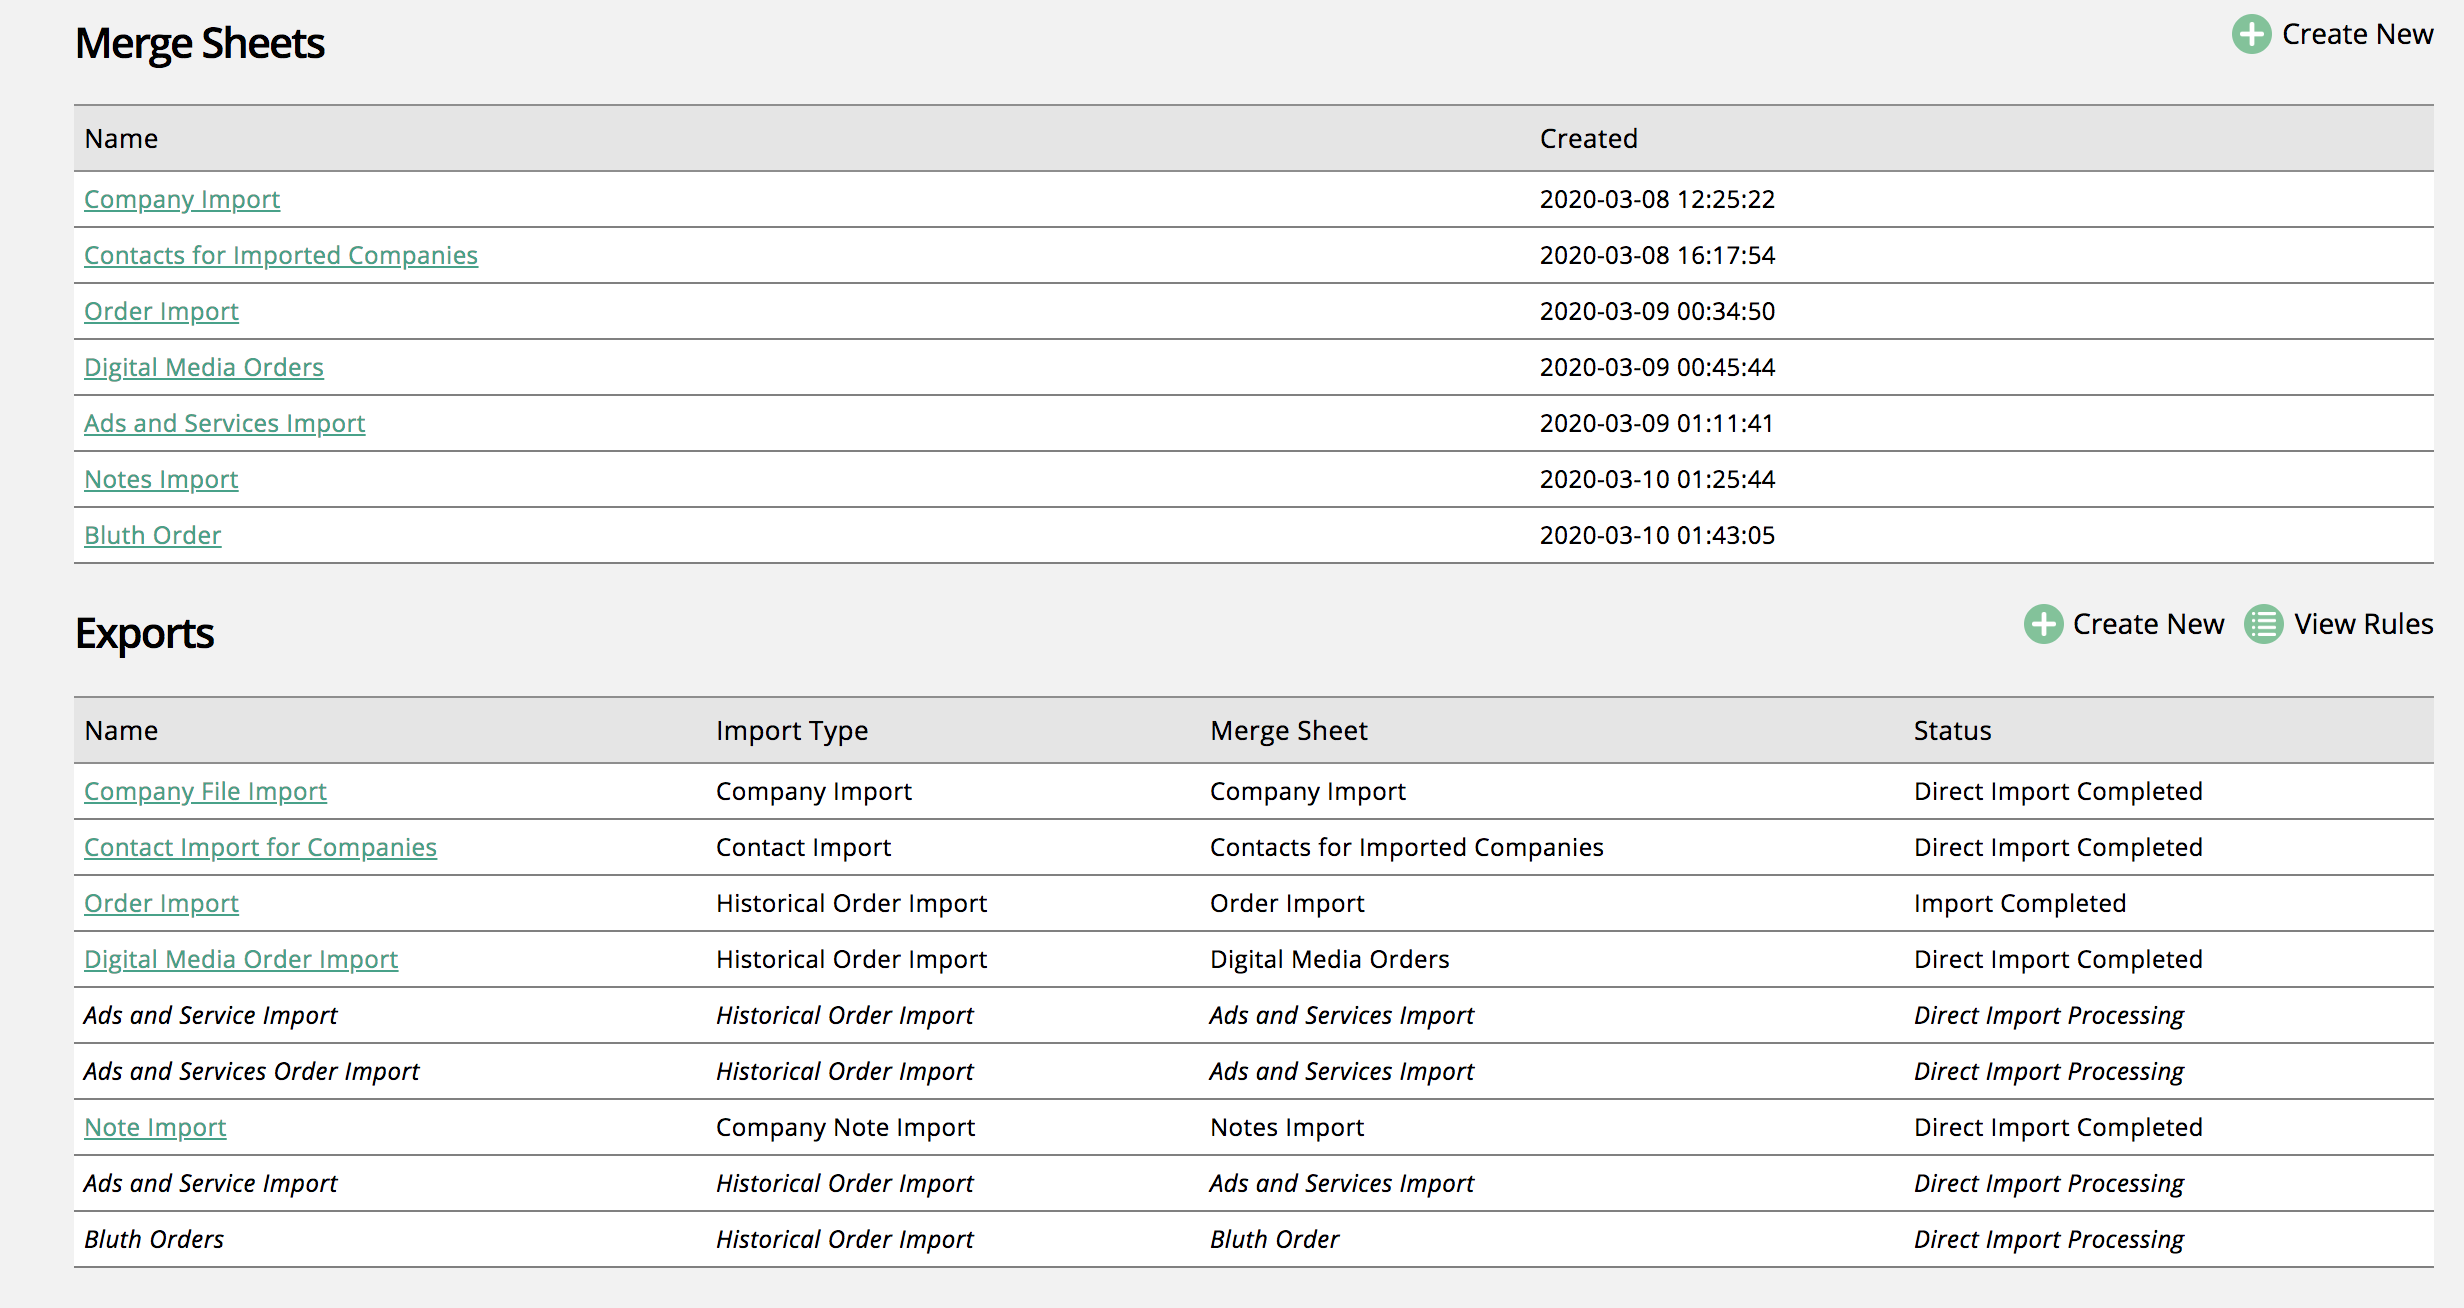
Get your Companies, Contacts, and Orders into the system using the Historical Data Tool
You can use the historical data tool to import your data into the system and manipulate the data from within the system before it's imported into the database. The tool allows you to merge your data files, append missing columns to your data, view errors and correct them, check for similar companies, and directly import the data. Once data is imported, you will be able to use your old reference numbers and the new system generated ID. In the example below, we will go through importing companies, merging those imported companies with contacts, and then importing the order.
Start the process by going to Setting > Data > Historical Data Tool and uploading your data. You can upload all your data at once, but for this example, we will go data set by data set. We will start by uploading the company data.
When you upload a sheet, you can name the sheet, give it a category, and choose to skip the header row, invalid rows, and strip out any HTML, which can cause importer errors. Select your file to import your data in the site.

Notice
All imports are processed in the background, so you don't have to wait for your data to get into the system. You will receive an email once the process is complete. If you are working with a small data set, you can wait on the page for the alert. Otherwise, go get a coffee!
Once a sheet is in the system, you need to make at least one column searchable to start the import process. The searchable fields are also used to merge with other sheets. We recommend using IDs or Name fields when doing company and contact importers. In this example, I will set both the ID and the Name to be searchable.
Now we will create a new merge sheet using the company data set. We need at least one data set on a merge sheet to import data. We will start by making a company merge sheet to get our companies in, then we will merge the company data with the contact data.
With the merge sheet in the system, you will see a new column on your data set: import record ID. Once the system processes the import, your data set will include the new system ID so you can use it for reference for future imports or data overrides.
Now we are going to start the import process by mapping the company columns to the required column for system import.
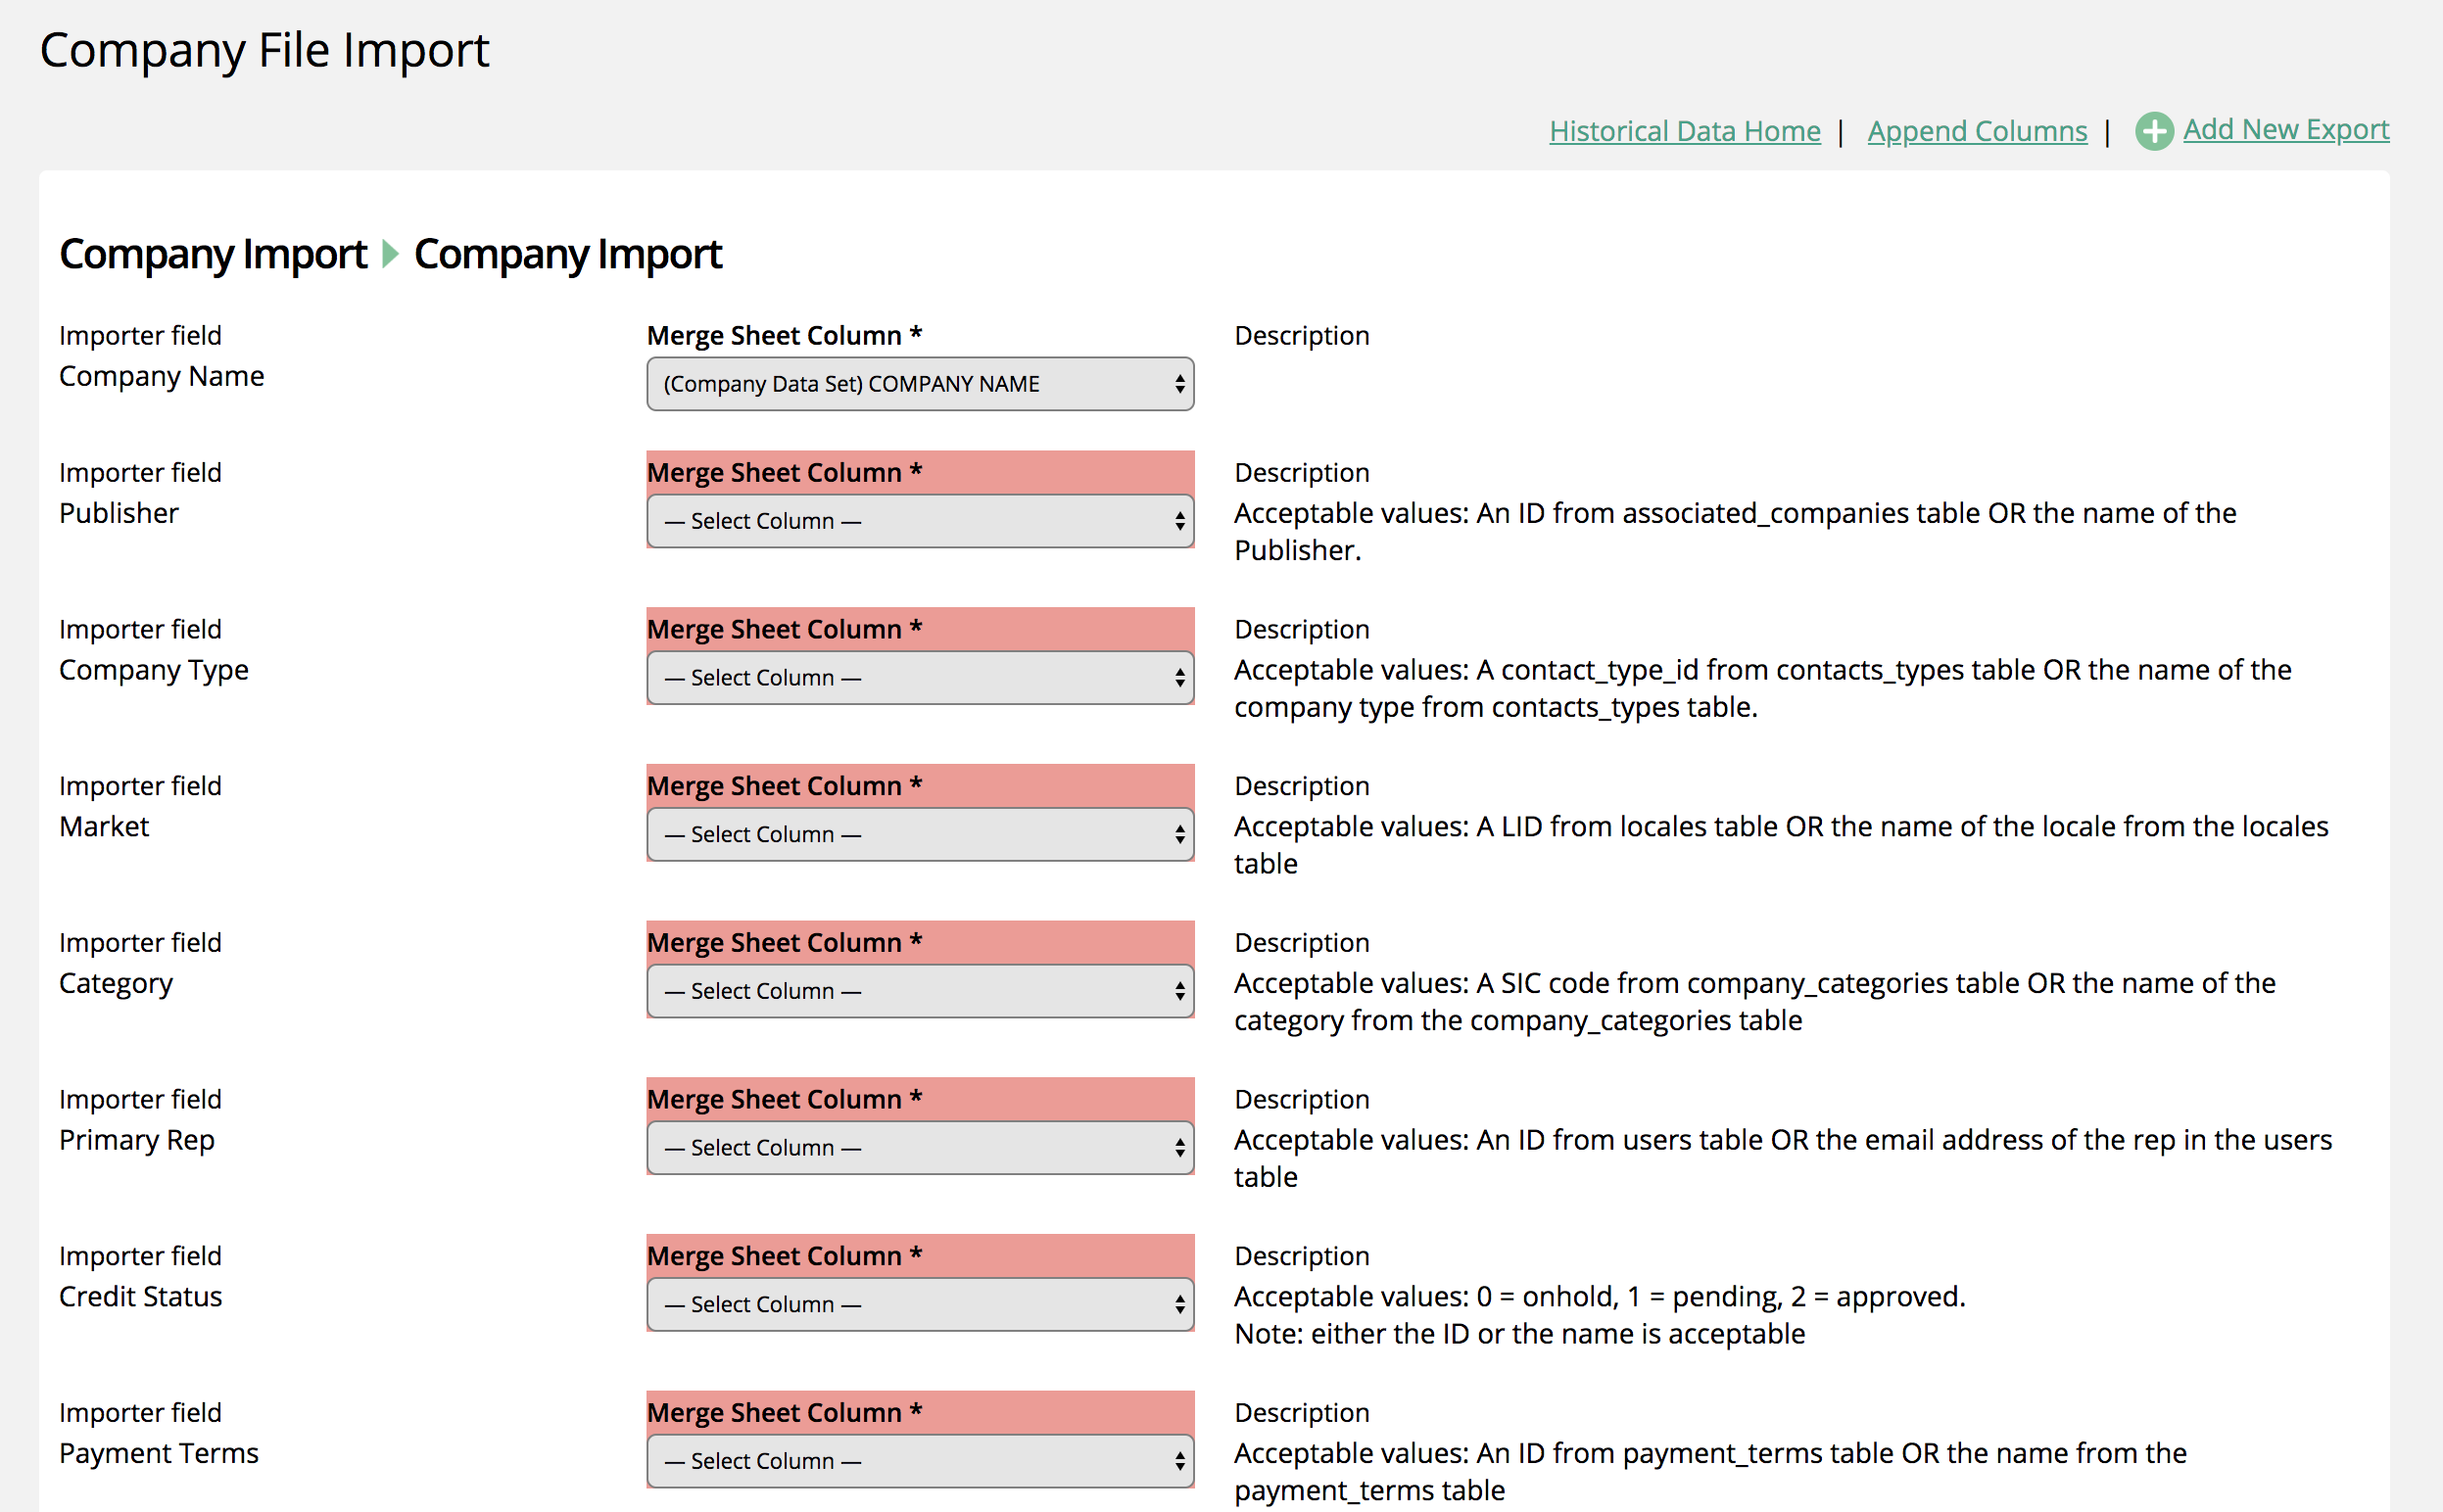
Tip
Don't have one of the required fields on your sheet? You can always use the append tool to add a column and set a contact for the field instead of re-importing the file.
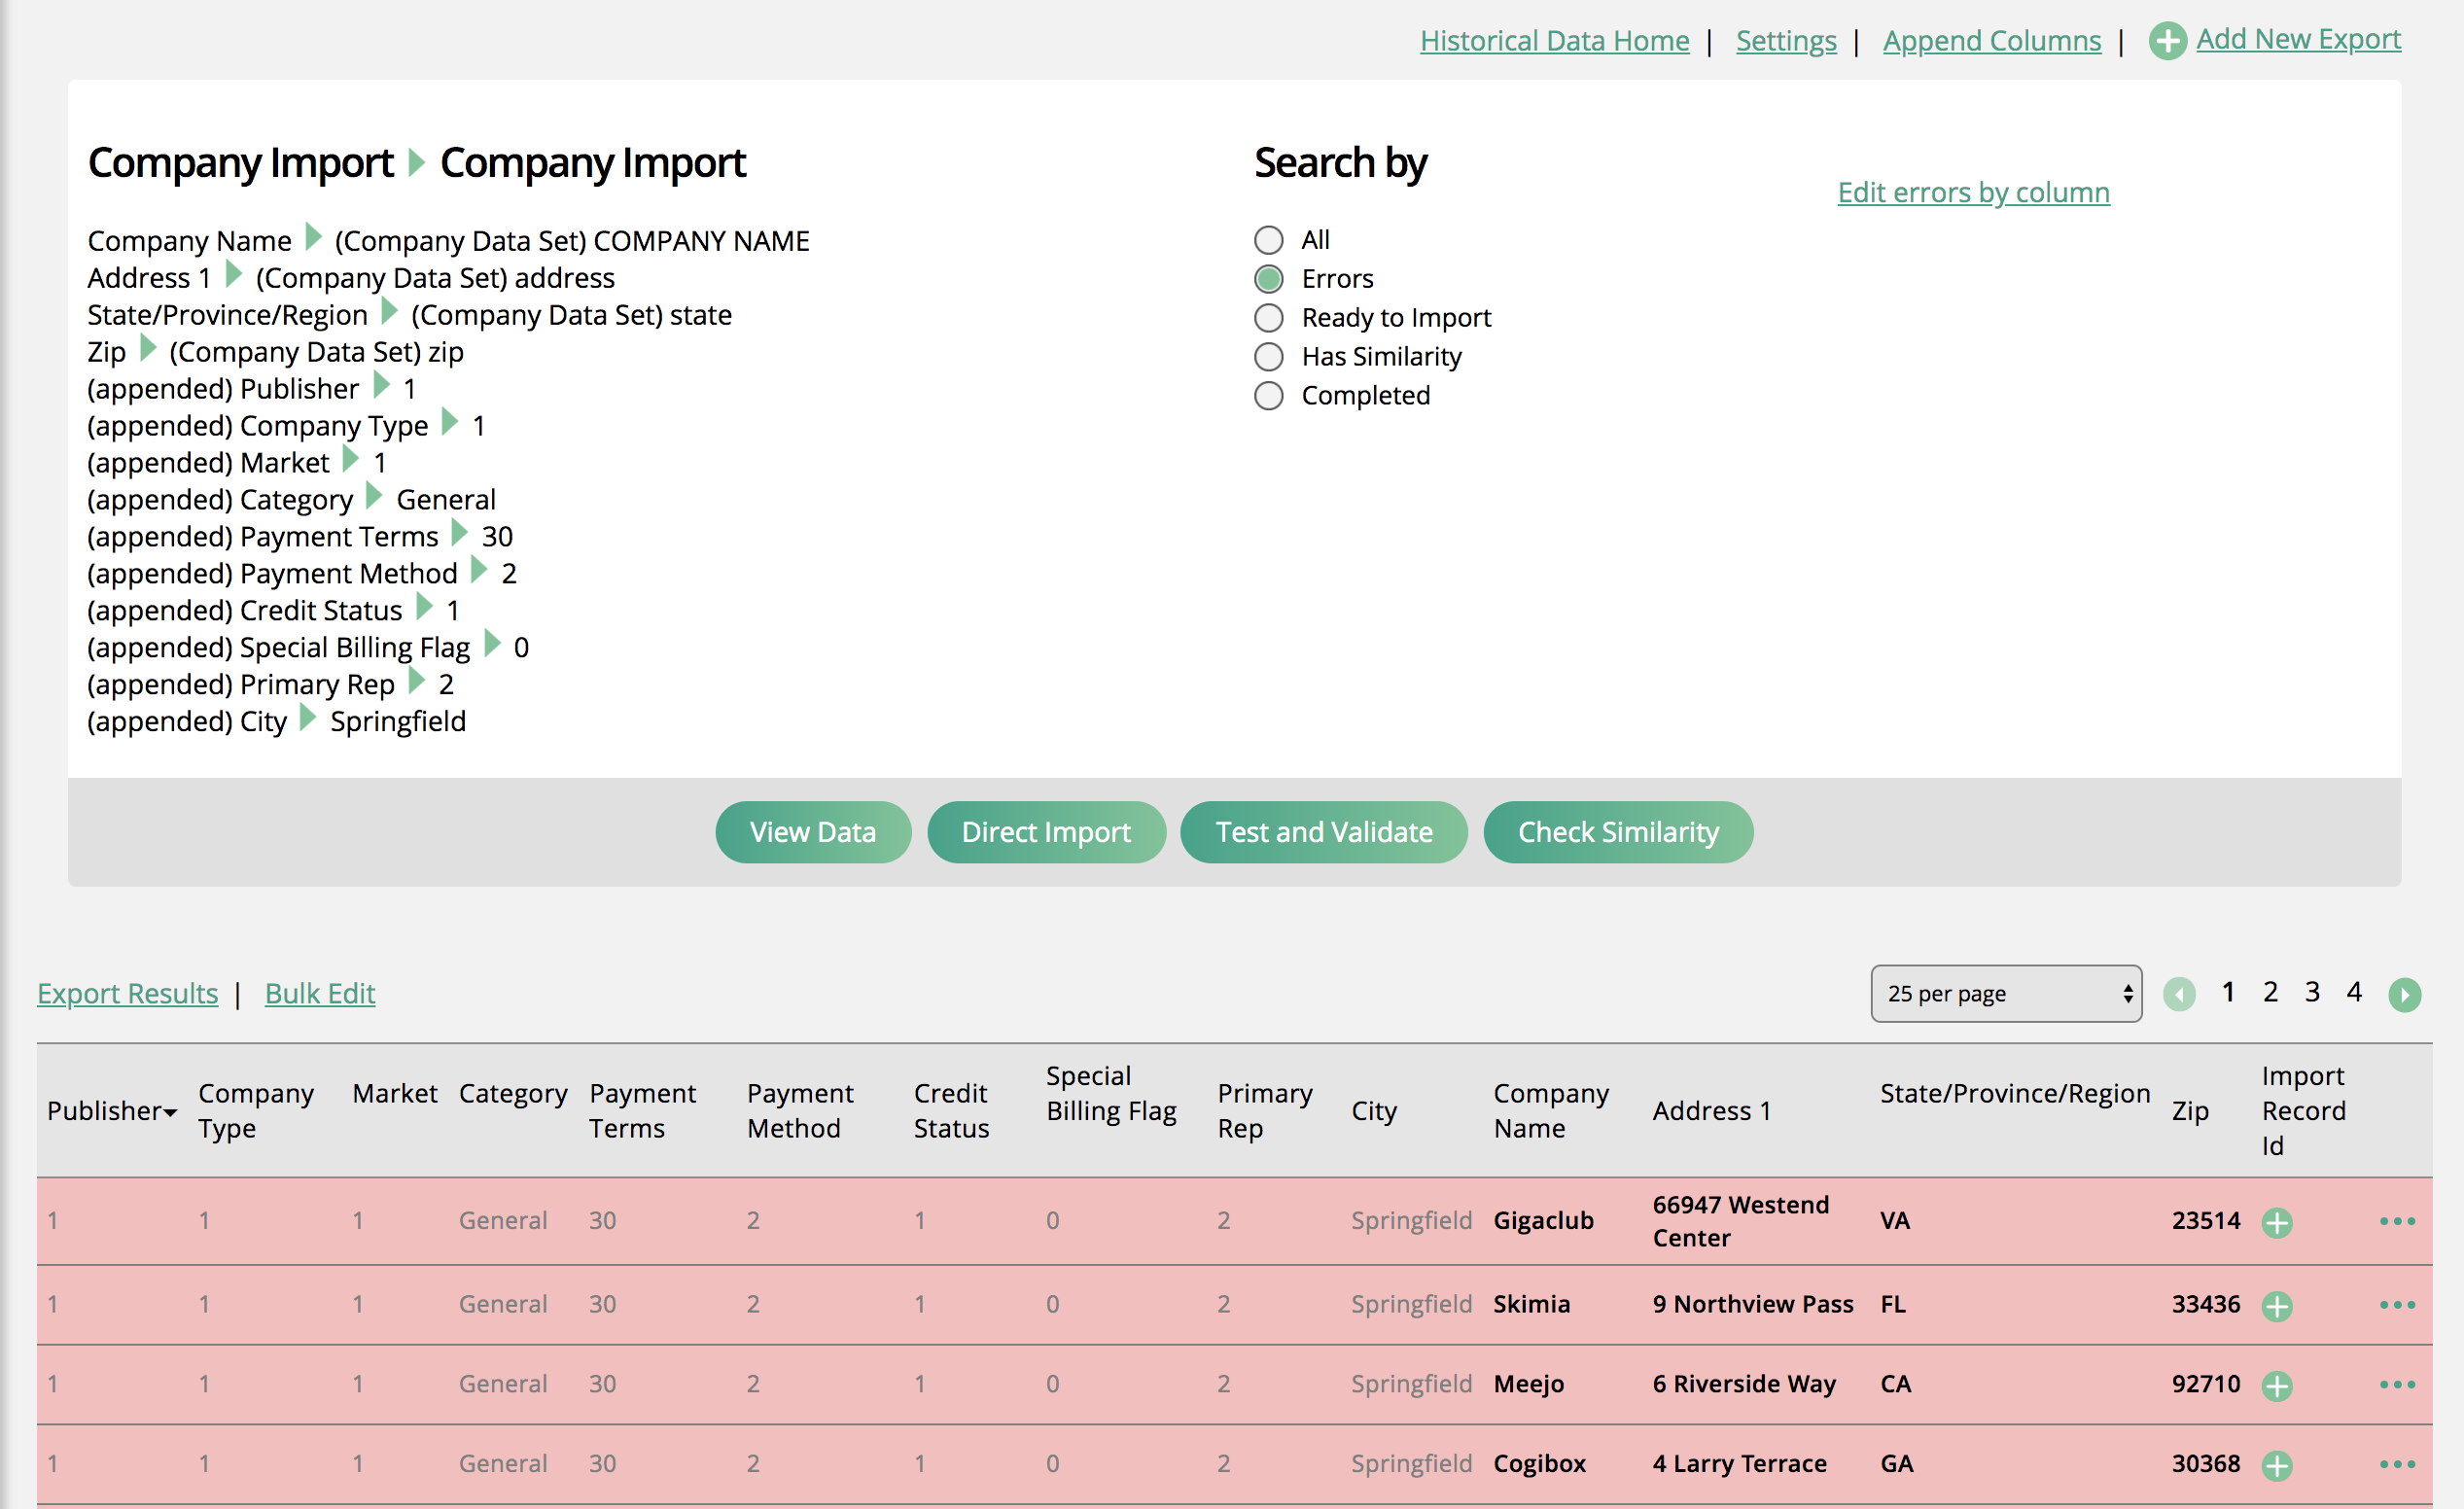
Always run a 'test and validate' before doing a direct import. You will see what records will be successful and which will fail. You can view errors to see exactly why a record can't get imported into the system. You can have the option of in-line editing each field, bulk editing an entire column, or use the edit errors by rows to up the same errors by row and column. You can also run a similarity check to see if any of your company may aready be in the system so you can skip the reord during the import process.
Important
You can't modify an appended column. If you set an appended column to a value and it fails, you need to change the appended column.
Once you fix your errors, do another test. I have re-run and fixed my error of the category field not matching. Now, all my records will successfully import so I will use the direct import option.
Now we need to add contacts to complete our company records, I will follow the same process as before: upload my sheet and make a field searchable. I am going to make ID searchable so I can map it to my company sheet that I already imported.
I will now create a merge sheet, but this time I will join it with my company sheet. I will join on the ID to create a new data set. My company data now has a newly populated field: Company Import ID. I will use this field to make sure my contacts are mapped to the correct company. I could use the name, but I prefer to use an ID.
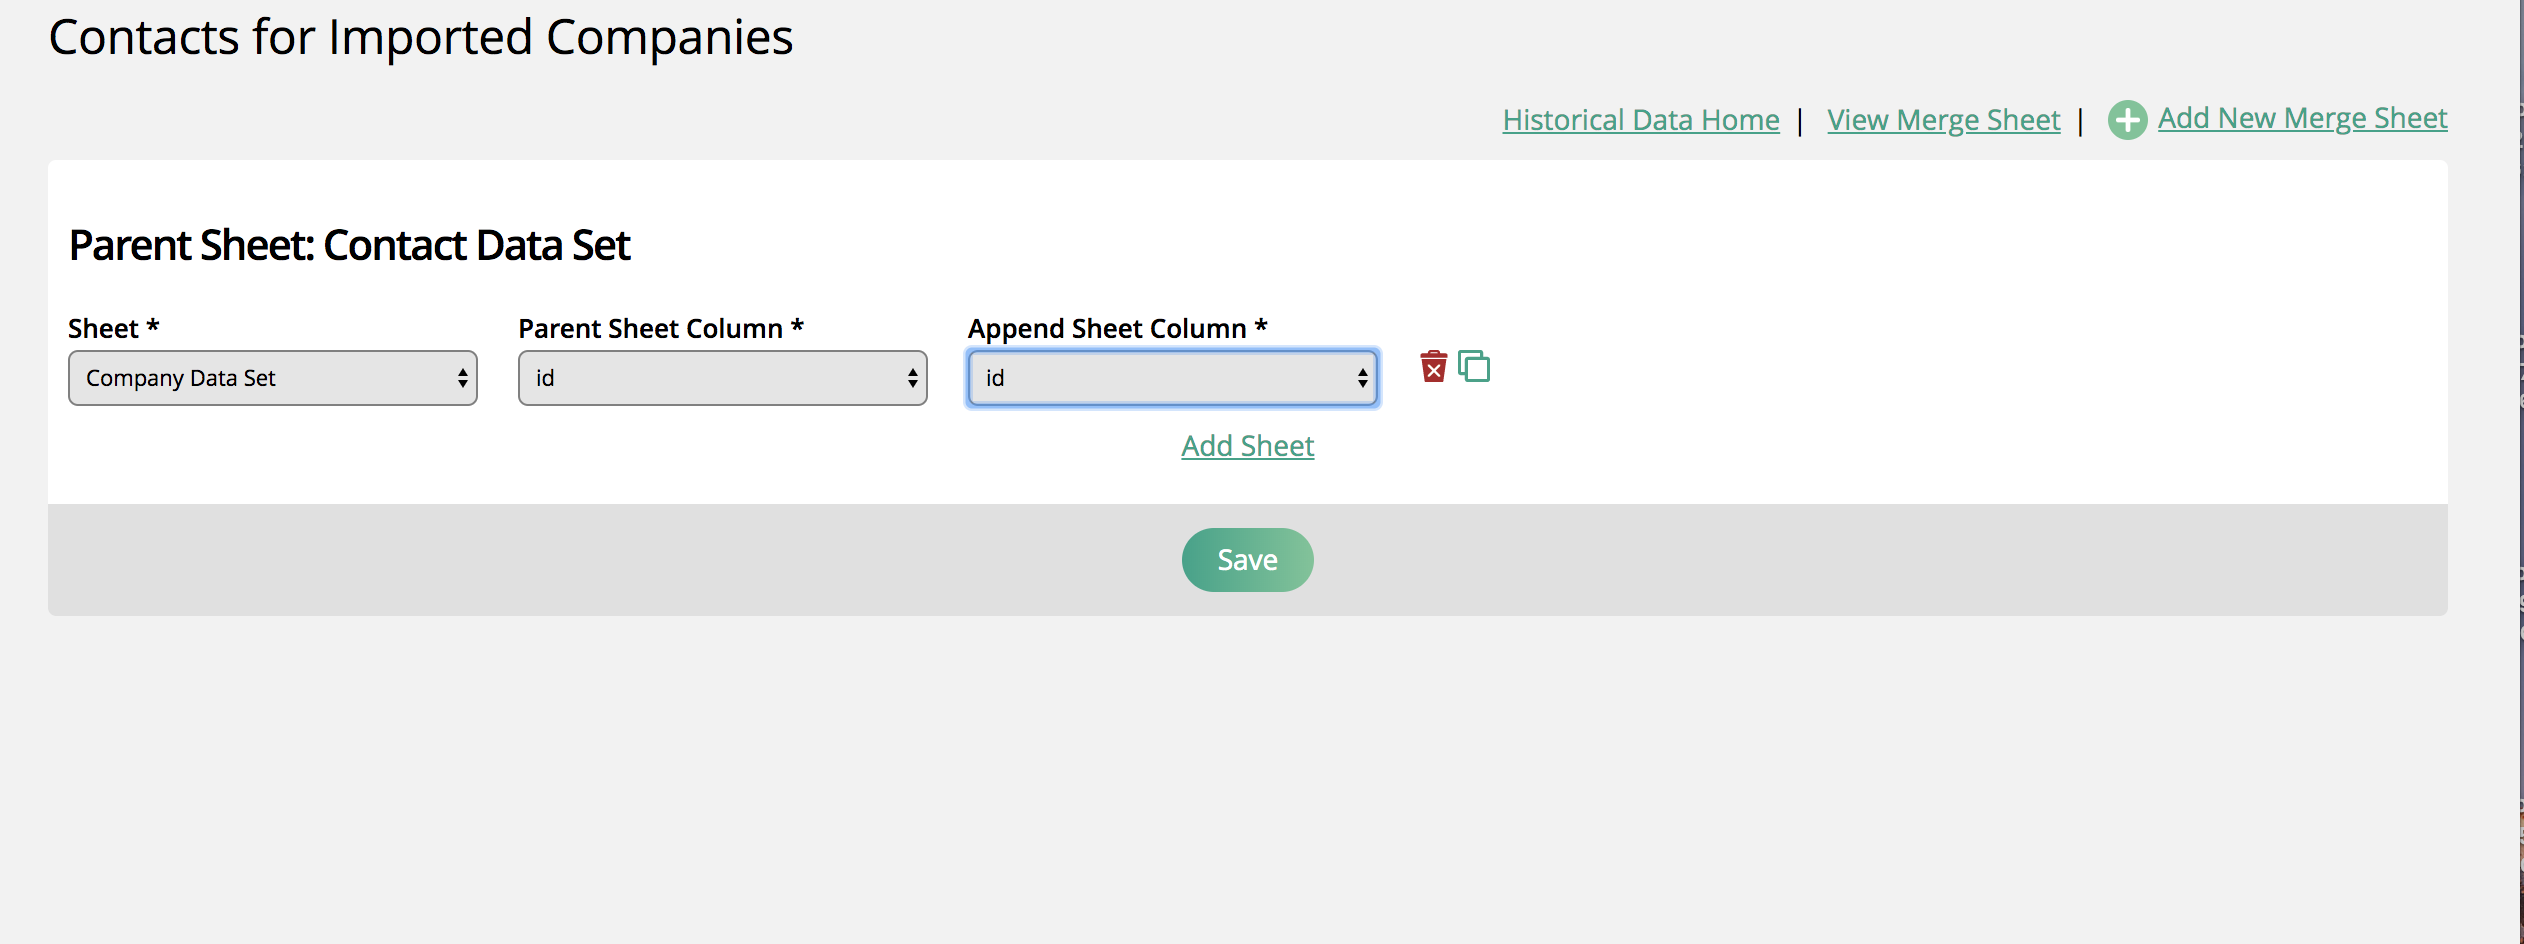
With my new merge sheet created, I will map by contact columns, starting with the company import ID. I will also include a dynamic attribute for the contact's birthday. I will also make sure to set the primary contact field for at least one company contact and I will map the billing and artwork contacts if I know them.
I checked the error and found none, so here goes the import! I now have companies and contacts in my system. The next step is to enter in some historical order.
Before I can import any historical order, I must have products set up in my system. I am going to import orders with print and digital ads, services, and impression items. Some of my items will be past orders and others will be in the future. I will also have a mix of invoiced items and items that need to be invoiced
I will go through the same process as before: upload the sheet, make a column searchable, and merge the sheet with my company file. I want to merge my orders with the company import because my order file used an old company ID and not a name. I am able to map this old company ID to the company data set I already imported. Now I can use the new company ID on my order file. I would have had to do this excel before.
I need to map the file to the historical import tool and test and validate the data. I have some errors, so I will fix them using the edit column feature. My ad size names don't exactly match what I setup, so I can change every ad size name using the columns errors.
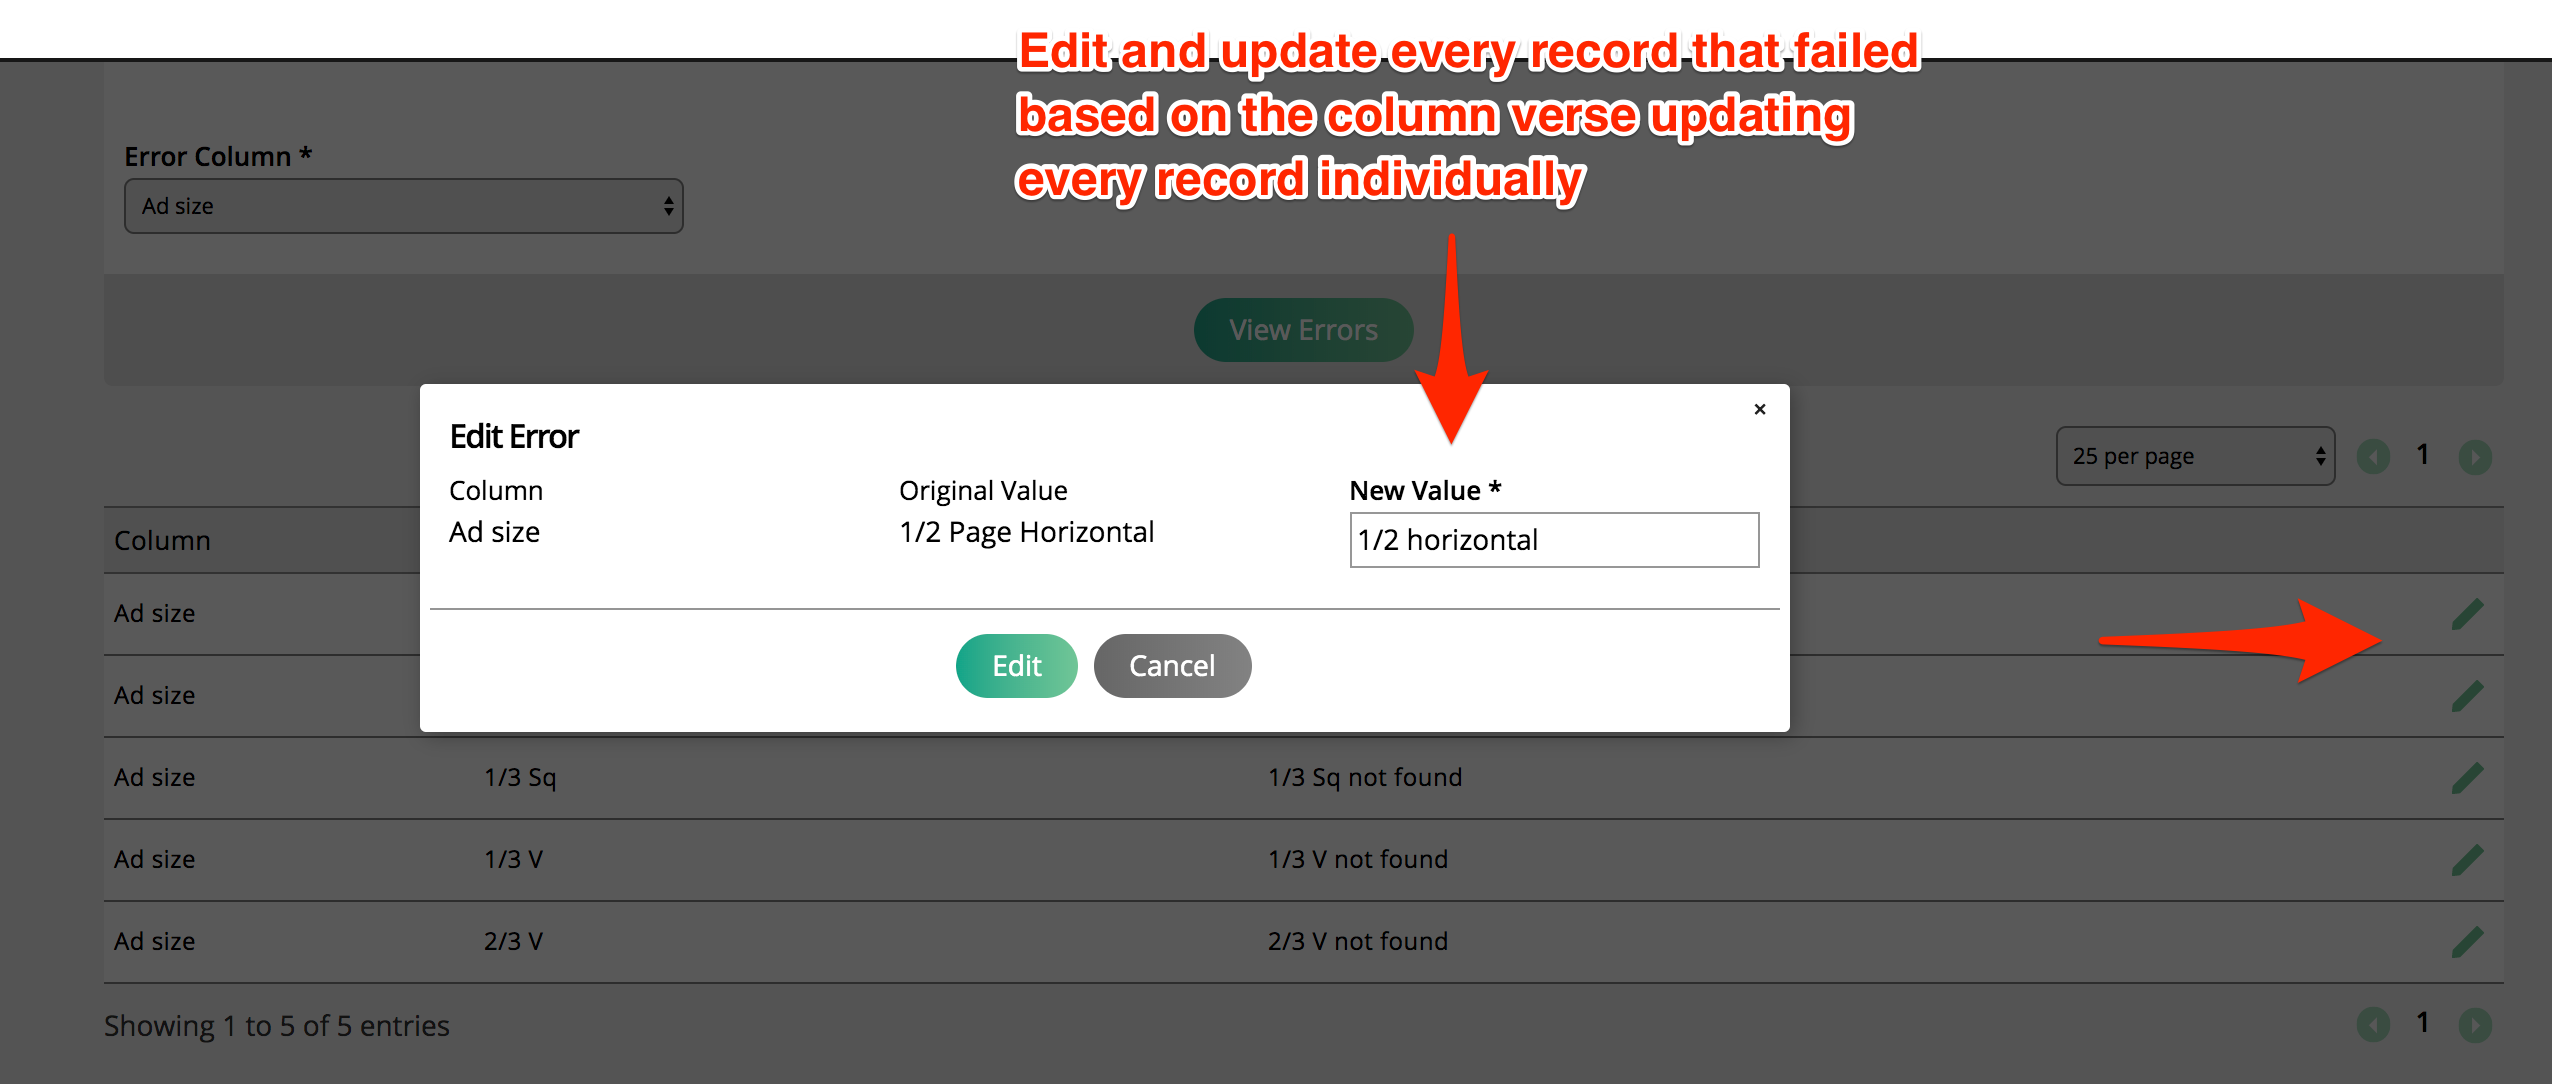
Now with my errors fixed, I will re-test. All my errors are fixed, so in go the orders! I will have a record of everyone of my merge files and imports in case I need to go back and modify any data. I can update and re-run an import, which will override my system data.
