Digital Media Inventory Groups Setup
We currently support Inventory Groups on all digital media product types. Inventory Groups are a way for you to manage inventory across products. The setup for each type of Inventory Group is the same, but the behavior and how inventory is actually managed varies a bit between Impression and Targeted Display products, Slot products and Reserved. Read through the document below to learn about the setup of Inventory Groups, as well as how they affect orders and scheduling for each product type. For information about how inventory groups affect orders and scheduling for each product type, please reference the product specific inventory group help center pages.
Inventory Group Setup
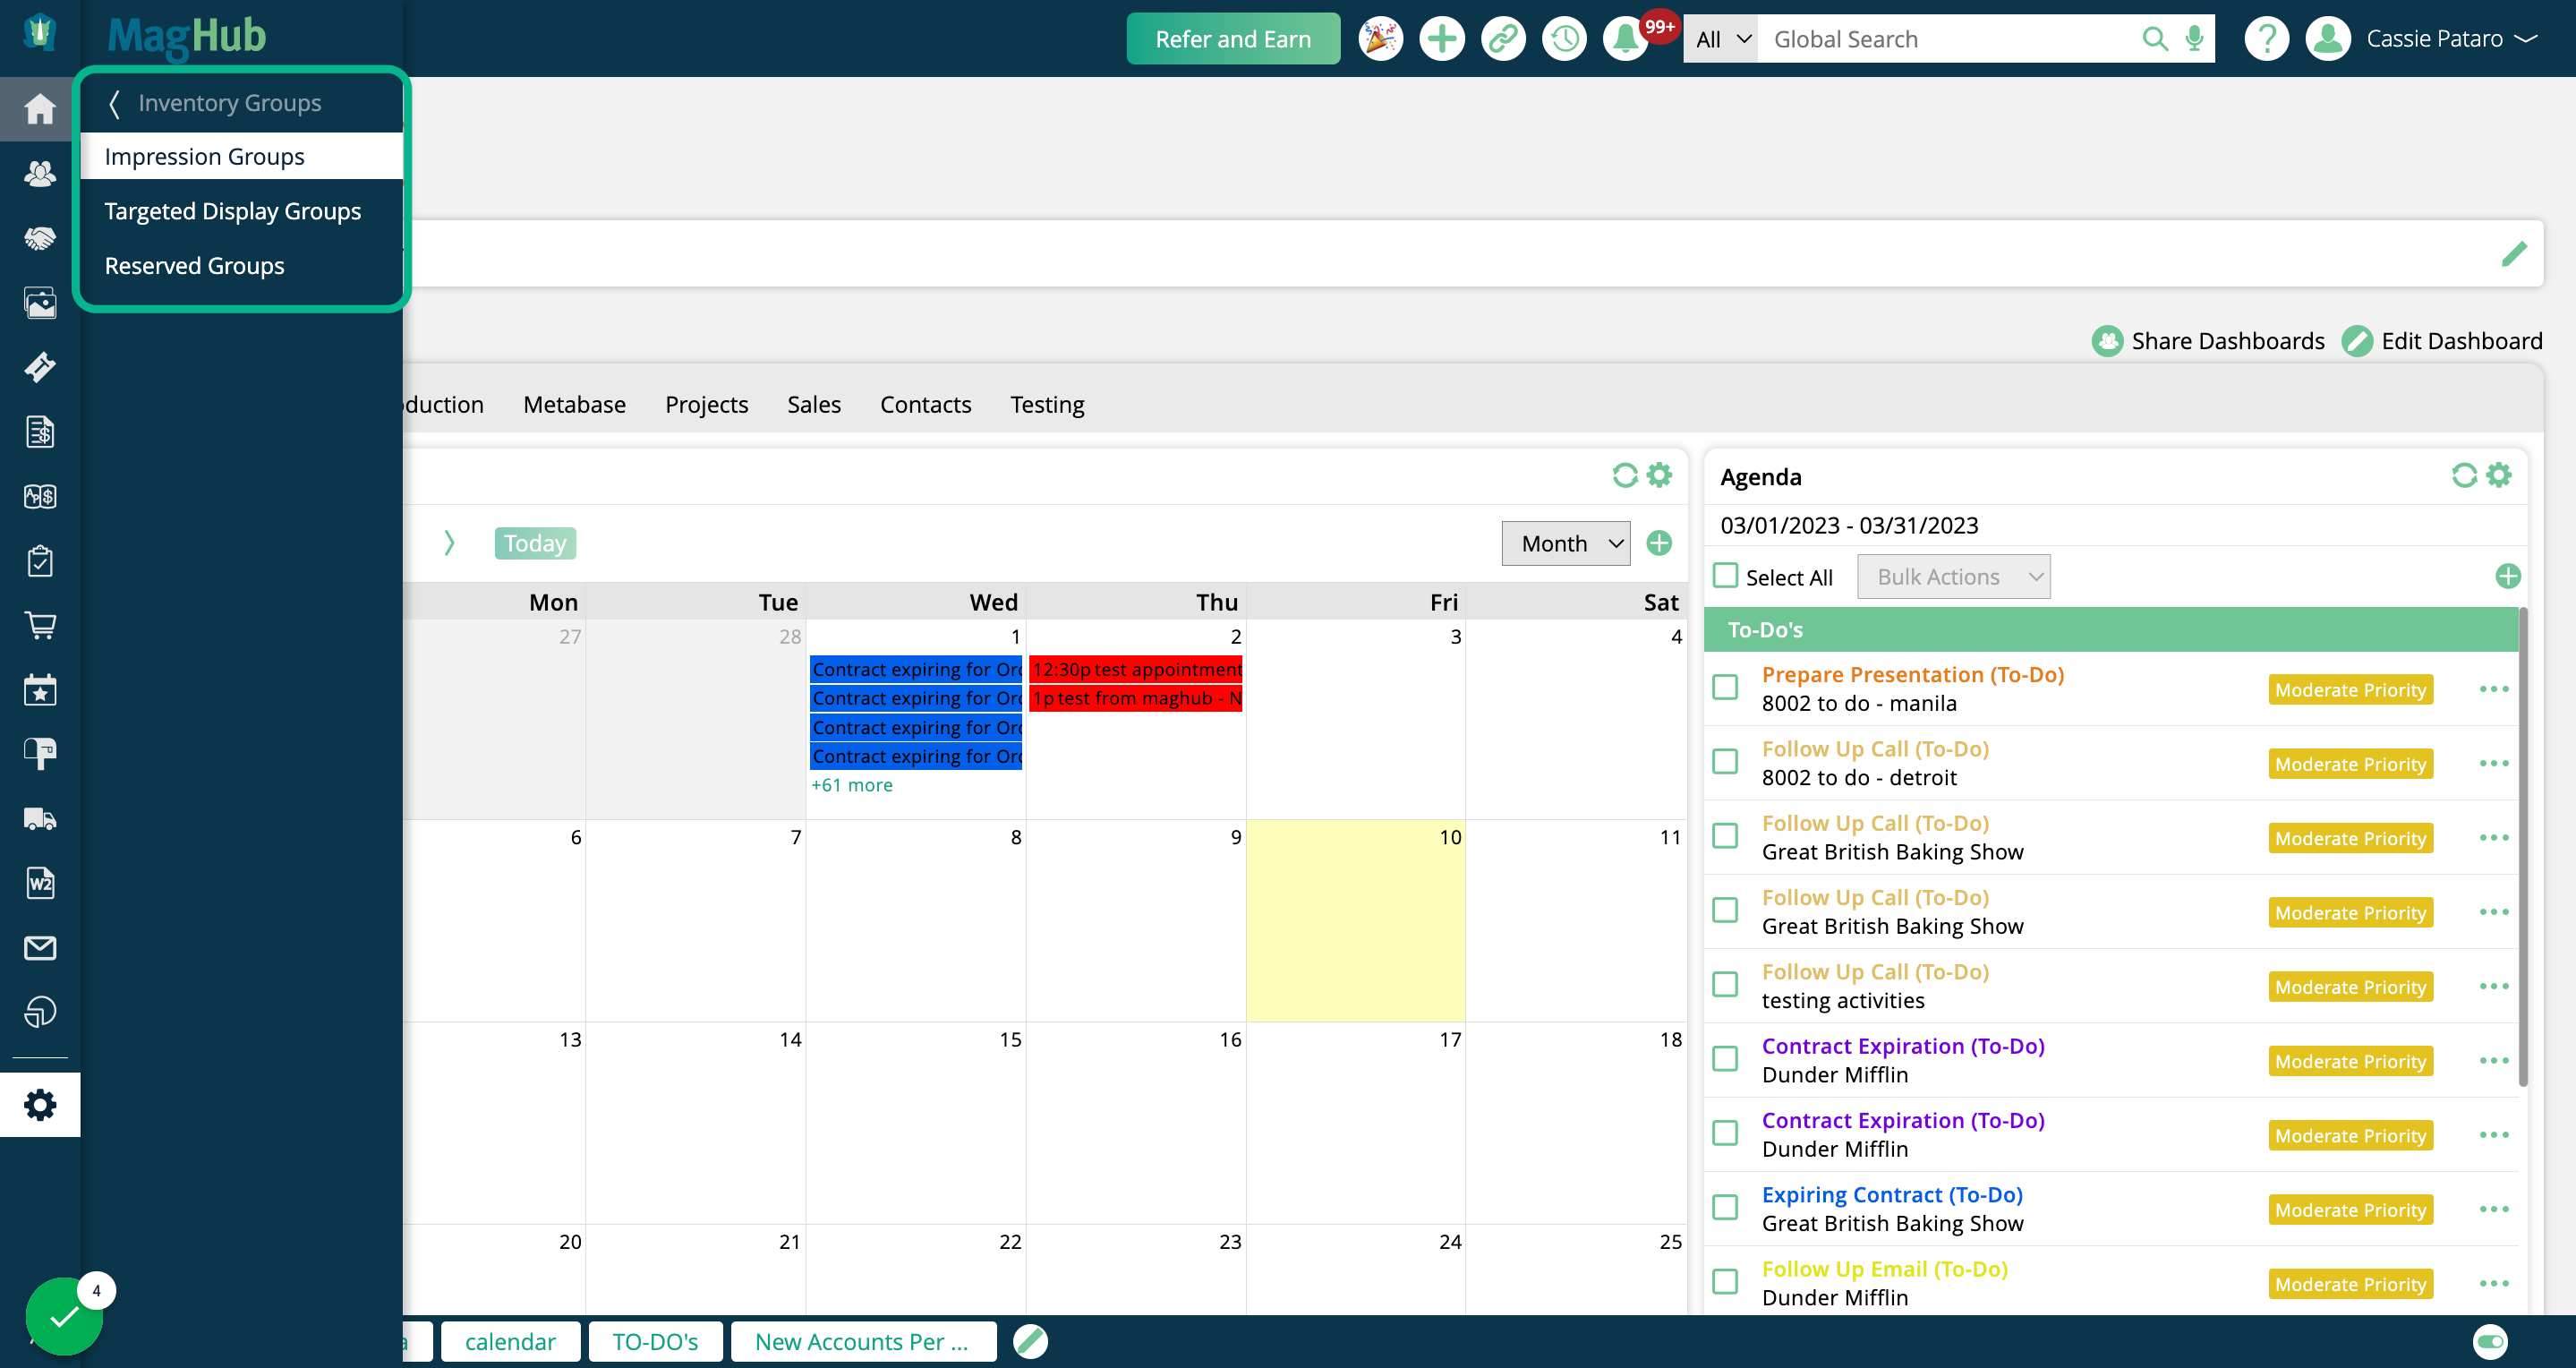
To set up inventory groups, go to Settings > Products > Inventory Groups, then choose either Impression Groups, Targeted Display Groups, Slot Groups or Reserved Groups depending on which product type you want to work with.
To access these pages, you need the User Permission Digital Media Inventory Groups.
Each of the setup pages functions the same, where you will be able to add and edit inventory groups and choose which products to include in those groups.

Inventory Group Setup - Creating Groups
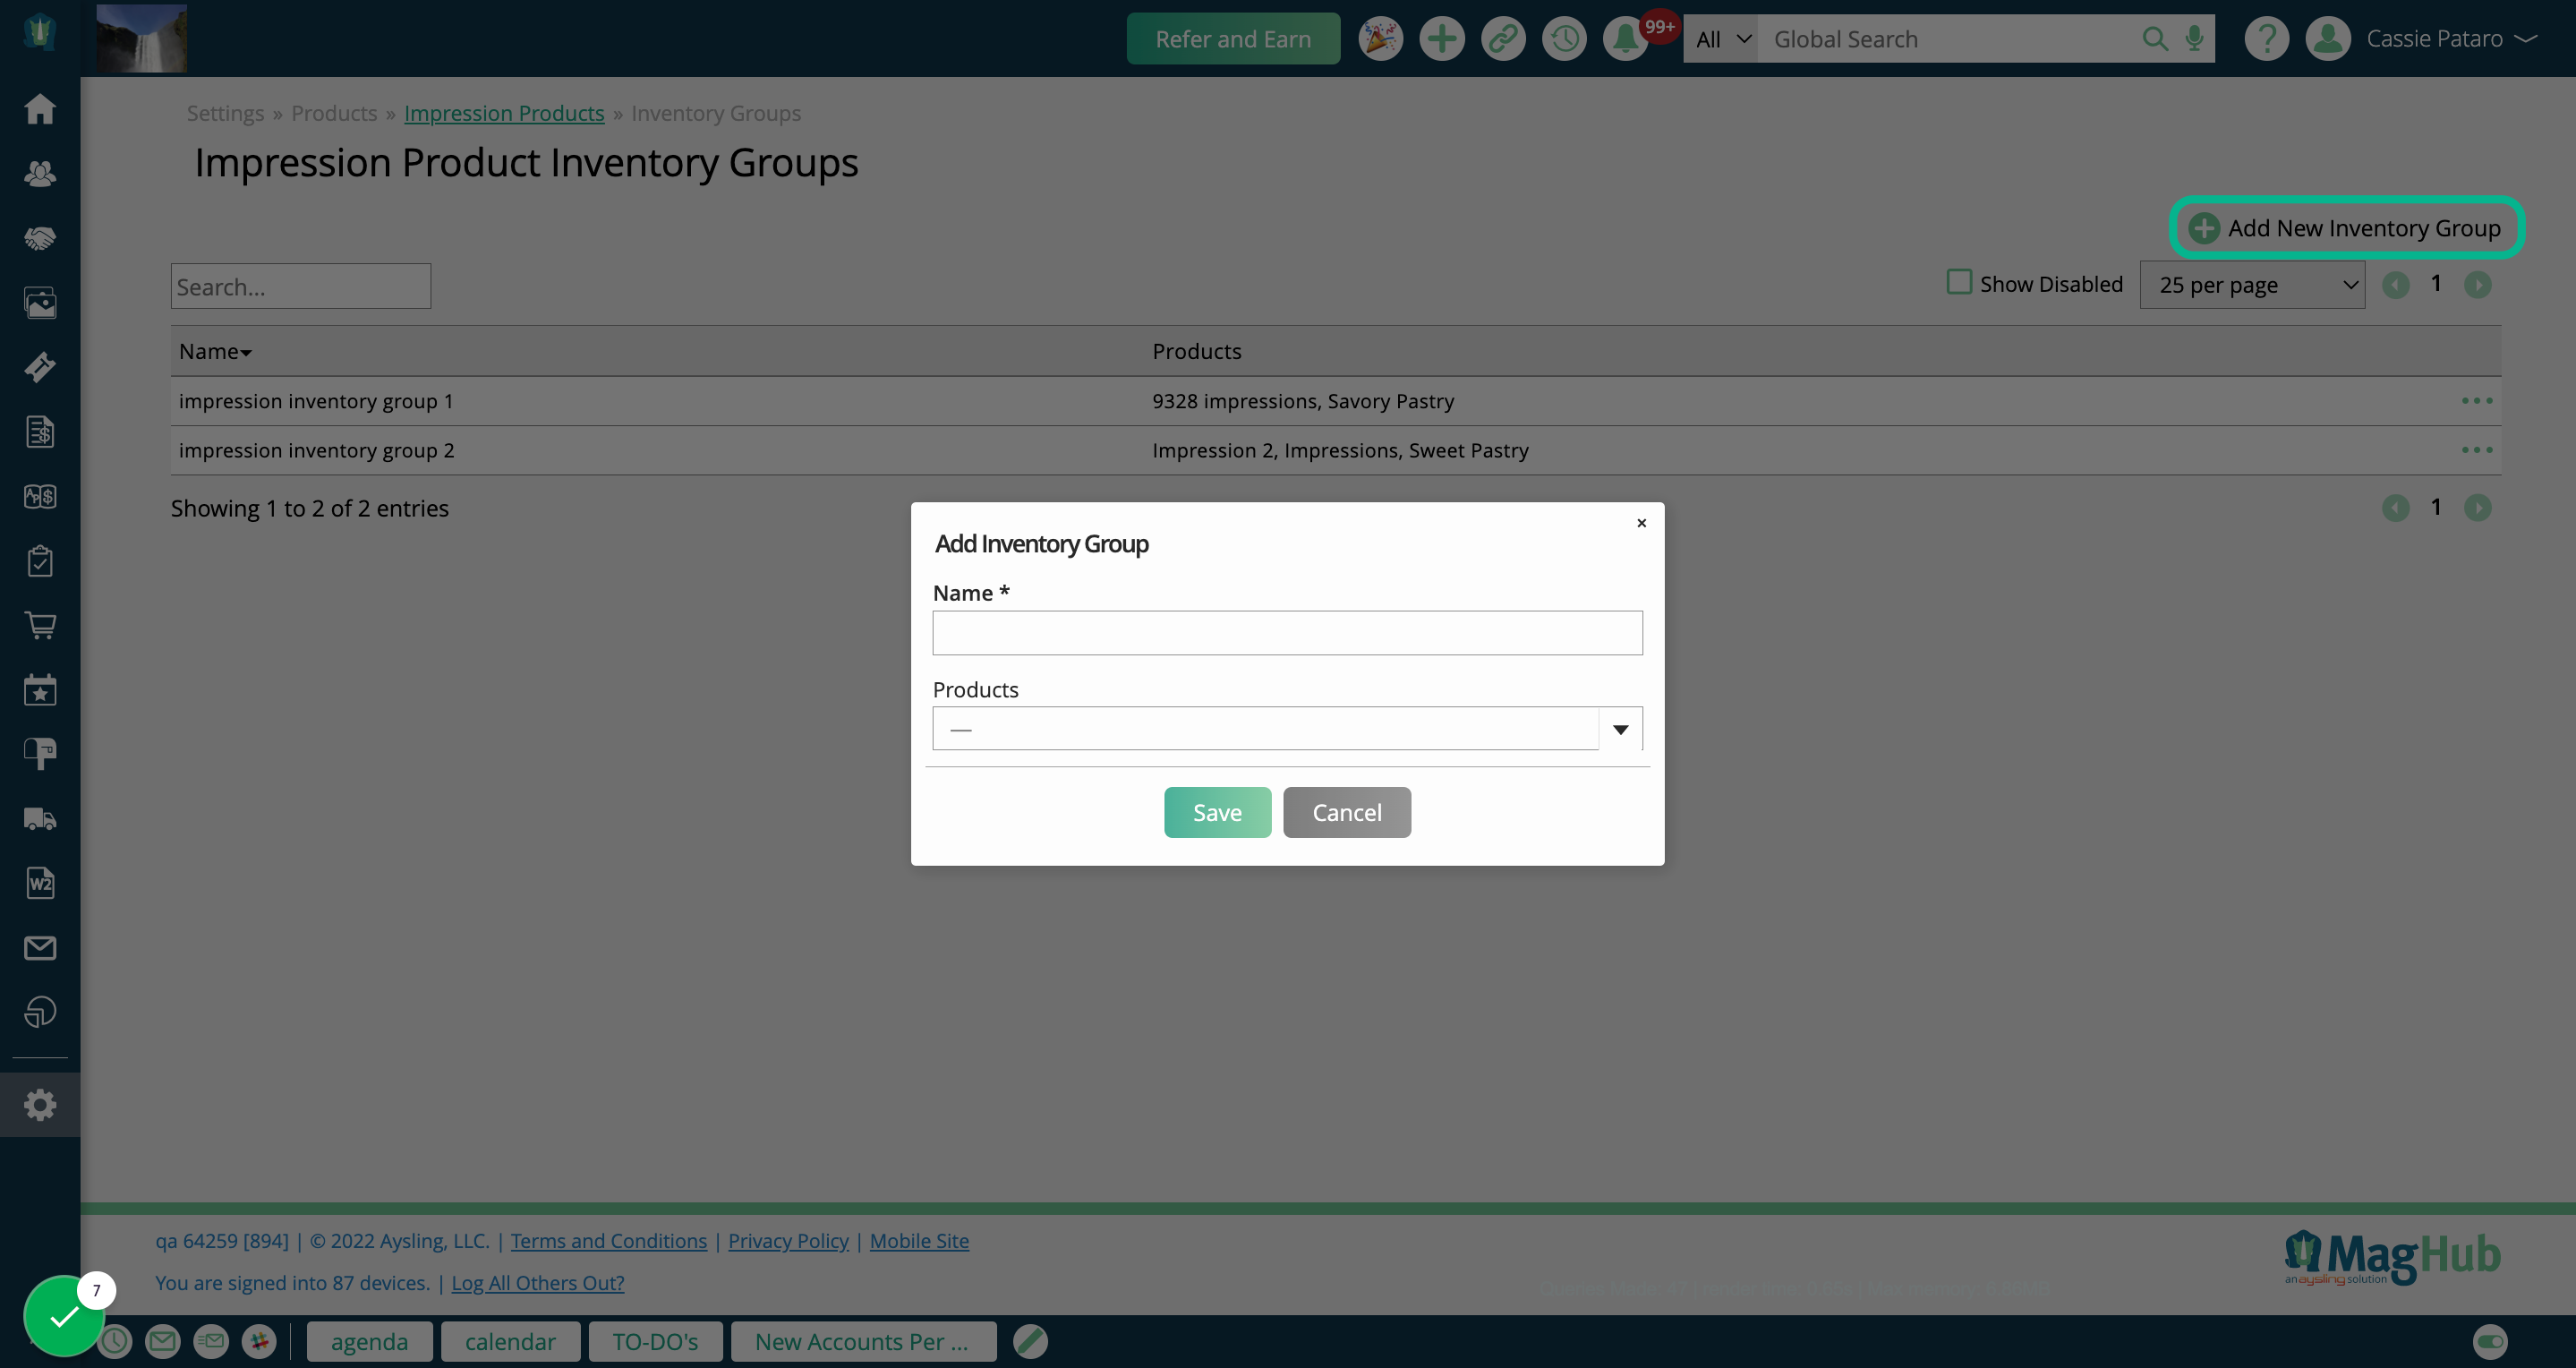
Click the + icon in the upper right corner to add a new inventory group. In the popup, enter a name for your group and choose the products you wish to include. All active products of that type will show up as an option.
Note
A product can only be in one inventory group at a time.
There are three additional options specifically for Slot Inventory Groups.
For Products with Channels and Sizes: Because of how Slot inventory is managed, for each group you need to choose if the group will be for products that do or do not have channels and sizes. If you choose No, your Product dropdown will be limited to Slot products that do not have channels and sizes. If you choose Yes, your Product dropdown will be limited to Slot products that do have channels and sizes.
Only Sell One Size Per Date: Only applicable if your group is for Slot products that use channels and sizes, this setting will restrict inventory across all sizes on the products for the selected date and position/channel. For more information, please reference the Create Digital Media Products for Slot Sales help center page.
Only Sell One Position/Channel Per Date: Only applicable if your group is for Slot products that use channels and sizes, this setting will restrict inventory across all channels on the products for the selected date and size. For more information, please reference the Create Digital Media Products for Slot Sales help center page.
Once you have chosen your inventory group name and products, click Save to create the group.

Inventory Group Setup - Performing Actions
On the table, there are various actions you can perform.
Use the ellipsis icon to edit existing groups (change the name or products included), disable or delete a group.
You can view disabled groups by clicking the Show Disabled box, and once again use the ellipsis to re-enable the group.
Click on the Name column to sort your inventory groups alphabetically by name.
The search bar above the table can be used to find particular groups.
If you have a large amount of inventory groups, you can change how many results are displayed and scroll through the pages to view more results.

Inventory Group Setup - Adding Future Scheduled Products
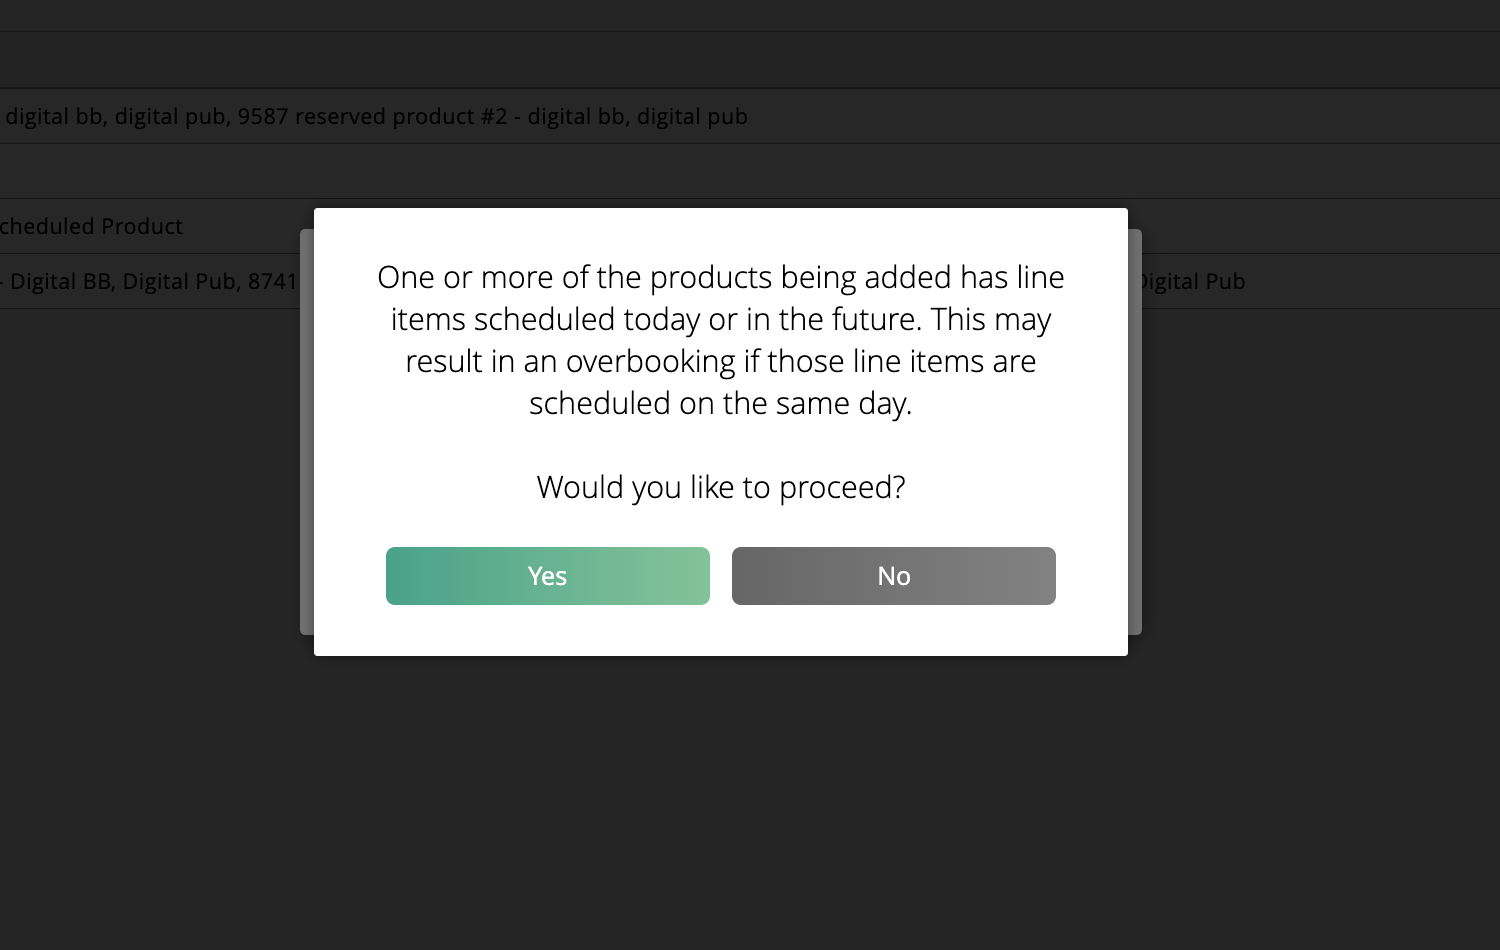
You can add any product to an Inventory Group. However, if you are adding products that have already been scheduled in the future (in the case of Reserved products), or items with delivery dates in the future (Impression and Targeted Display products), you will see an additional notification. The popup lets you know that the product you are adding is already scheduled in the future, so adding it to a new group may create an overbooking issue, and asks you if you would like to proceed.

Inventory Group Setup - Adding Inventory Groups Directly to Products
The Inventory Group setup pages are the only place on the site to create new inventory groups. However, when adding or editing a Reserved, Impression, or Targeted Display Product, you do have the ability to set an existing inventory group onto the product, if certain conditions are met.
To do this, go to Settings > Products > Reserved Products, Impression Products, Slot Products, or Targeted Display Products.
You must have the user permission Slot, Impression, Reserved, & Targeted Display Products to access this page.
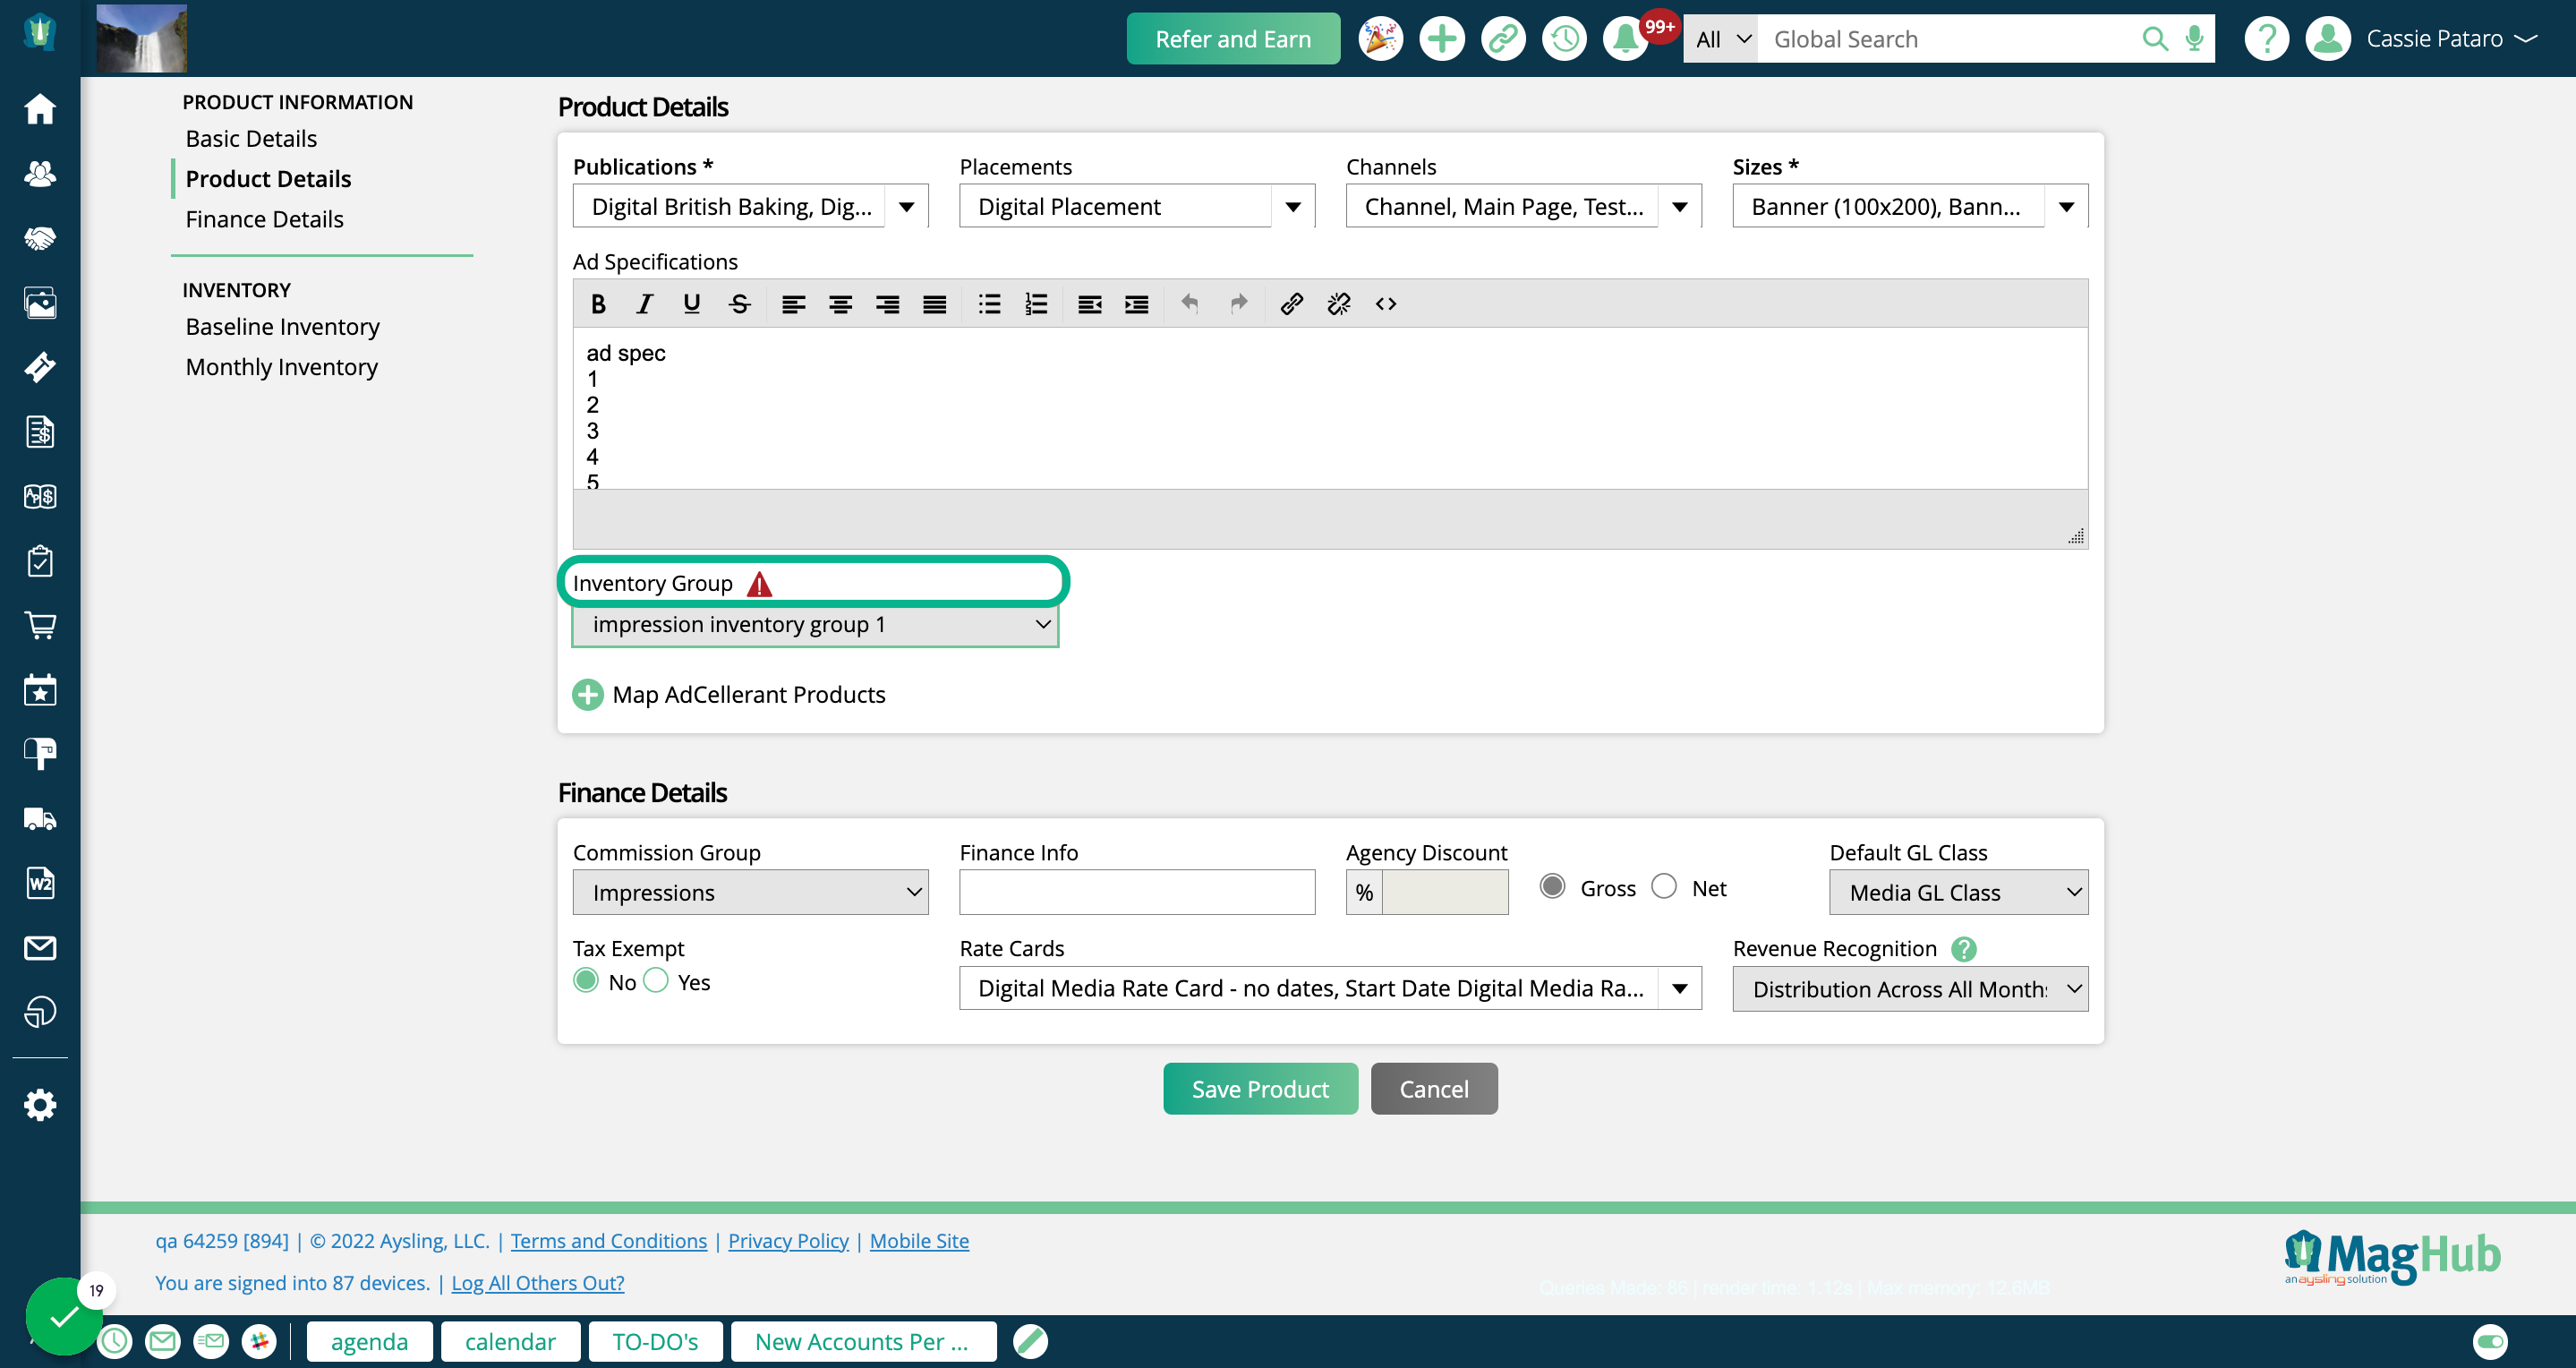
When adding or editing a product, you will see an Inventory Group field.
If the product is included in an inventory group, its name will show up in the field. If not, the field will be blank.
You can change the group by opening the dropdown and selecting from your existing Inventory Groups. Make sure to save your changes.

Added 11/10/2023