Calls
When you reach out to a company but nothing is scheduled, you can create a call record to track the activity. Call activities are recorded by adding a call or recording a call from a call list.
You can create a call from several areas of the system, including your agenda and calendar dashboard widgets, a company or contact’s page, as well as by using the + button at the top of the page to ‘Add Call'.
You can also create calls from a call list. These can be found by going to Home > My Call List.
No matter where you create the call, you must specifics the type, company, contact, and user. The title will populate based on the company you select, but you can override it.
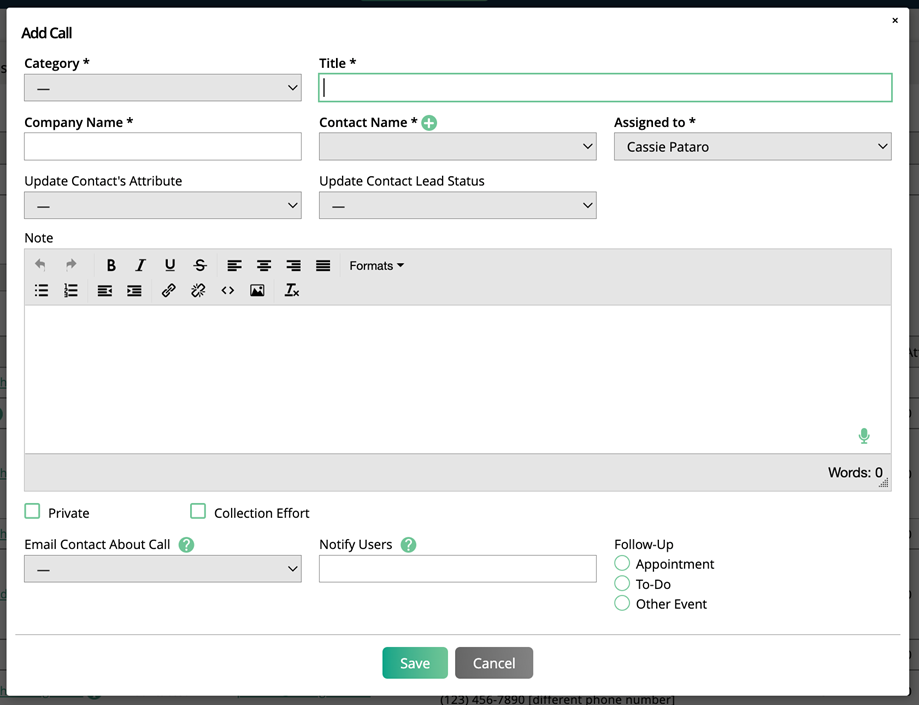
You can only select users who are reps on the account.
Calls have the following fields you can take advantage of, but are not required.
Opportunity and Forecast: Let your team know you are actively working a customer's opportunity by assigning a to-do. For example, following up with a phone call about the quote. User will see this activity in the Forecast Reports.
Choose from the company’s Opportunities first, then select a Forecast. The Forecasts dropdown will show all Forecasts associated with the selected Opportunity.
Update Contact Attribute: You can modify any contact attributes when creating the activity. Maybe you are creating the to-do after the fact and learned the contact's birthday!
Update Lead Status: Use this to keep your contact's status accurate and up to date. Maybe you had a great phone call and the person is qualified or maybe they are not interested, you need to mark them as disqualified.
Notes: Enter any useful notes you want to keep for reference or let others in your company about.
Collection Effort: You may need to schedule a time to discuss a finance issue. You can mark the item as a collection effort so if displays in your notes as a collection effort. You can show/set an agreed upon payment amount and date.
Notify users: You can send an email to another user(s) in the system when you create the to-do. You may want to do this to alert them of an important update so they can get involved with the customers.
Email Contact About Call: You can set up templated emails and choose from the list of four to send immediately after you record the call. For example, you may have a Thank You for speaking with me email set up with next steps.
Follow-Up: Calls are not meant to be scheduled. Use appointments for to-dos for scheduled calls. So, it is likely a Call will lead to a follow-up. Use this to automatically create a follow-up activity as soon as you are done recording the call.
Additional Details: This section shows up on your activities depending on if you have activity dynamic attributes set up. The attributes themselves may or may not be required in order to create the activity.
Save the call so it can show up on the company/contact page.
Tip
You can integrate with Twillio to trigger the phone call from the system and get a recording of the conversation for your record. Click here for more information about our Twilio integration.
Updated 01/08/2024
Text Messaging your Contacts
Send a text message to your contacts with a valid cell phone. In order to send a text message, you must have the texting module enabled, your account set to allow SMS messaging, and have a contact with a phone type of cell phone. Please contact your Account Manager if you want to enable the texting feature. The stats vary, but SMS messaging is opened 5x times more and responded to 7.5x more than an email. Start using texting to catch up with your contacts about open orders, missing materials, or unpaid invoices.
Once the texting module is enabled, go to My Preferences > Personal Information. Under your Cell Phone, you will see a check box titled Allow SMS. Check the box to start sending texts. Your SMS messaging will display your Cell Phone number to the contact so they can call or text back.
You also need to create at least one Activity Category with the type of Text in order to record a text message.
Now you can start sending texts to your contacts. You will see an SMS icon next to any phone number that is set to the type of Cell Phone. If you don't see the icon, check to see the type of phone number.
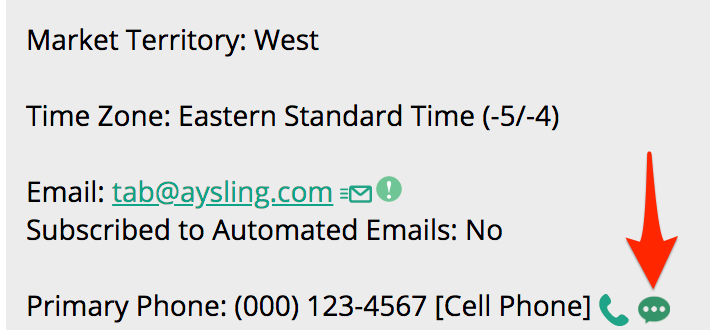
Click on the icon and you will see the text pop-up. Every text message will start by listing 'From Your Name' and end with 'Reply to Your Number or Your Email'. Add your message.
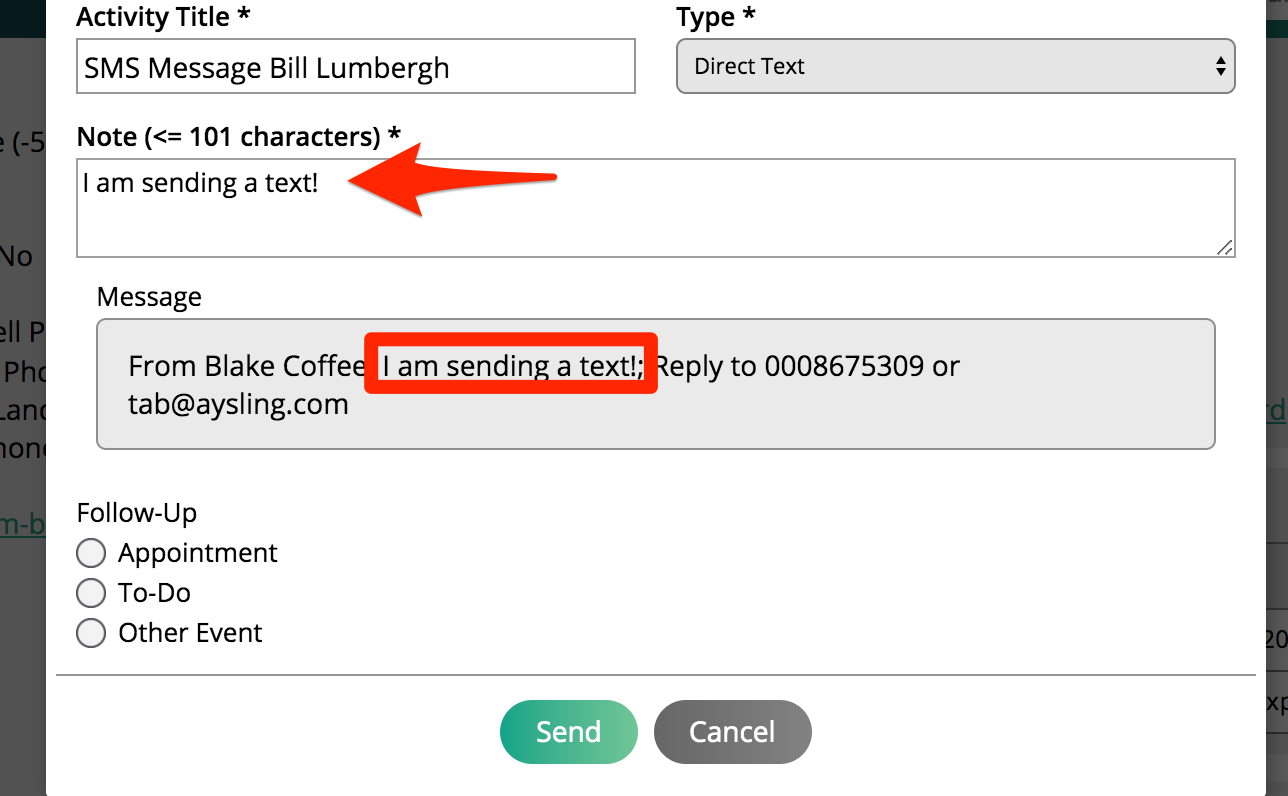
The contact will receive a message from a system number with your text.
All text messages will show up in the activity records of the contact or company.
You can send a text from the contact page, agenda and calendar widget, and the ticket page. Replies WILL NOT be recorded in the system.
Transcribe and Summarize Calls
With both the Twilio and Astro integrations enabled, you will be able to take advantage of our call transcription and summarization service. Any calls made and recorded via Twilio will have the ability to be transcribed and summarized using AI technology.
Setup
In order to transcribe calls, you need both the Twilio and Astro integrations. Click here for more information about Twilio, and reach out to our support team for more information about Astro.
To make a call via Twilio, click on the phone icon on a contact's overview page.
Tip
There are a few other places in the system this can be done from, including your Call Lists.
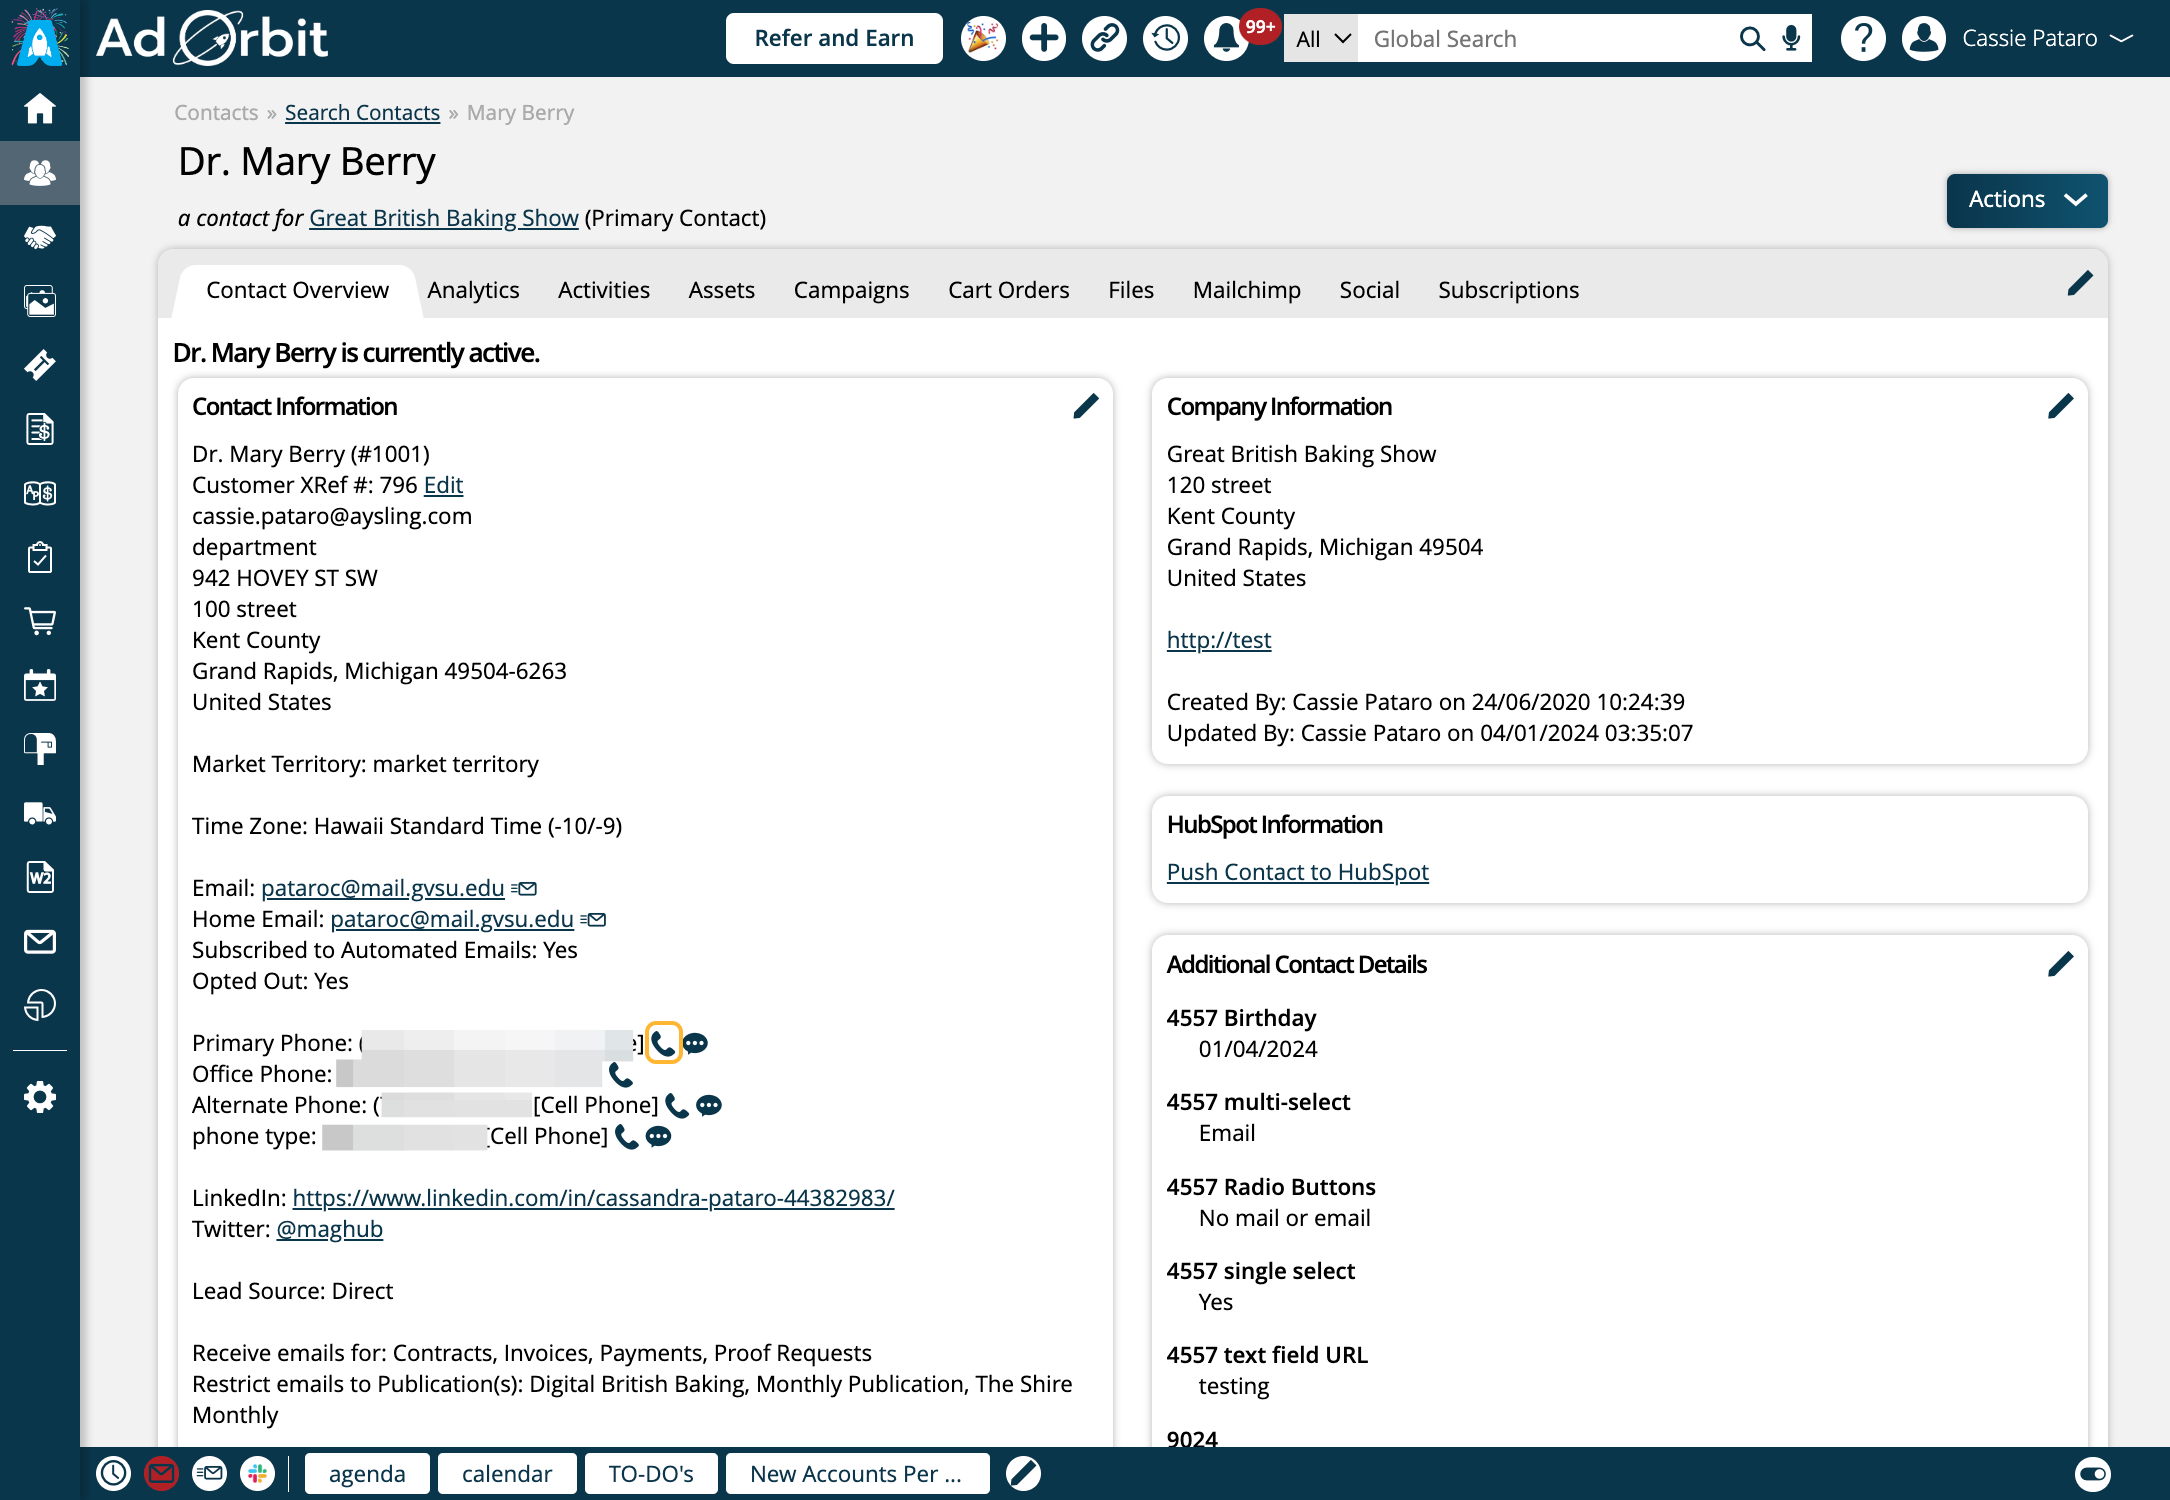
In the Add Call popup, make sure to select 'Record Call'. You cannot transcribe a call if it is not recorded.
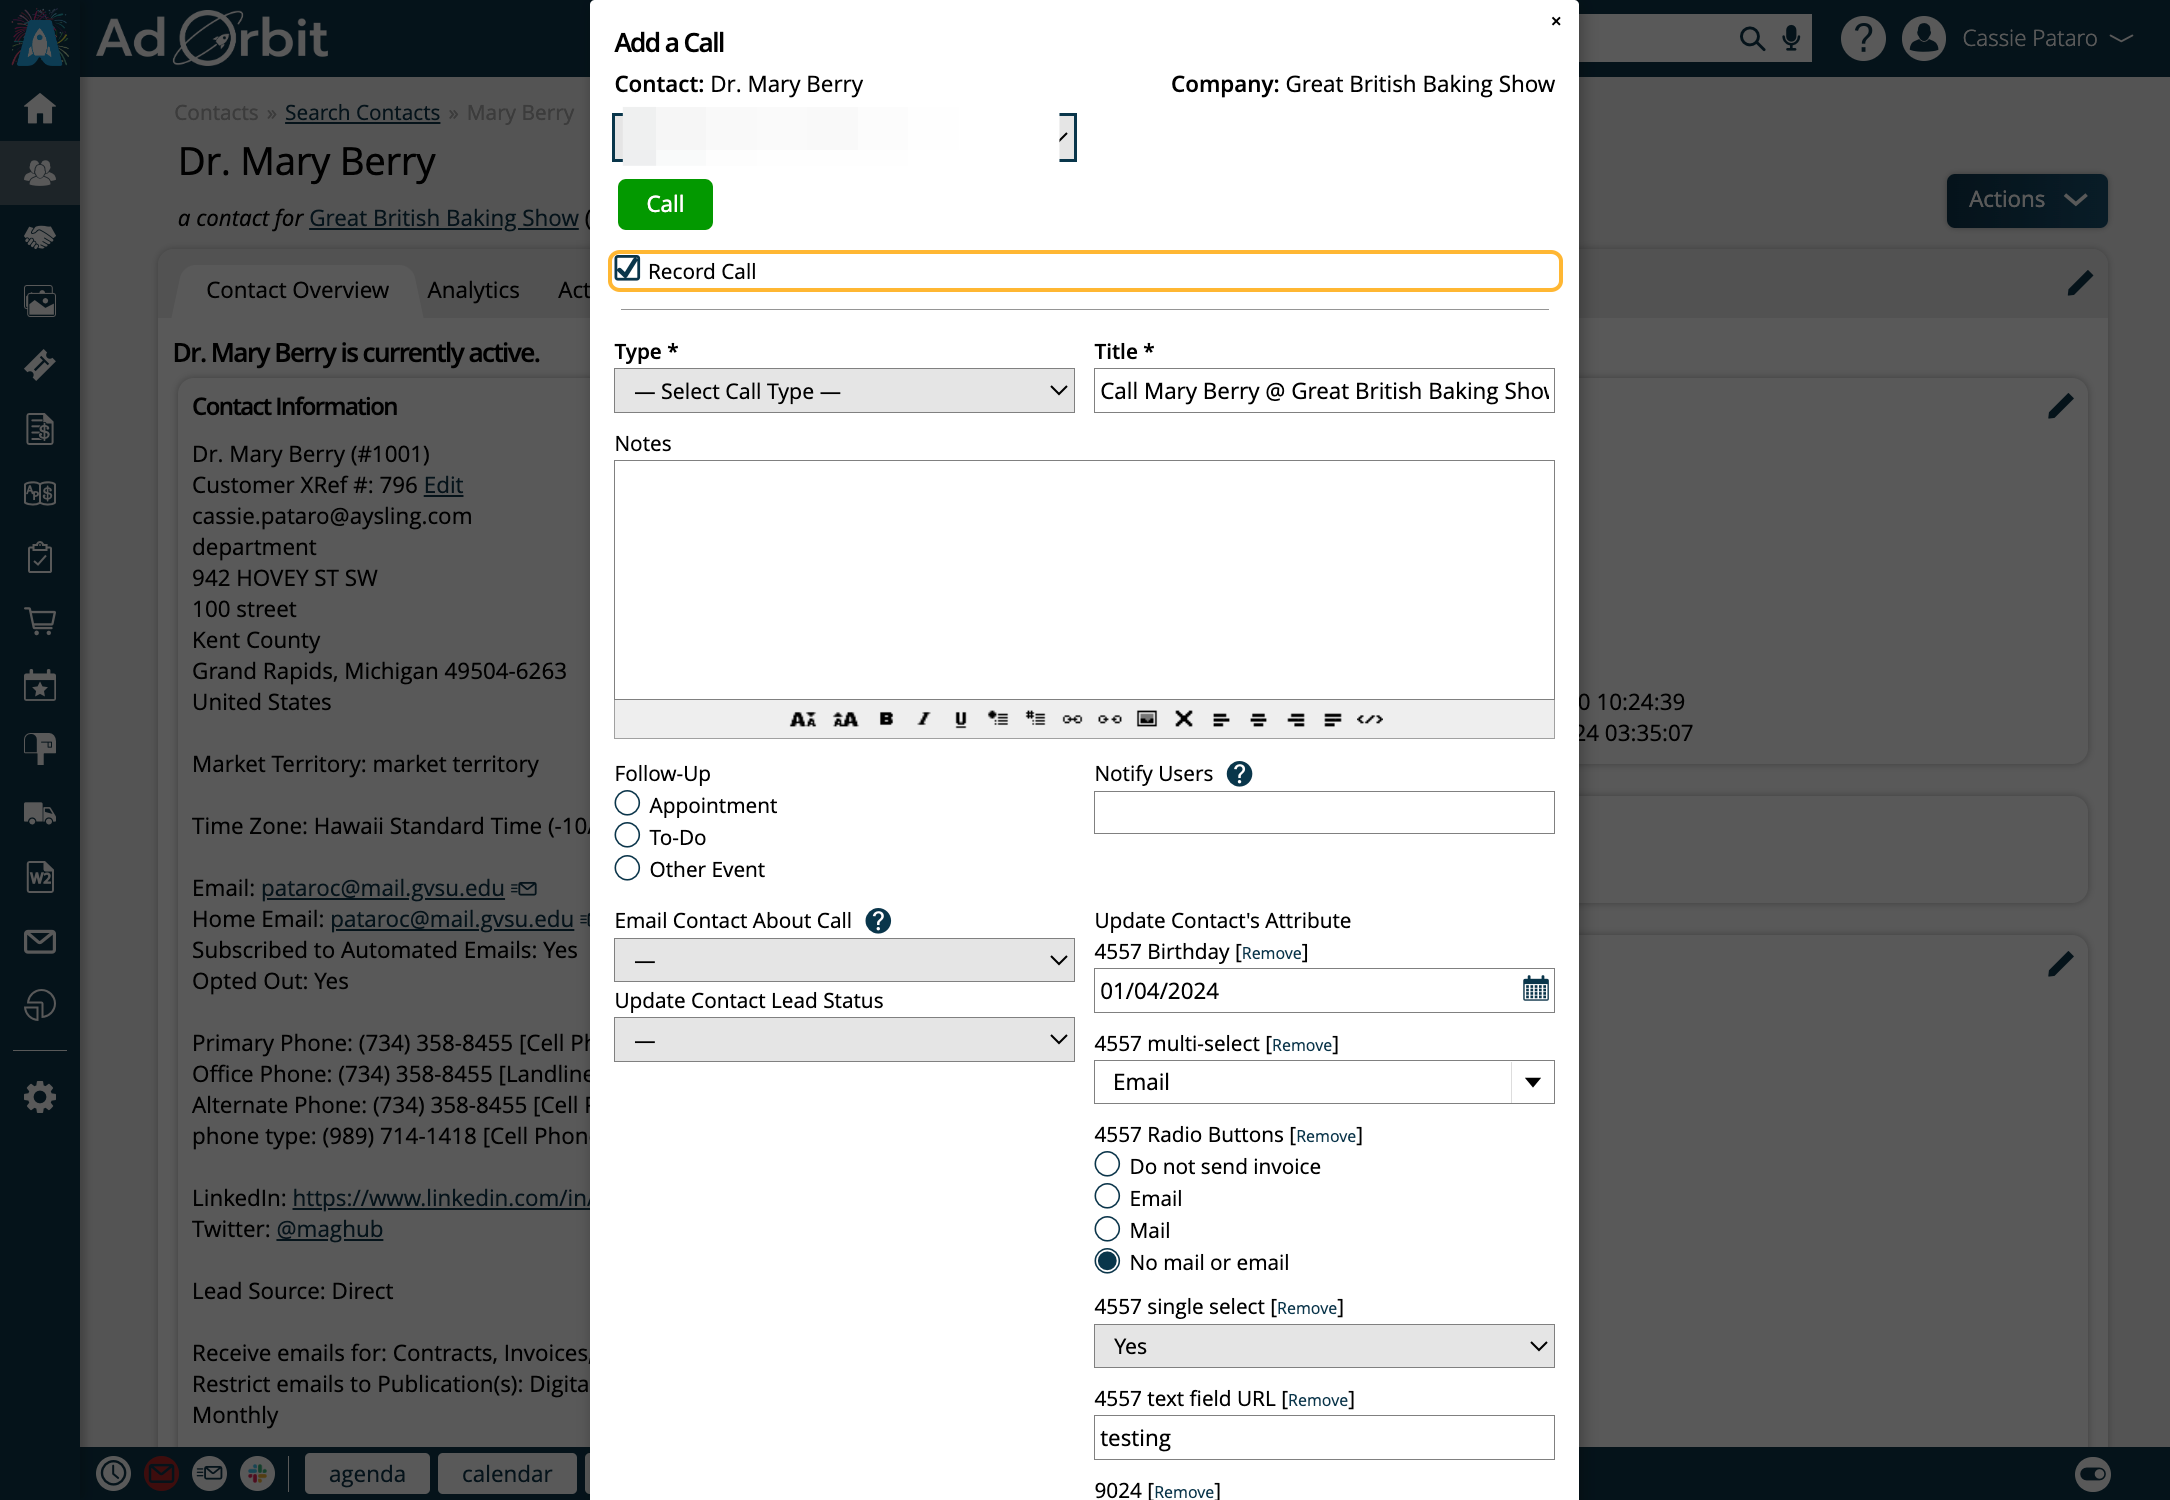
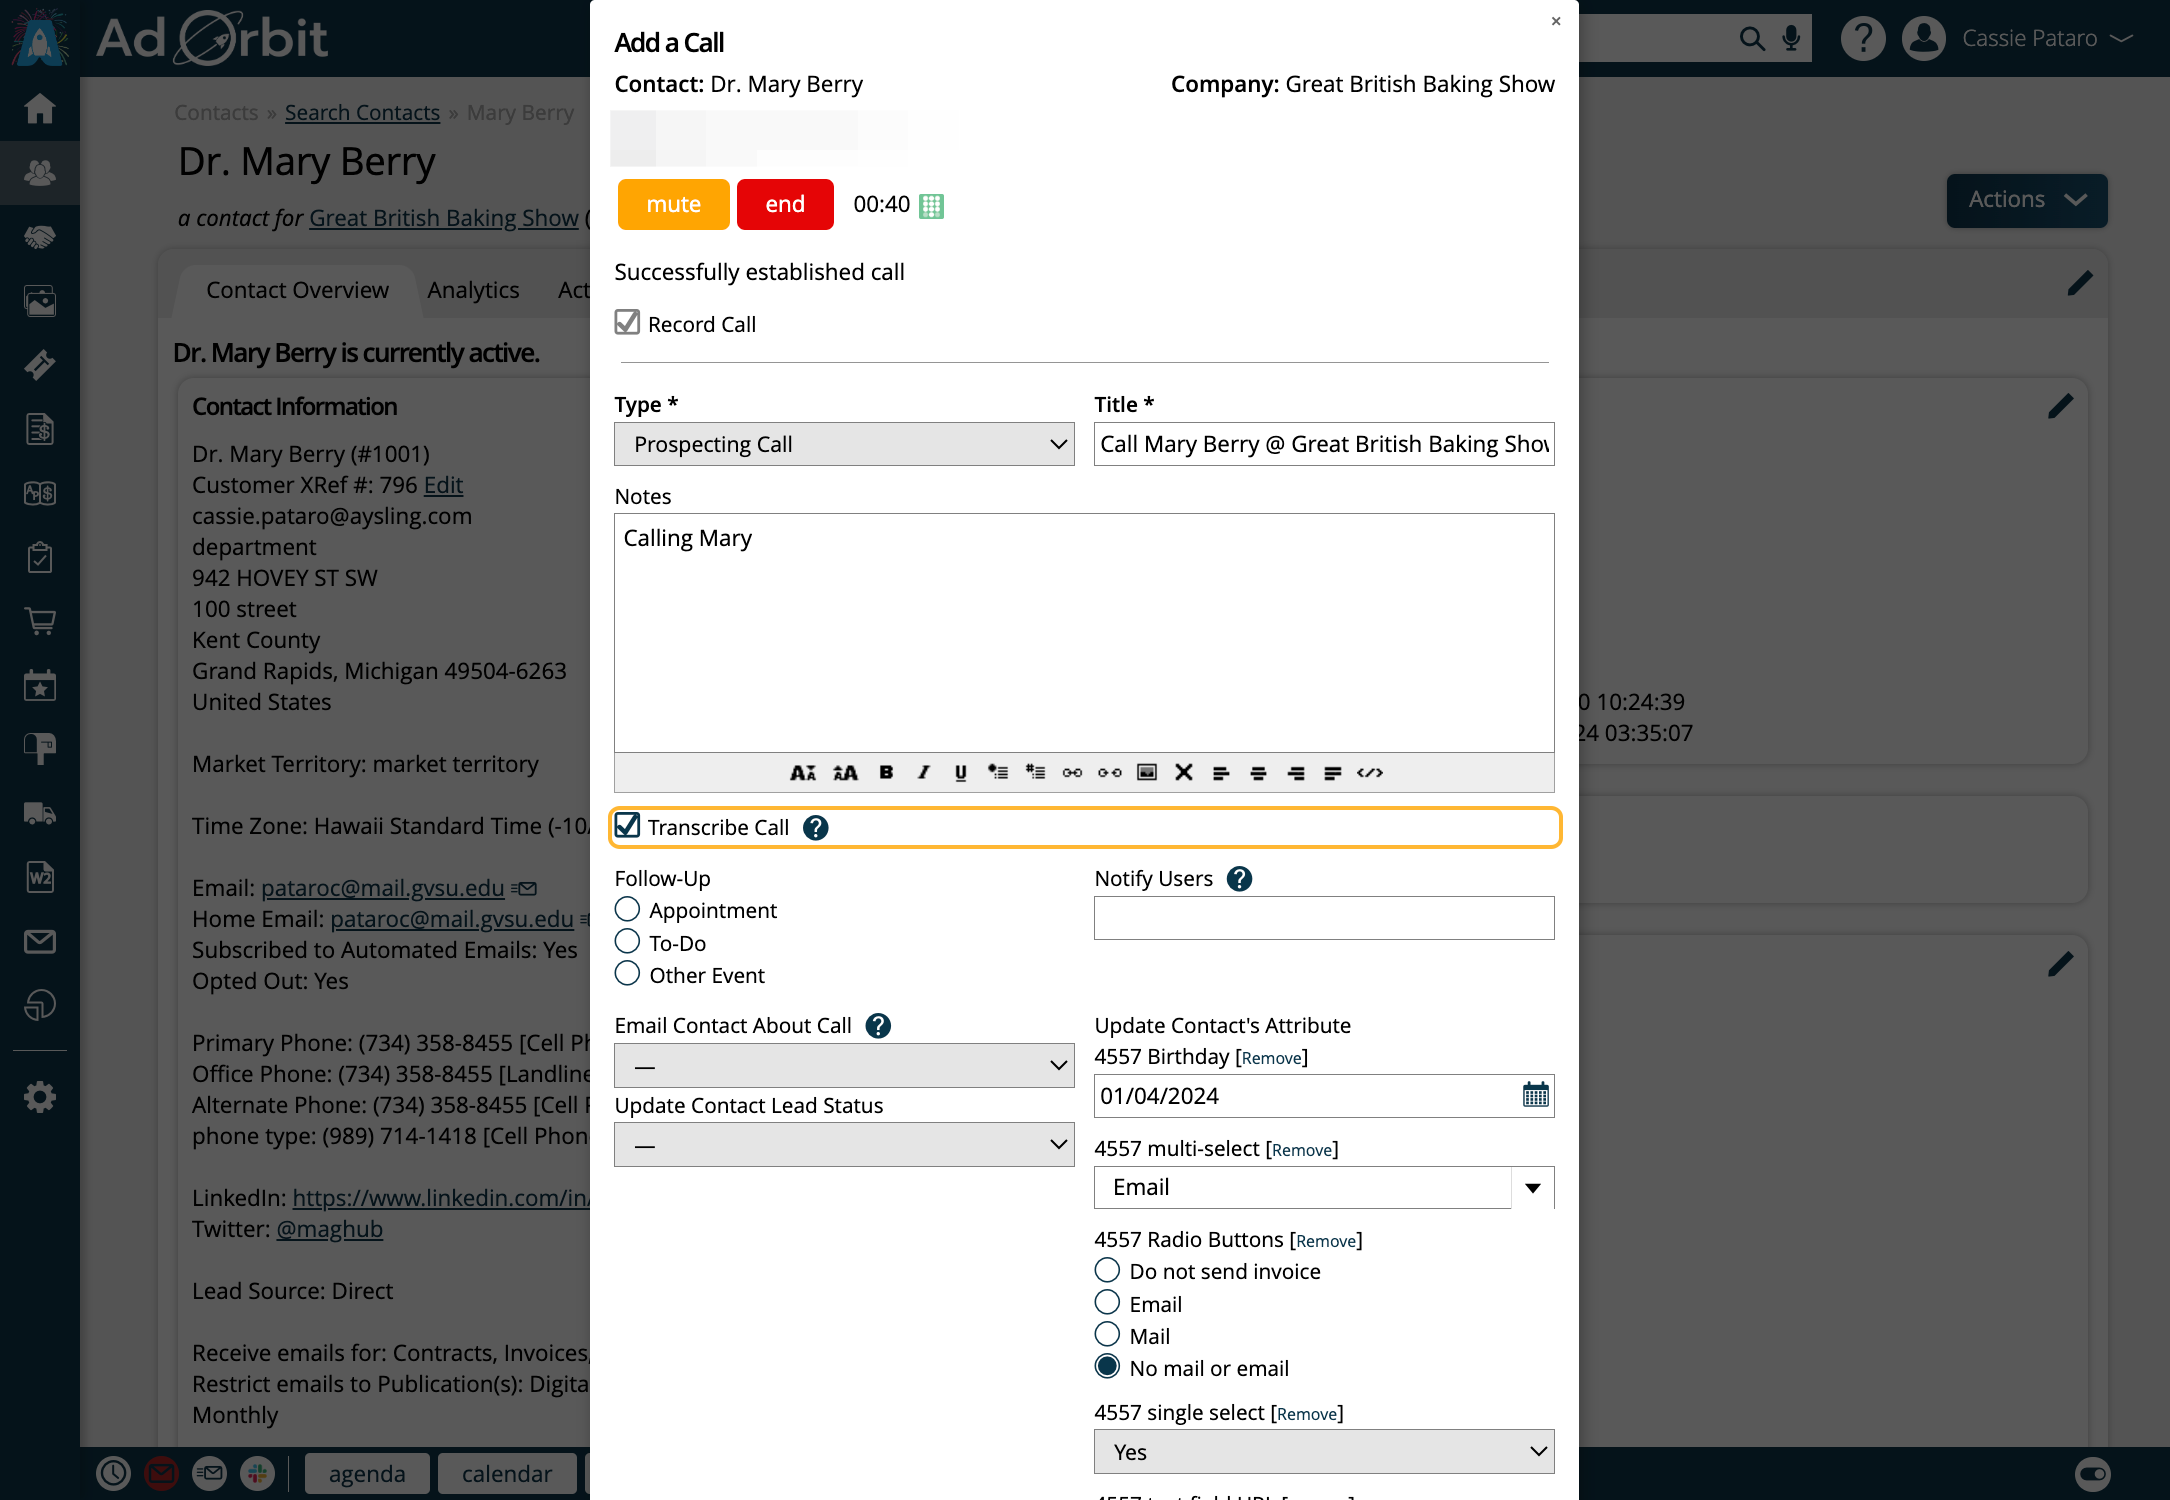
During the call, you will see a new checkbox labeled 'Transcribe Call'.
When checked, transcription of the call will begin immediately once you save the activity. You do not have to check this option right away. As long as the call was recorded, you will have the option to transcribe it later on.
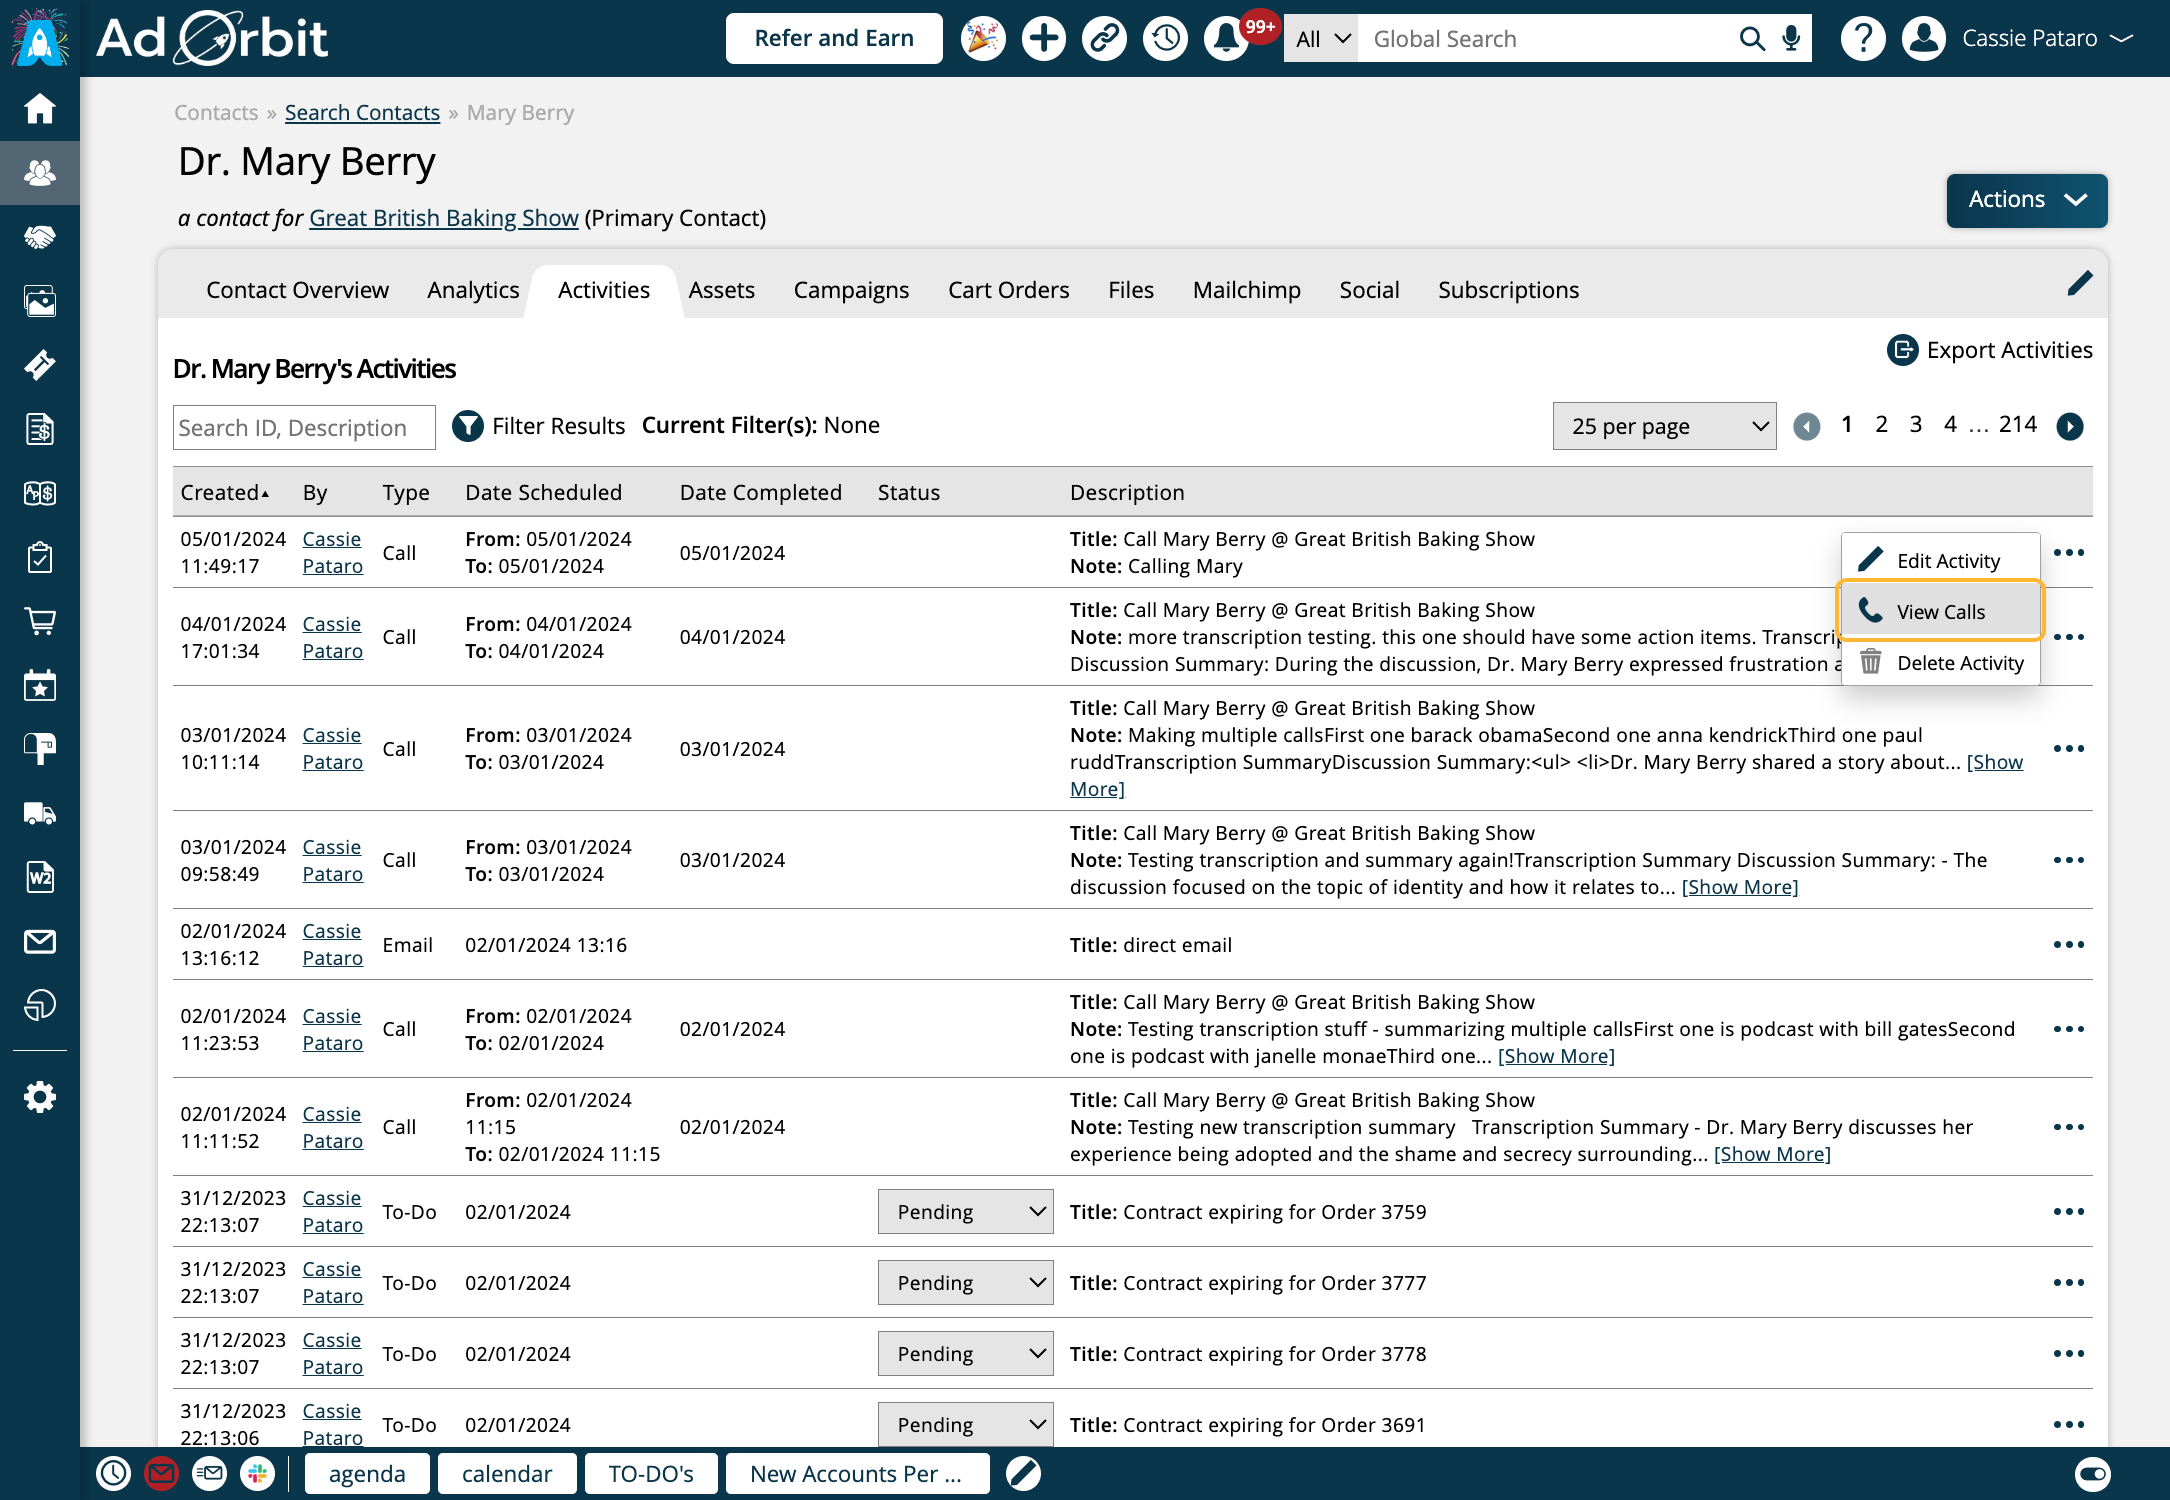
On the contact's Activities tab, you'll see your call. Click on View Calls to view your transcription status.
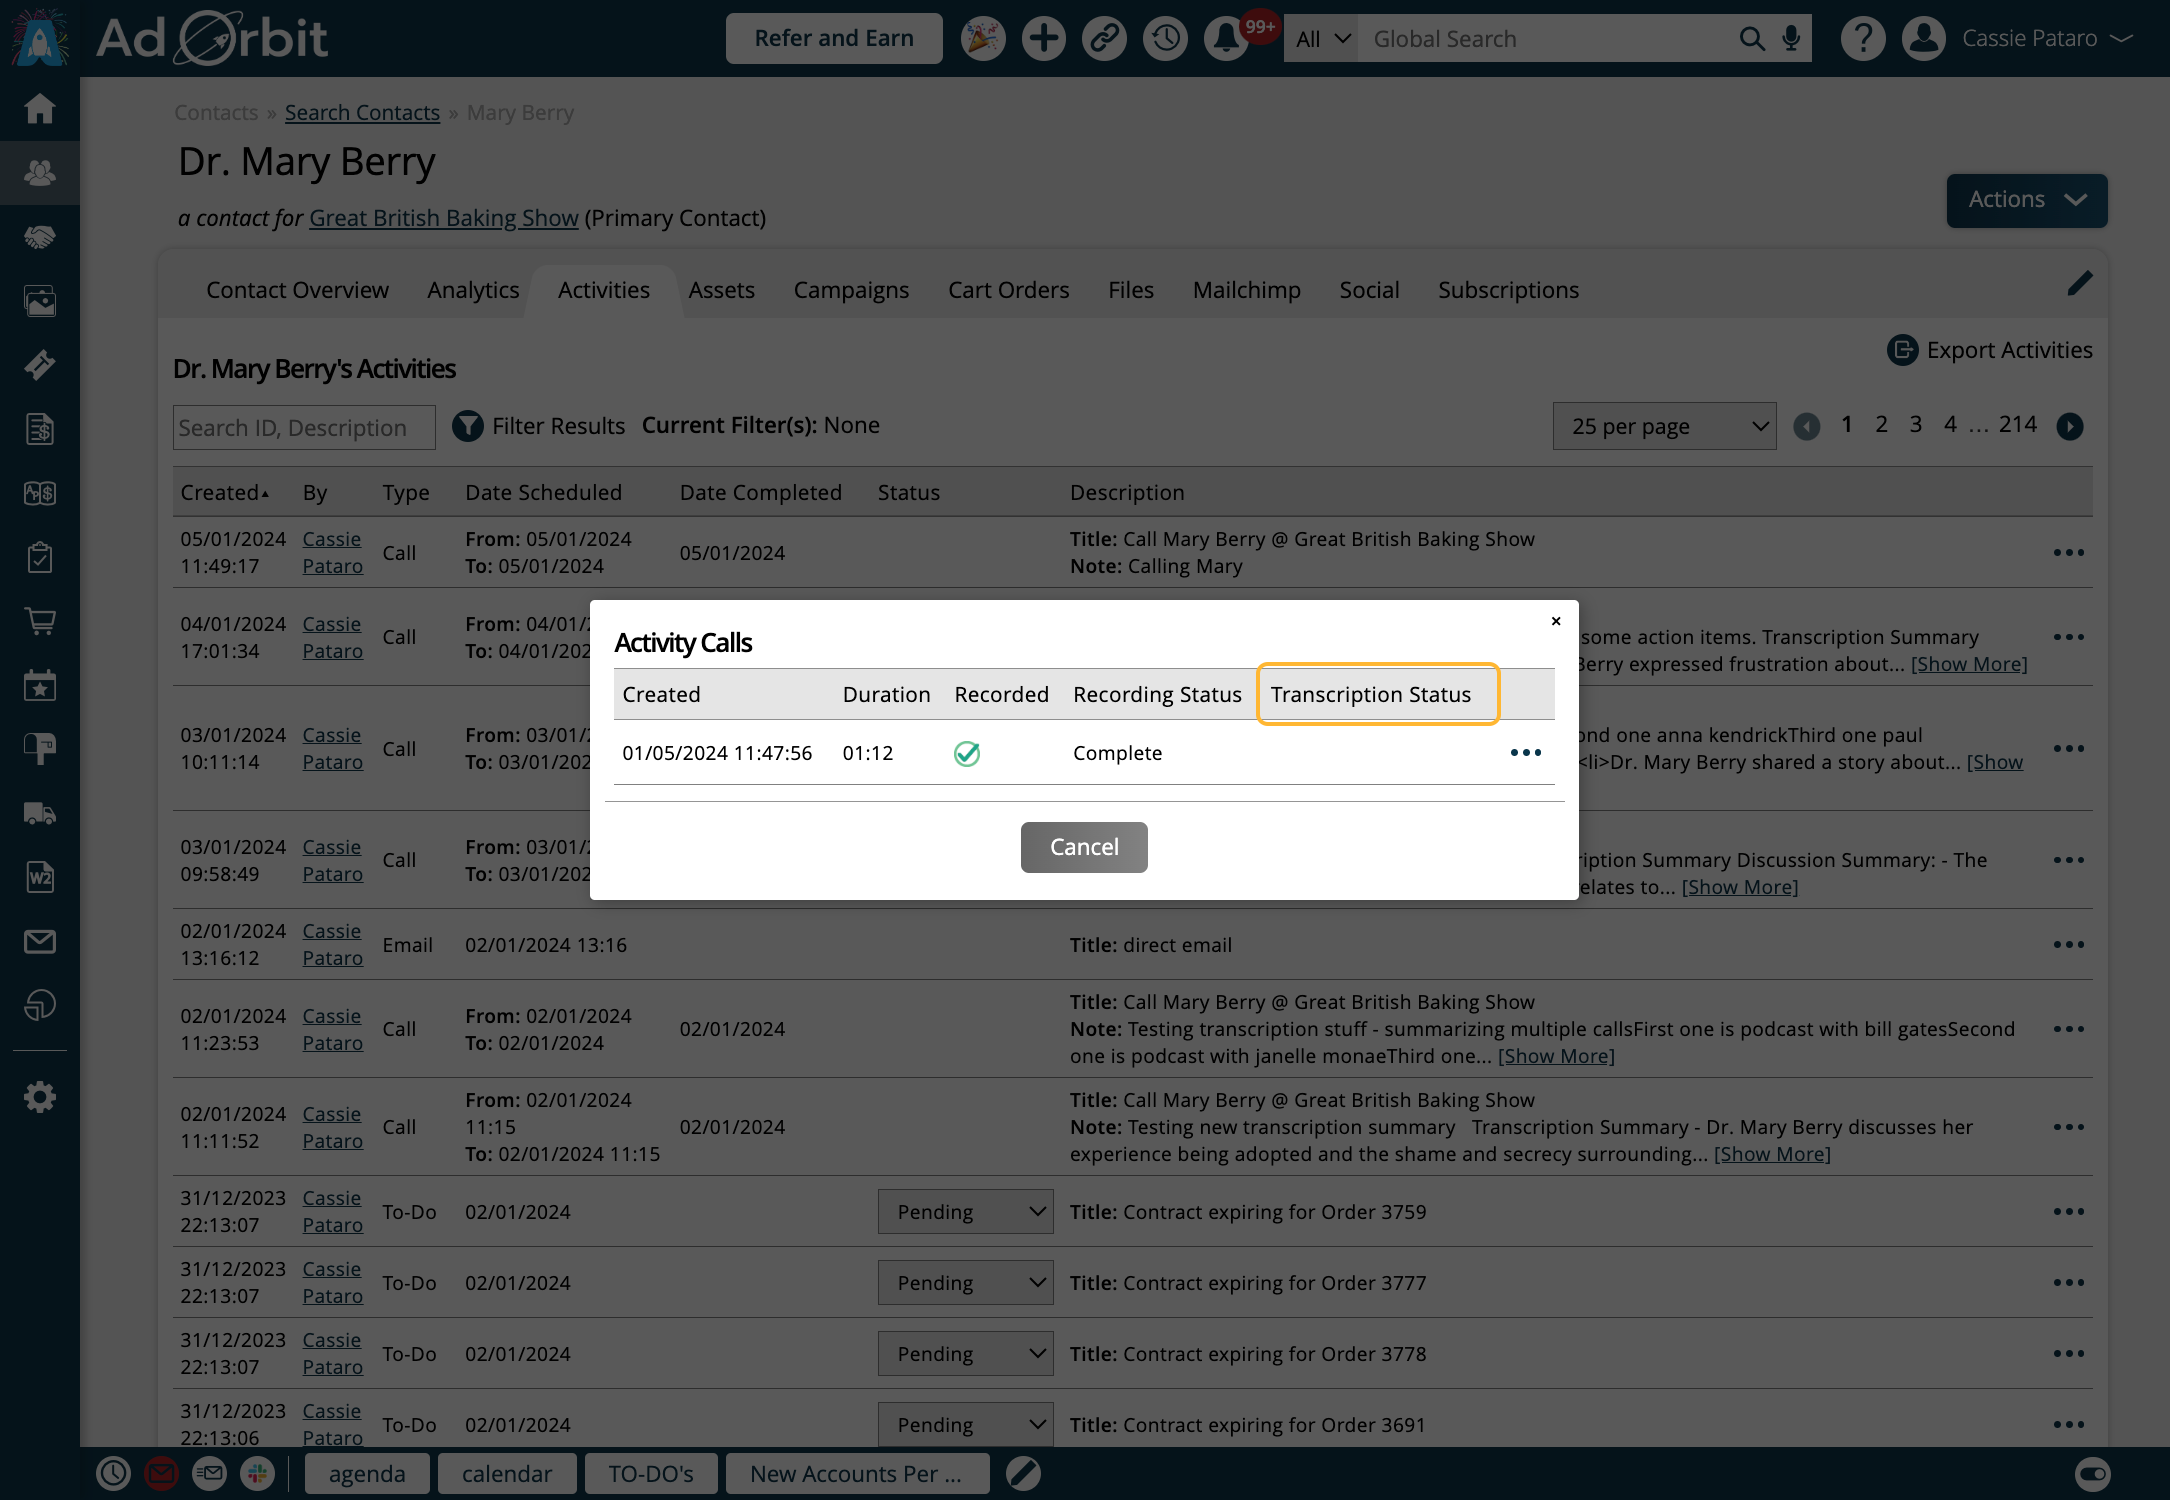
If you did not choose to transcribe the call in the initial Add Call popup, nothing will display under the Transcription Status field.
To transcribe a call after the fact, use the ellipses icon in the popup and click 'Start Transcription'.
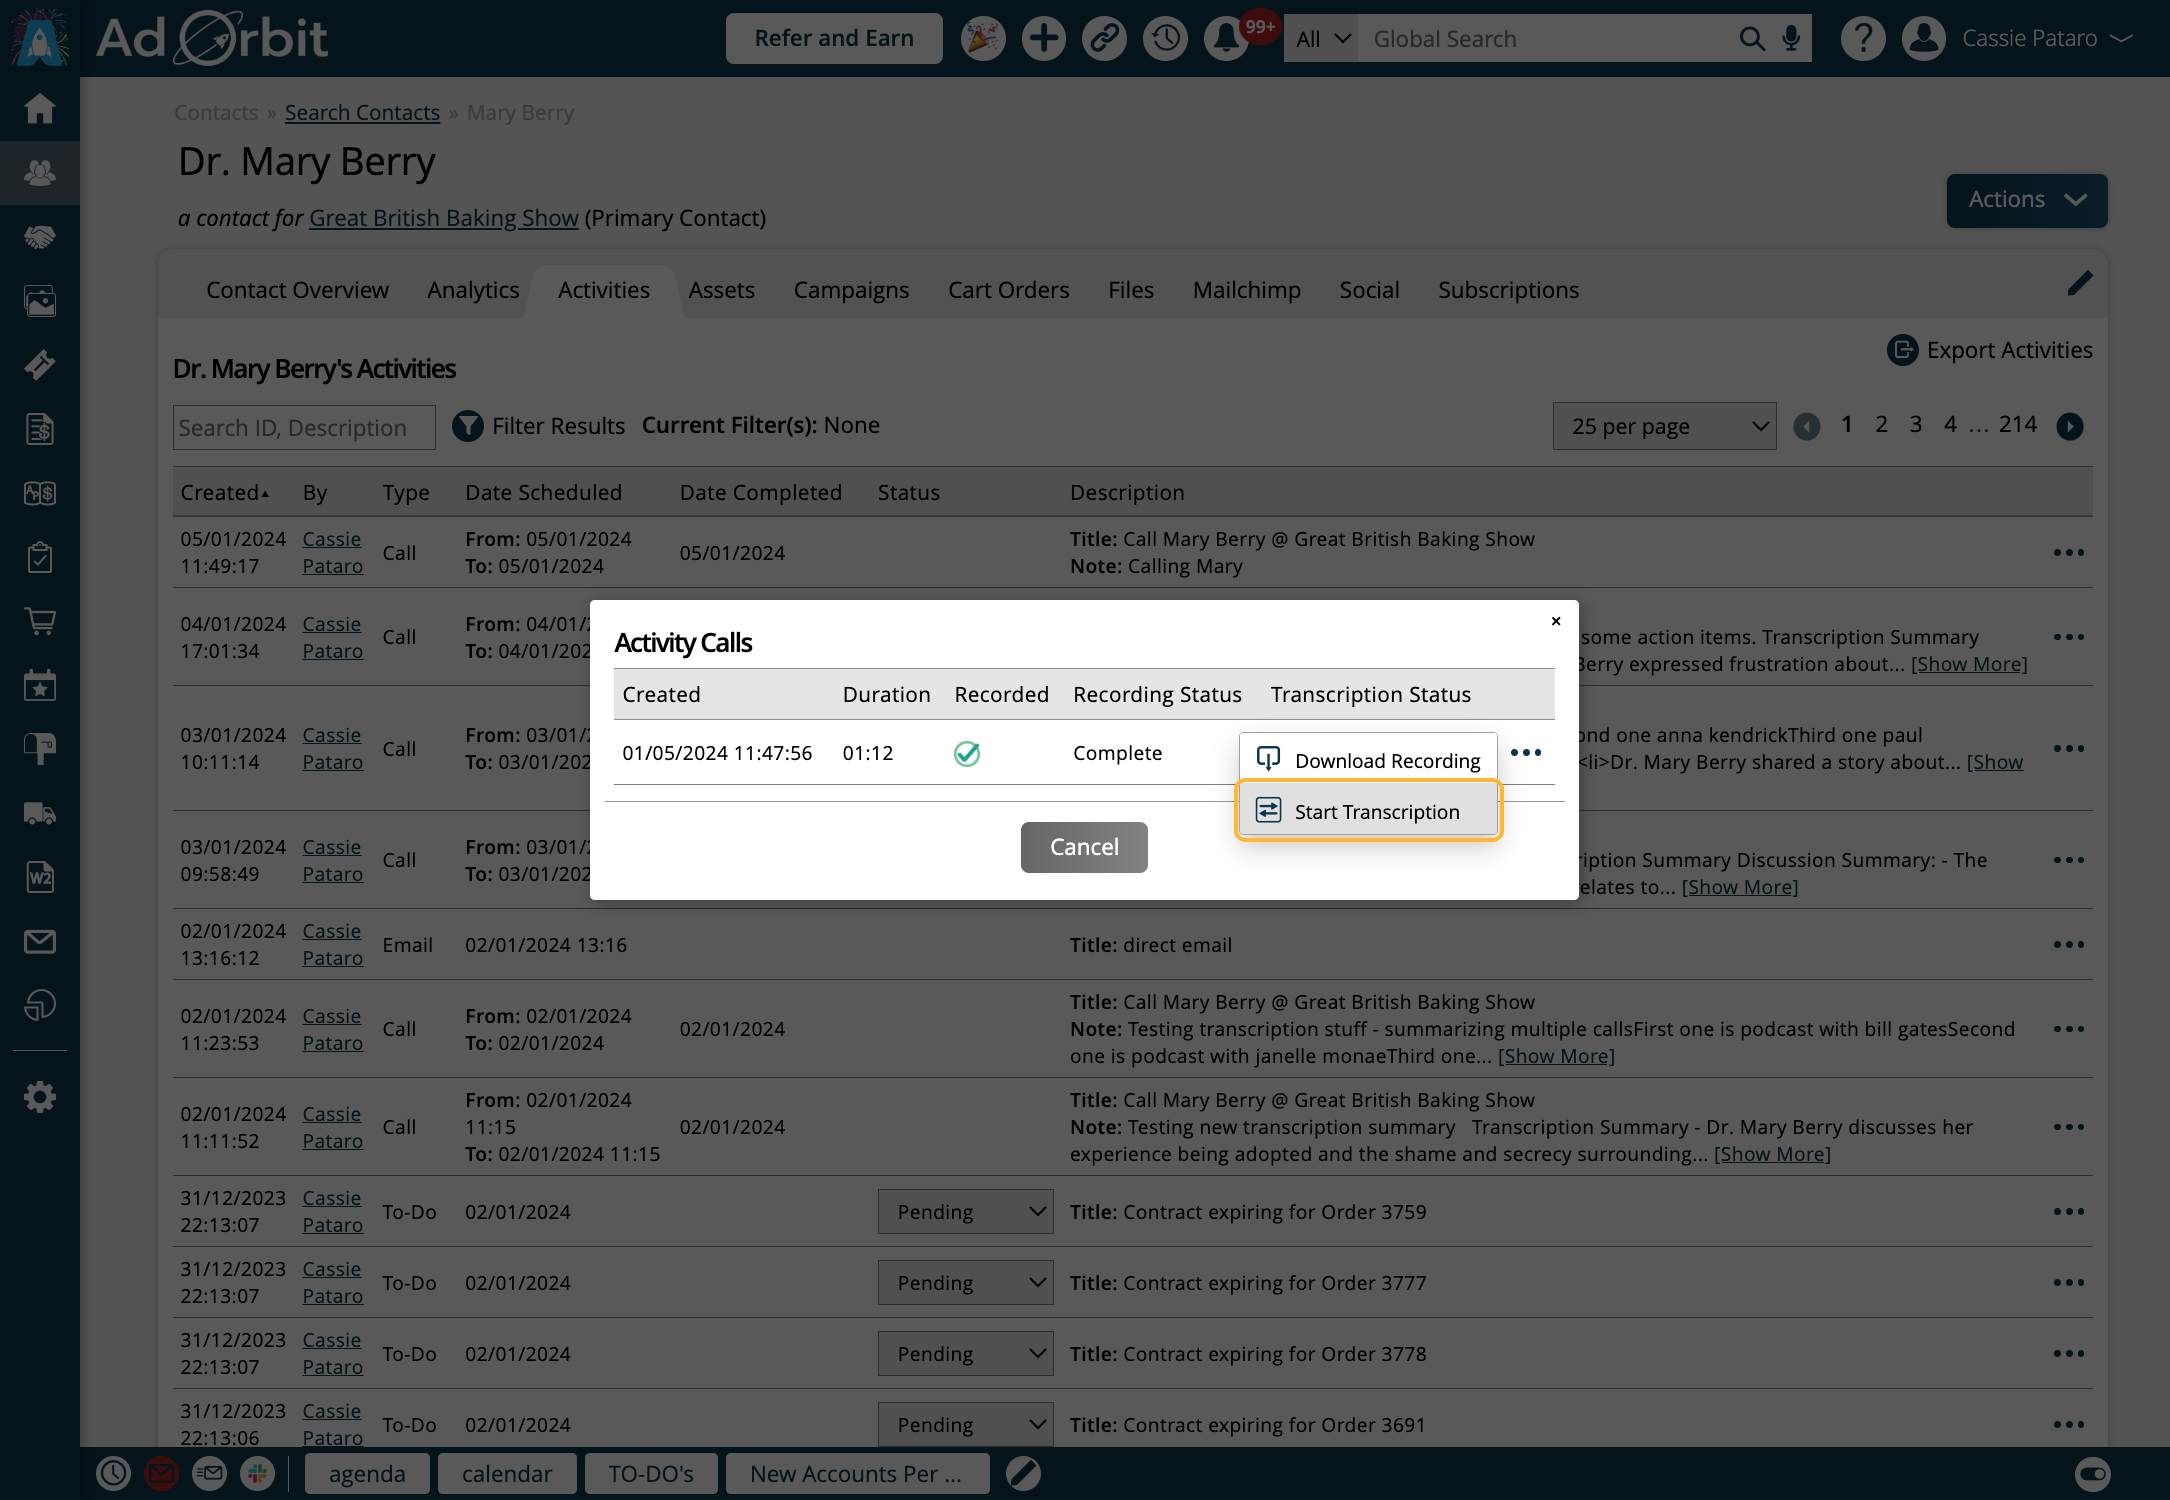
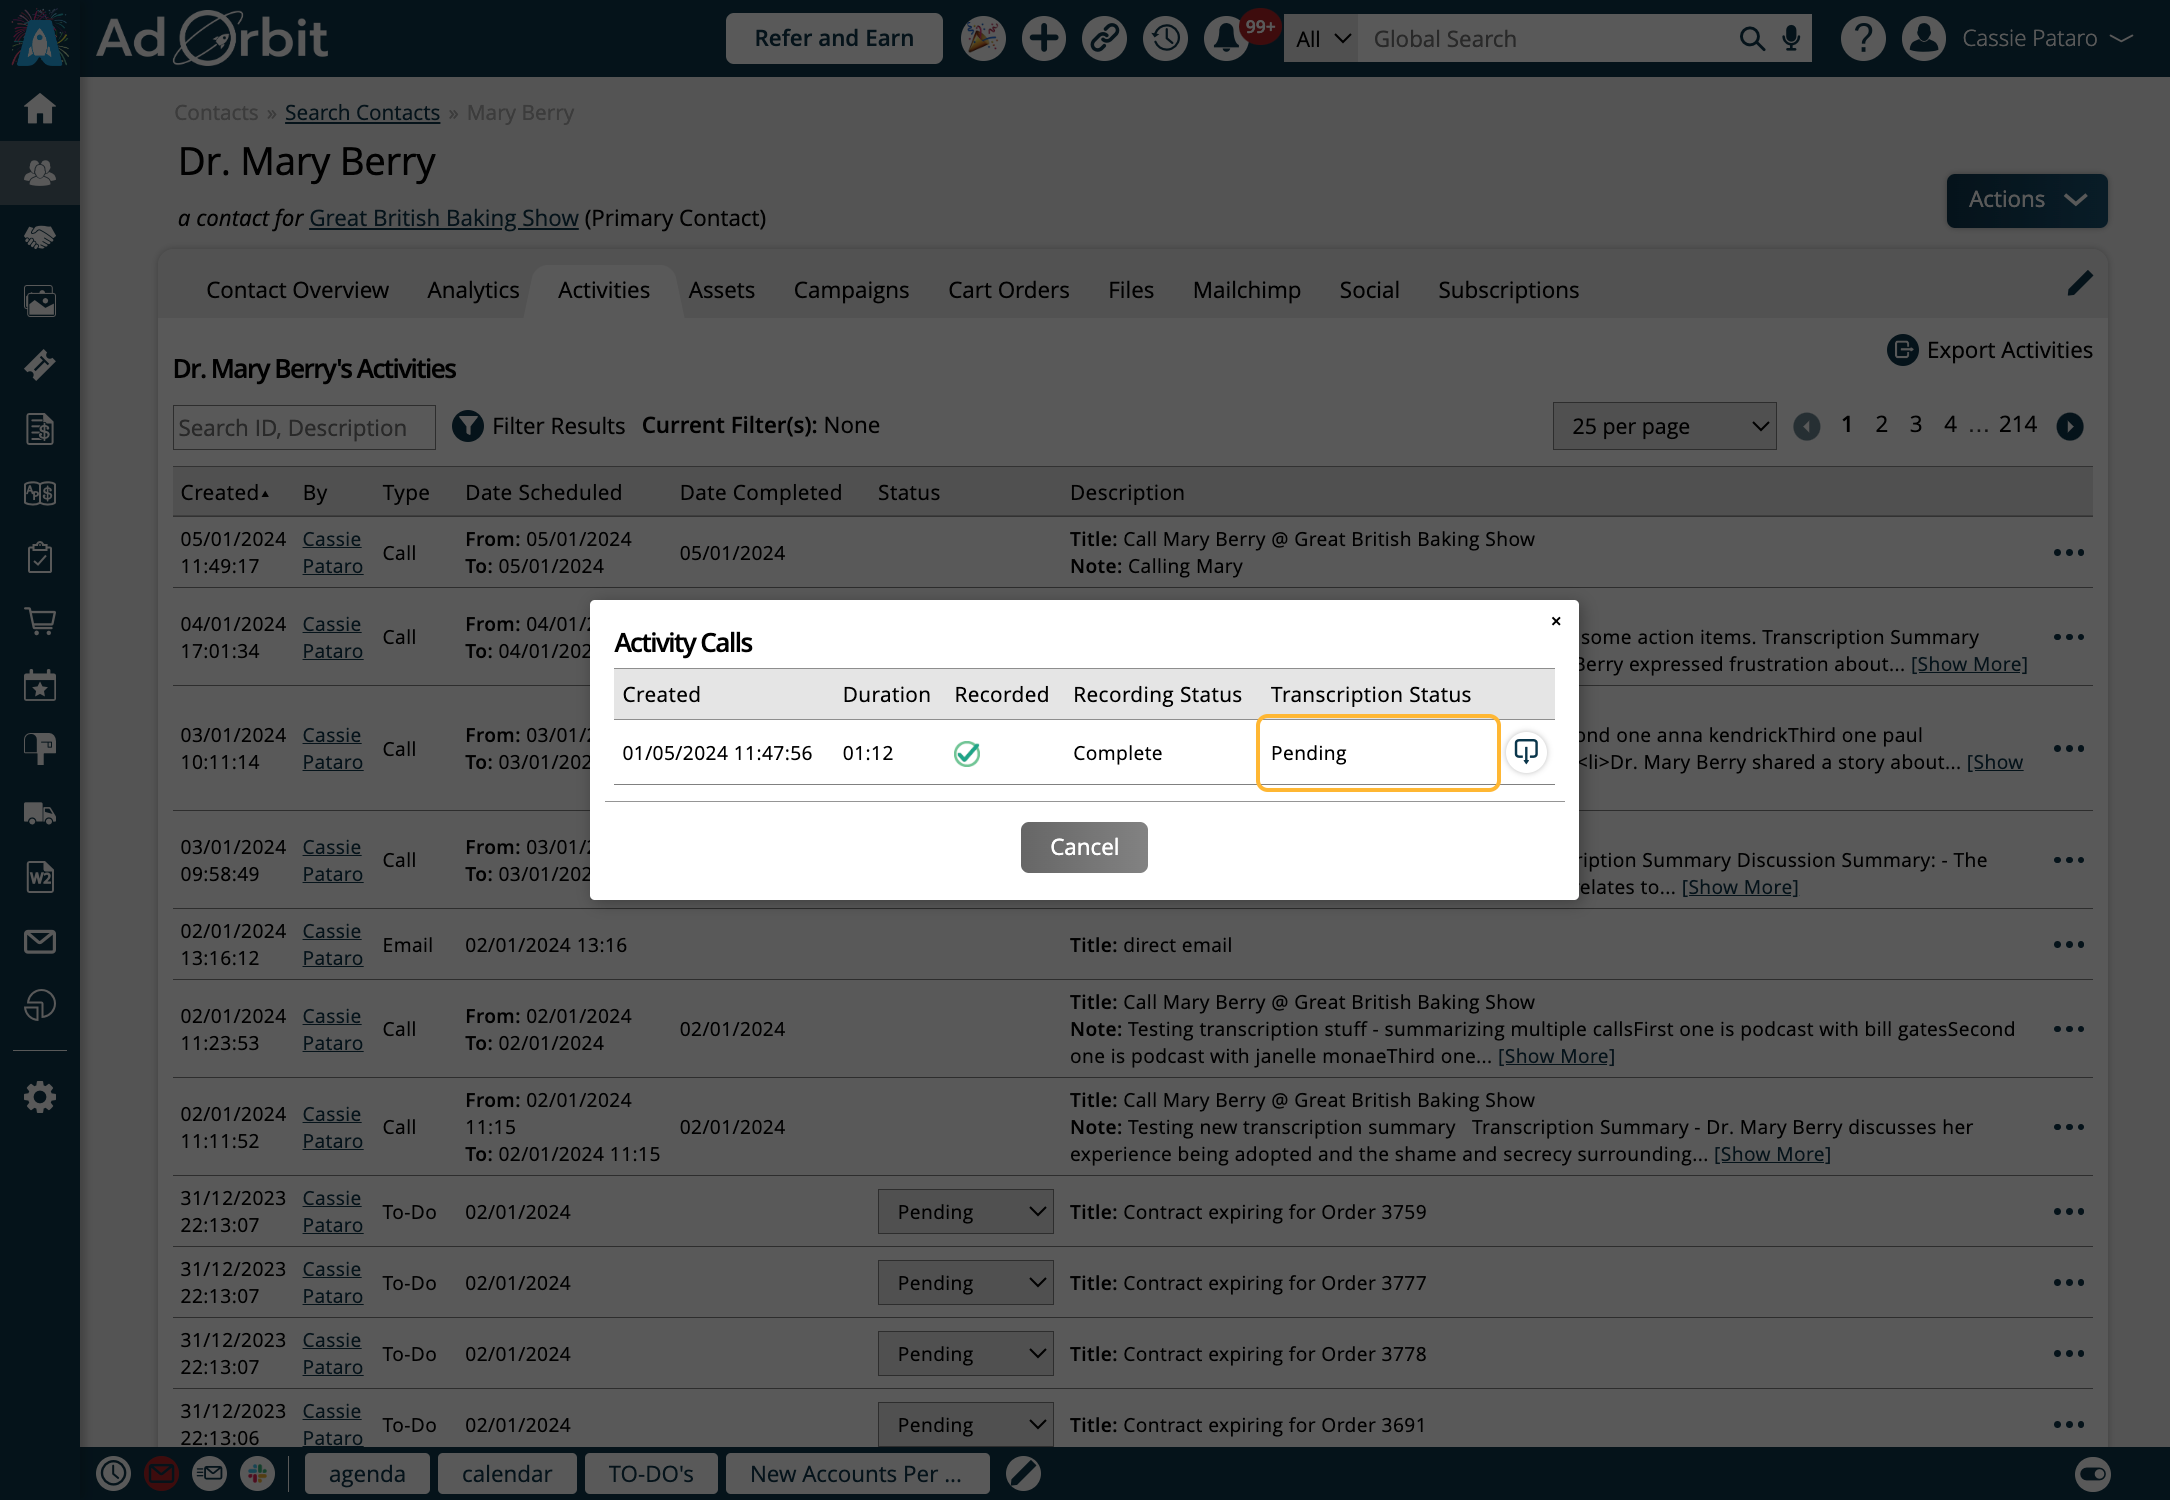
If you checked 'Transcribe Call' in the initial call popup, or you chose to manually 'Start Transcription', you can view the status in the View Calls popup.
A Pending status means the background job to transcribe the call has not started yet but it is queued up.
In Progress means the call is being actively transcribed.
When you see a Complete status, the transcription has finished.
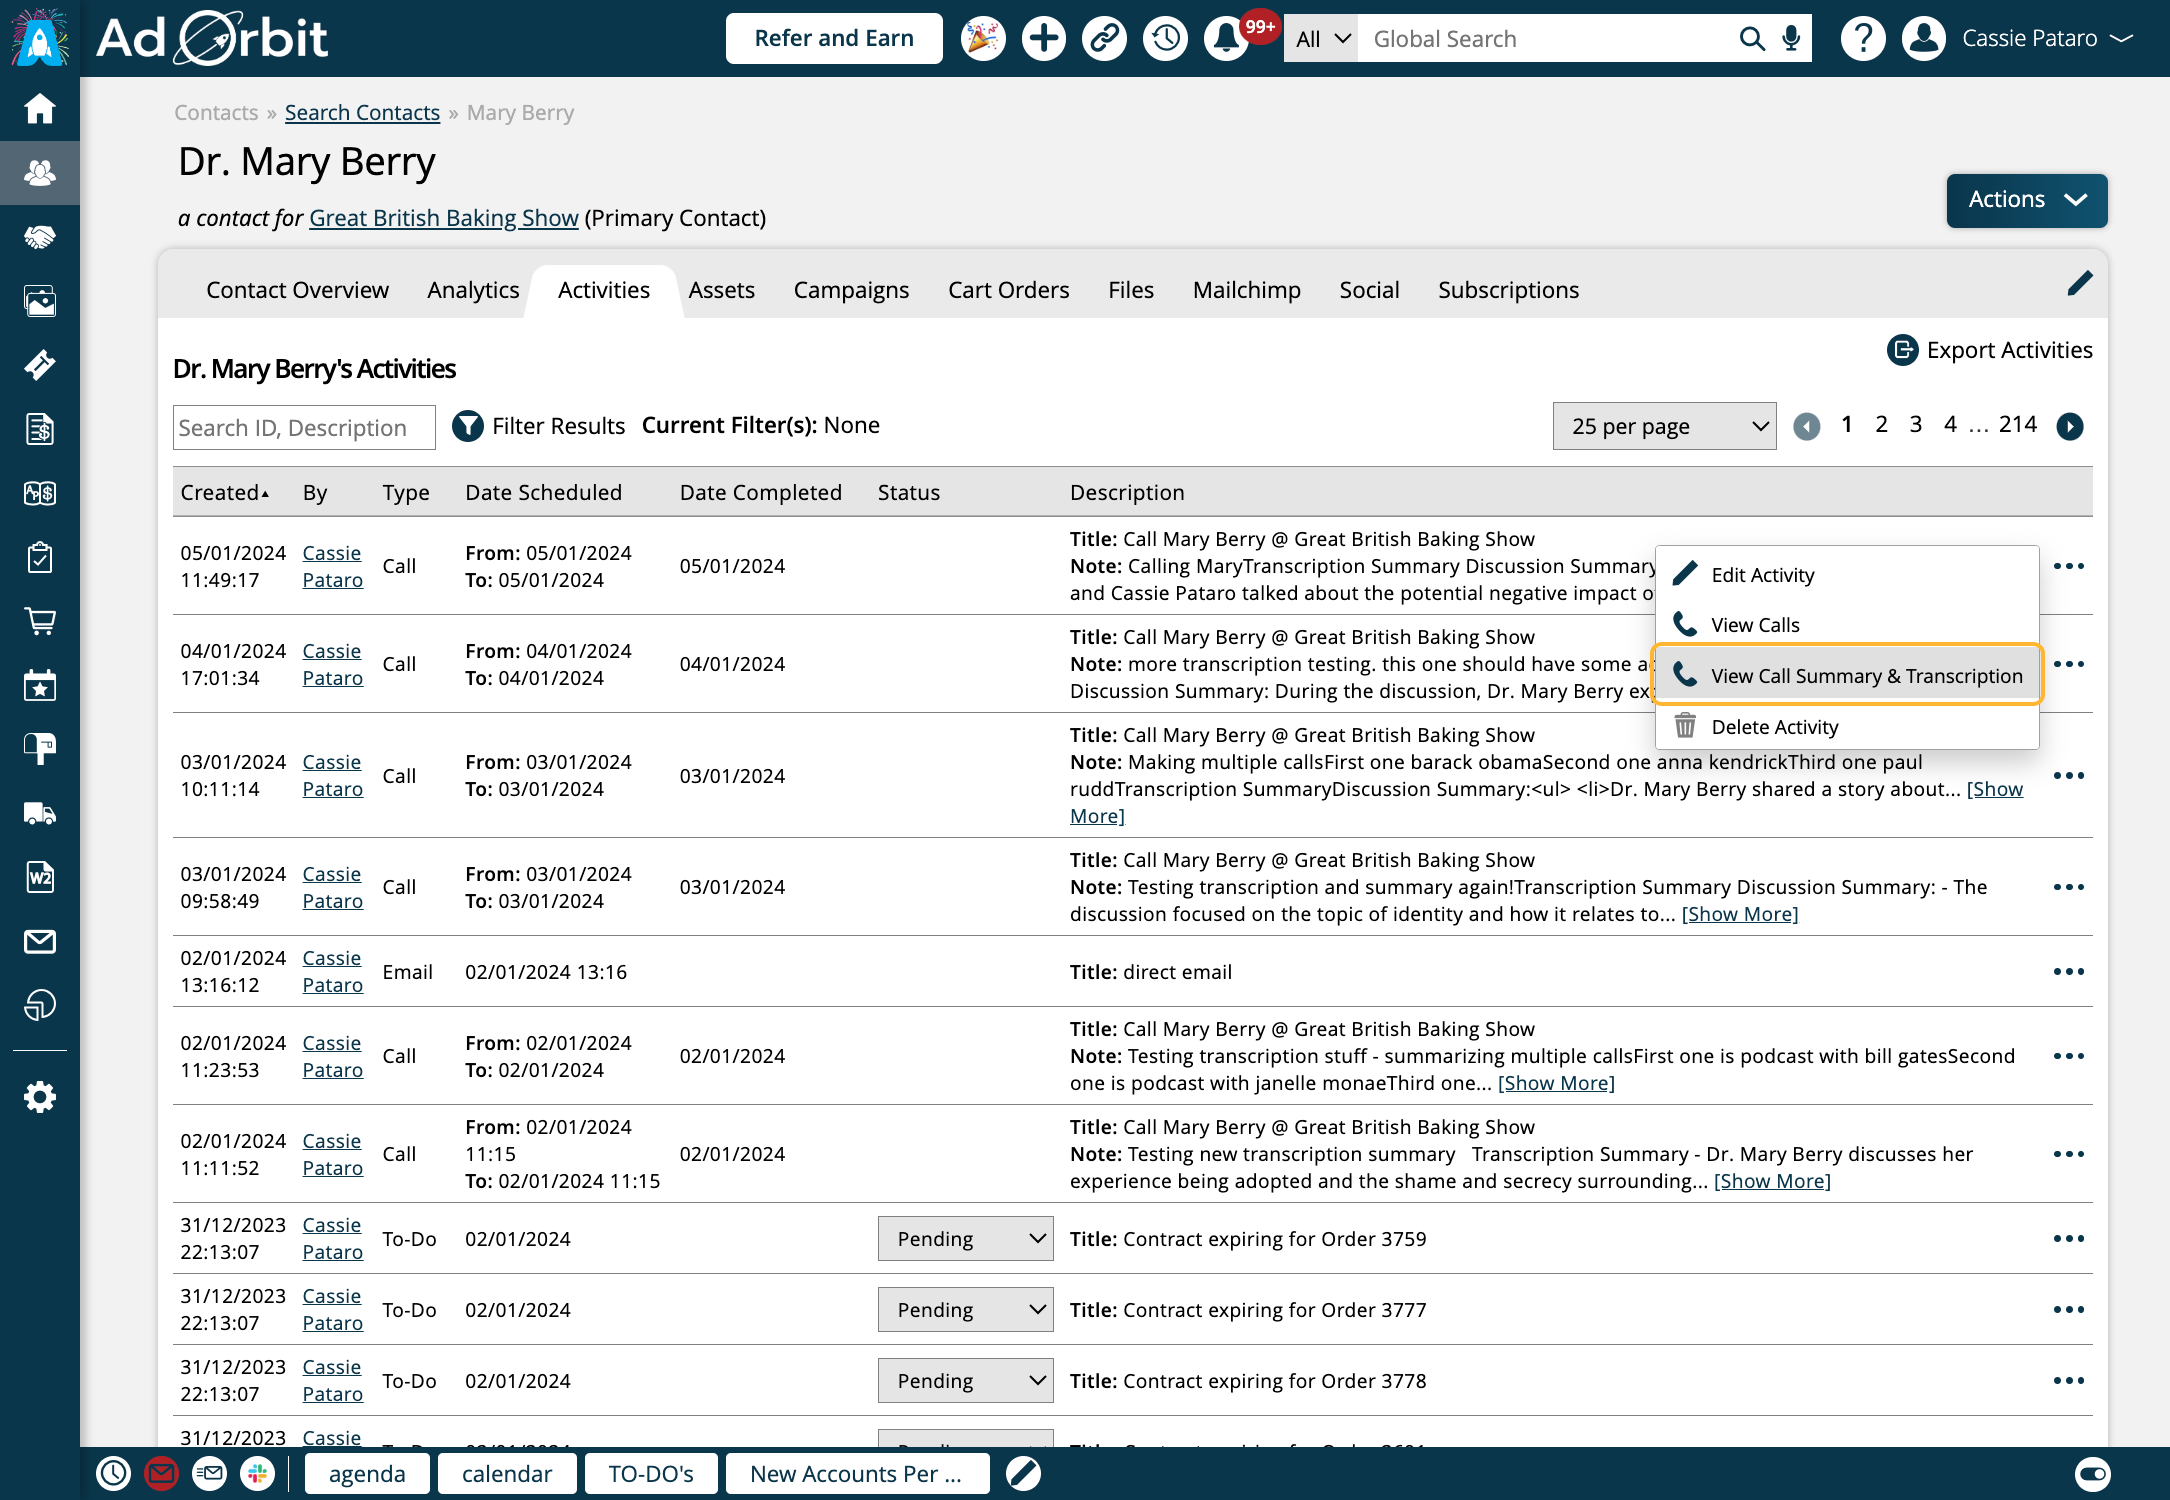
When the transcription is finished, you'll see a new action on the activity called 'View Call Summary and Transcription'.
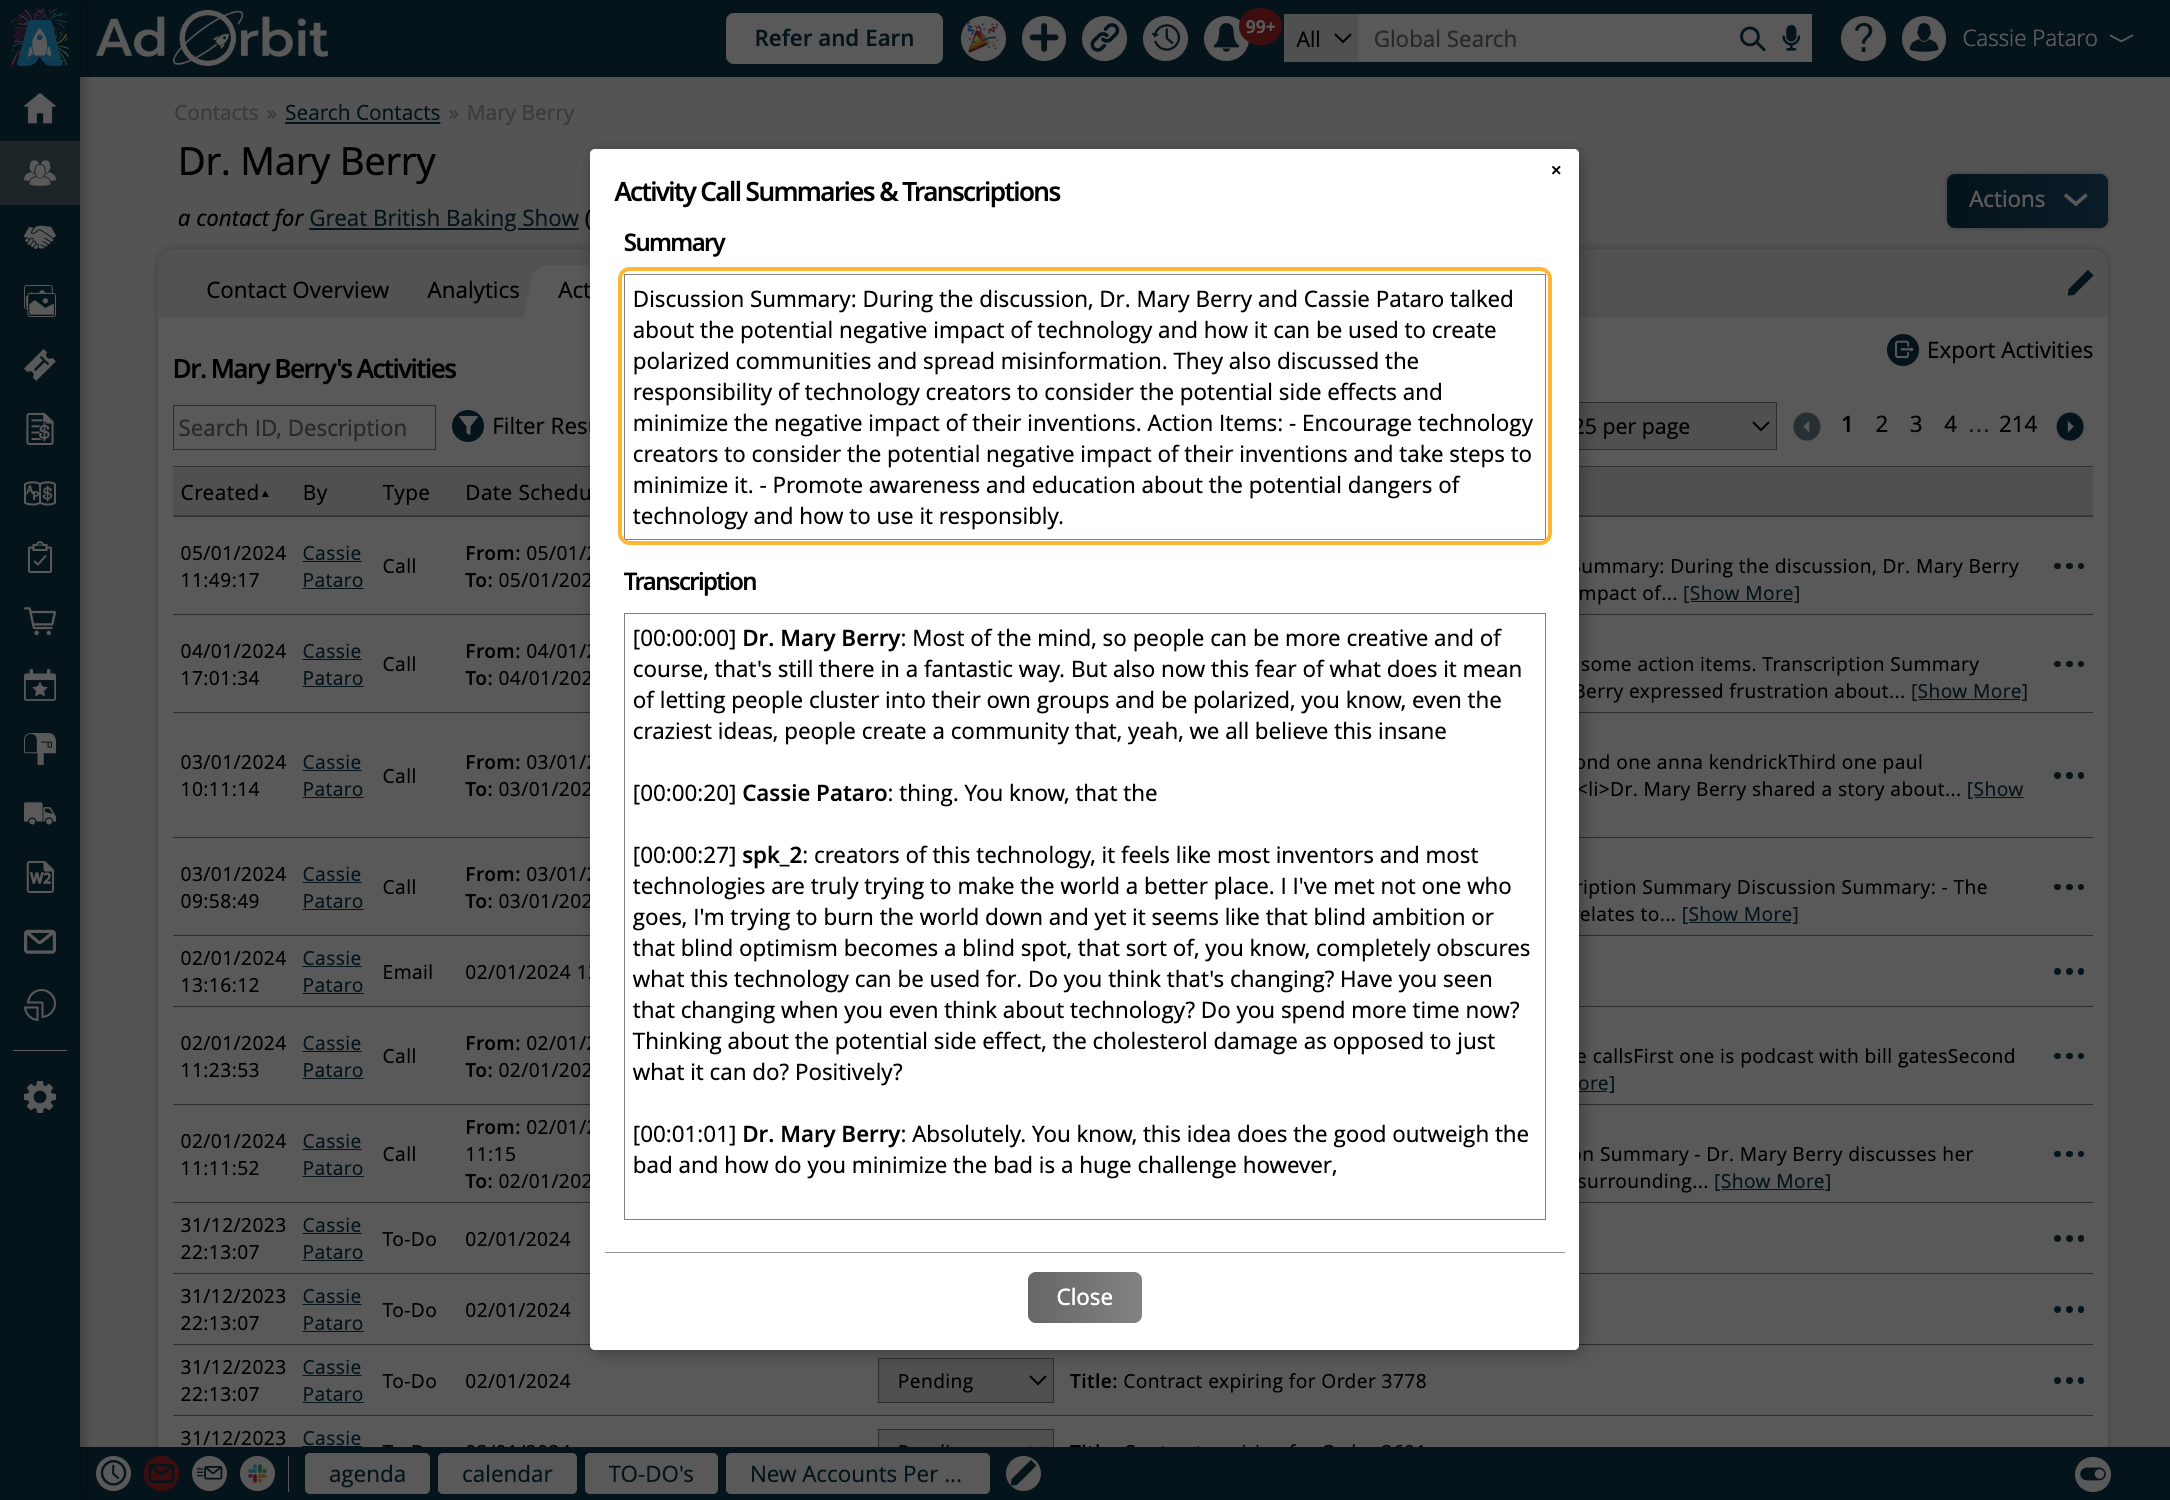
This button opens a popup where you can view the AI generated call summary and transcription. This popup is view-only.
The Summary displays bullet points of the call as well as action items. And the transcription will display the call written out in its entirety.
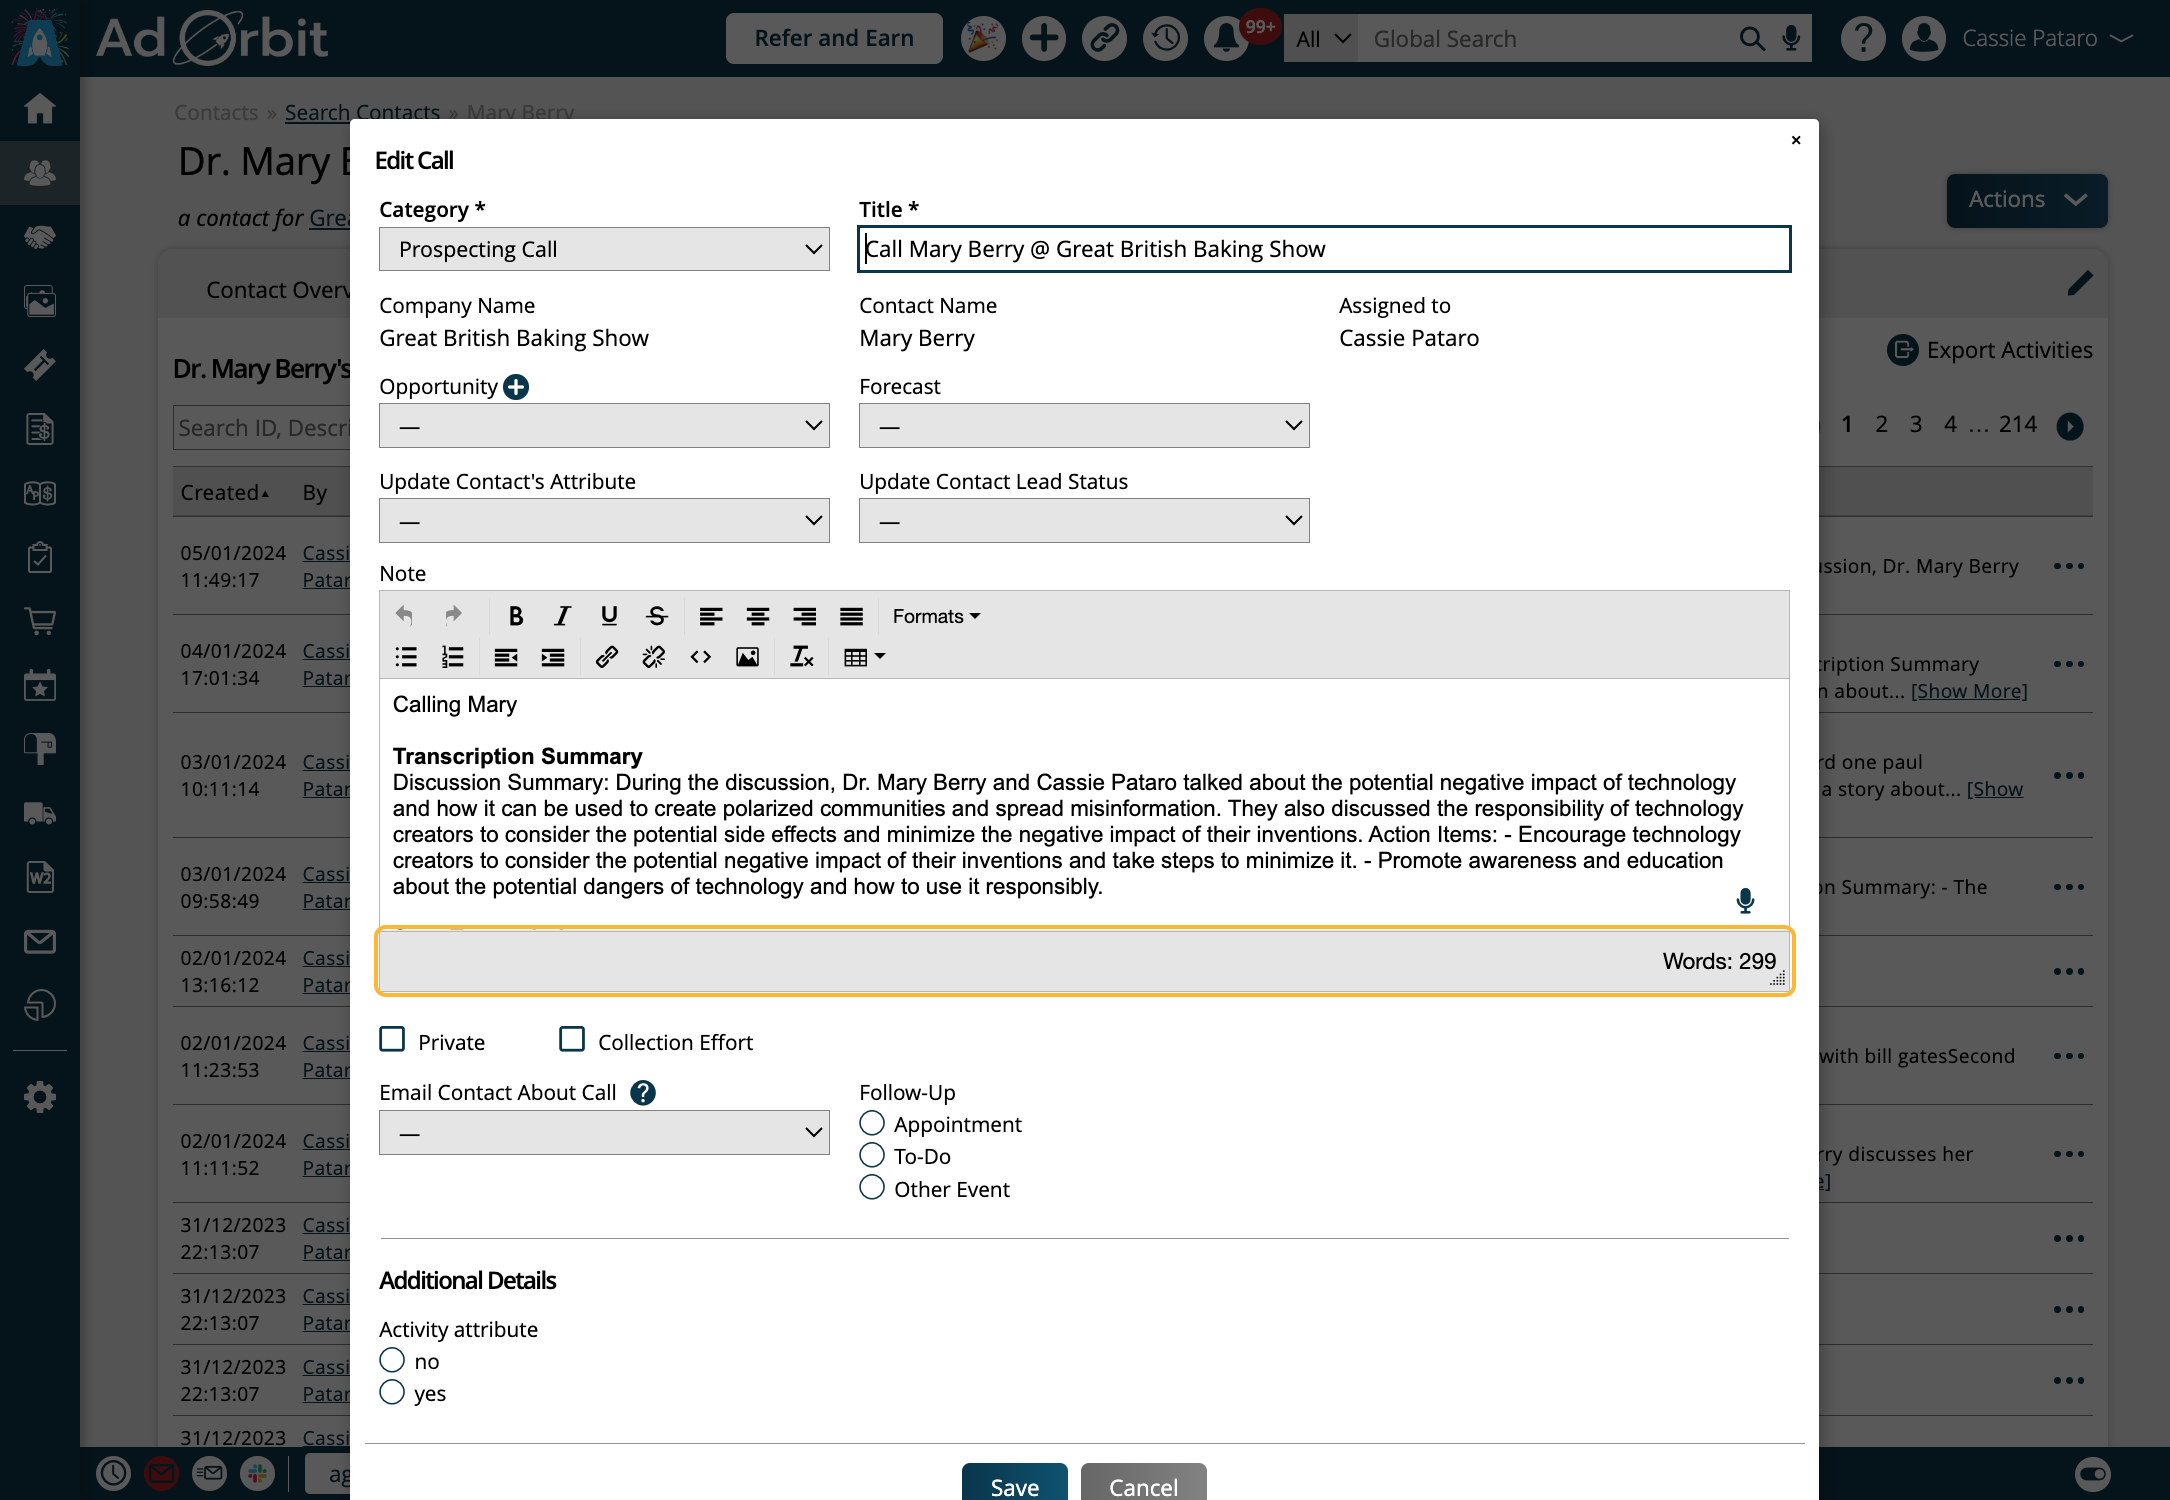
The summary and transcription can also be viewed in the Edit Activity popup. Here, you can make changes to the summary and transcription as needed, and the original copies will be kept in the 'View Call Summary & Transcription' popup.
New 01/08/2024