Use Ad Hoc Grouping of your Line Items
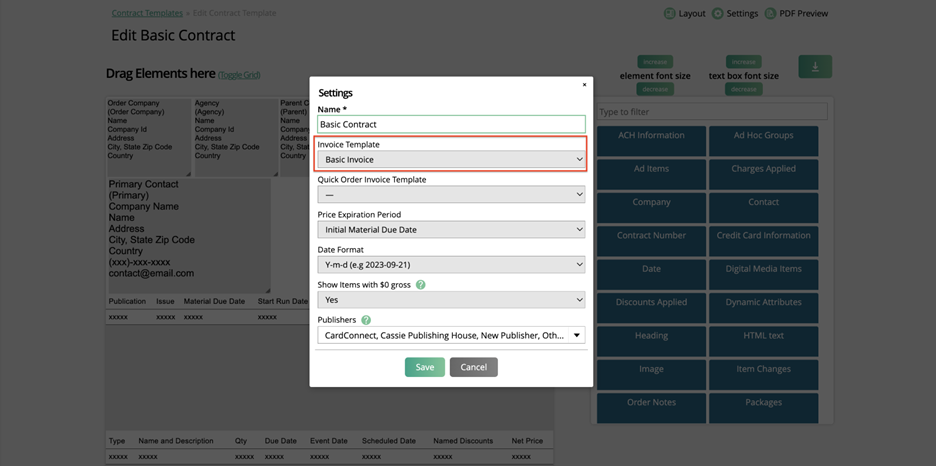
Ad Hoc Groups allow you to select line items on a pending order that you want to show together on a contract and invoice. You must add the Ad Hoc Group element to any contract template or invoice template for your Ad Hoc Groups to show up.
Add the Ad Hoc Group element to any Contract and Invoice template. If you want to invoice your groups together, you must associate an invoice template with your contract template.

To add an Ad Hoc Group to an order, you need the User Permission ‘Allow Ad Hoc Grouping’. Ad Hoc Groups can be added to incomplete and pending orders, and fully approved orders.
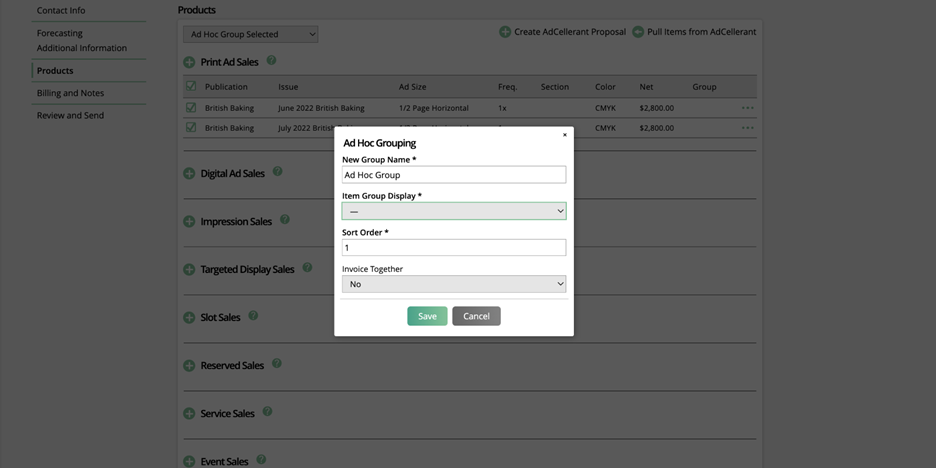
On incomplete or pending orders, you can create Ad Hoc Groups on the Products tab, as long as you have at least one line item. Select the line items you want to group together and use the Bulk Action drop-down and select Ad Hoc Group Selected. There are multiple settings on each group. There are multiple settings on each group.

New Group Name: The group name will display above the group table or as the item name if you use the Single Item display.
Item Group Display: Select the display you want for your group. There are six options to choose from.
Line Item Details w/Line Pricing

Line Item Details w/Group Pricing

Concatenated List w/o Line Item Details w/Group Pricing

Bullet List w/o Line Item Details w/Group Pricing

Single Line Display w/Group Name and Pricing

Service Bundle w/Group Name, Description and Pricing

This display is different from the other options in that it will only work if your group contains only Service products. If there are any Event, Digital Media, or Ad items in your group, it will default to using the ‘Single Line Display w/Group Name and Pricing’ display instead. If only services are included, it will show the name and description of the first product in the group and the group price.
Sort Order: By default, groups will display in the order you create them. You can modify the sort order of each group if you want to re-order how the groups display on the contract template.
Invoice Together: Setting a group to invoice together means that you can’t invoice the individual line items of the order. You must create a group invoice. If you choose to invoice your group together, you can enter an invoice date. The system will not automatically create the invoice. Make sure your contract template has an invoice template assigned to it.
Once your group has been created, you can add it to new line items on your order, or remove it from items if necessary. To edit an item’s group, open the Edit Line Item popup. Here you will see a ‘grouping’ dropdown, which includes a list of your system’s display groups, as well as any Ad Hoc Groups created for the order.
You can also add line items to existing Ad Hoc Groups in bulk by selecting the desired line items, and using the Ad Hoc Group Selected bulk action. In the popup, you will be able to either create a new group, or add the items to an existing group.
There is also the option to add or edit Ad Hoc Groups on fully approved orders. To manage these Ad Hoc Groups, go to the company’s orders tab.
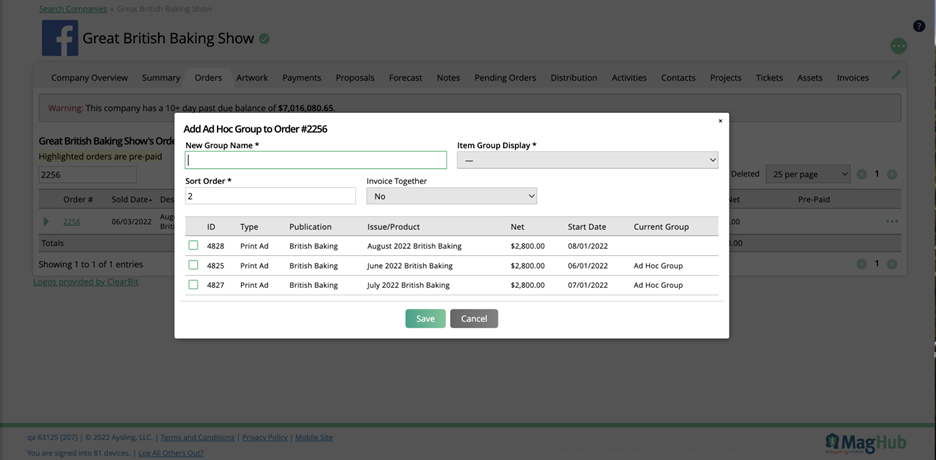
To create a new Ad Hoc Group, use the ellipsis icon on the order, and select the Add Ad Hoc Group Action.
In the popup, enter a name for the group, and choose how you would like it to display on your contracts. By default, the group’s sort order will be the order the groups are created in, but you can change that by manually entering a sort order.
Like on pending orders, you can also choose whether or not to invoice the group together. Setting a group to invoice together means that you can’t invoice the individual line items of the order. You must create a group invoice. If you choose to invoice your group together, you will need to enter an invoice date.

Important
If the order is on an installment schedule, you cannot set the group to invoice together.
The popup will also show a list of the existing line items on the order that the group can be added to. Each line will show information about the item, including ID, type, net, and the item’s current grouping, if any.
Once your group has been created, you can add it to new line items on your order, or remove it from items if necessary. To edit an item’s group, open the Edit Line Item popup. Here you will see a ‘grouping’ dropdown, which includes a list of your system’s display groups, as well as any Ad Hoc Groups created for the order.
Note
If an ad hoc group has already been invoiced, it cannot be added to any new items or removed from items. Similarly, if a line item has been invoiced, no changes can be made to its grouping.
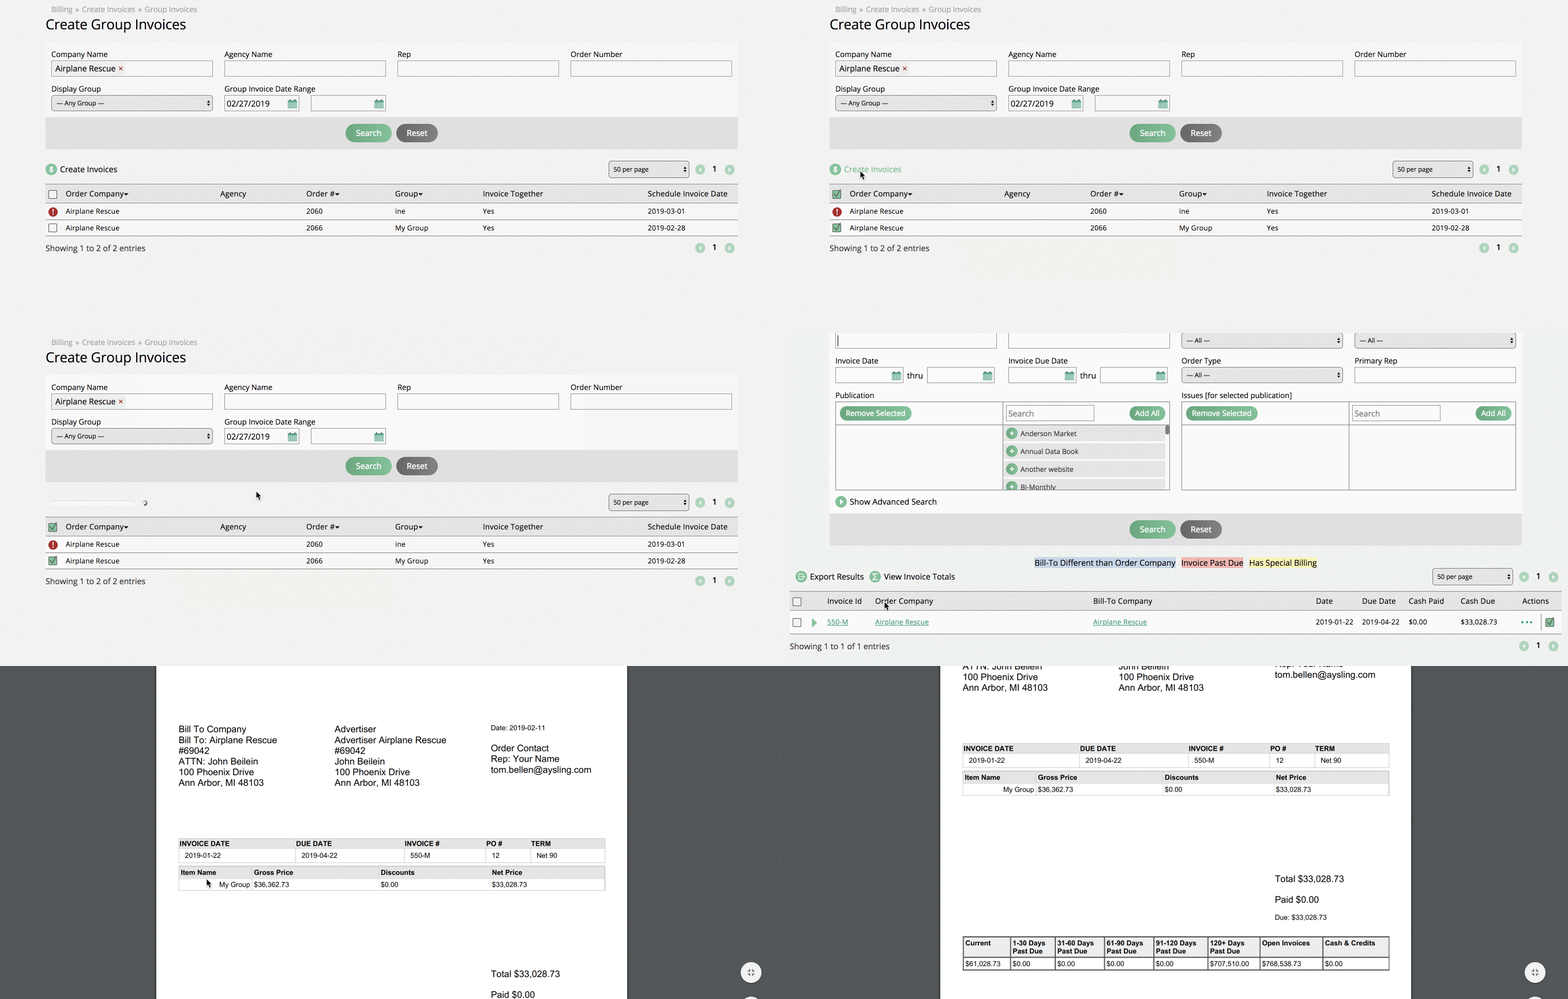
Assuming you set your Ad Hoc Group to invoice together, you can go to Billing > Invoices and click Create New Invoice, then Create Group Invoices, or use the plus icon on the main menu to create your invoice. Only one group will show up on your group invoice. Make sure you have the Ad Hoc Groups element on your invoice template. If you created an installment on your order, you will not be able to create any group invoices.
Select the group(s) you want to invoice and click Create Invoices.

Updated 8/5/22