Route Sheets
Once you have gone through the required distribution module set up, you can create your locations, routes, and route sheets. The easiest workflow is to first review and set up your routes, create a location, then create a route sheet.
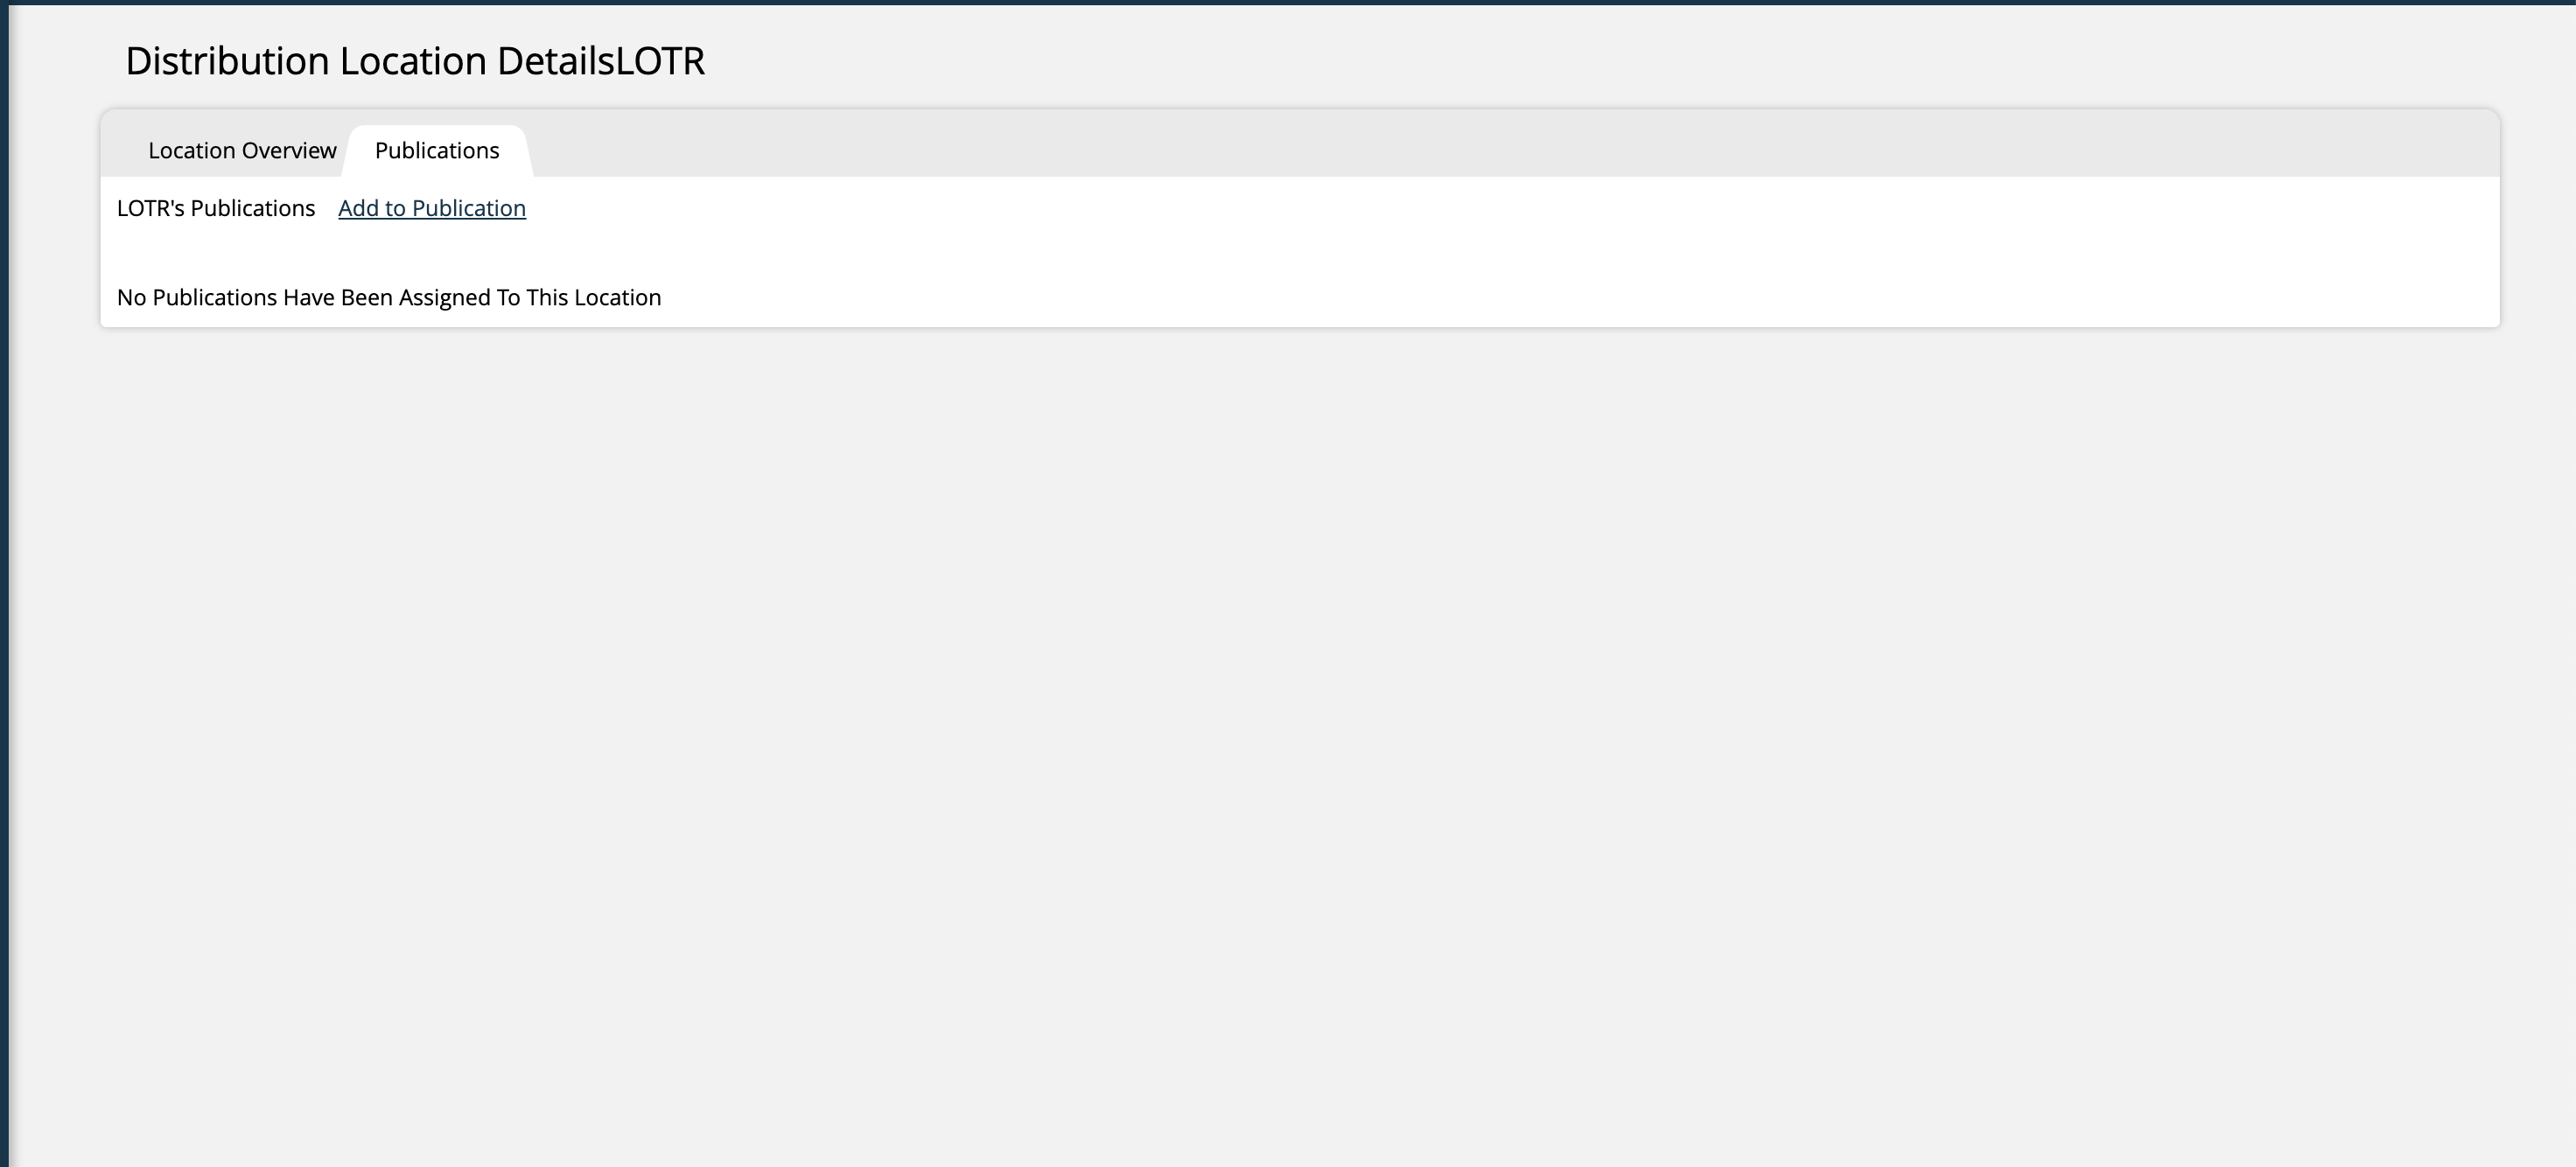
The next step after creating your locations is to generate a route sheet. To do this, go to a Location Overview page, and click on the Publications tab. Click the Add to Publication button.
Tip
Brand new Route Sheets must be created from the Publications tab of a Location. However, existing Route Sheets can be managed by going to Distribution > Route Sheets.
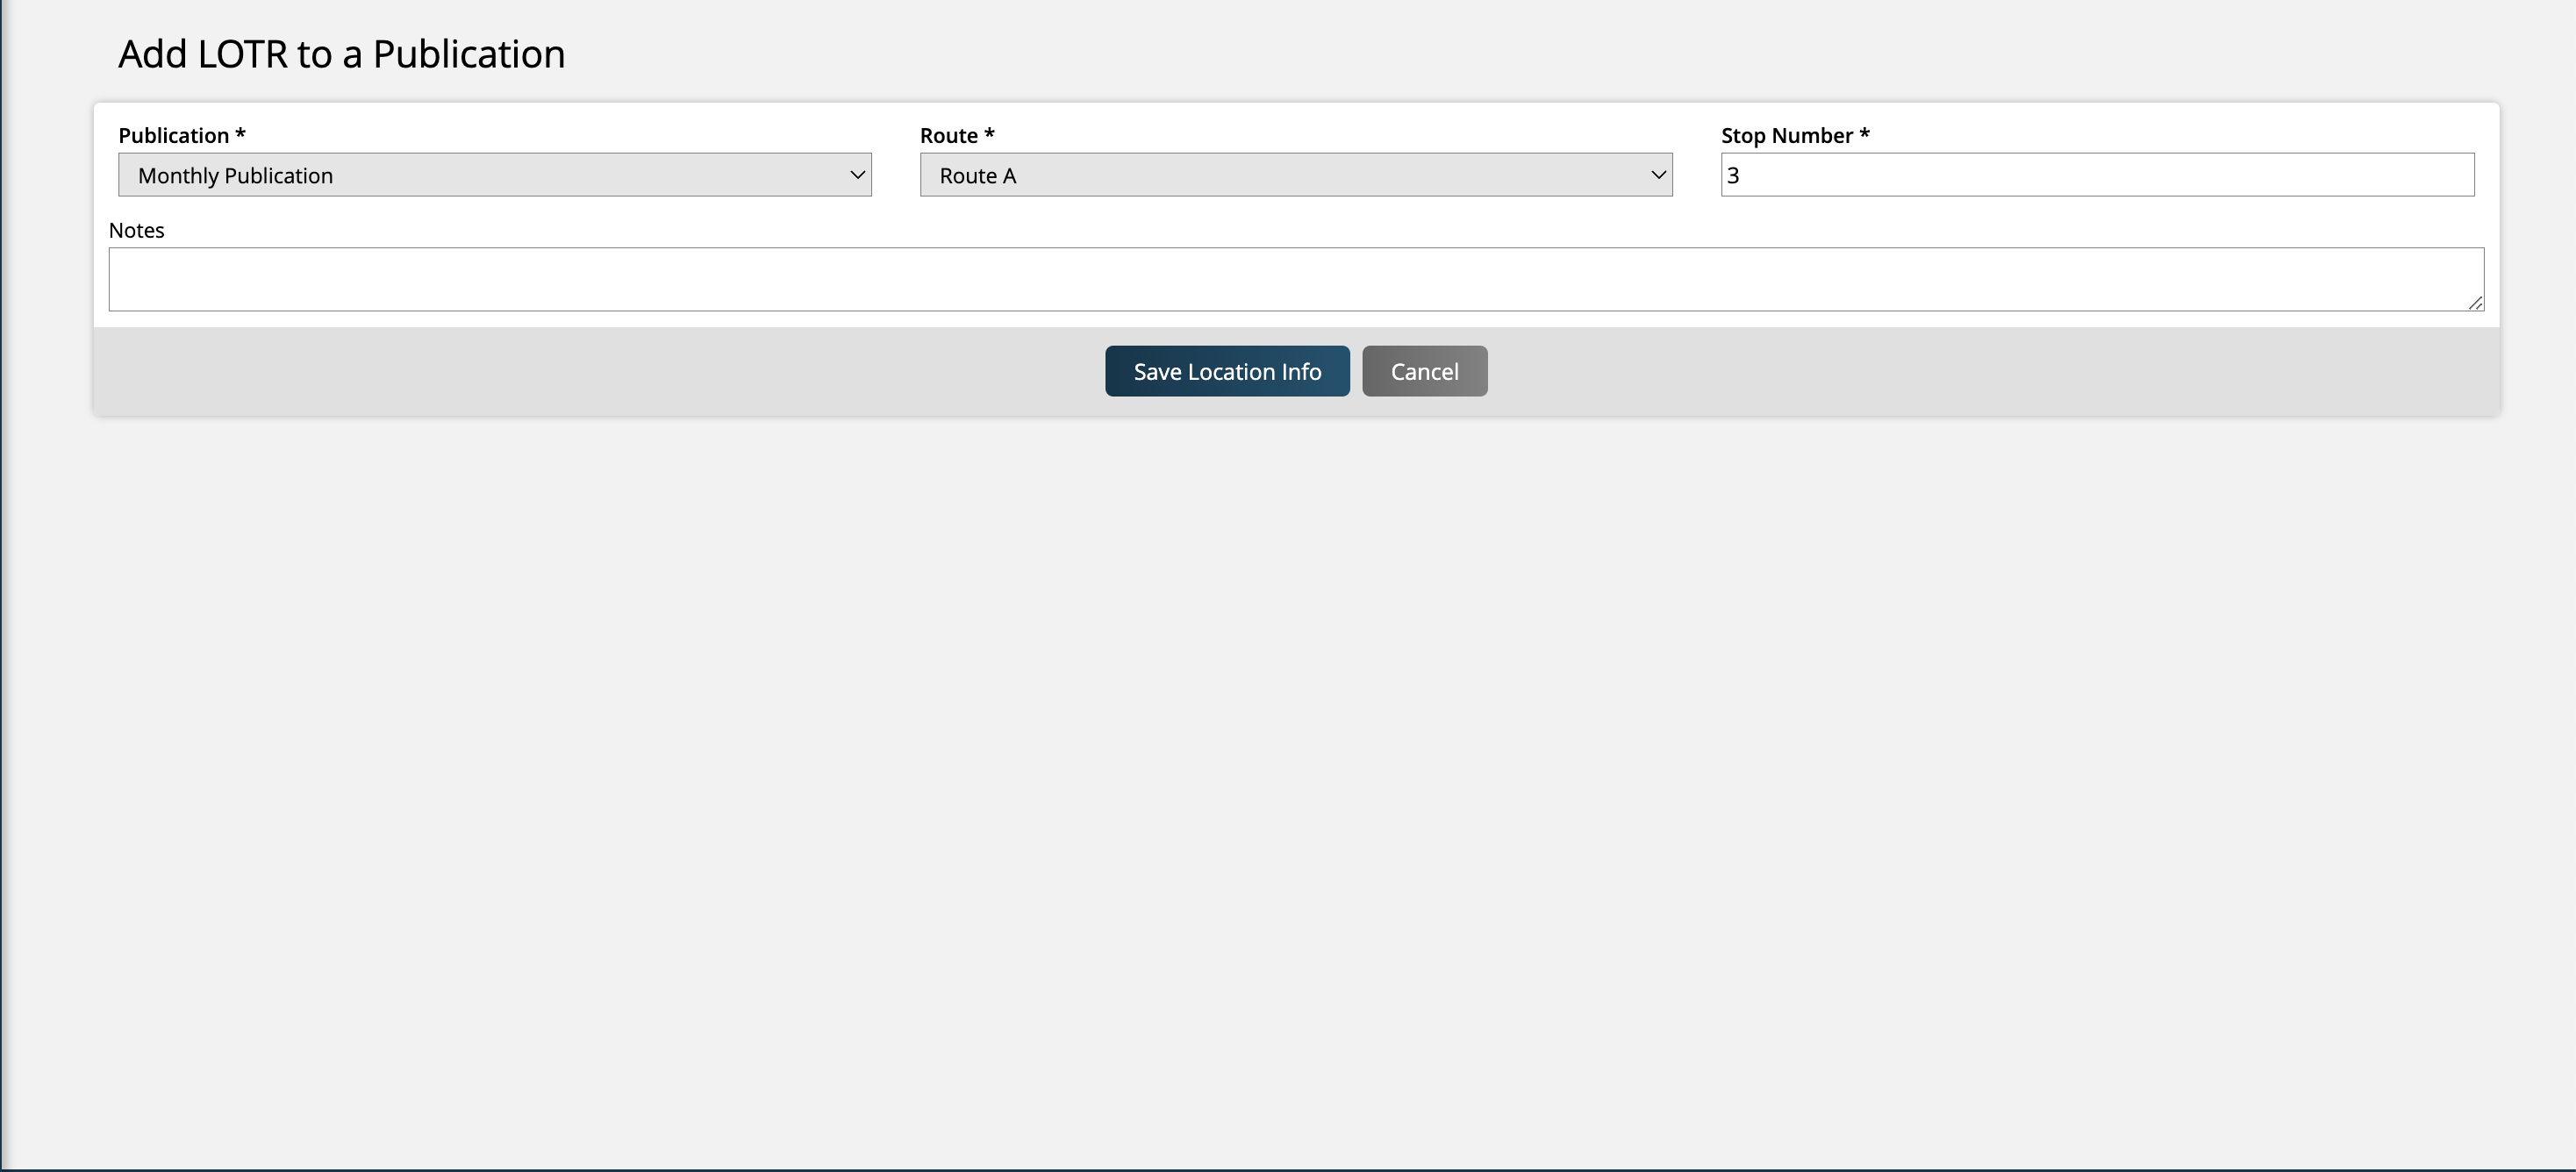
Select the publication, route, and stop number along the route.
Note
If the publication you want is not showing up as an option, it means you need to add a zip code to the publication’s Distribution Center field. Go to Settings > Products > Publication & Issue Setup, and edit your publication to add this information.
Once you click 'Save Location Info', you will see your Route Sheet where you can enter drop off information. There are a few ways to do this – on the calendar tab, which lets you add drop off information for individual dates, by using the bulk creation tab, or by copying distribution dates.
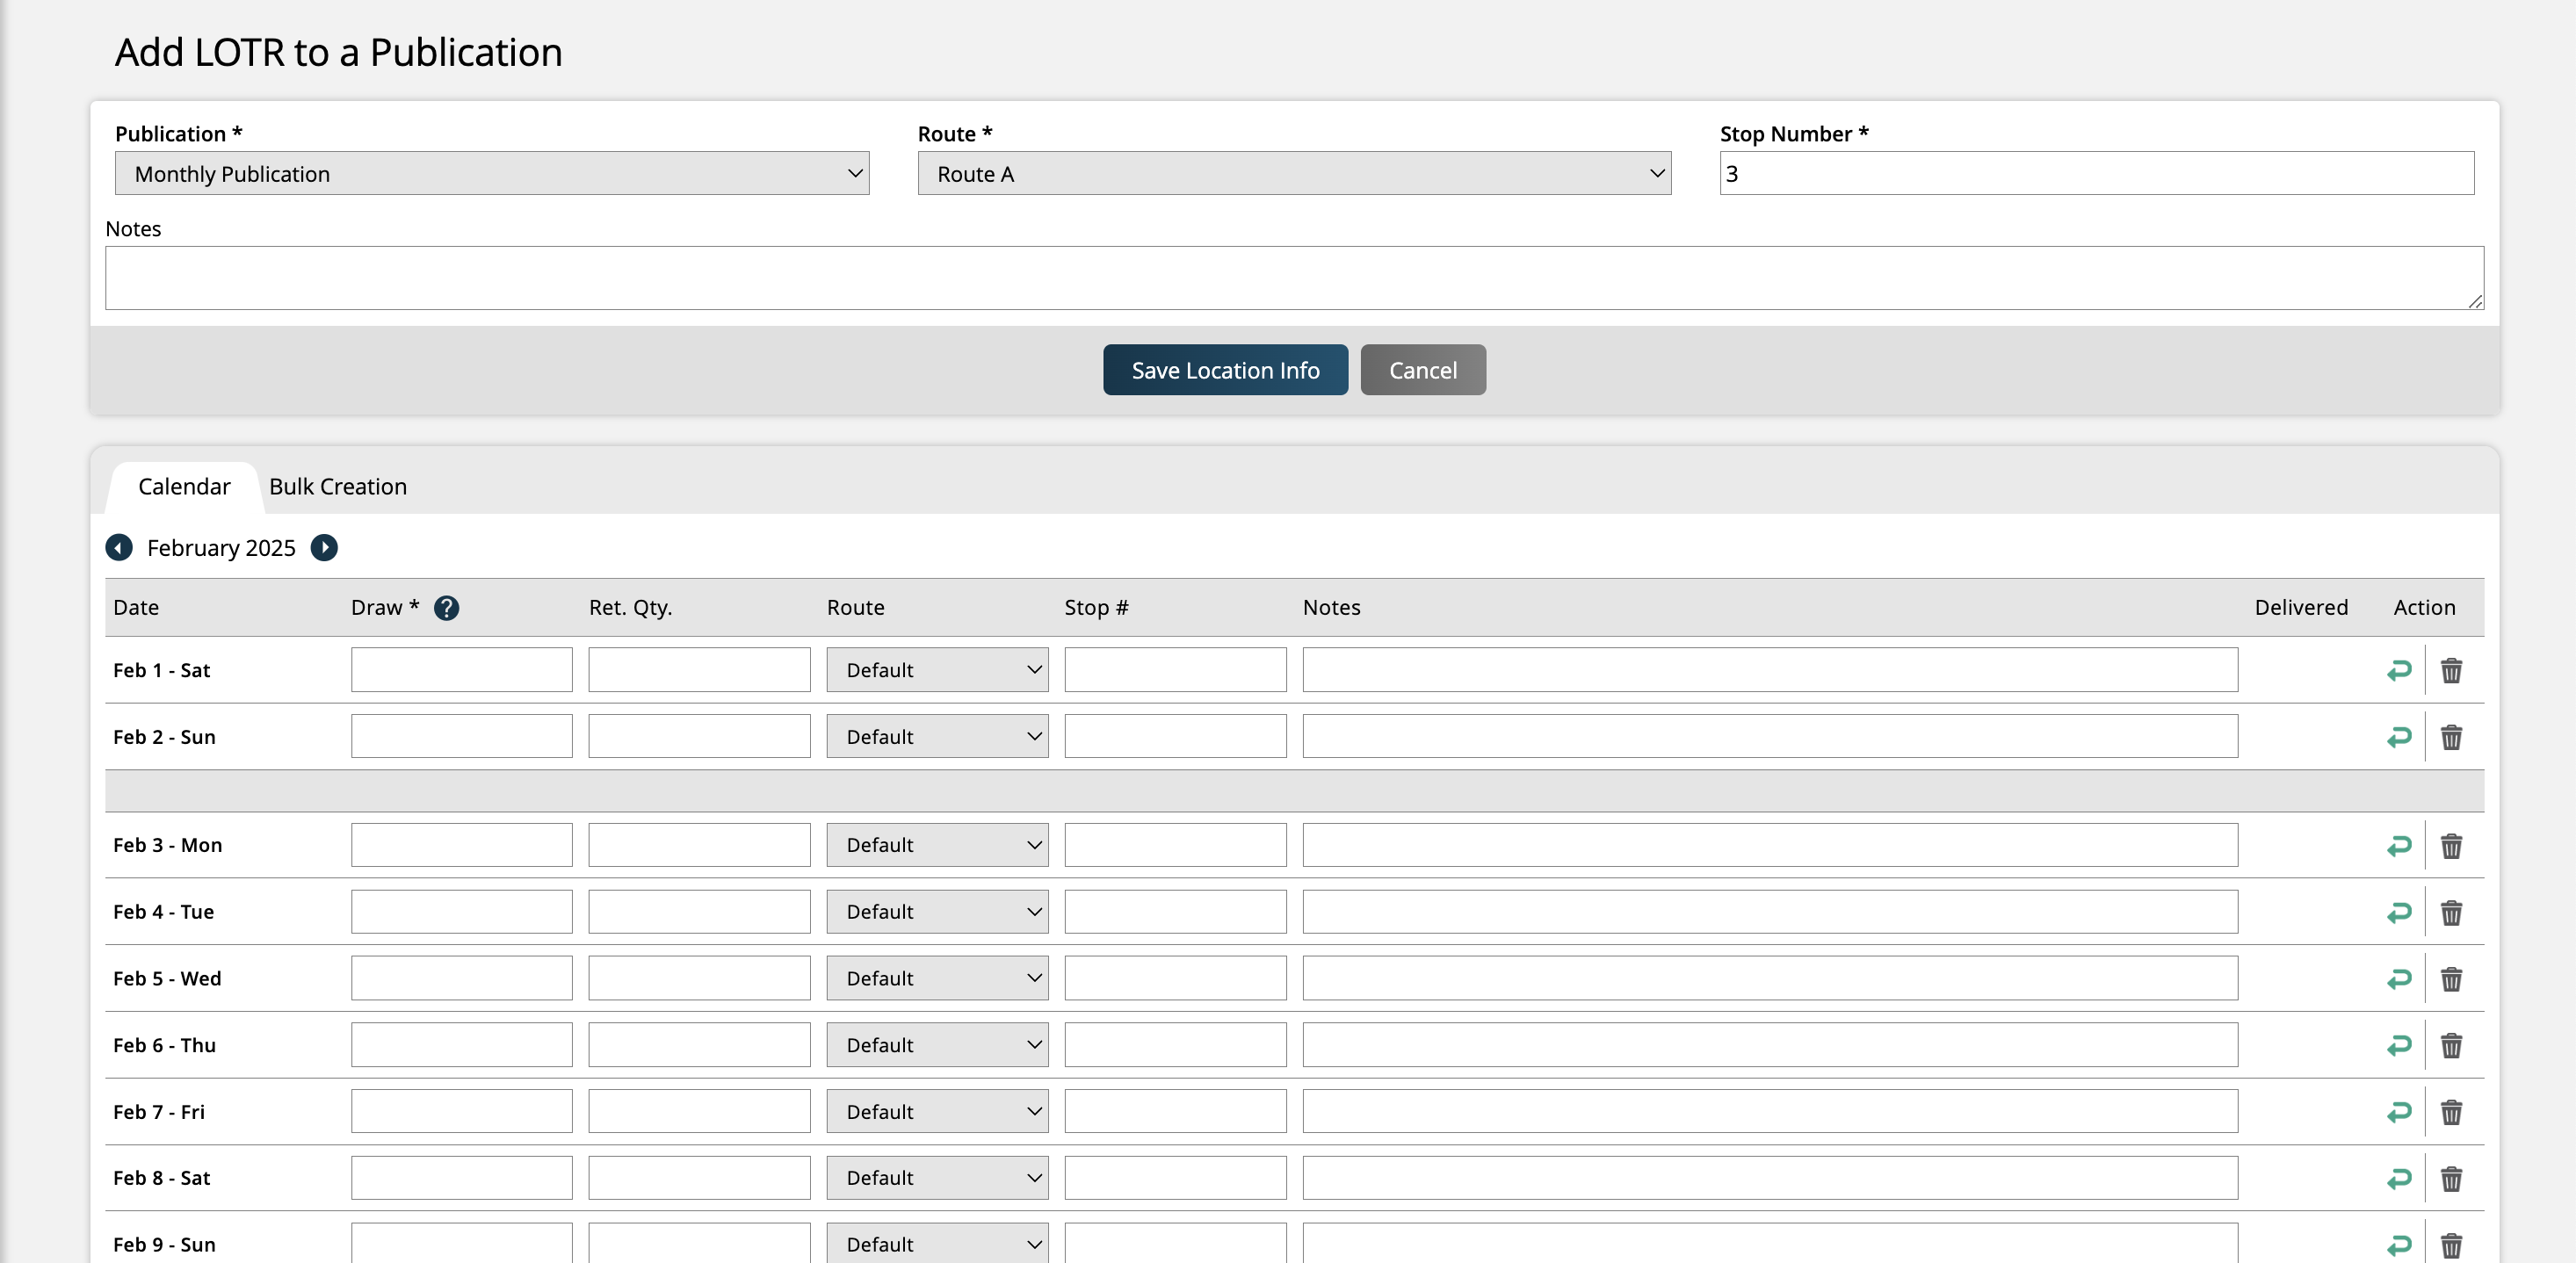
Calendar
When using the calendar tab, you can set the draw (number of copies planned to drop off), returned quantity, the route, stop number, and any relevant notes for individual dates.
The returned quantity is how much of the last issue was returned.
By default, you will see the current month’s dates, but you can scroll between months to change other months’ drop off information.
Bulk Creation
To set bulk drop off information, enter the year, day of the month (1-31), and the draw (number of copies planned to drop off) into the Master Values row. You can also set the returned quantity, route, stop number, and relevant notes if you wish. Click Apply.
Once applied, the values set in the Master Values fields will show up for each month under the Import Values fields. Check the boxes next to the month you wish the information to apply to, and click Save Dates at the bottom of the page. The master values will only be applied to the months you checked off.
Copy Distribution Data from Month-to-Month
You can copy your previous month’s distribution data to a future month in bulk. Use this feature to quickly update your routes from month-to-month without having to go into each individual record.
Important
You can't undo the copy action once it is done.
Go to Distribution > Locations and select Copy Distribution Dates.
Select the year and month you want to copy, and then select the month and year you want to copy the dates into.
Before copying the information, you can unmark any routes you don’t want to be copied.
Click on Copy Dates to complete the process.
To manage existing route sheets, go to Distribution > Route Sheets.
Updated 1/24/2025