Creating Your Expense Report
You can generate Expense Reports from Home > My Expenses. Your expenses can be internal expenses, like travel costs, or expenses towards customer projects, which you can mark as billable to the client.
The system uses expense Classes, Groups and Accounts to track company expenses for accounting purposes, so prior to using the expense system, make sure to set up your Classes, Groups and Accounts by navigating to Settings > Payables.
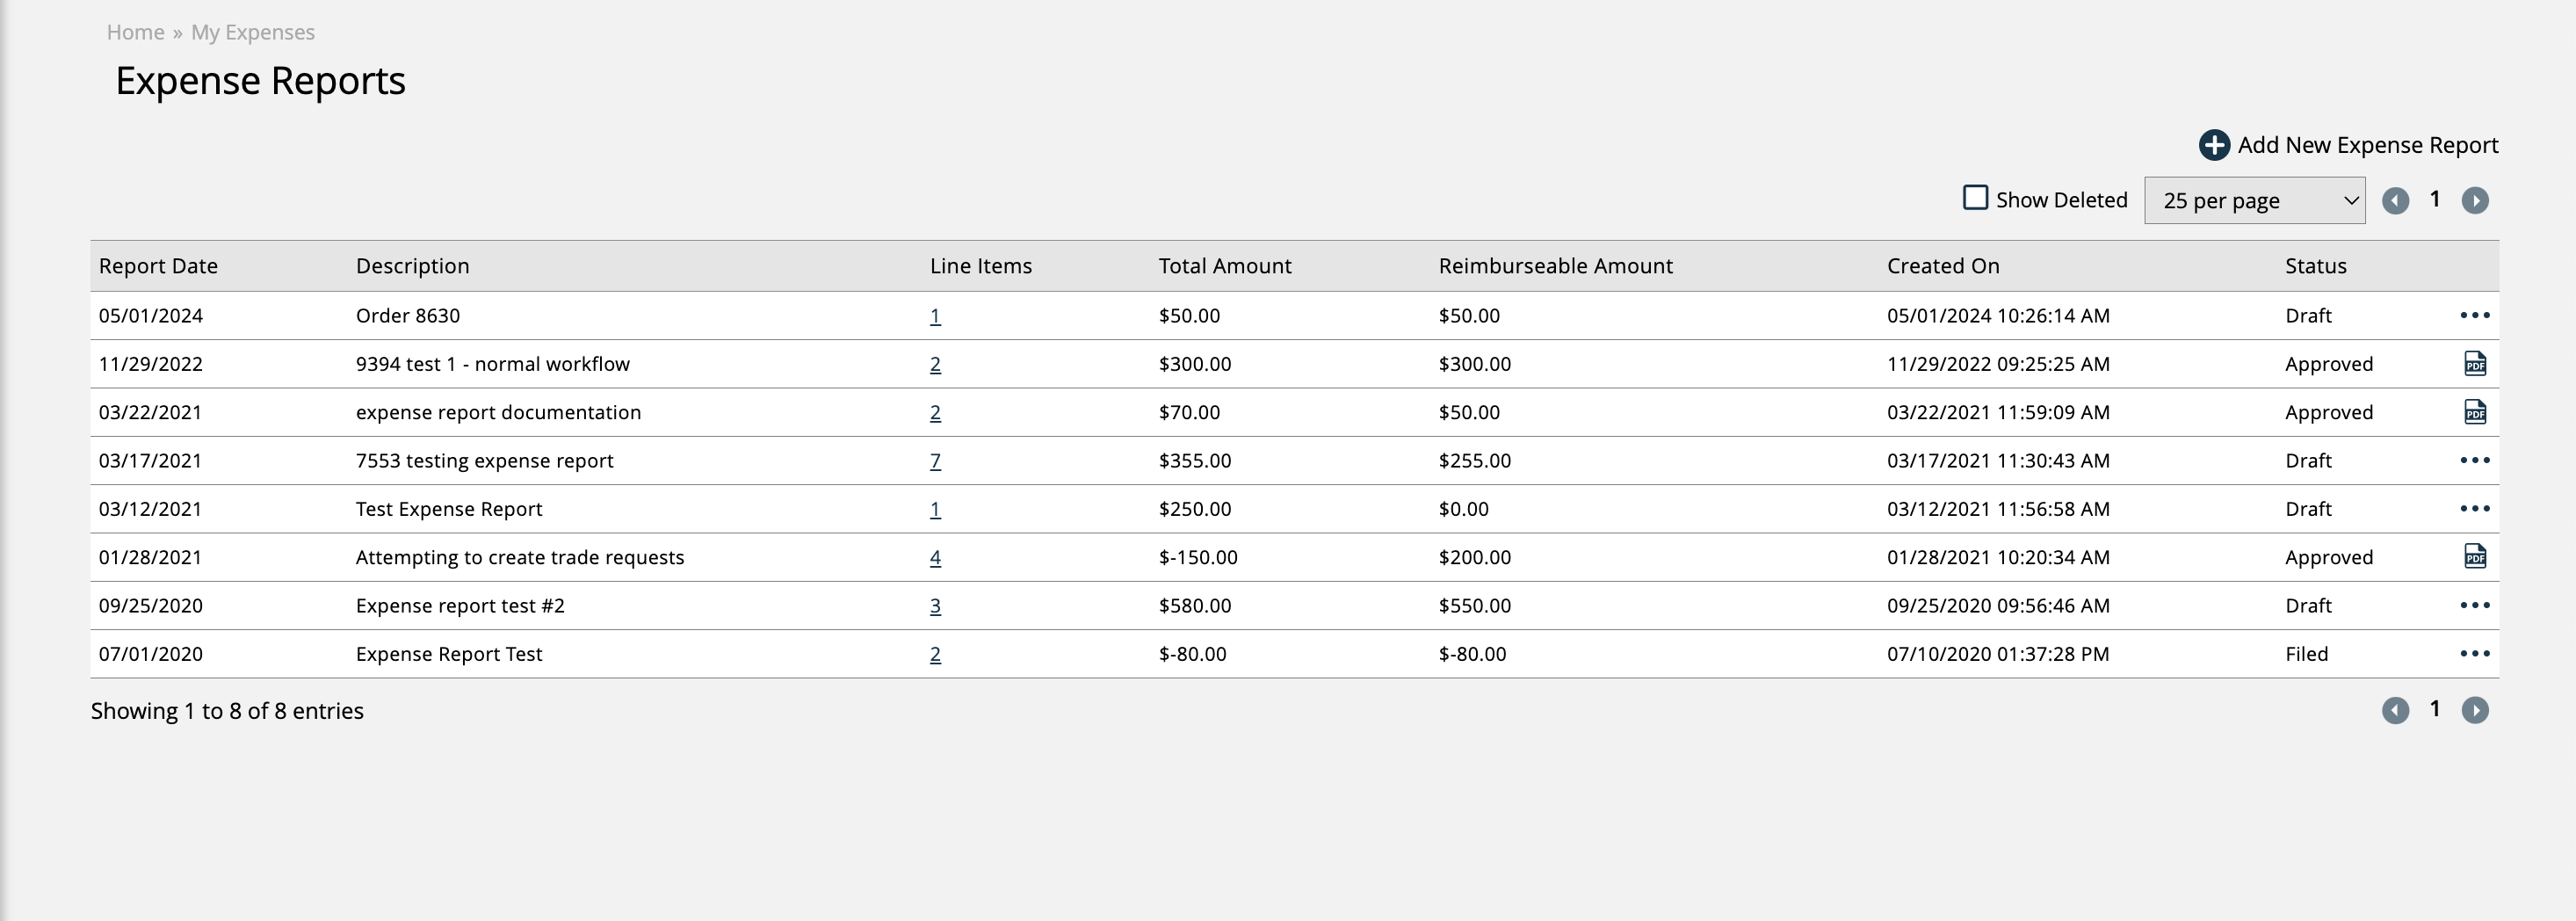
Go to Home > My Expenses and click on Add New Expense Report to generate a new expense report. You must enter a description and report date. The Expense Report page shows summary information about each of your Expense Reports, such as the number of expense items, the total amount, and when the report was created.
Note
You shouldn't file the report until you have finished adding your Expense Items.

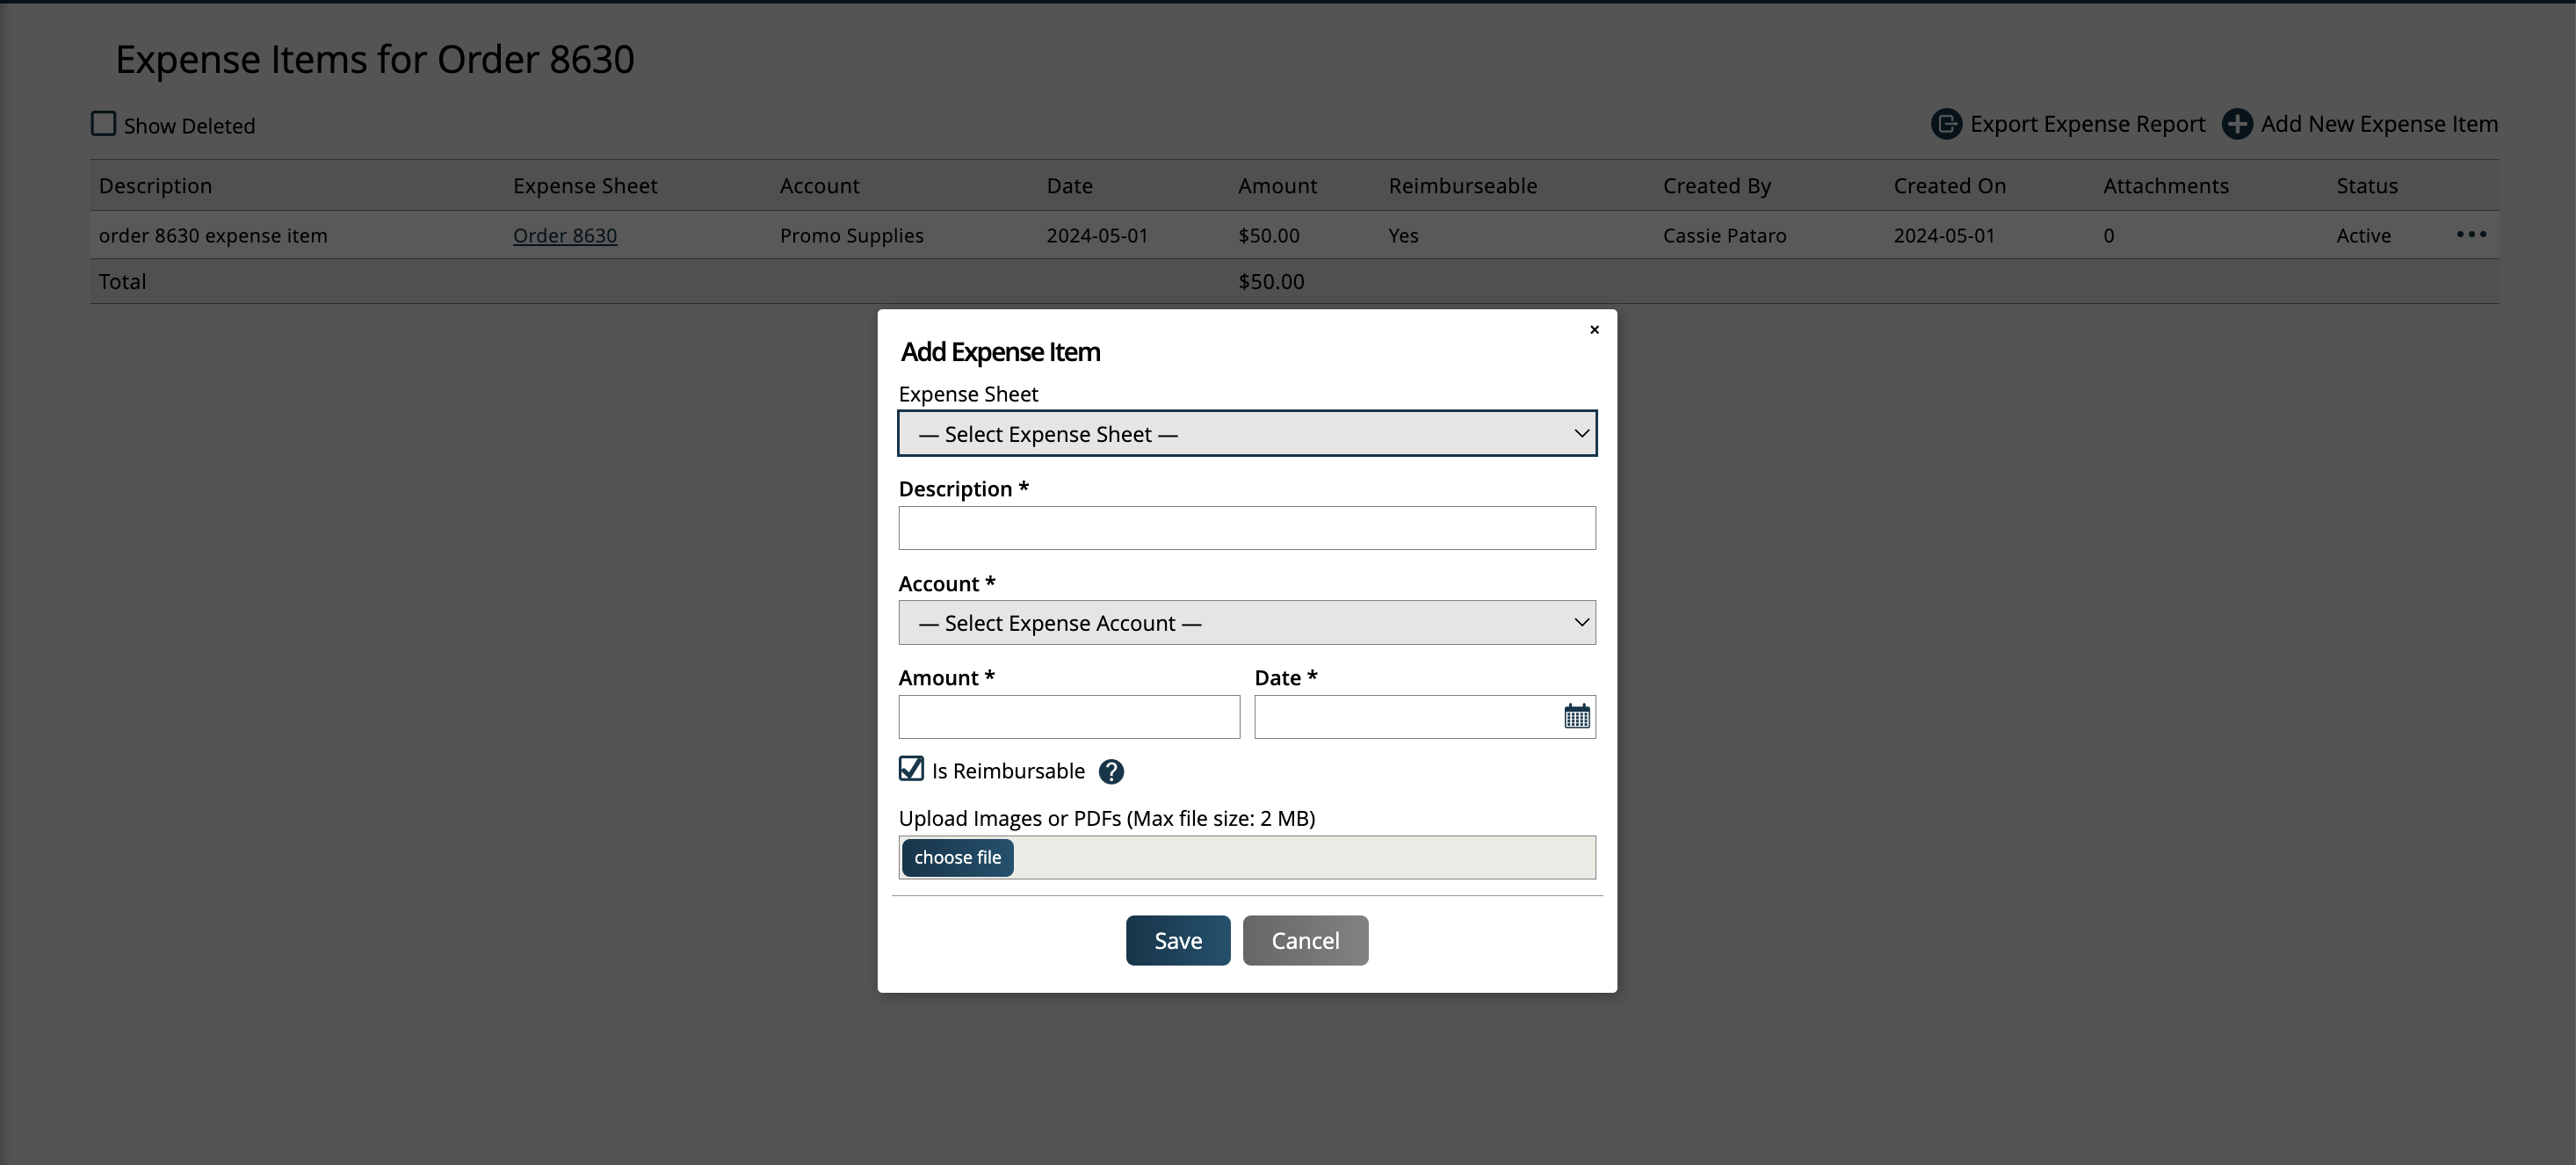
After you create your report, you can begin adding Expense Items to it. There are two ways to do this. You can either use the ellipsis action and click the Add Expense Item option, or you can click on the number in the Line Items column, which will bring you to the Expense Items page for that report. From the Expense Items page, you can use the Add New Expense Items action to create a new item for the report.

If the expense item is going to be billed to a client, then make sure to choose an Expense Sheet to associate the Expense Item with. Each Expense Sheet in the dropdown will have the company’s name next to the Expense Sheet title, so it is clear which client the Expense Sheet is for.
Any expense items added to your report that are tied to an Expense Sheet will automatically show up on that Expense Sheet.
The item’s description, expense account, amount, and date are all required fields. You can also upload a receipt to the item and mark whether the Expense Item is reimbursable.
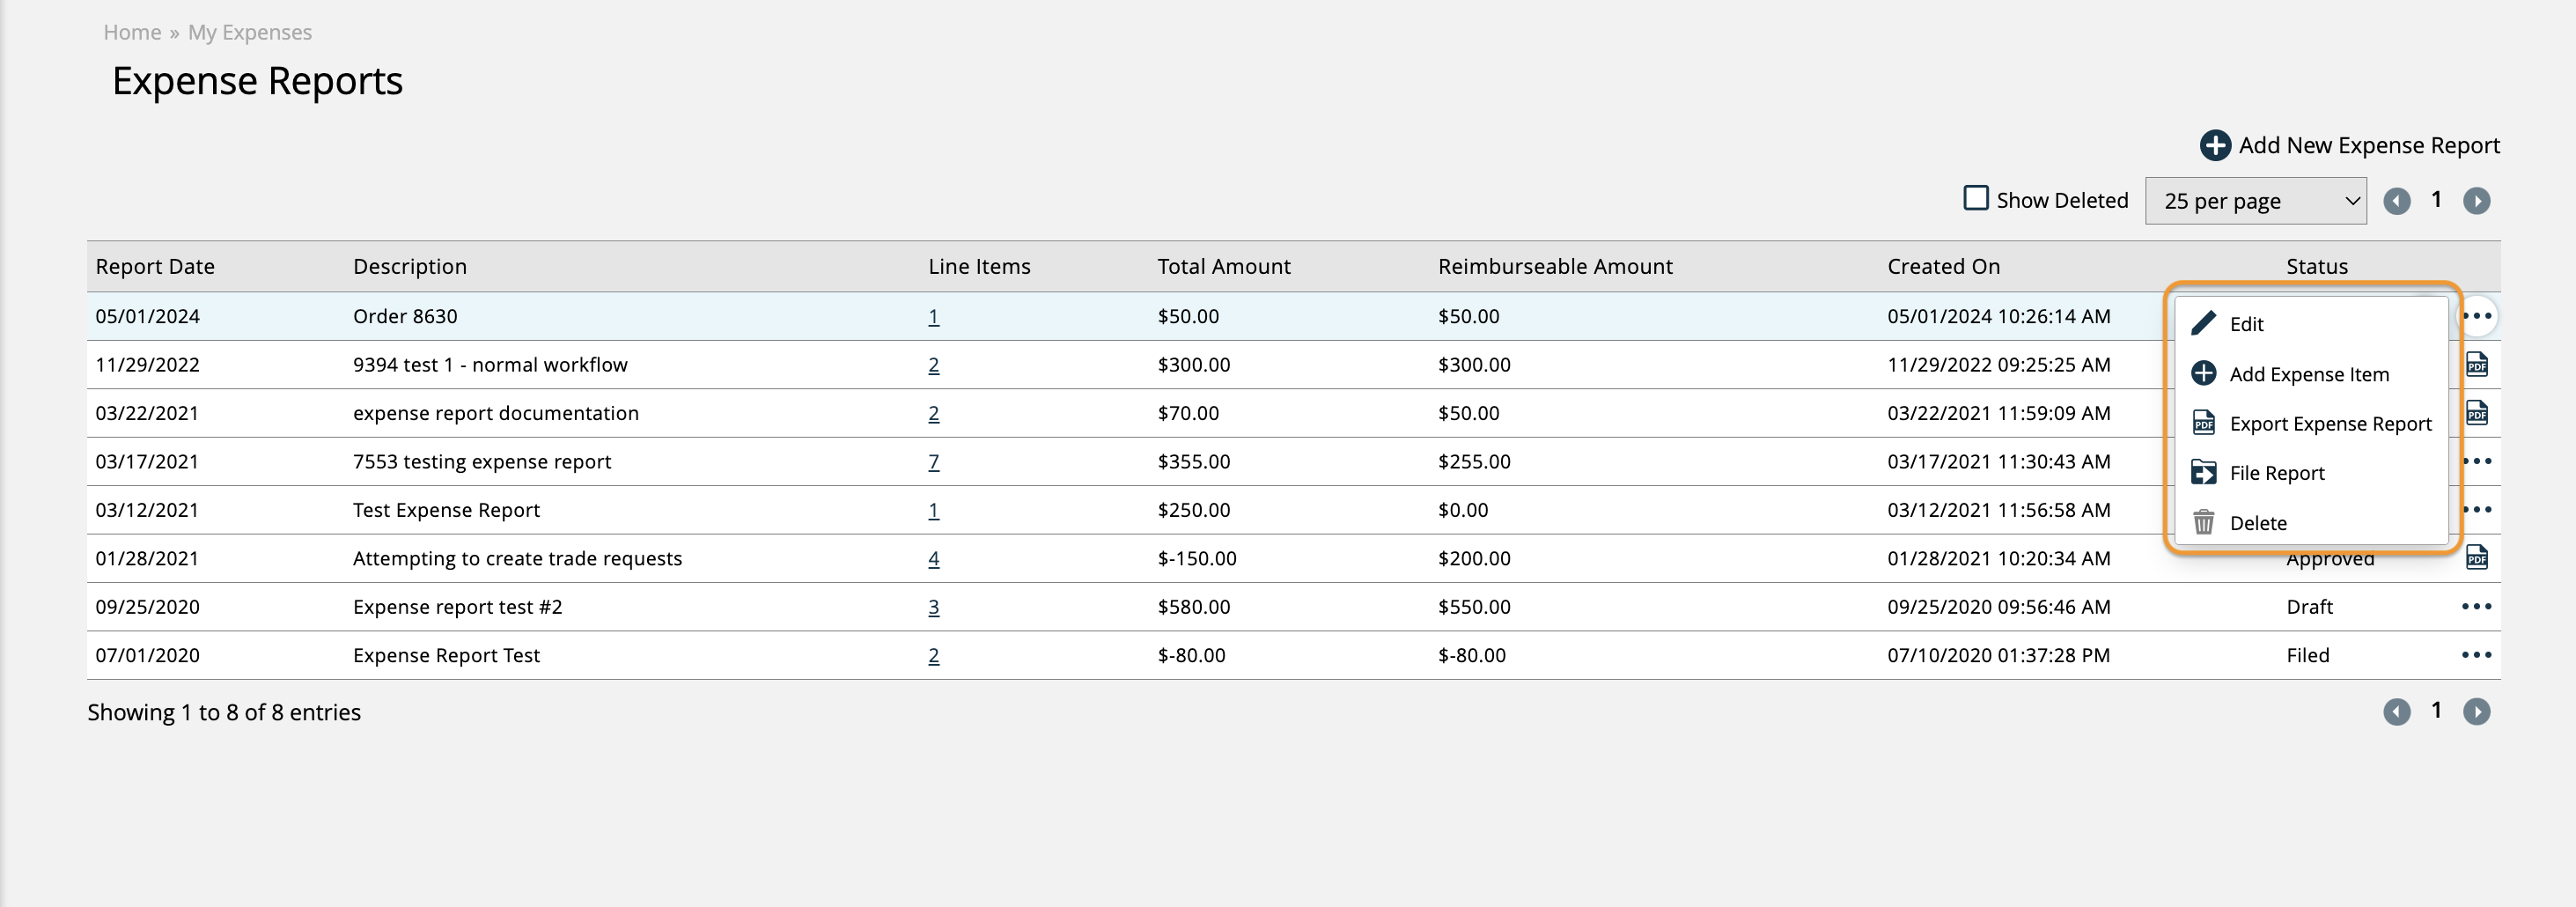
There are more actions you can take from the Expense Report page, by clicking on the ellipsis icon. You can edit the report, which lets you change the name or date, or delete it. There is also the option to export the report, which will open a PDF of the report’s Expense Items.
Note
If a report has been filed or approved, there will be fewer actions available.

Expense Items Page
The Expense Items page for an Expense Report shows detail about each Expense Item, including a description, if it’s tied to an Expense Sheet, the total amount, and any attachments. This page is where you need to go to edit or delete your Expense Report line items.
If you have the User Permission ‘Expenses’, and if your Expense Items are associated with an Expense Sheet, by clicking on the Expense Sheet name you will be redirected to that Expense Sheet in the system
You can also view a PDF of the report, create new Expense Items, and delete and reinstate your Expense Items here.
Once you are done adding all your expenses, you can submit the report for approval by using the File Report action on the Expense Reports page. The system will send the report to the finance email for approval. You can click on ‘Unfile’ if you need to make any changes.
Updated 7/30/2024