Navigating the MagBuilder-Indesign Integration
Your InDesign users can manage tickets without leaving InDesign. A user can view find ad and editorial tickets, view assets, upload assets, send proof requests, view and manage statuses, and mark artwork as final, all within InDesign.
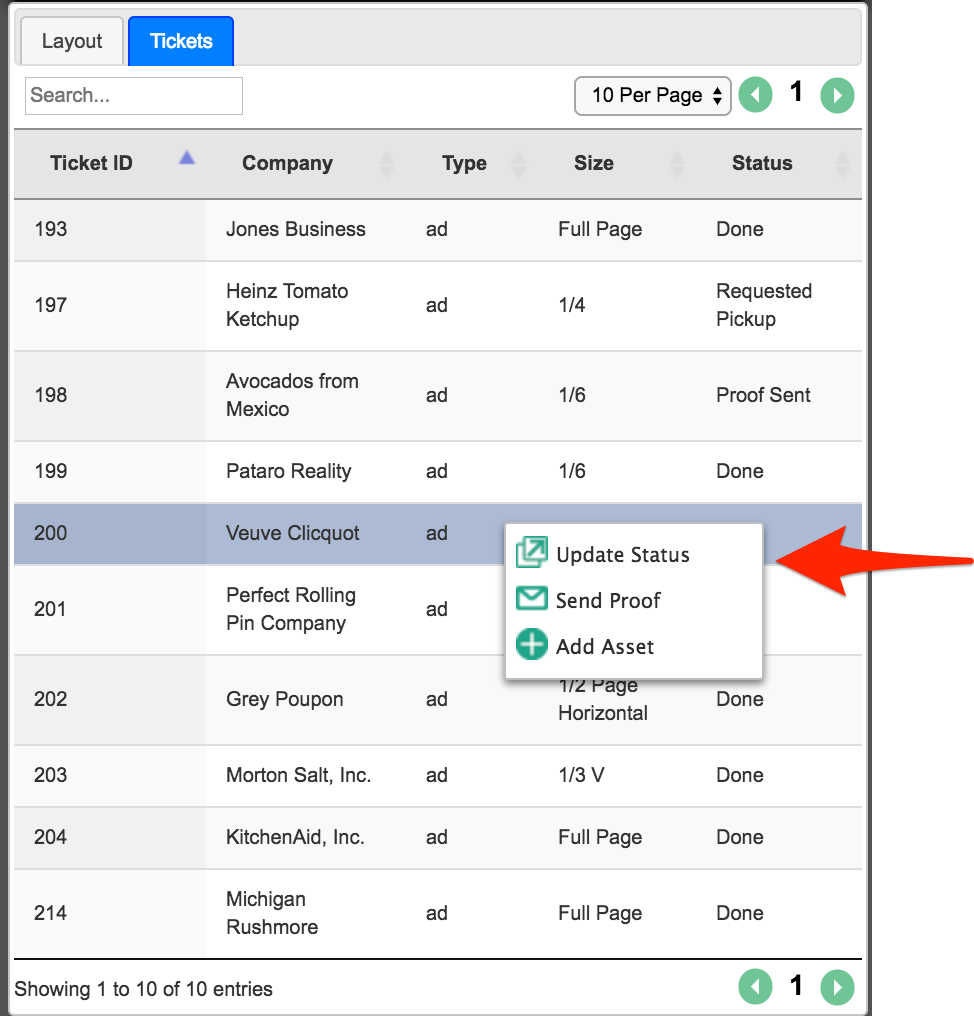
To view your ticket information in InDesign, go to the ticket tab. Use the search box to help find tickets. You can right click on a ticket to view your available actions: Update Status, Send Proof, Add Asset.
The three action will all update tickets in Ad Orbit.
Update Status: The InDesign user can change the ad ticket status directly from InDesign. The user can select from any active ad ticket status
Send Proof: When selected, the system will trigger the Proof Email template and attach the most recently added file; this is the same behavior as sending a proof email from the production report.
Add Asset: The user can upload file(s) to the selected ticket. You can click on the ticket to view all uploaded assets. You can mark one of the assets as final, which will update the ticket in Ad Orbit and allow you to place the asset directly into InDesign from the Layout tab.

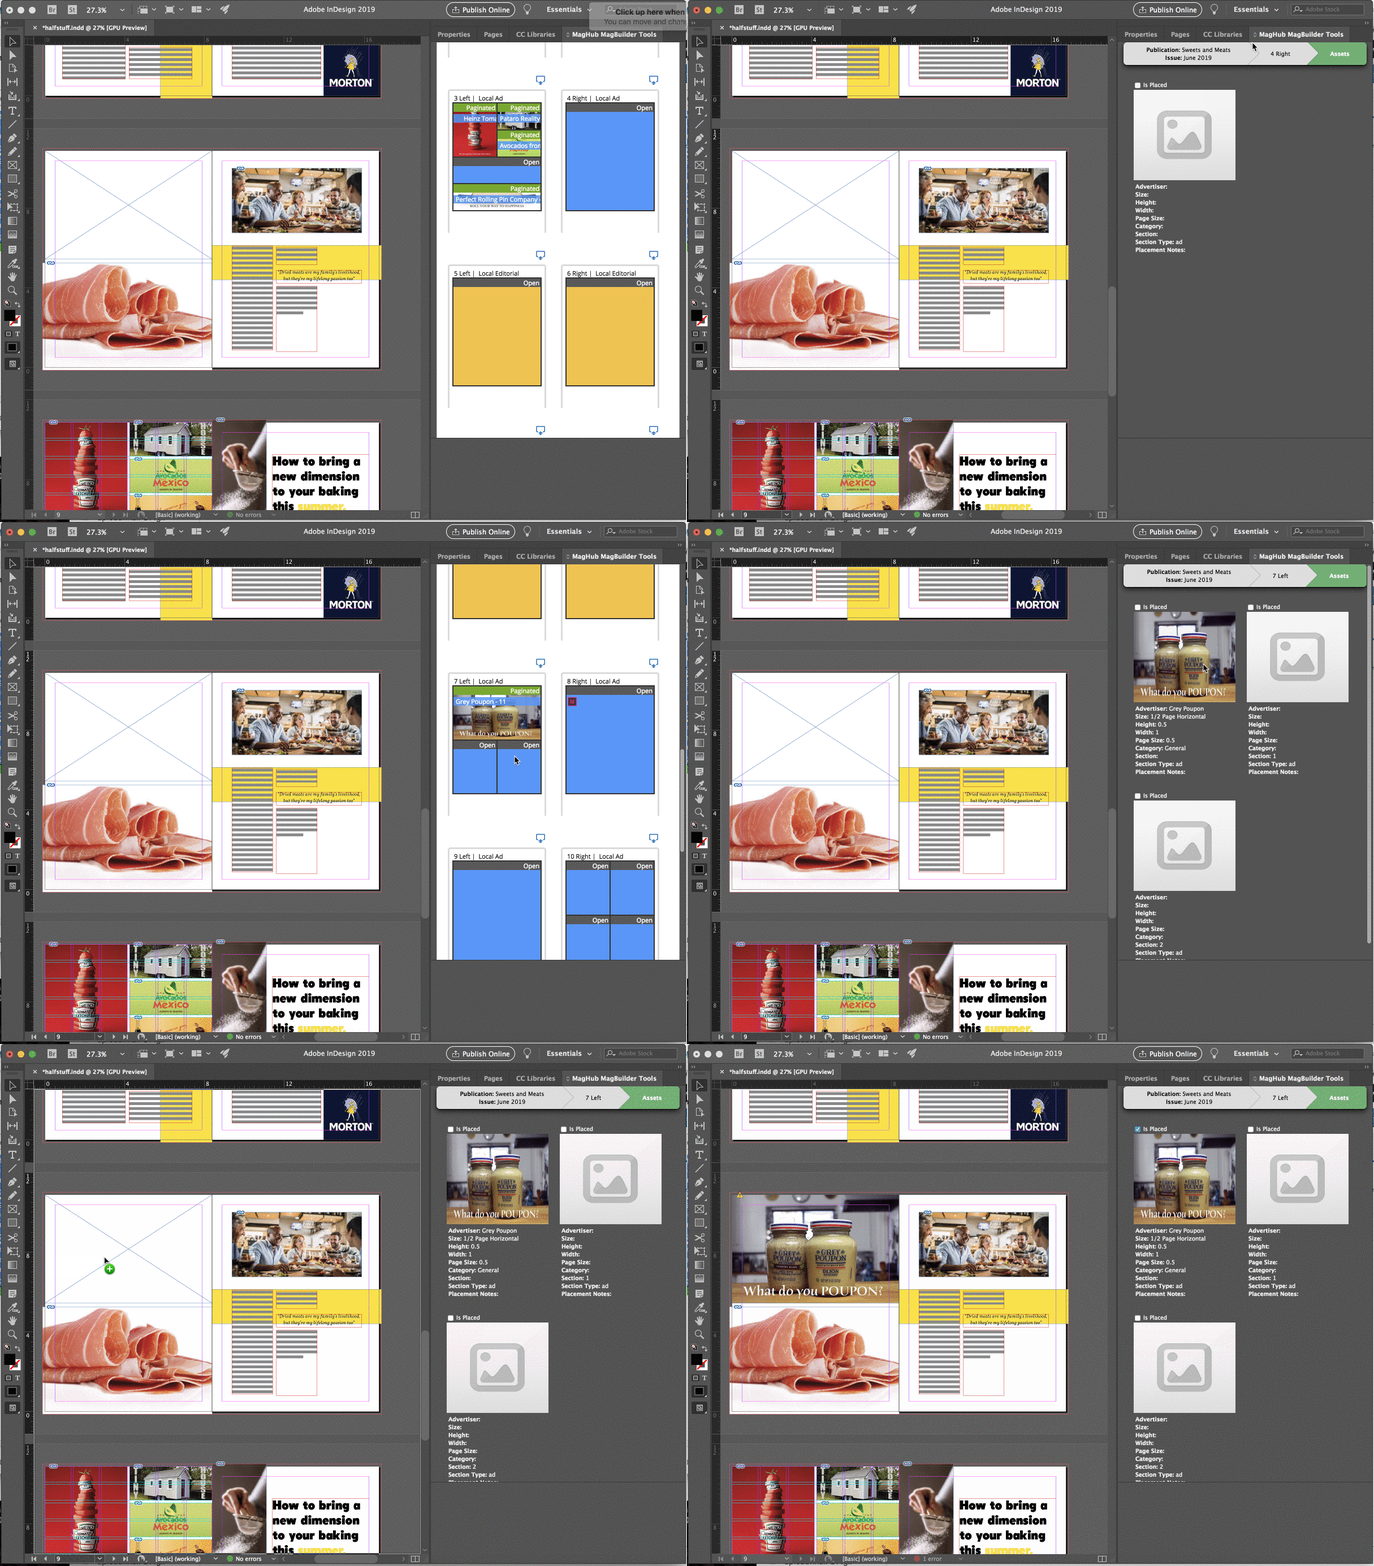
You can view and place artwork from Ad Orbit directly into InDesign. In order to place artwork into InDesign, the artwork must be paginated in MagBuilder and marked as final. Click on the MagBuilder page to view available artwork you can place then click and drag the image into your InDesign file.
With your InDesign file open, from the Window menu, open the Ad Orbit MagBuilder Tools. Select the Publication and issue – click OK.
In the Layout view, scroll down to find the page with the ad you need place in your layout Double click on the image of the ad – this will open the Asset tab Click+hold the mouse button and drag the asset to the page,. Release the mouse button to place the image.
Note
The asset will not go into an existing graphic box. Release the mouse on a spot on the page that does not contain a text or graphic box.
Adjust the file as needed and save your InDesign file. The “is Placed” box above the asset in the MagBuilder Tools panel is automatically checked once you place the asset. You will see an InDesign logo on the paginated ticket in MagBuilder.
Tip
If you delete the asset from the InDesign page, you need to manually uncheck the box)

The auto-flow feature in the InDesign plugin will place artwork from Ad Orbit into your InDesign document. The artwork must be placed in MagBuilder and the artwork must be marked as final. The plugin places artwork by matching your page layouts to an InDesign master page. Artwork will also use your InDesign fitting settings.
In your InDesign Layout, create Master Pages to match your MagBuilder Layout pages. The Prefix of your Master page must be MH, and the name must exactly match the name of the MagBuilder layout.
On the master page in InDesign, create your graphic boxes for the ads. In InDesign, open the Script Label palette from the Window menu select Utilities > Script Labels. Click on the first graphic box, the in the Script label box type Ad Orbit_1. Click on the next graphic box on the page and label it Ad Orbit_2, etc. The script label number needs to match the order you set up your MagBuilder page.

You must Save your InDesign file before you can use the auto-flow feature.
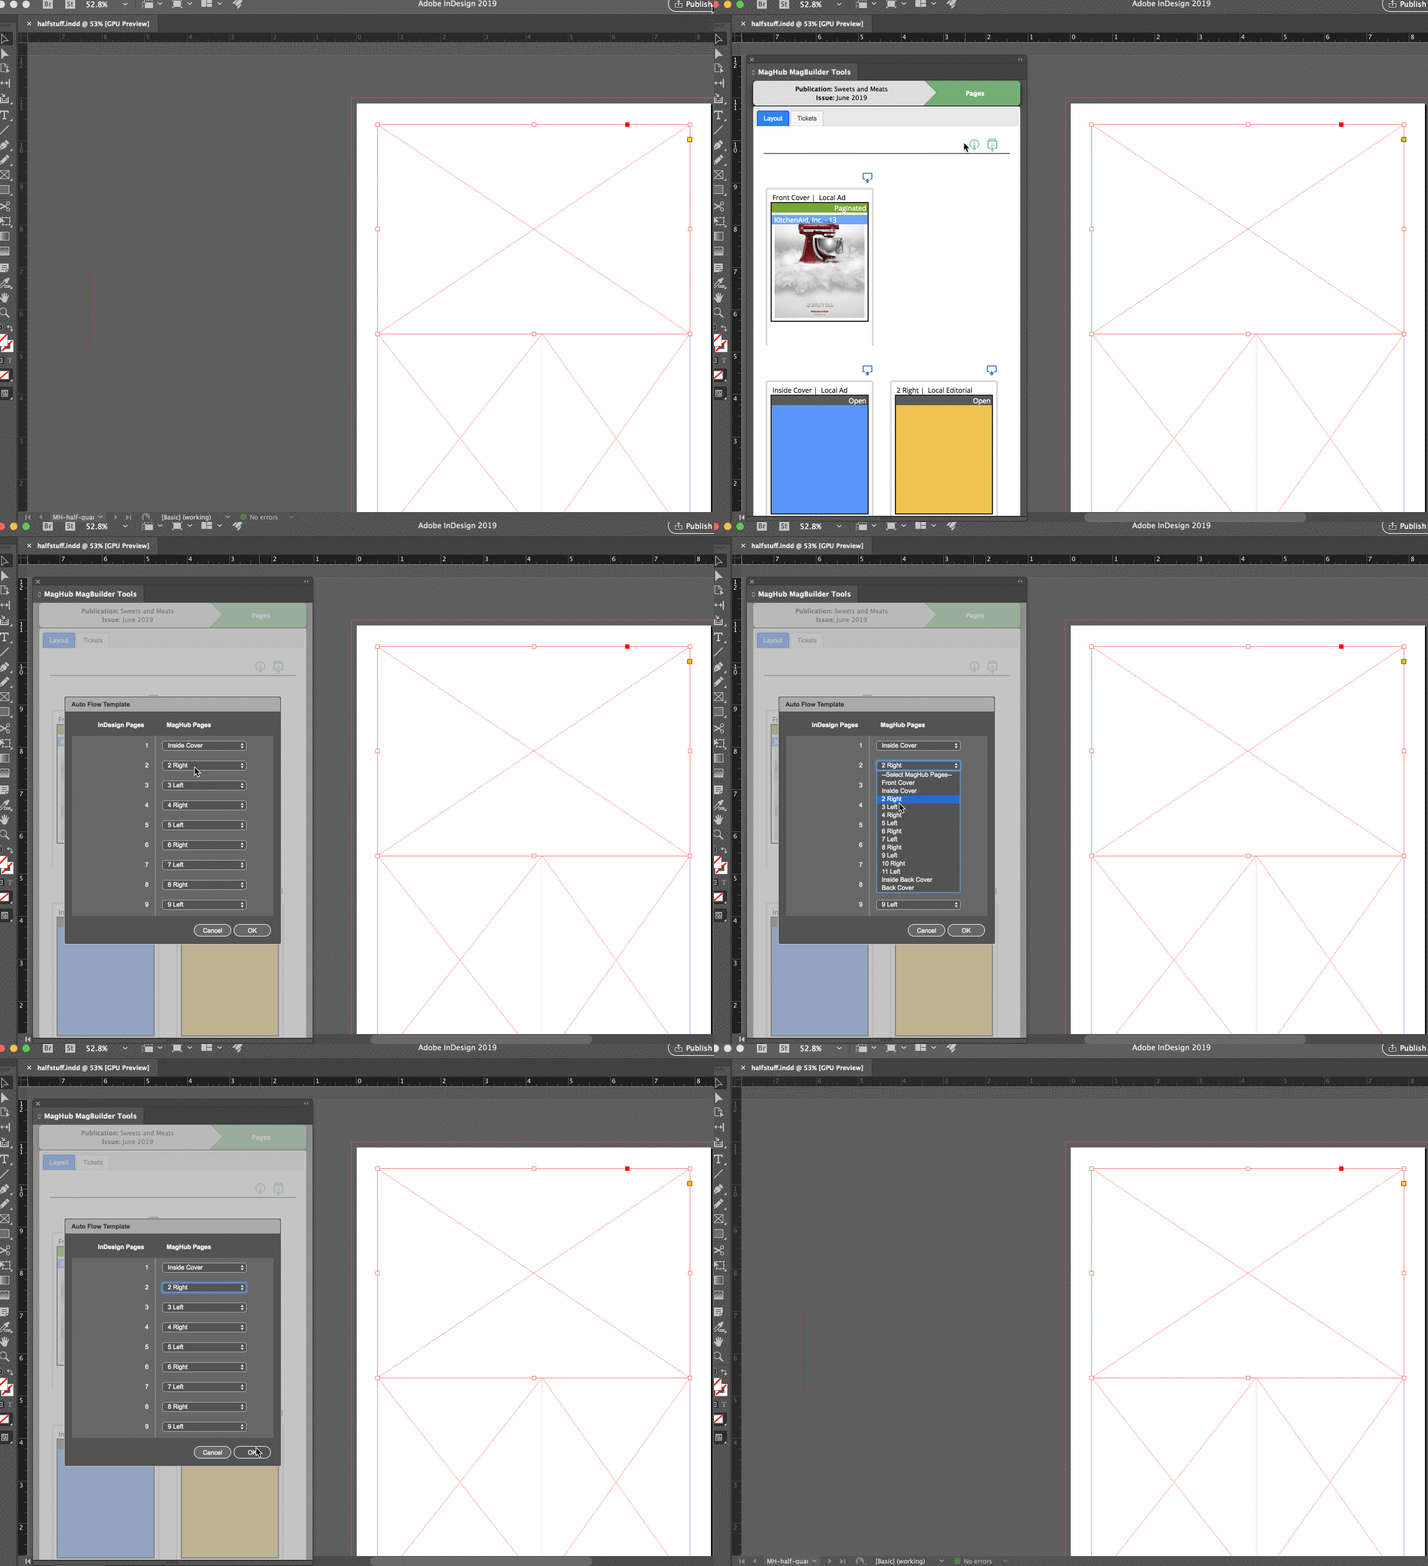
On the Ad Orbit MagBuilder Tools panel, click on the Auto-Flow Icon. Another window will pop up where you can map your InDesign pages to the MagBuilder pages, when done, click OK. The ad files should have been pulled into your layout. Double check each ad for correct placement and size. The plug-in will flow ads into the graphic frames following the fitting options you have defined on your frames. If you want the ads to flow in at 100%, make sure you have no fitting options applied to the frame. (You can check by clicking on the frame, Object menu > Frame Fitting Options).

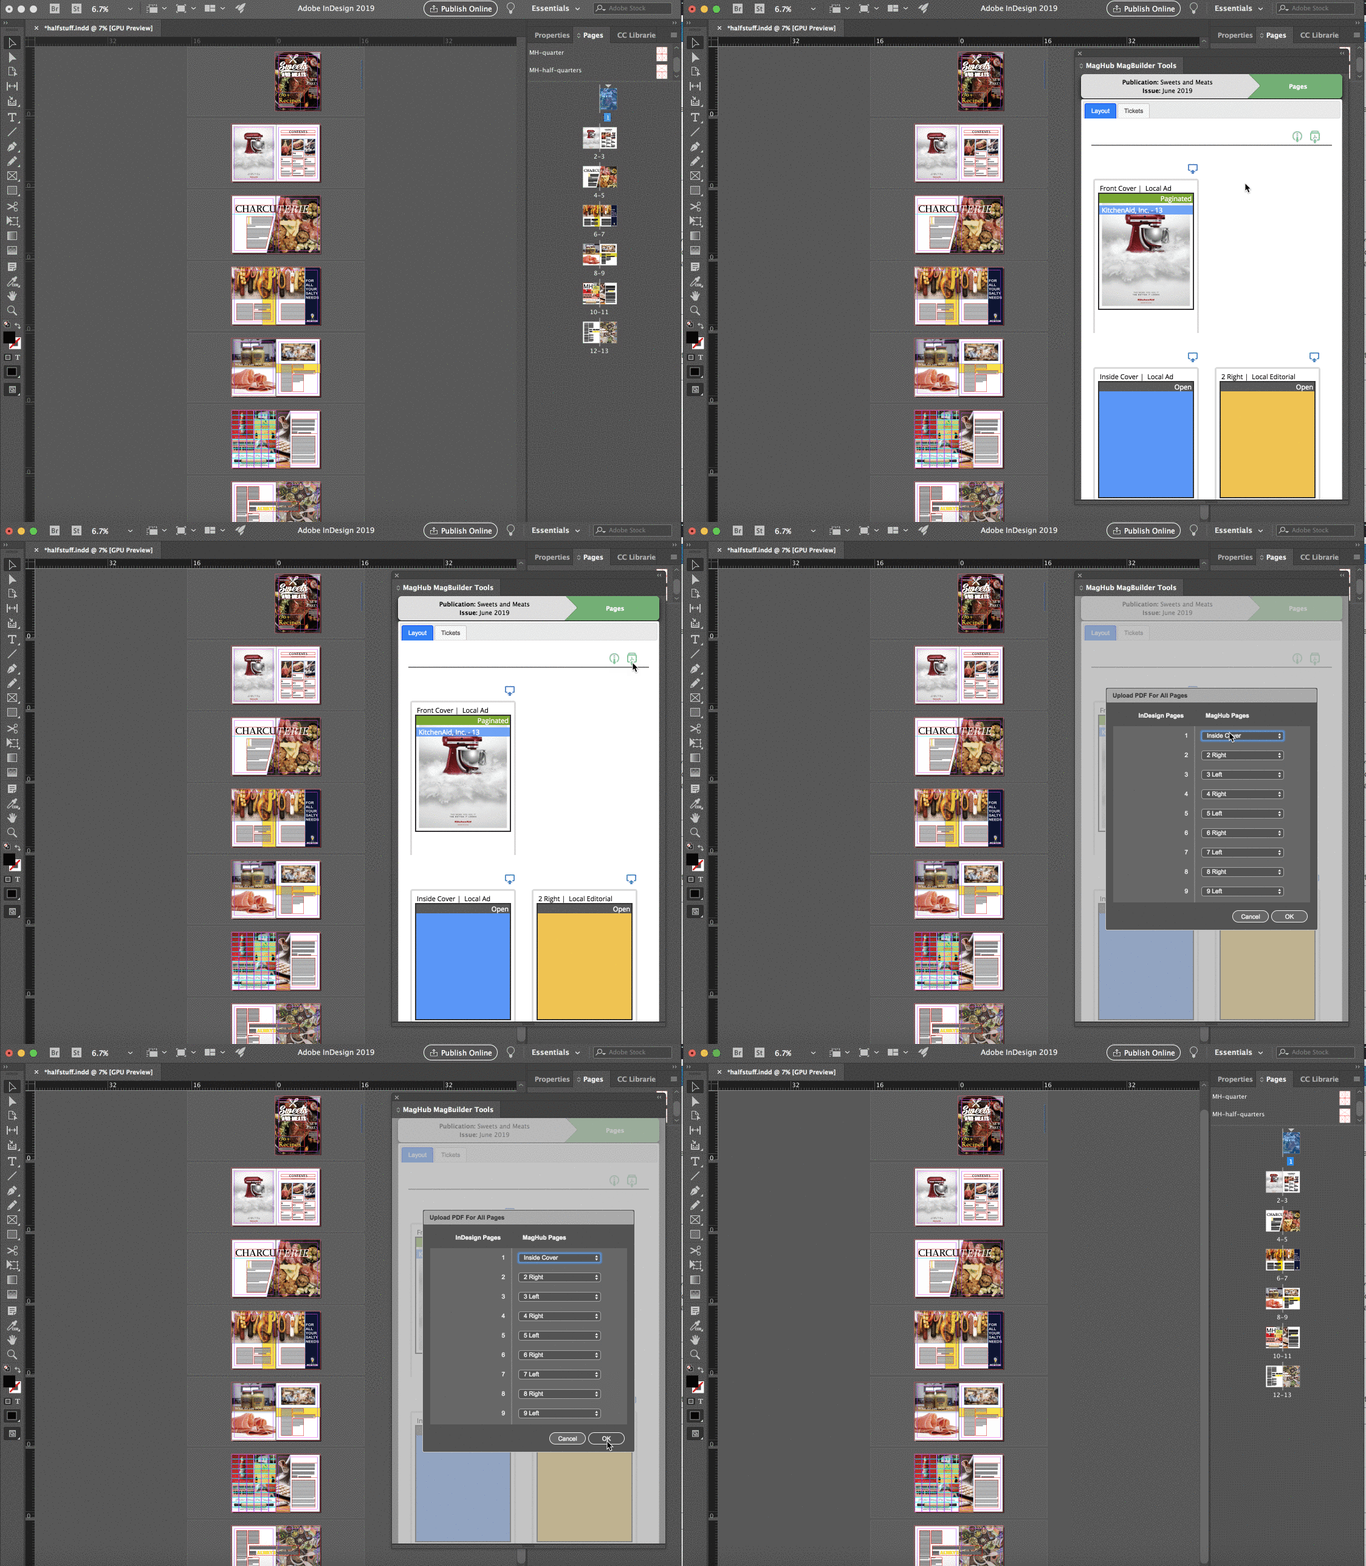
You can upload a PDF of your final InDesign layouts into MagBuilder in bulk or one page at a time. Use the upload PDF action to map your InDesign file page numbers to your MagBuilder pages. Once uploaded, your team can view the final book from within Ad Orbit and you can send an electronic tear sheet when you invoice your advertisers.
Notice
Save your InDesign file before beginning the upload process.
On the Ad Orbit MagBuilder Tools palette, click the upload icon. A new window will open and here you will map your MagBuilder pages from the right hand side to your InDesign layouts on the left. Once properly mapped, click the OK button to begin the upload. Depending on the size of your files, and how many pages you are uploading, this process could take a while, as it’s creating the PDFs of the pages and uploading them to MagBuilder.
Check to be sure the upload process was successful by going to your MagBuilder book in Ad Orbit, click the View Final Preview link to see the page previews that have uploaded.
You can upload a single page PDF by clicking on the upload icon on an individual MagBuilder page without the MagBuilder tool window.
Note
You can only upload a single page if your InDesign file has a single page. You will get an error message if you try to use the single page action with a multi-page InDesign file.
