Managing Your Product Tickets
Every sold line item creates a ticket for the production team to work on. You can assign tickets to users, update statuses, upload materials for proofs or review, and notify customers and internal users by email, all from the ticket. Most parts of the tickets are the same between all the product types, but there are a few differences when it comes to the details and asset management. We will review all parts of the ticket.
Finding your Tickets
The fastest way to find your ticket(s) is by the Global Search or going to Production > Tickets > All Tickets. Each ticket type also has its own search page with filters specific to the type.
Use the search to find your tickets and click on the Ticket ID number or Ticket Icon to view the ticket page.
Each ticket is broken out into multiple sections that contain different information and actions.
Some sections will be visible on every ticket in the system, such as the Ticket Details section, and other sections are specific to integrations or product types, such as the Assign to Ad Size section, and will only be displayed on some tickets.
Each of the main sections on the ticket page are collapsible and expandable by clicking on the triangle, arrow icon by the section title.
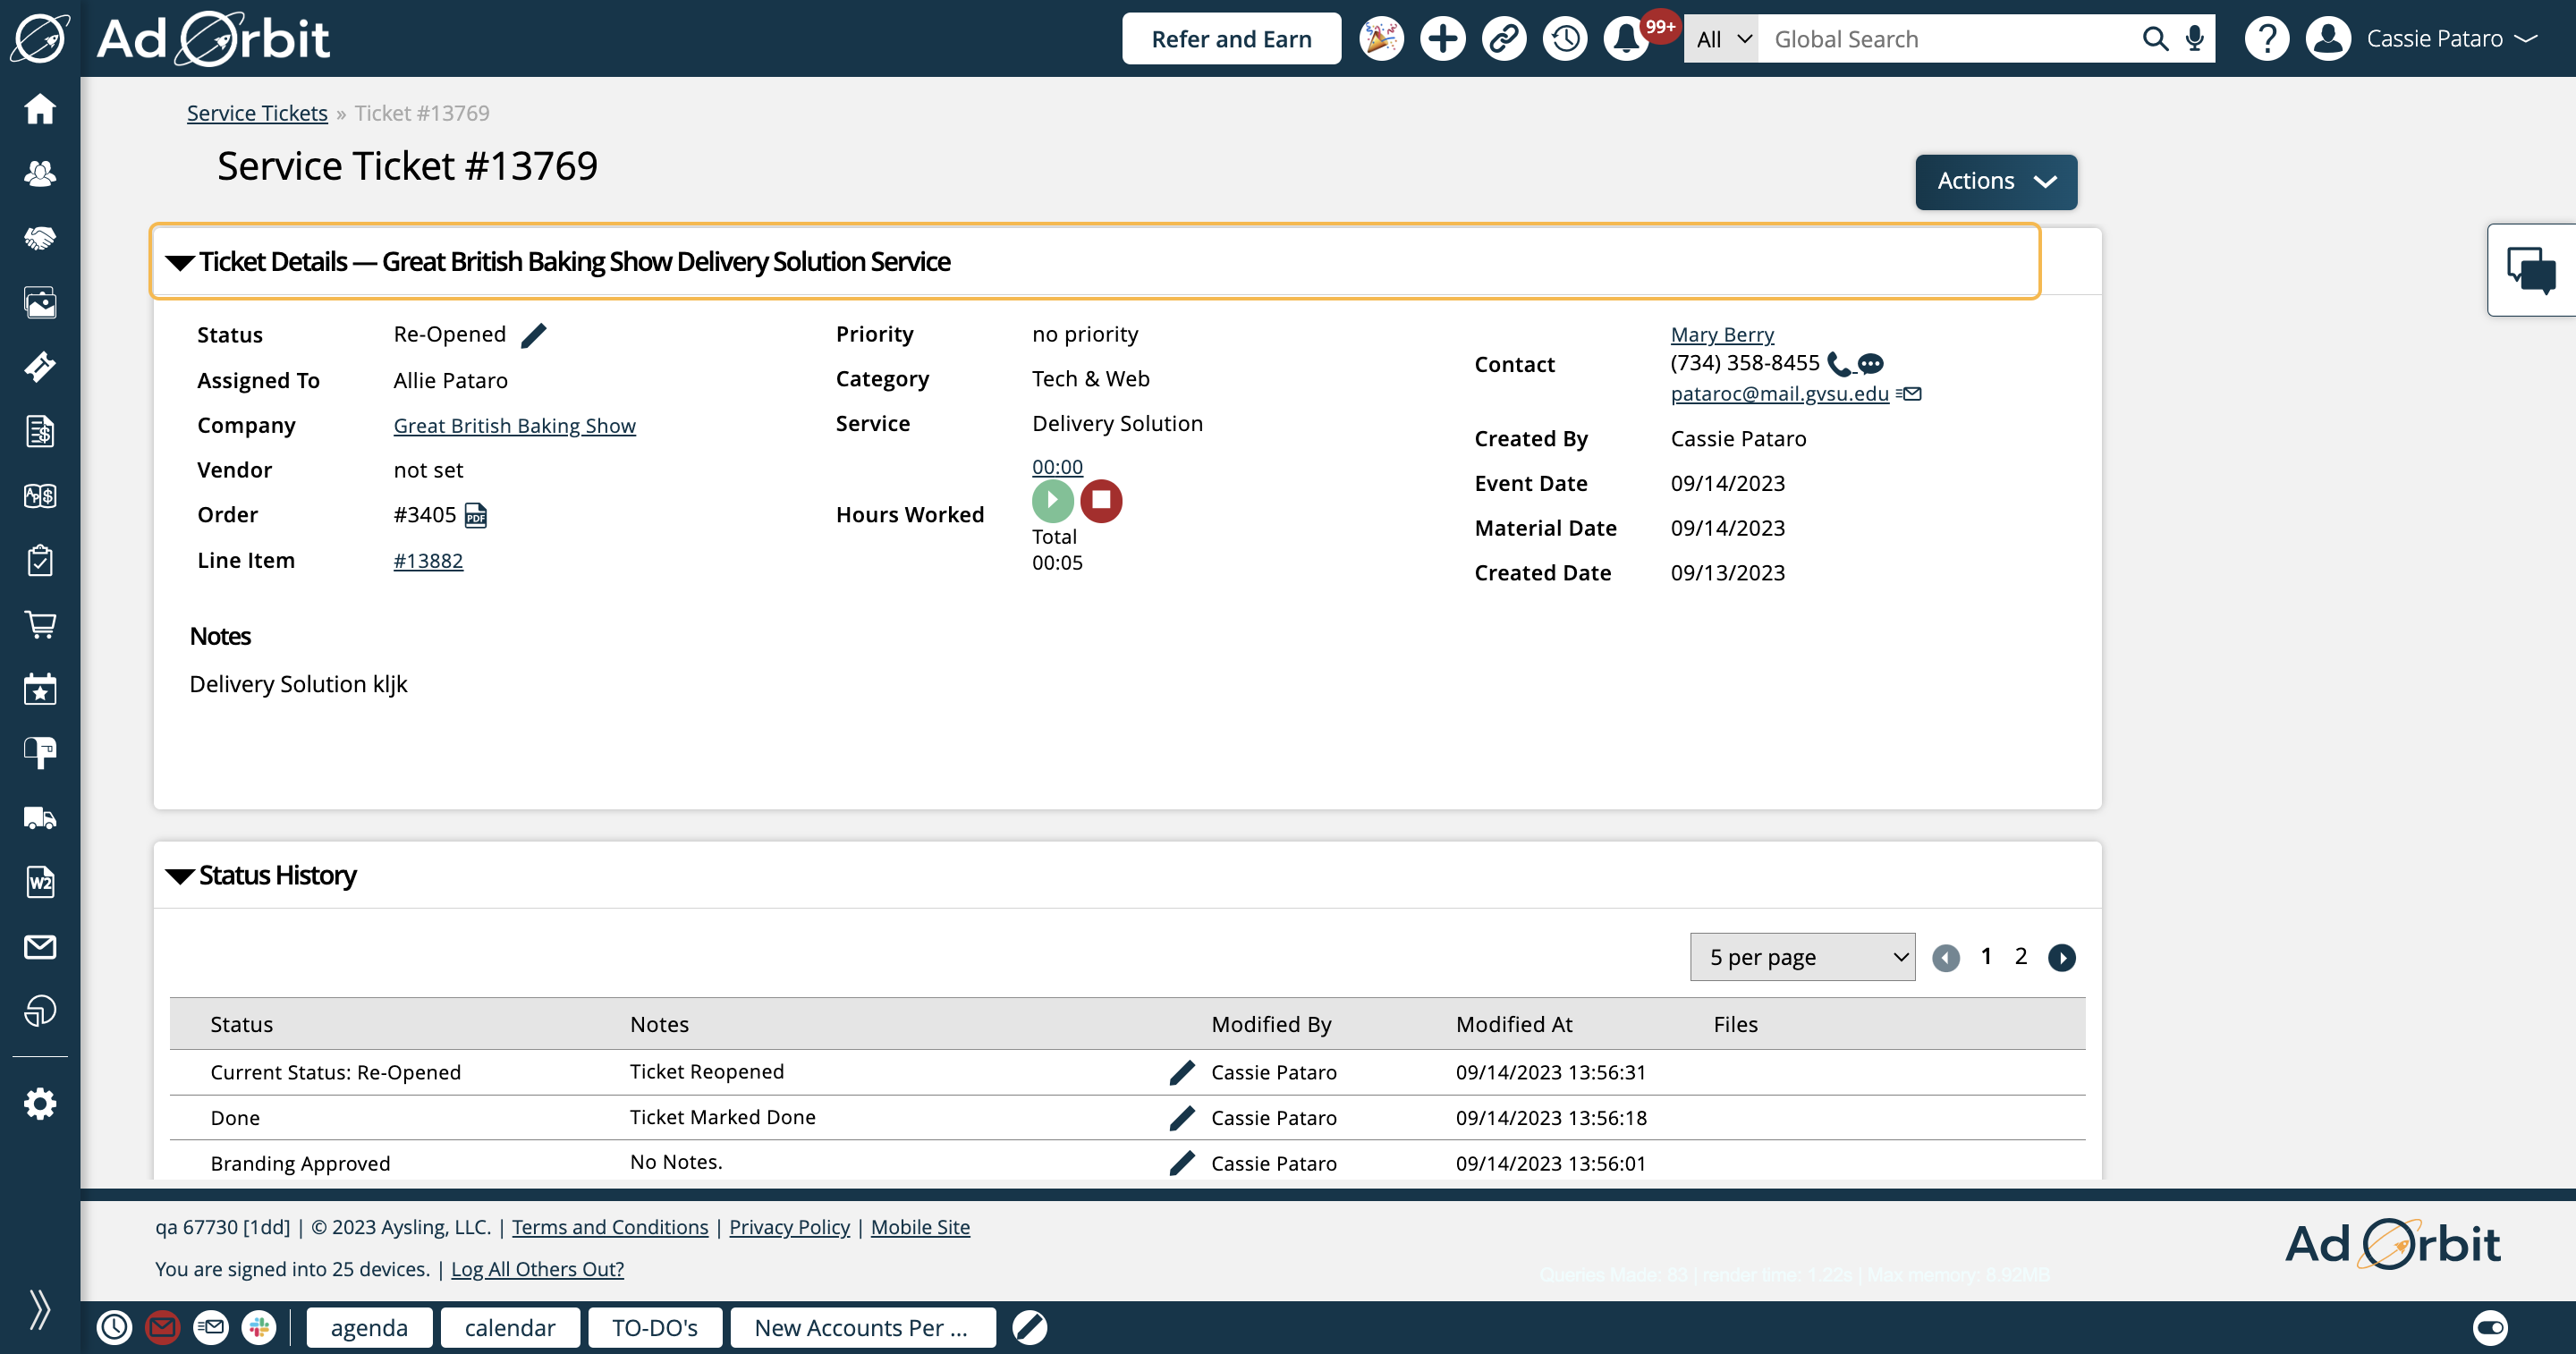
The first section on all tickets is the details. Almost all the details for a ticket come from the Sales Order. The details include the customer, what they purchased, notes about the item, and any relevant dynamic attributes.
The information in the details section is grouped, to make finding the information you need easier. The fields that display will depend on the type of ticket, and what is relevant to the ticket.
The box on the left contains details about the order and line item.
The middle section displays details about the sold product. For instance, for a print ad ticket you will see publication and issue, whereas for a service ticket you will see category and quantity.
And finally, the box on the right displays contact information and relevant dates for the item.
Underneath the boxes, you may see additional information, such as dynamic attributes, or product descriptions.

In the Ticket Details section, there are various actions you can take.
One is by clicking the pencil icon next to the ticket Status. This allows you to quickly change the status of the ticket to something new.
The edit icon next to the Assigned To user can be used to change the user assigned to the ticket.
Once you have selected your user, you can choose to keep the last status. Otherwise, the system will assign the new user and set the new ticket status to 'Assigned.'
Many of the fields in the ticket details section serve as quicklinks to other locations in Ad Orbit. For instance, you can click on the company’s name to open that company’s overview page.
If you need to view the contract PDF for the line item, click on the PDF icon next to the order number.
You can also view and edit (permissions depending), the line item by clicking on the line item number.
If your system configuration 'Enable Tracking of Time Worked on Tickets' is set to Yes, you'll also see the timer actions in this section of the page on service tickets.
You can start, stop, and pause time here. Clicking on the number next to hours worked will bring you to a page where you can view records of all the time recorded on the ticket.
There are two external links you can add to your tickets if needed - one for Documents, and one for Analytics/Reporting.
If set on the ticket, both links will be displayed in the Ticket Details section.
External Document Link: This link essentially serves as a replacement to an asset for proof requests. If a link is entered here, you will not be required to attach an asset when sending proof requests. If using this link, we highly recommend adding the 'External Link' merge tag to your proof request email templates.
External Reporting/Analytics Link: When added to a ticket, the reporting/analytics link can be accessed by your team on ticket searches and the Consolidated Production Report. It can also be accessed by your contacts in their Client Center account on their Analytics tab. The link should be used to connect the ticket to an external ad campaign or analytics report.
Tip
To set these links on your ticket, open the Edit Ticket popup.
If you have Twilio enabled, the phone and text icons can be used to reach out to the ticket contacts by phone.
You can also click the mail icon to send them a direct email.
The edit ticket action in this section header opens the Edit Ticket popup, where you can make multiple changes to the ticket at once, including changing the status, the assigned user, editing dynamic attributes, and setting external reporting links.
This action is also available from the main Actions dropdown.
Note
If using the Slot Inventory Ticket Flag configuration, the Edit Ticket popup is where you set the flag for a ticket.
The Actions dropdown is where you can perform any other actions needed for the ticket that are not available in the Ticket Details section. Click on the Actions button to open the menu and view all of your available action options. The actions you see here are dependent on both the ticket type, and your user permissions.
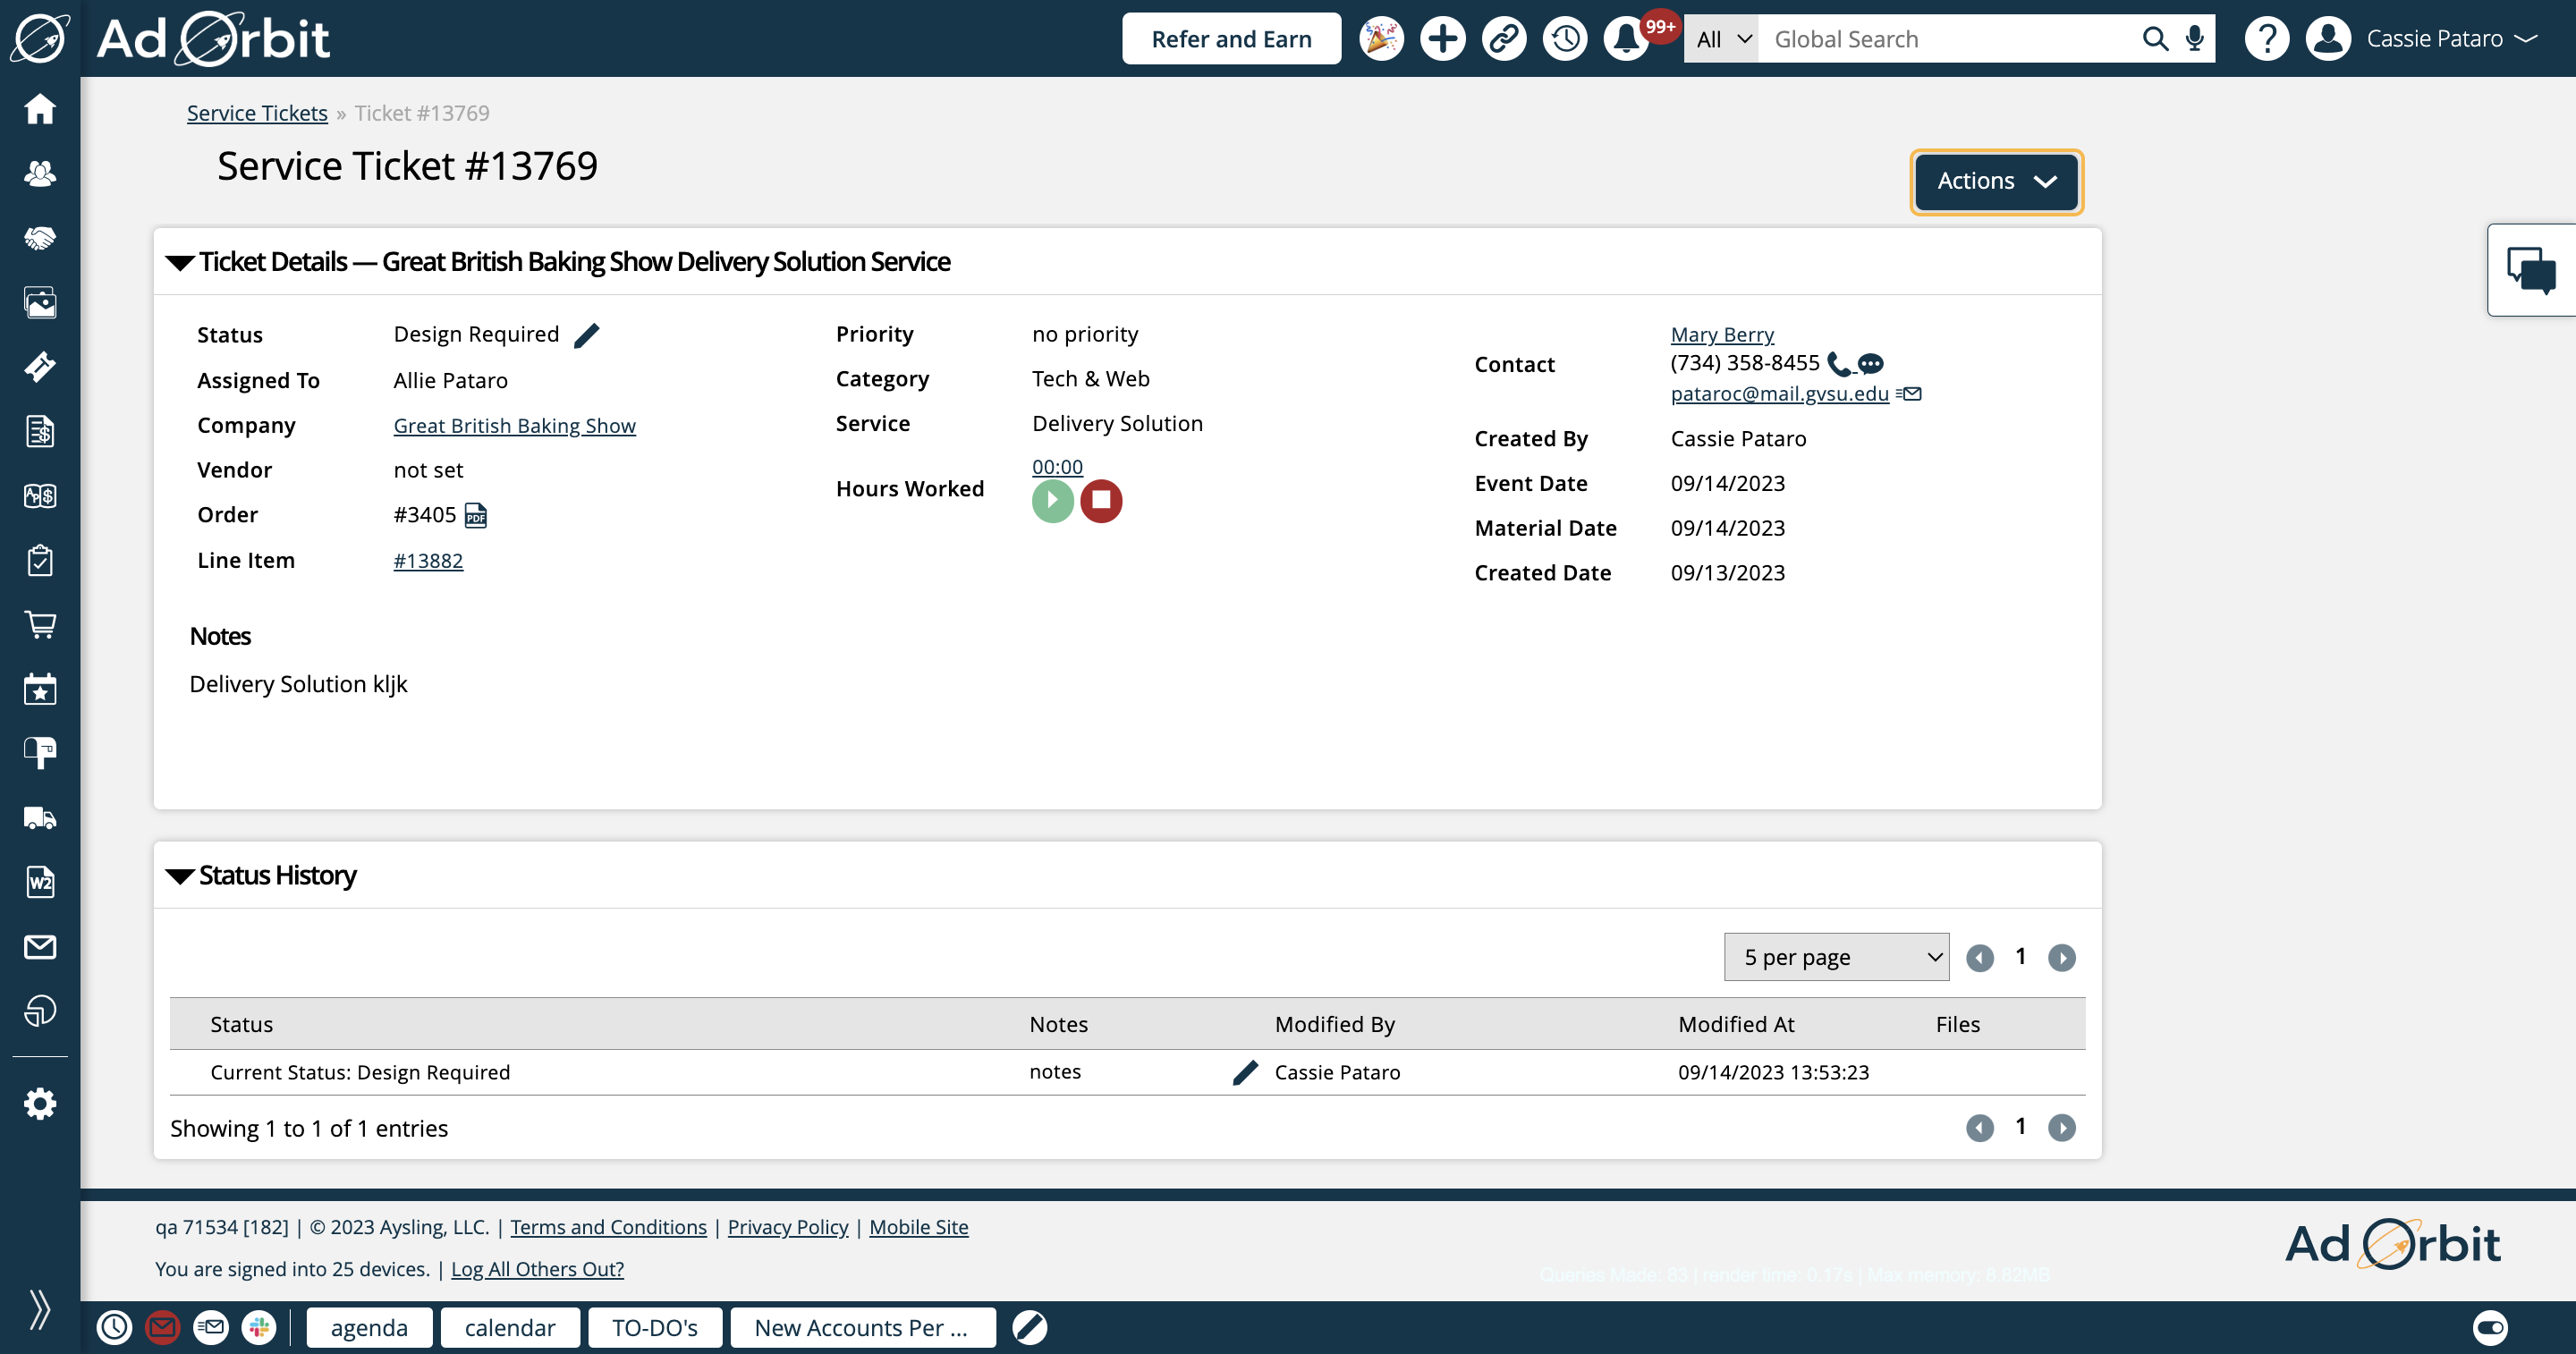
The first action you'll see is Edit Ticket.
Edit Ticket will open a popup, where you can make changes to the ticket as a whole. These changes include items like the ticket description, assigned user and contact, ticket status, document and reporting links, as well as ticket dynamic attributes.
This action is also available from the Ticket Details section.
Note
If using the Slot Inventory Ticket Flag configuration, the Edit Ticket popup is where you set the flag for a ticket.

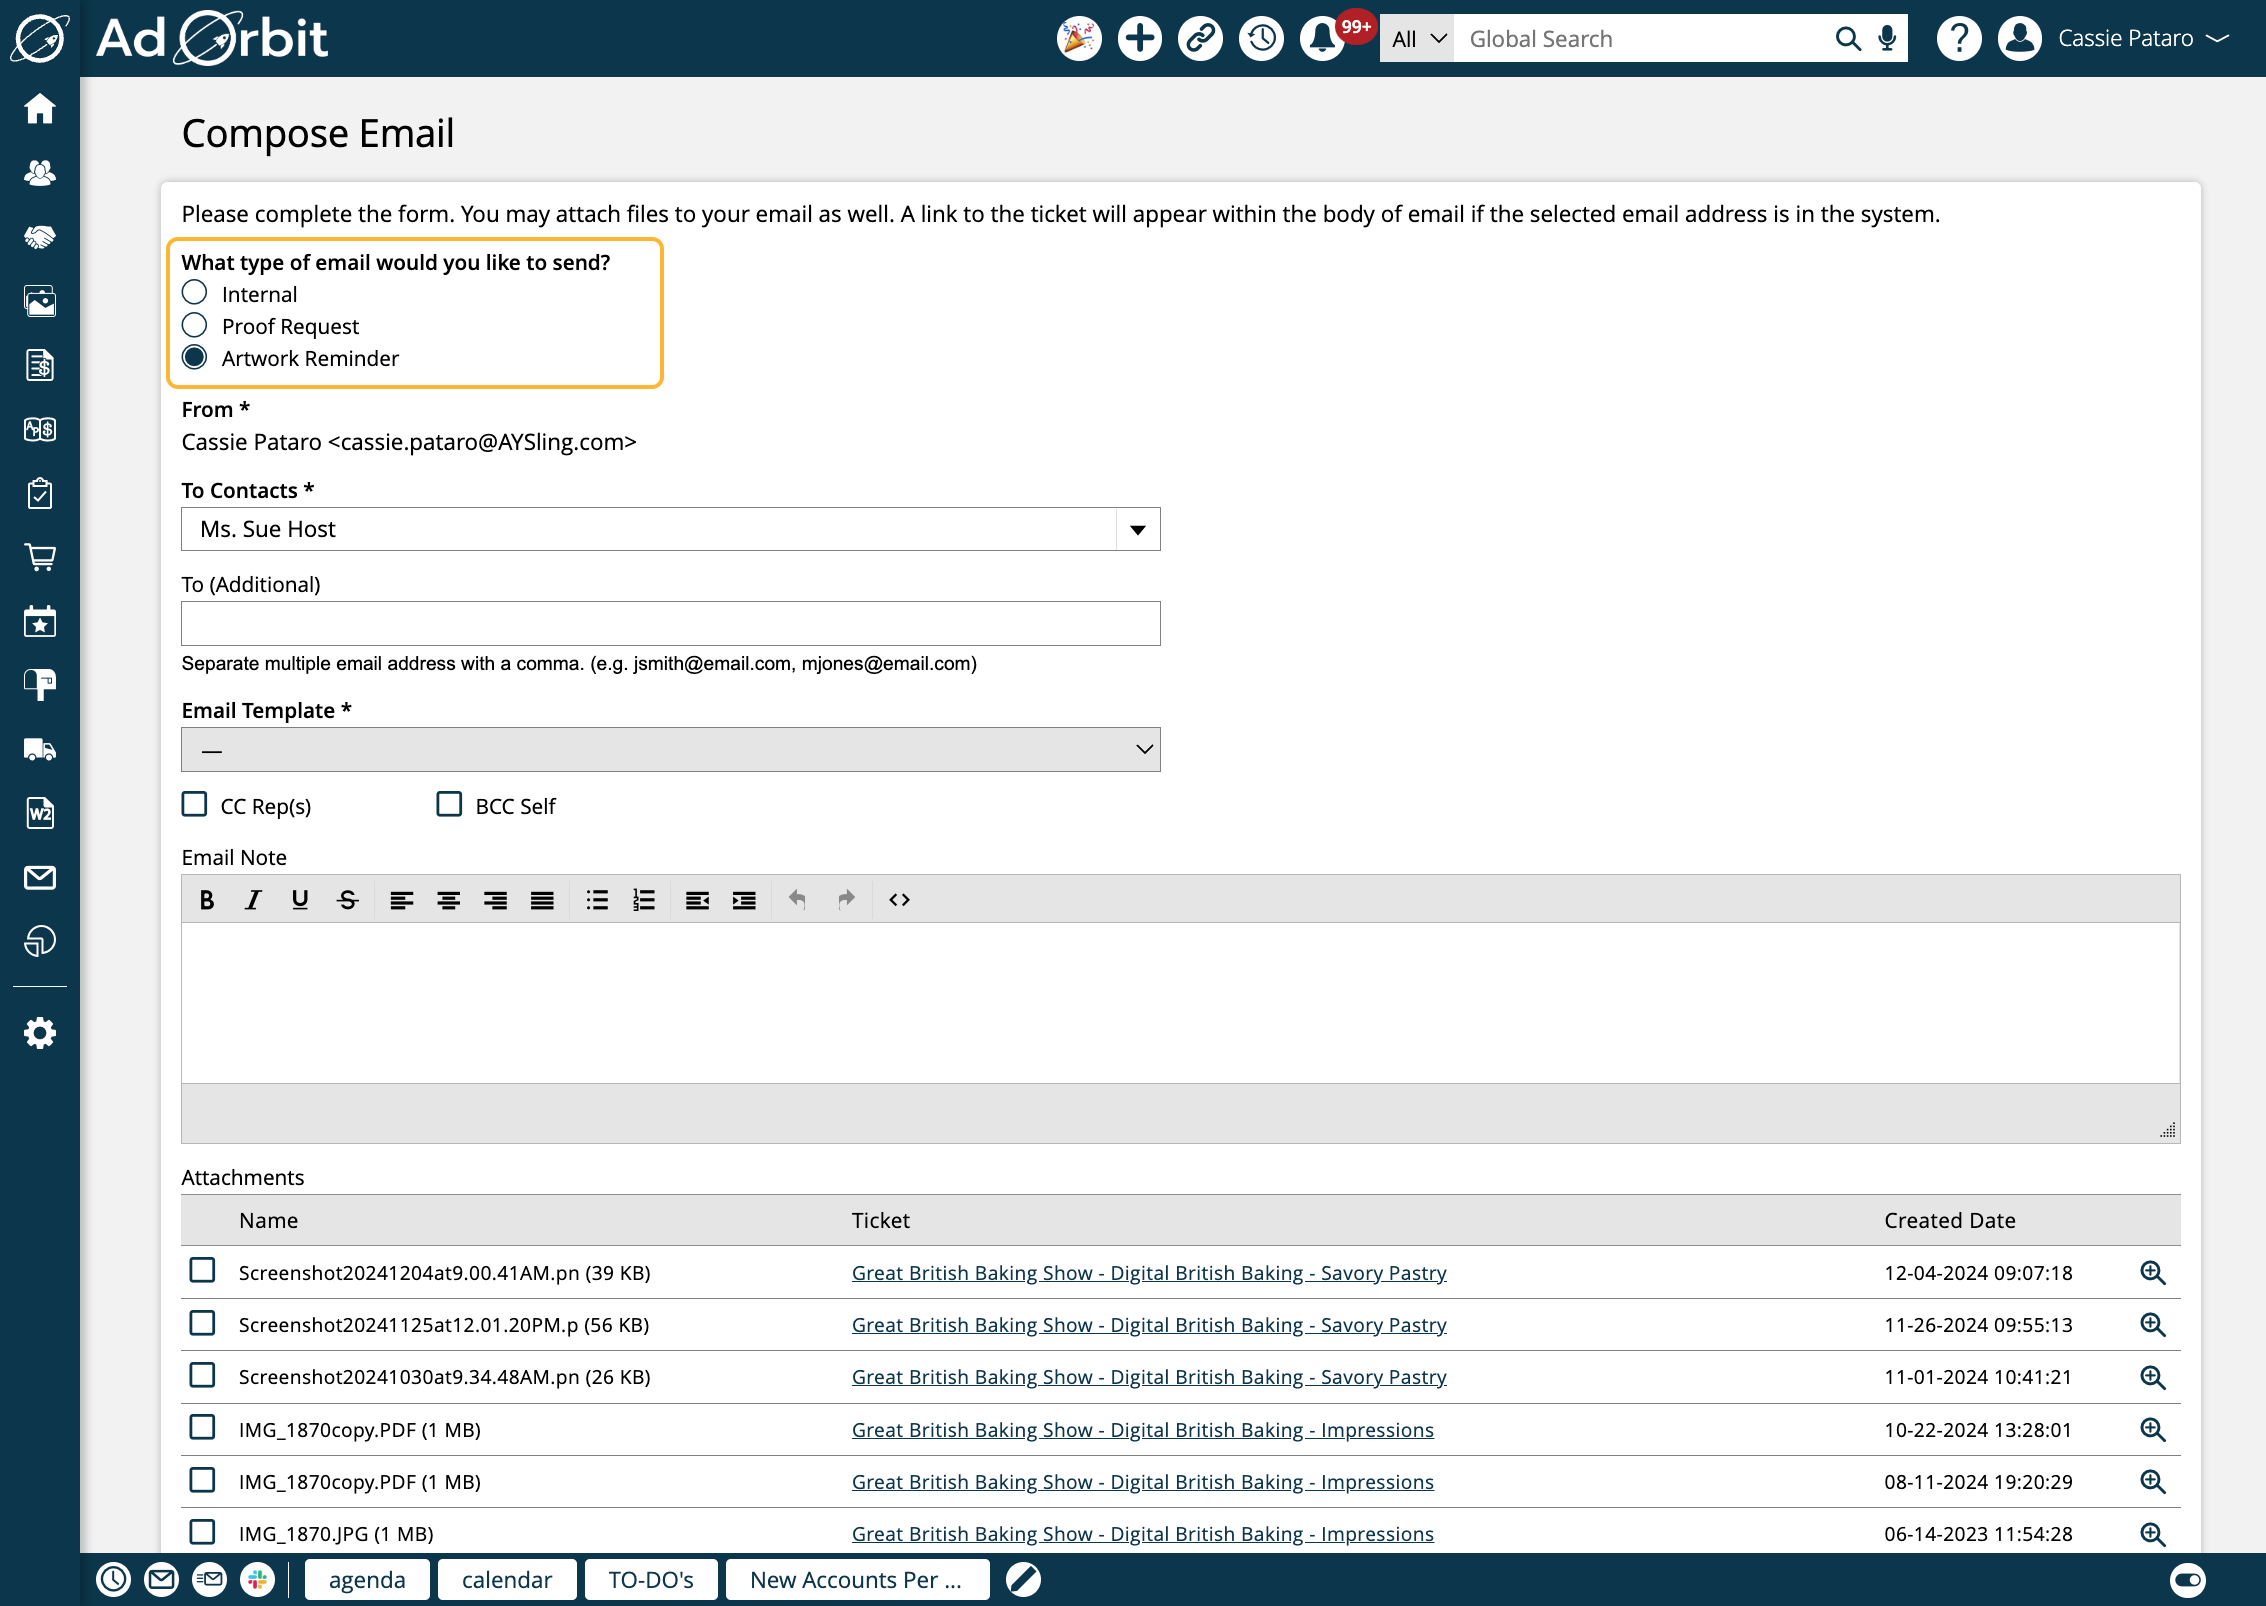
The Email Ticket action opens the Compose Email page where you can generate internal emails, artwork reminders, and proof requests.
There are different required and optional fields on this page depending on which type of email you're sending.
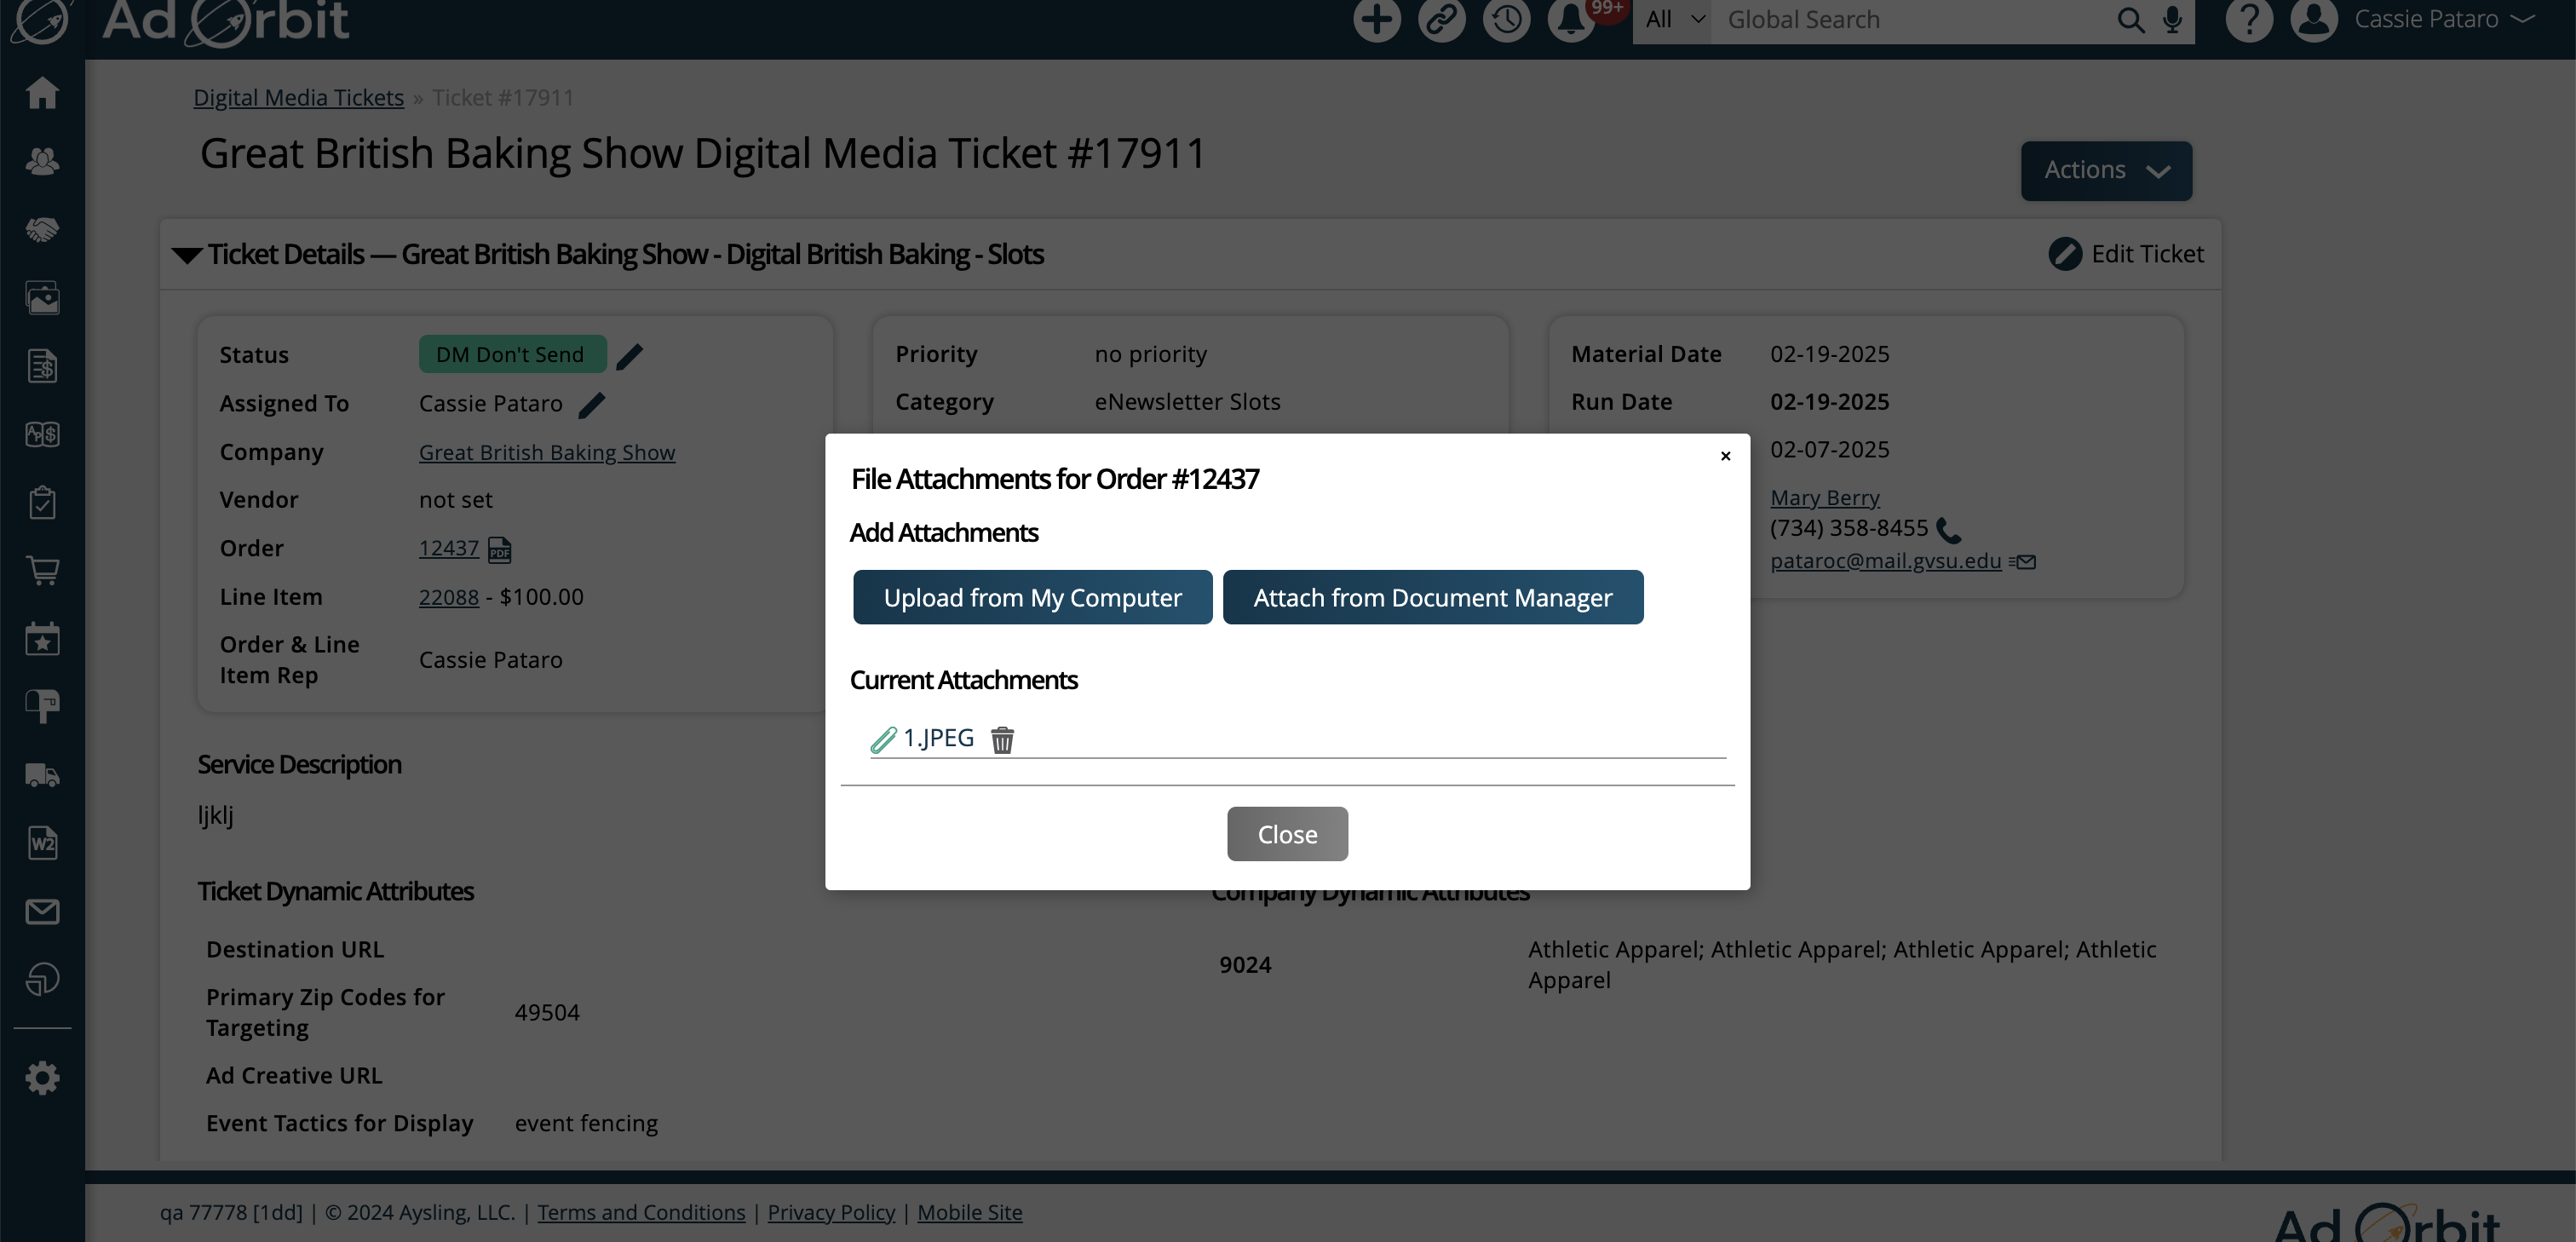
The Order Files action will be visible if you have access to the same action on the pending or signed order.
The popup allows you to view and interact with existing files associated with the order, as well as upload new files.
These files are not the same as ticket files, instead they are files associated on the order level.
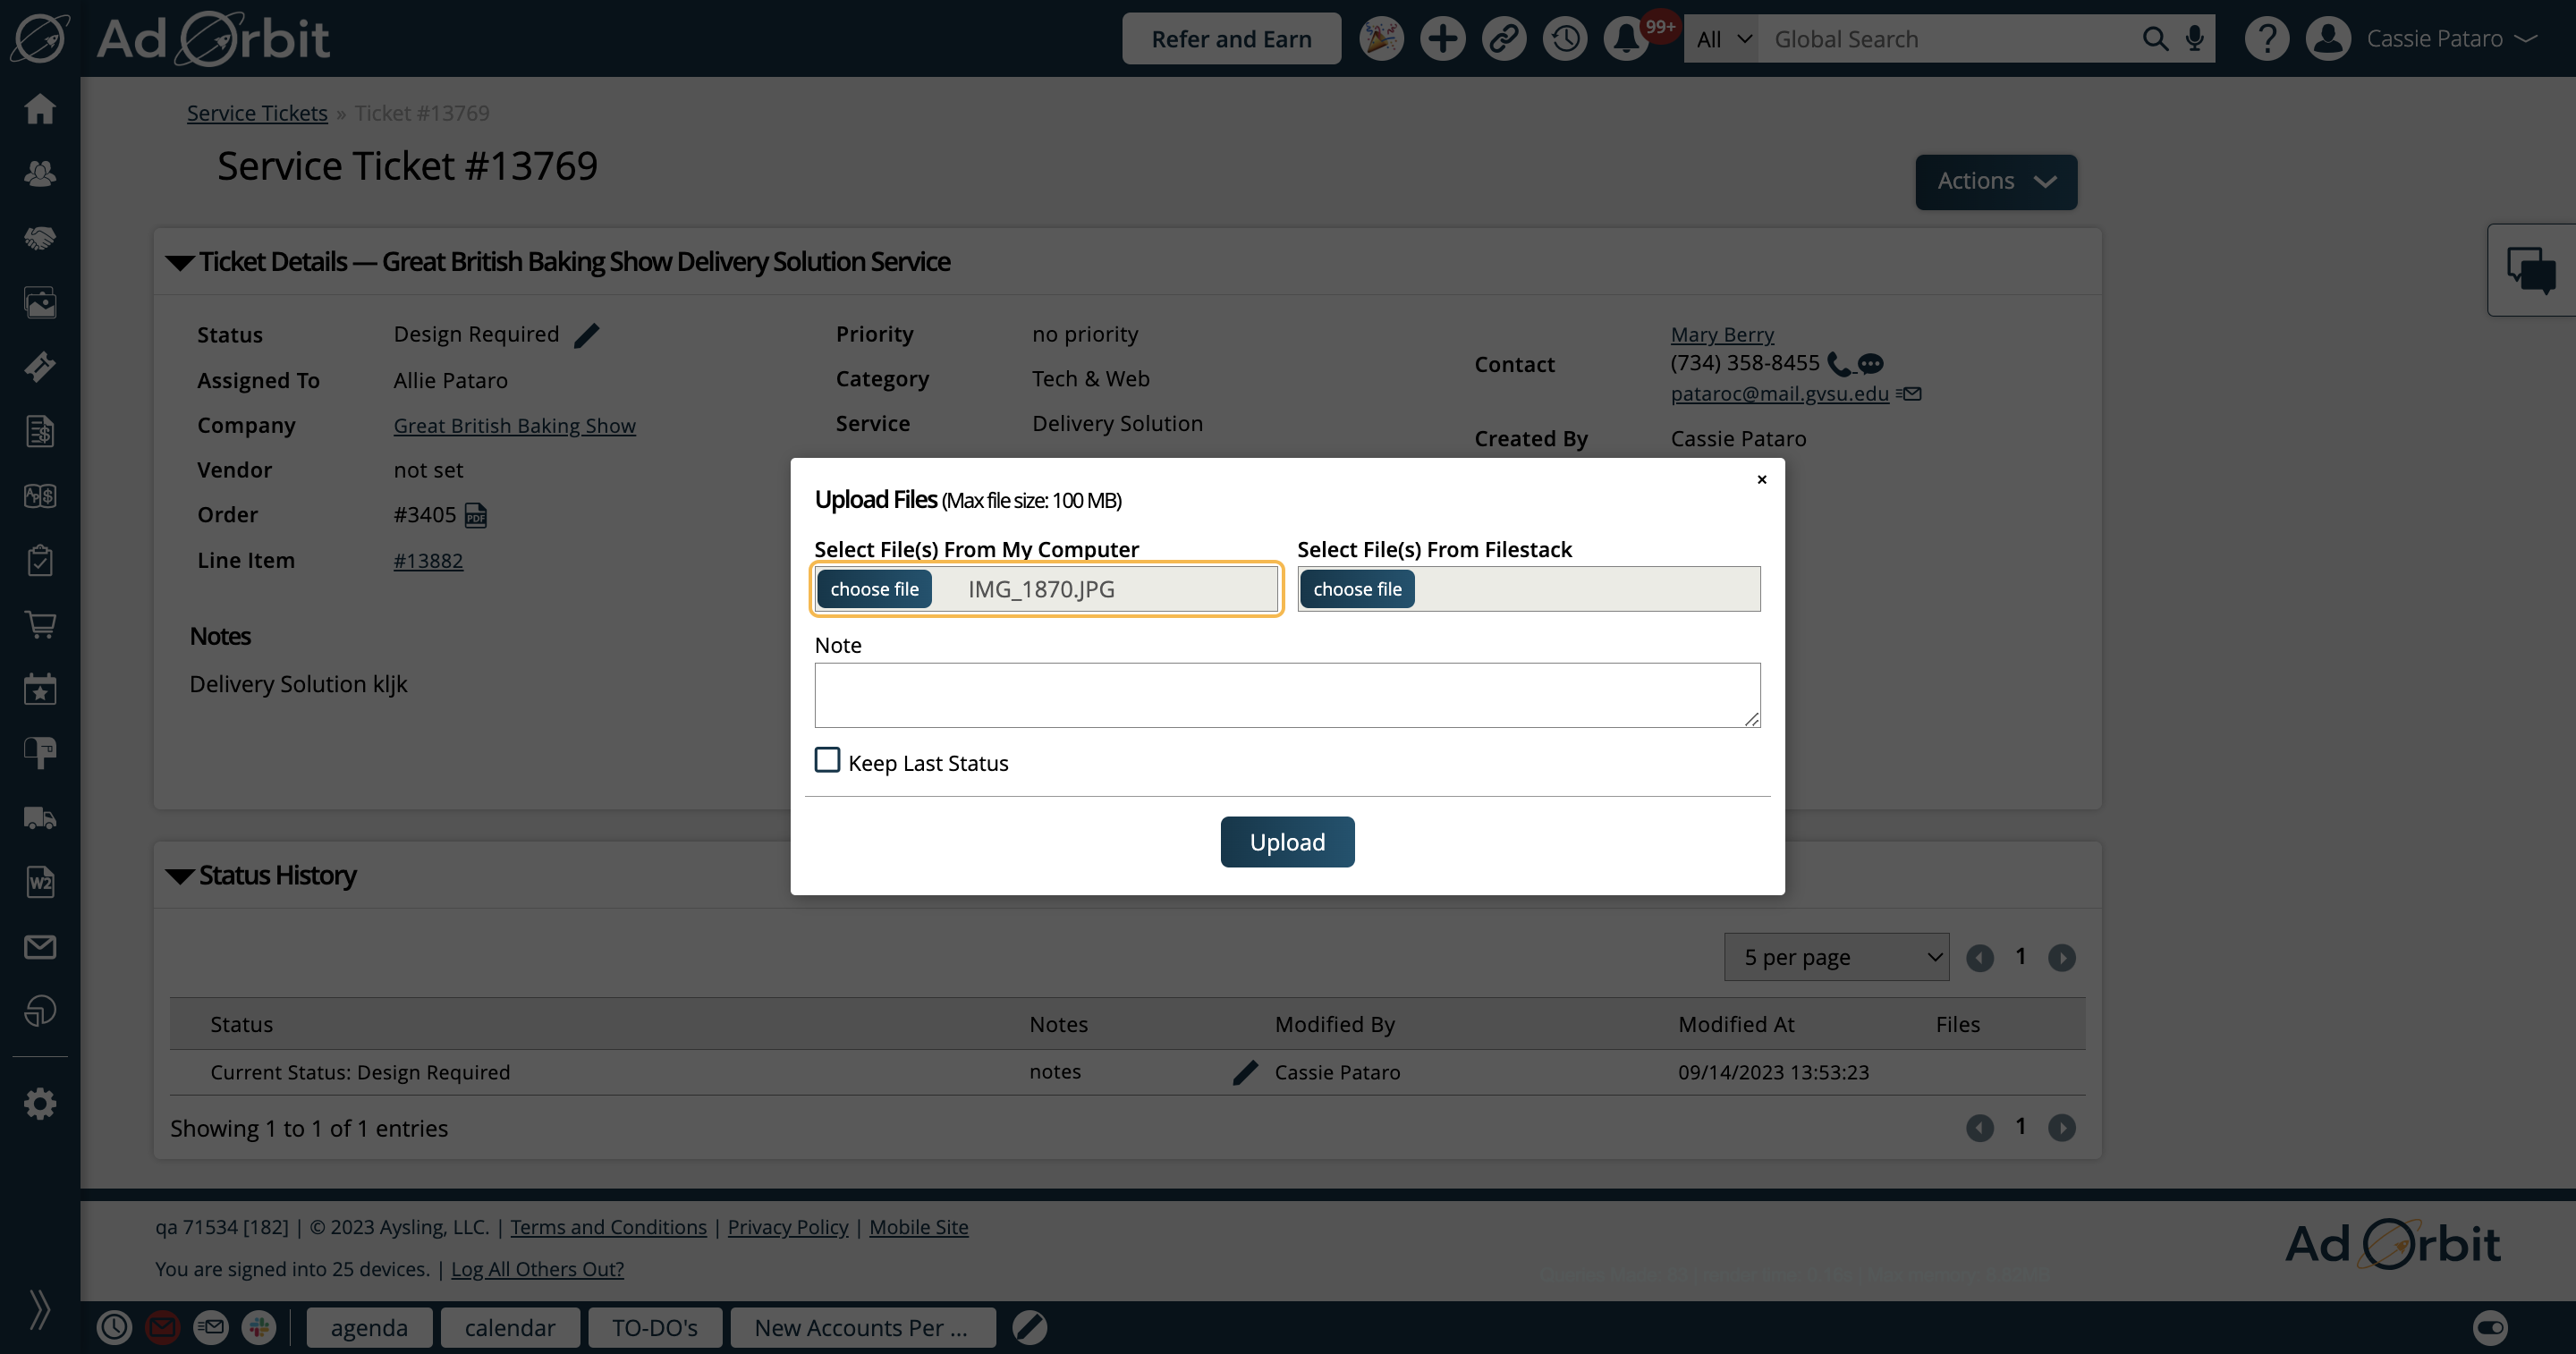
Upload Files
The Upload Files action allows you to attach assets to the ticket, either by uploading a file from your computer, or by using Filestack if you have that integration enabled.
You can also enter notes, and choose whether to keep the last status here. The files added in the popup will appear under the 'Files' section of the ticket.
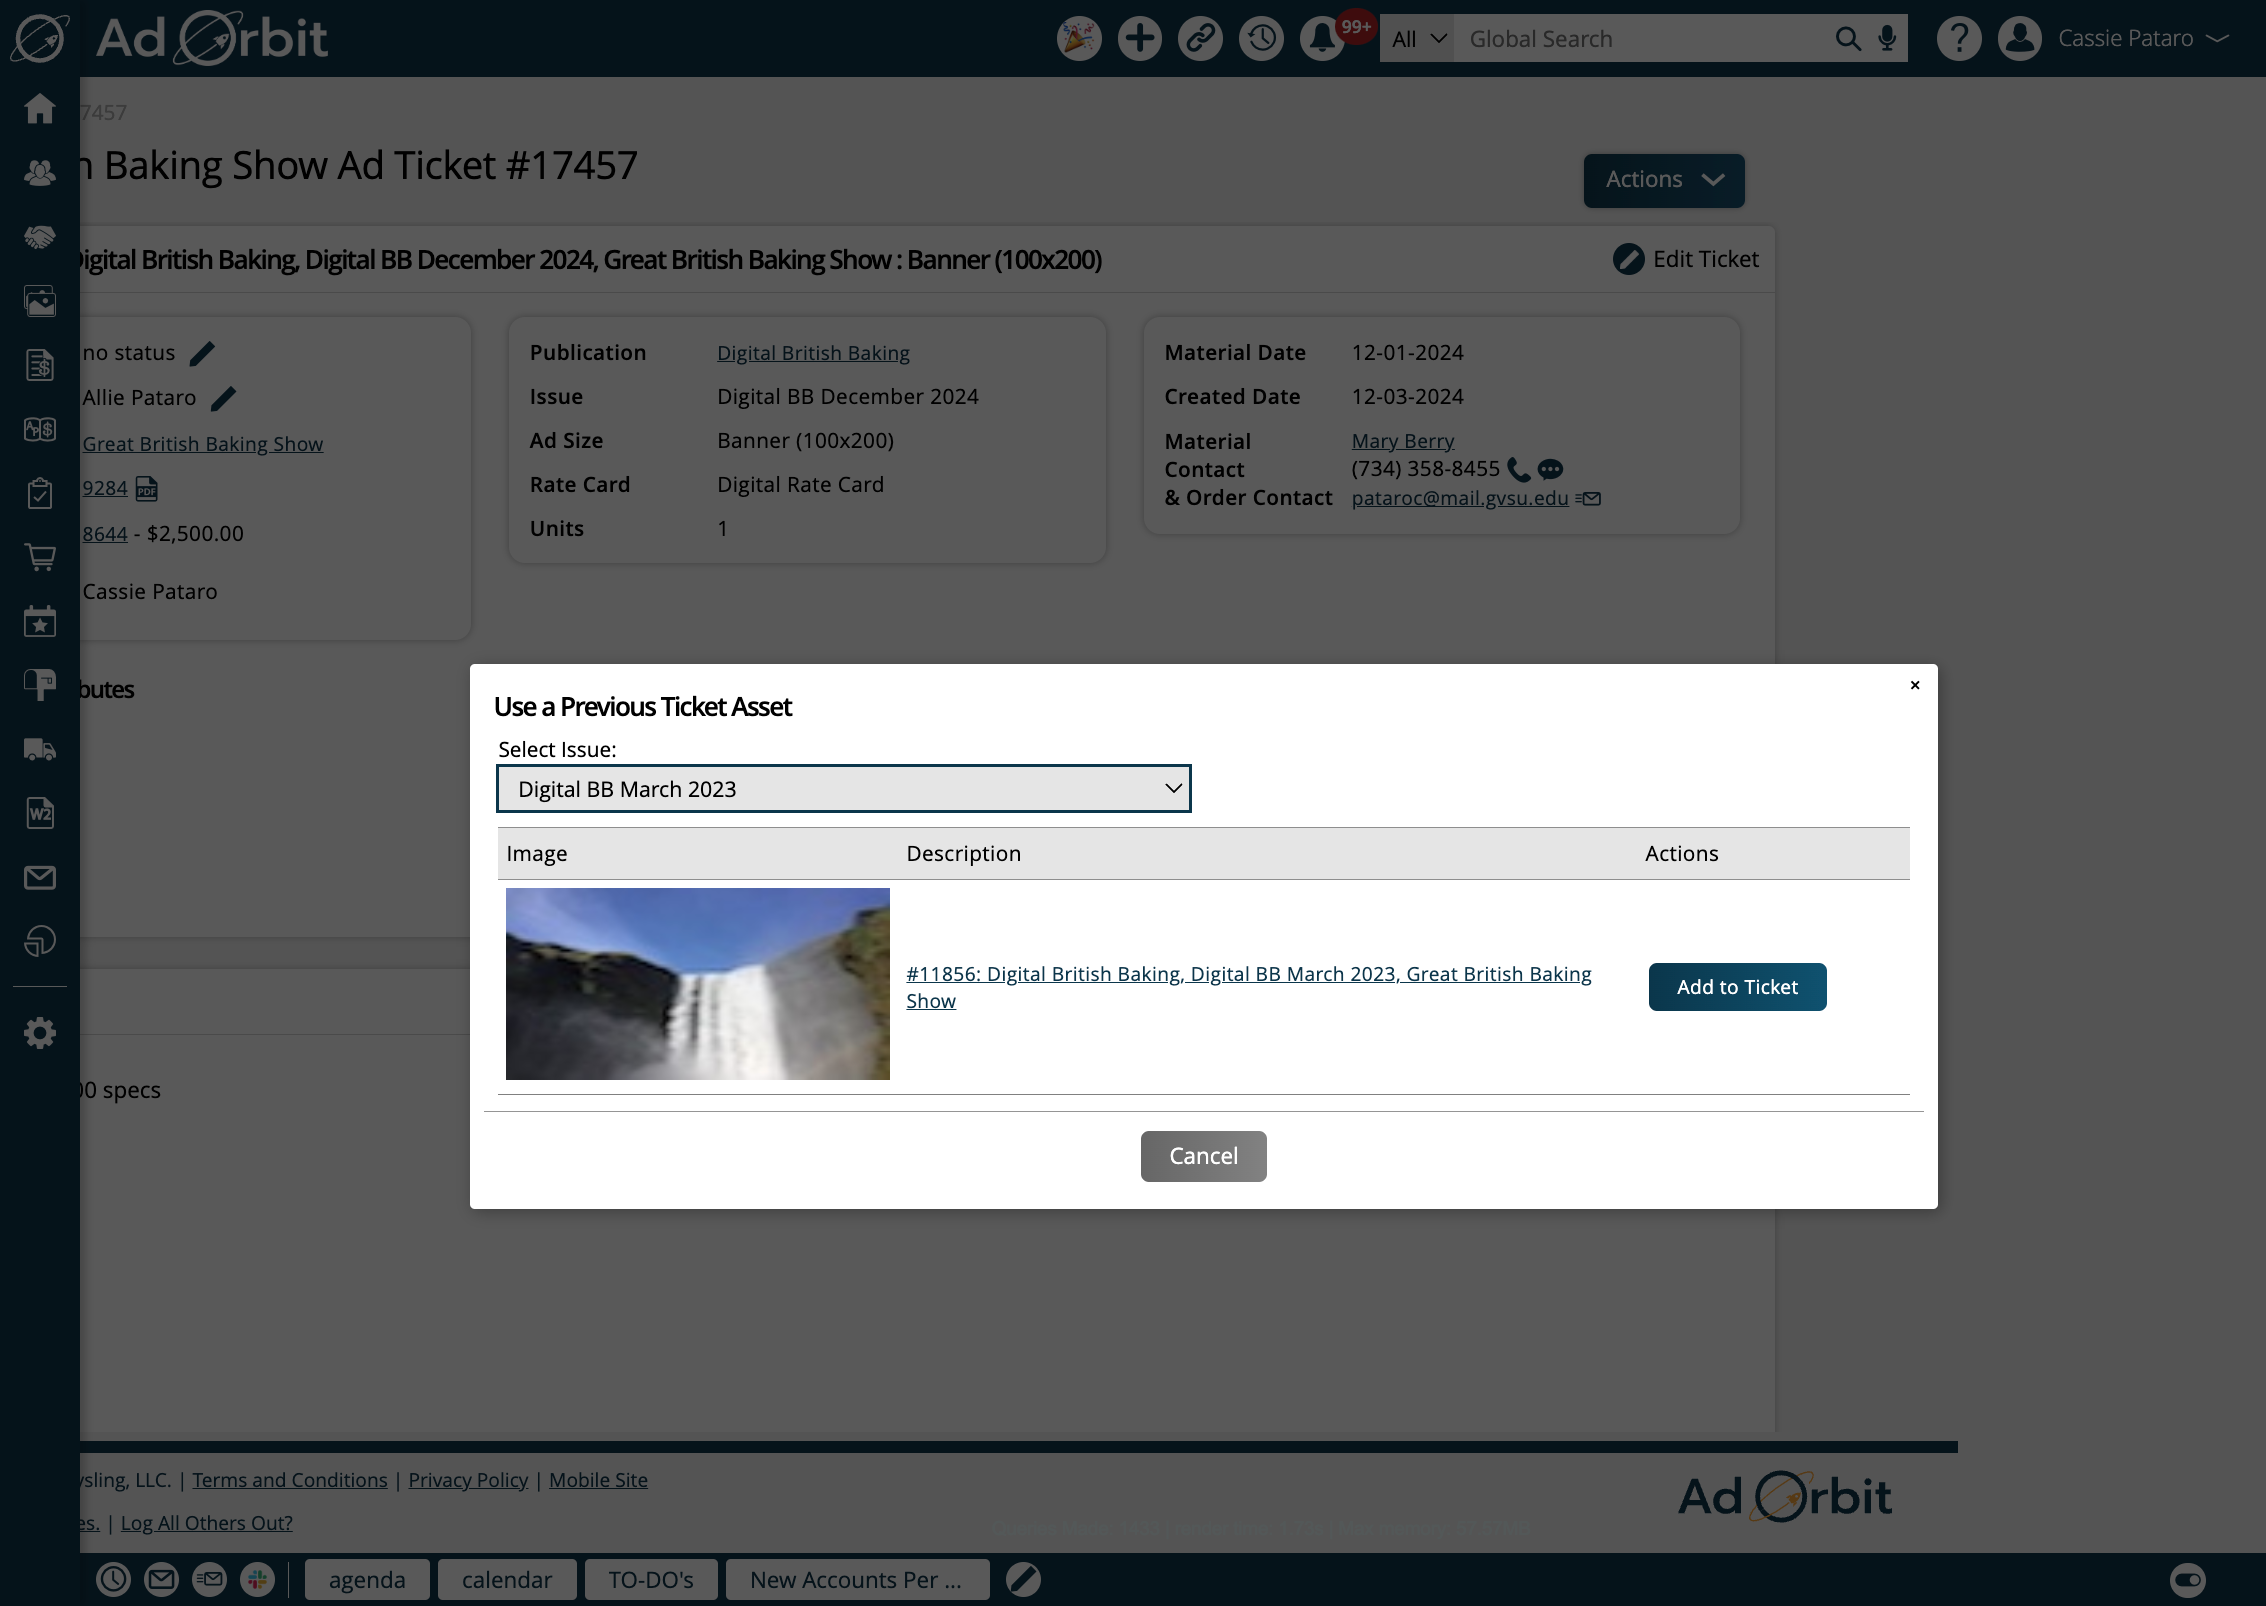
Use Asset from Related Ticket
If you wish to pick up an asset from a previous, related ticket, you can do so using this action. The assets that are available to choose from are assets marked as final on tickets for past issues for the same company, and ad size.
Upload Tear Sheet Image
By default, a ticket's tear sheet image is the file that is uploaded to that item in MagBuilder. If you wish to override this image and use a different tear sheet image instead, or if you want a tear sheet image but do not use MagBuilder, then use this action to upload the file you want to use for your tear sheet.
The next action in the list is to request Brand/Design Approval.
When you need to get approval from a customer on an asset on a service ticket, you need to first make sure the service ticket is assigned to a user and is marked for brand approval. A user must have permission to mark a ticket as brand approval. If you don't have permission, you can request brand approval and wait for an approver to update your ticket before sending the proof.
You can send a proof on any service ticket with an asset. Once you have an asset uploaded to a ticket, mark the ticket to request brand approval.
The brand approval will go out from the Design Approval Email in the configuration setting, and any user with the permission to do brand approval can update the ticket.
If you have permission to perform Brand Approvals, you'll also see the Brand Approve action. If you do not see this action, you do not have the permission to Brand Approve.
Proof request emails can only be sent on a service ticket once it is brand approved.
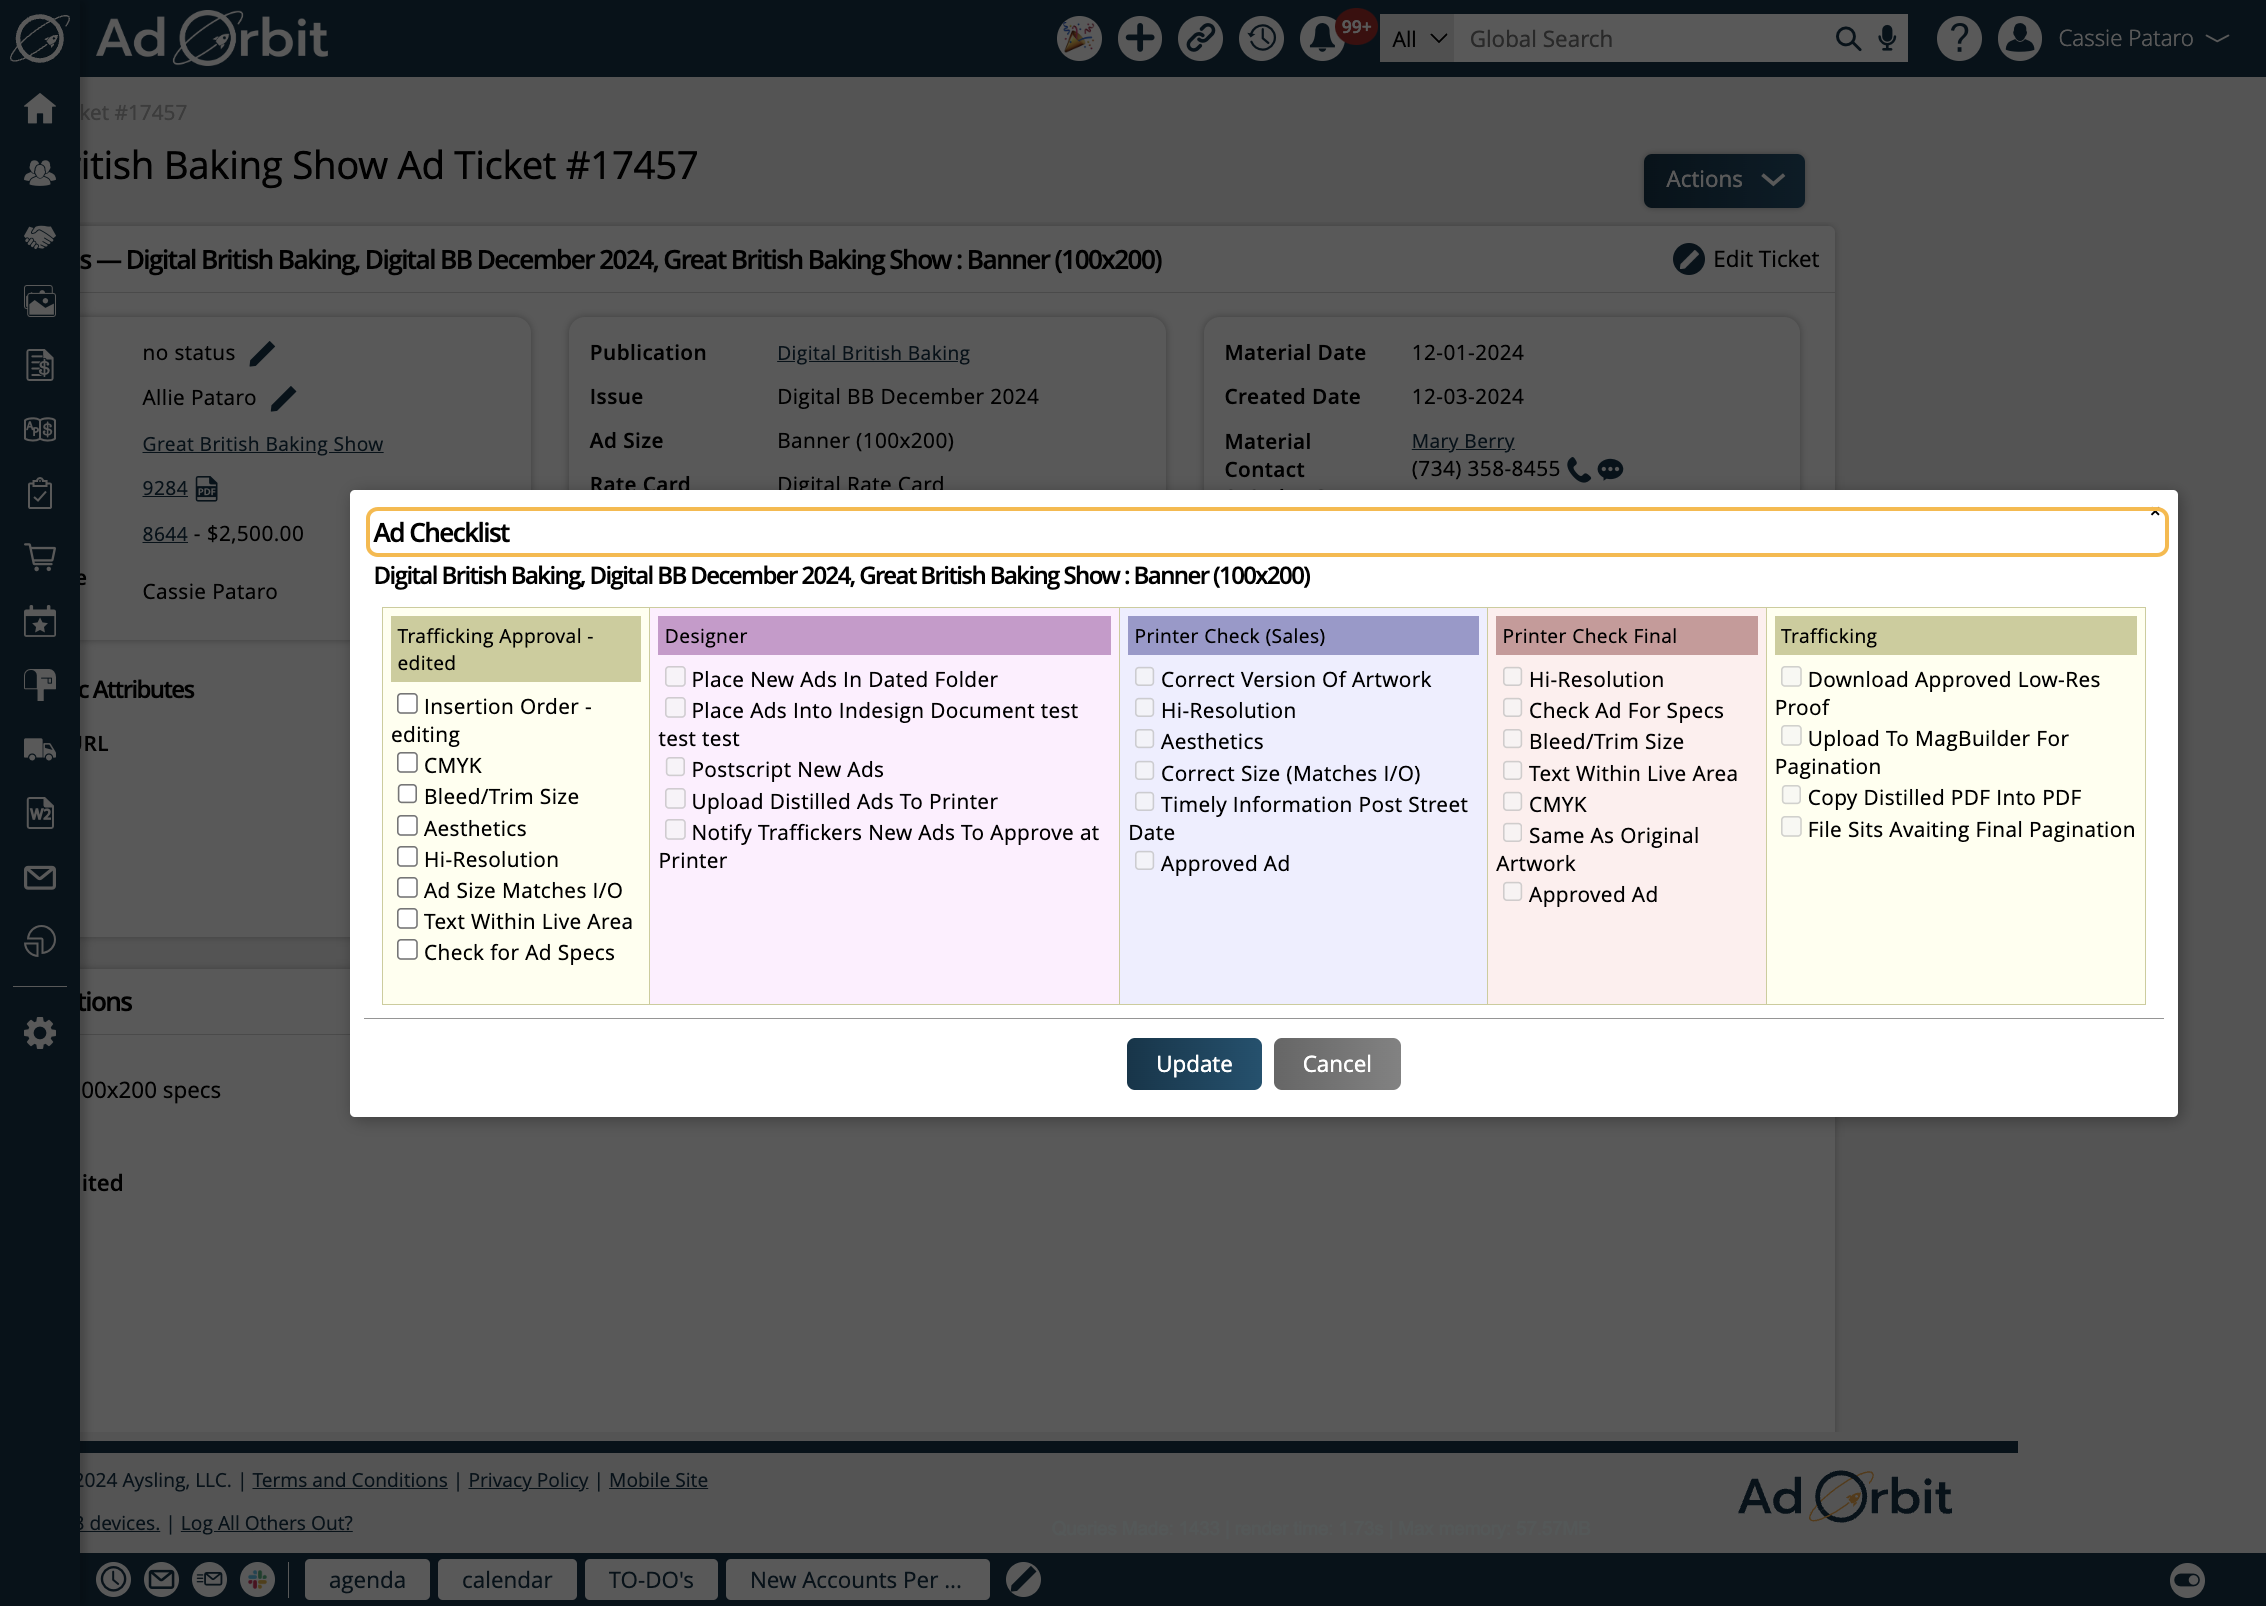
Procedural Checklist
Click this action to view and interact with the Procedural Checklist on your ticket. For more information about this feature, click here.
Copy Client Center Link
Use this action to copy the Client Center ticket link. This link can be pasted into emails sent to your contacts. Unlike the Anonymous Artwork Upload link, your contacts will need to be logged into the Client Center to access this page.
Generate Anonymous Artwork Upload Link
The Anonymous Artwork Upload Link is an optional tag in your Artwork Reminder emails called 'Upload Artwork Url'. When included in your reminder emails, it allows your contacts to upload assets to their tickets without needing to log into the Client Center. Click this action to generate the link. Once generated, you'll see the Anonymous Artwork Upload Link section on your ticket.
And finally, you can mark tickets as Done. Marking a ticket as done indicates no further work is needed on it.
If you have permission to re-open closed tickets, on any ticket marked as Done, you'll be able to 'Mark Not Done'. Without this permission you won't be able to perform any actions on a closed ticket.
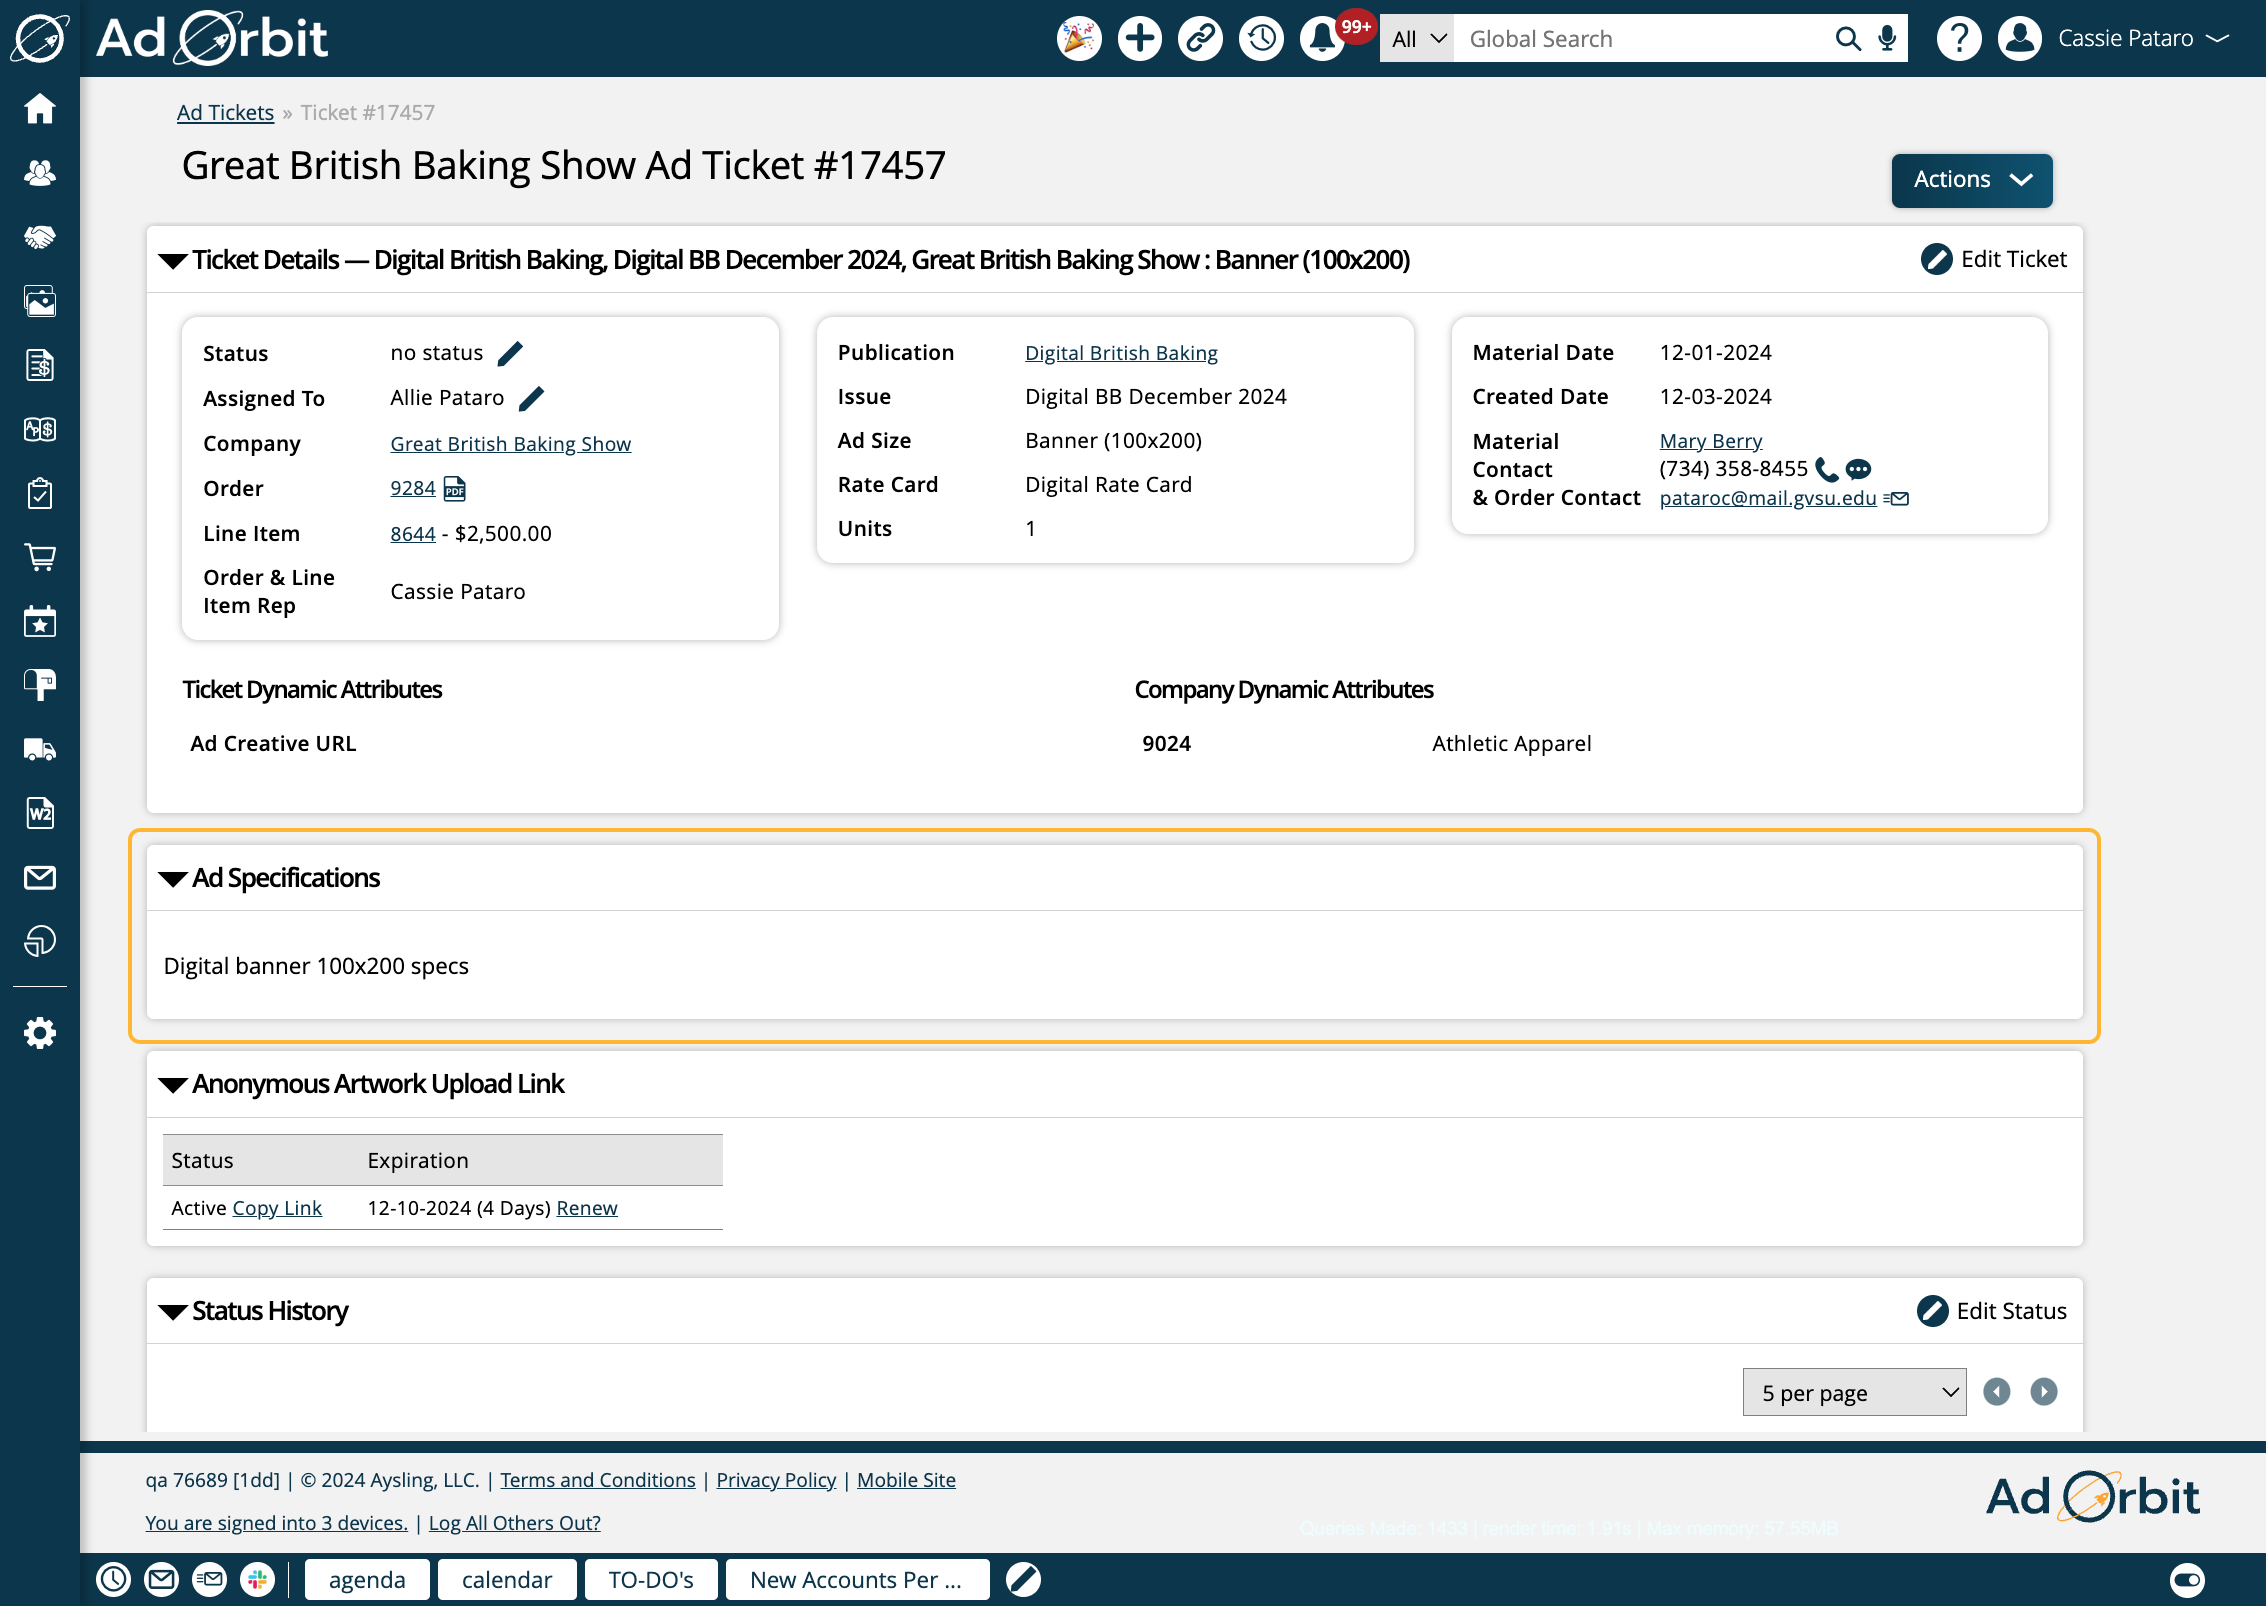
If there are Ad Specs set on a product or ad size, you will see the Ad Specifications section of the ticket. This section simply displays the Ad Spec details of the product or size associated with the ticket.
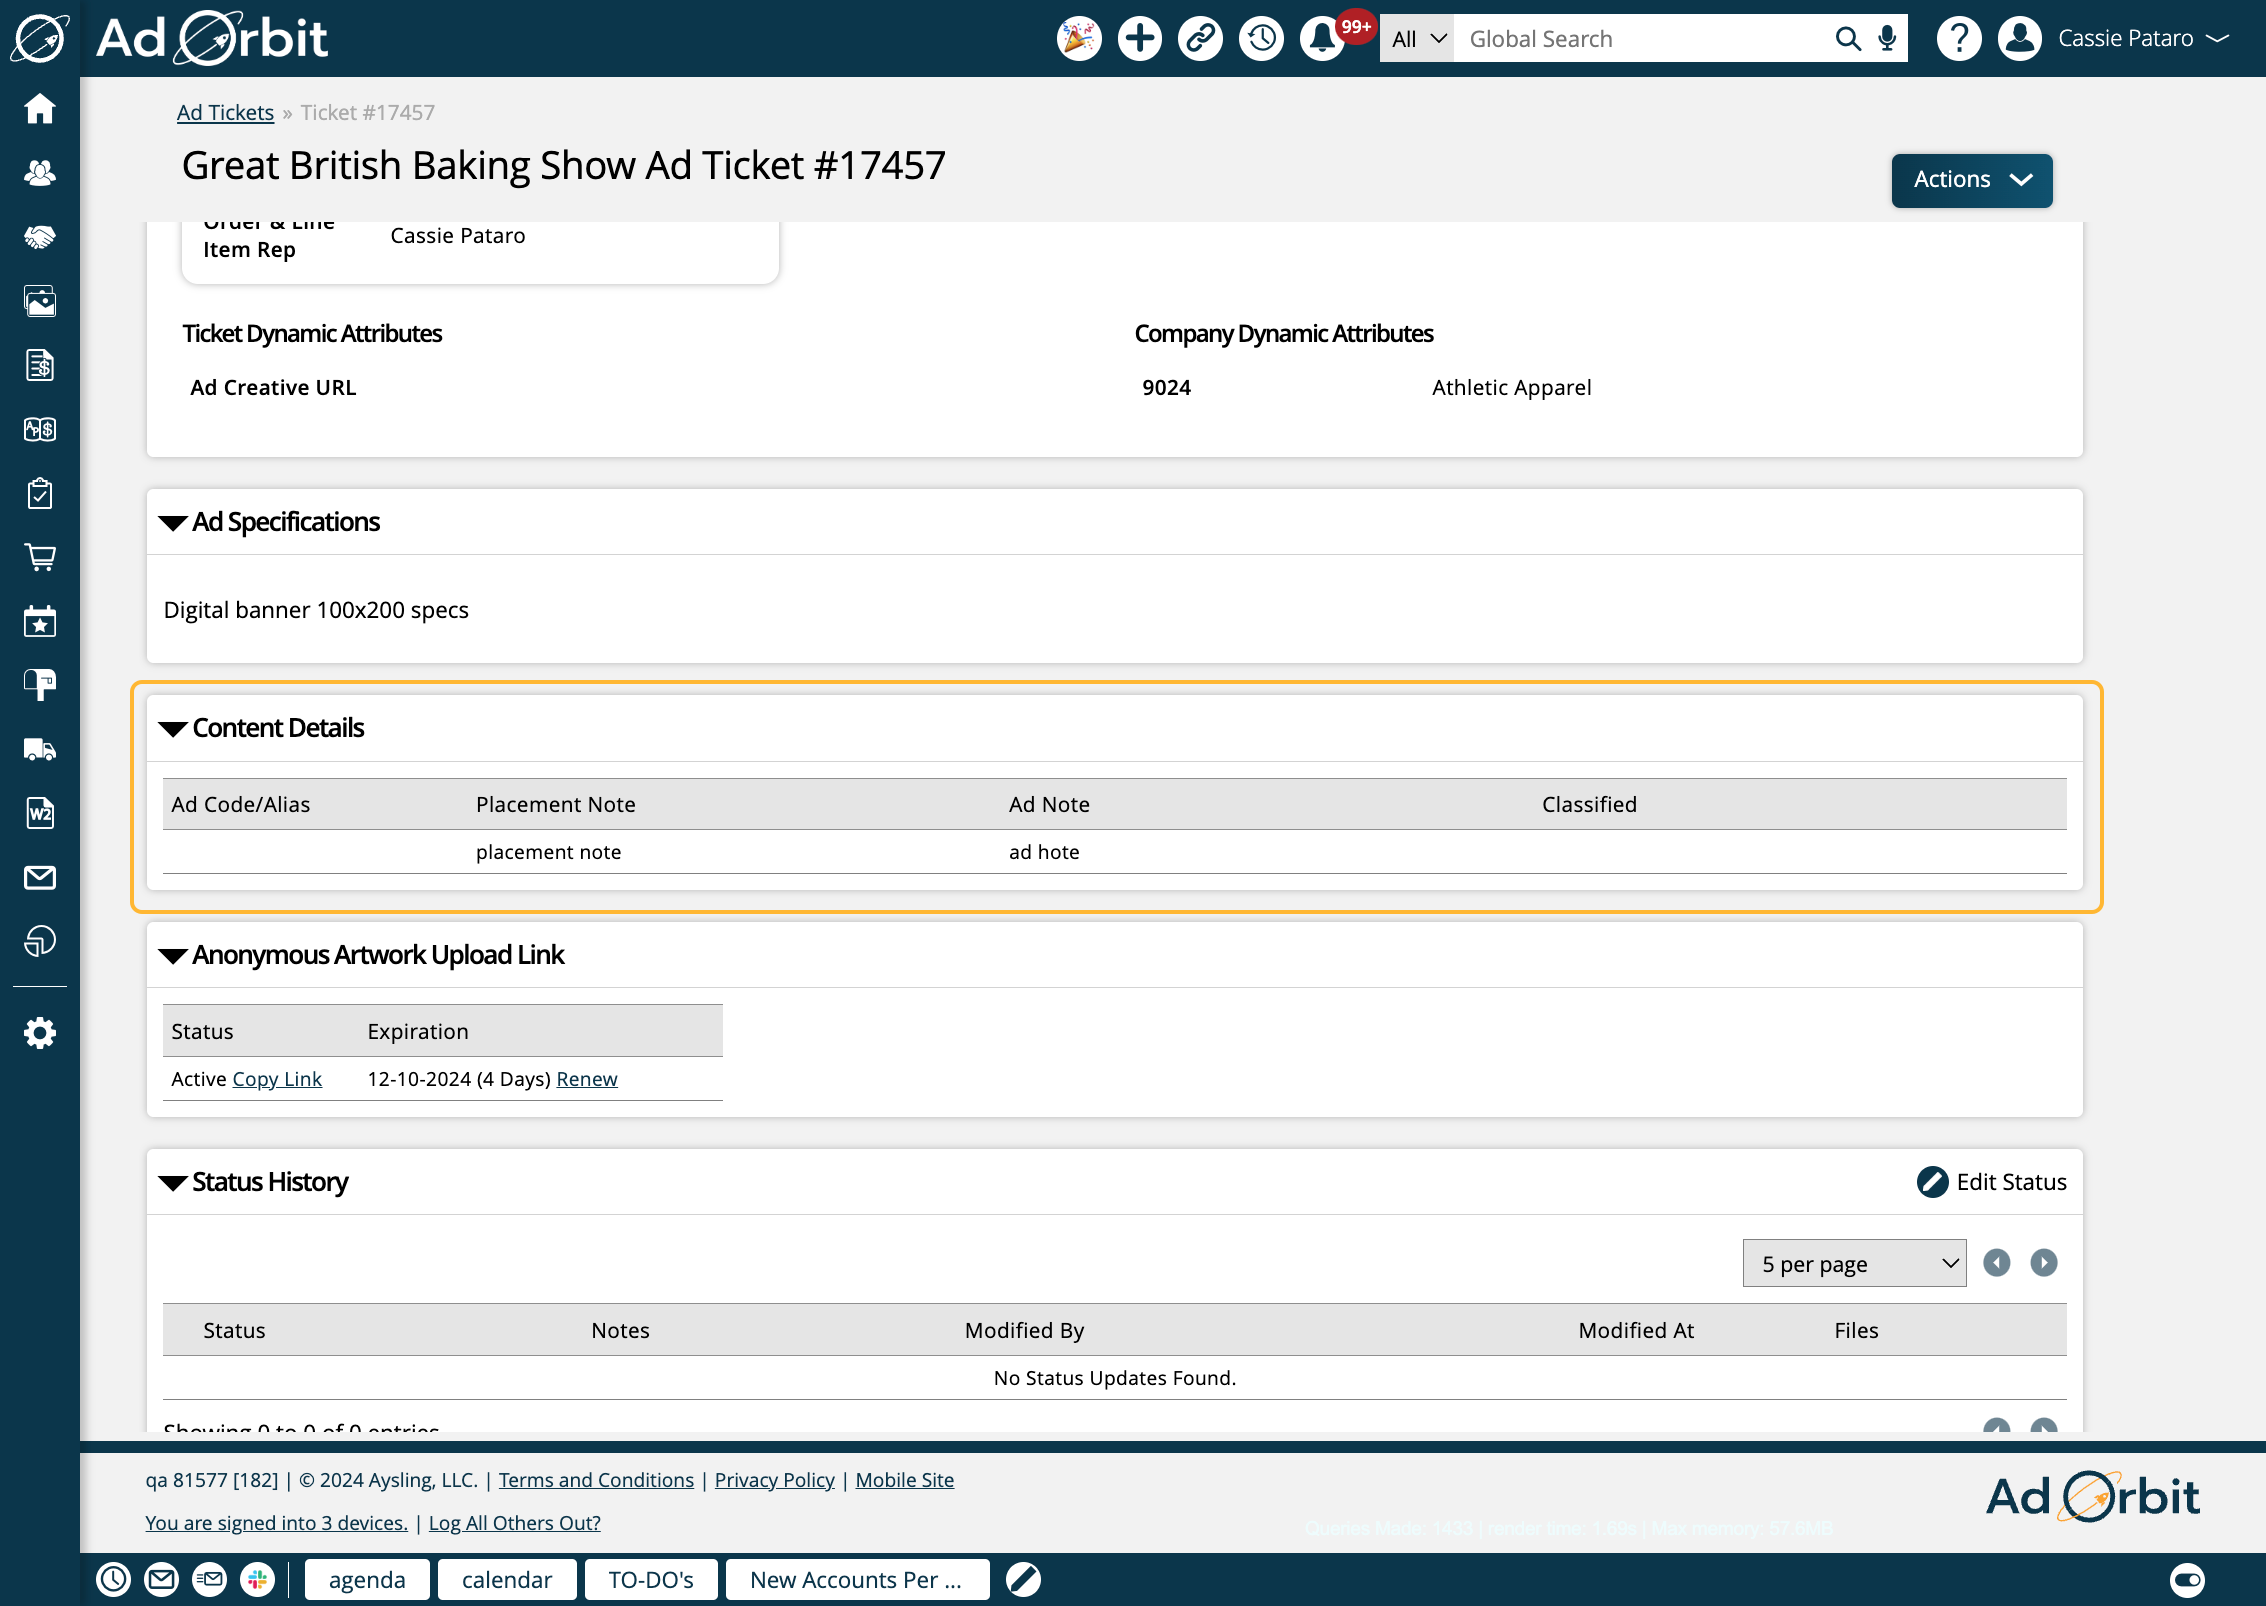
On print and digital ad tickets, there will be a Content Details section. The Content Details includes information about ad size aliases, placement and ad notes, as well as any classified text if applicable.
The Anonymous Artwork Upload Link is an optional tag in your Artwork Reminder emails called 'Upload Artwork Url'. When included in your reminder emails, it allows your contacts to upload assets to their tickets without needing to log into the Client Center. This section on ticket pages allows you to interact with that link.
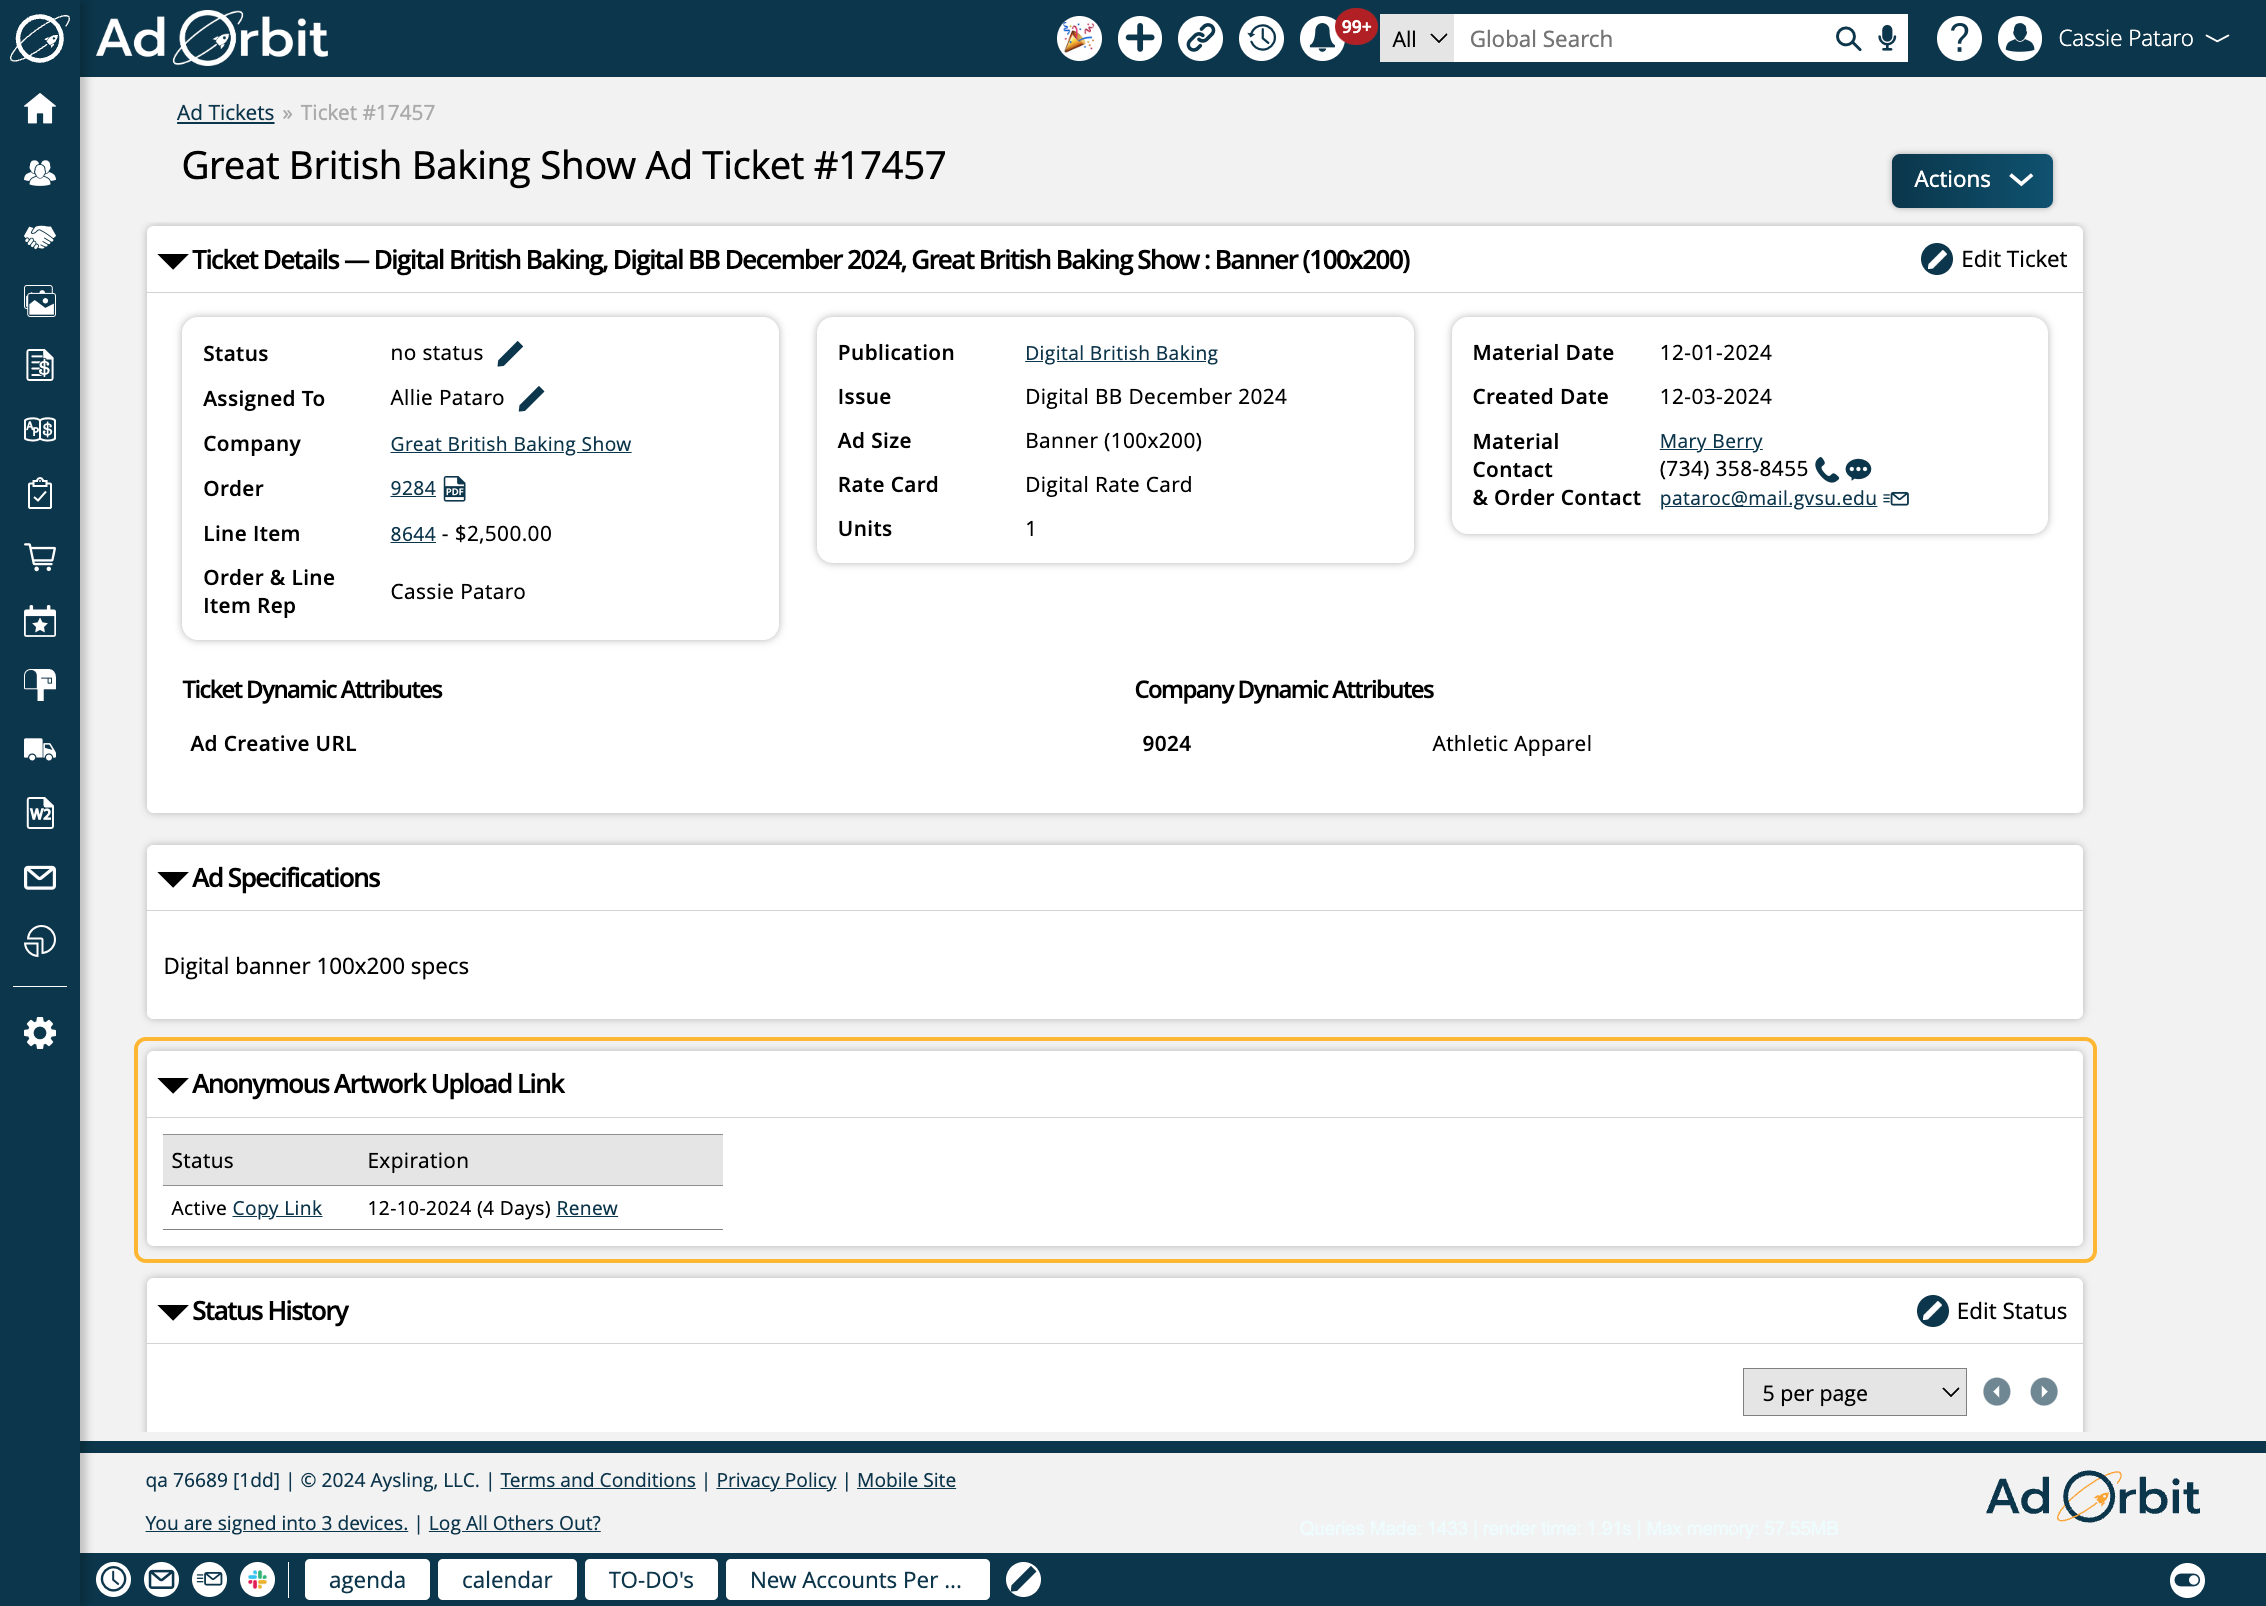
This ticket section will only display once the link has been generated. The section displays the link’s status and expiration date.
Tip
To generate the Anonymous Artwork Upload Link and see this section on your ticket, click on the main Actions menu on the ticket, and click the ‘Generate Anonymous Upload Link’ action.
If the link is active, you can copy the link and paste it into a custom email.
If expired, you can Renew the link. When renewing the link, you can choose whether or not to email the ticket artwork contact and notify them of the renewal.
The Status History section is visible on every ticket. In a table format, it shows any changes made to the ticket’s status over time. Each record shows the status change, any relevant notes, and who the status change was performed by.
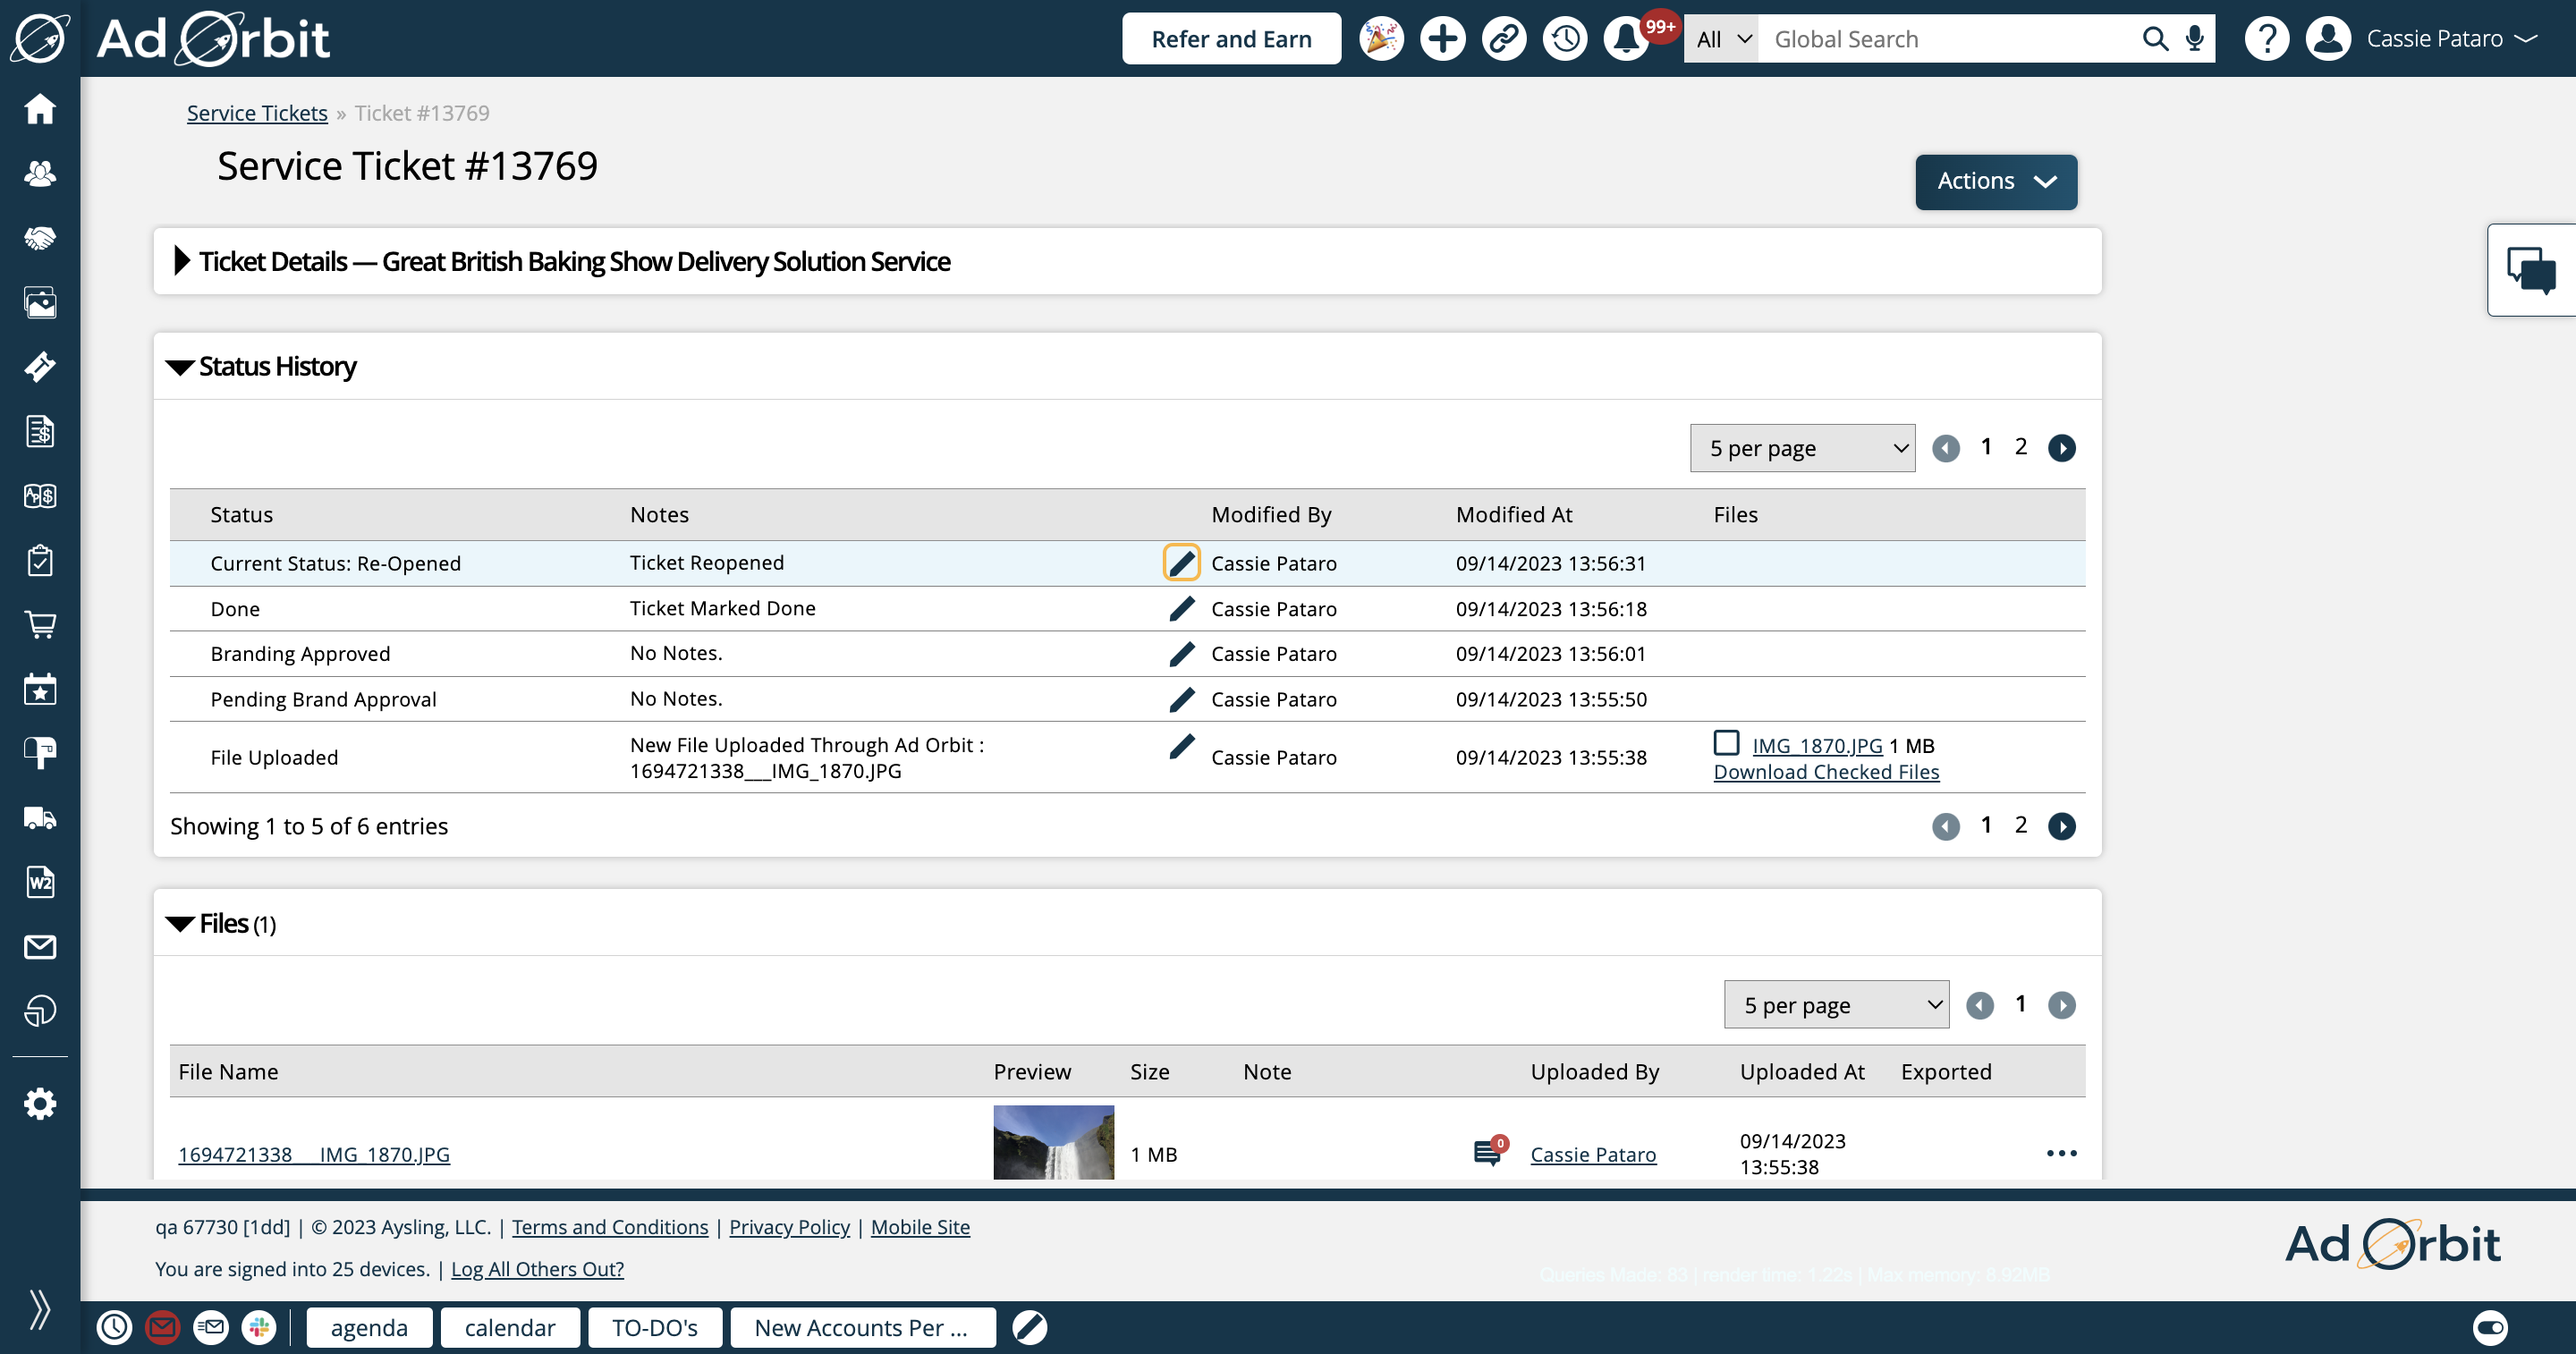
Multiple actions can be taken from the Status History section of your ticket.
Clicking Edit Status in the header allows you to change the status of the ticket.
If you have permission to edit status notes, you’ll see an edit icon next to each status change. Clicking on this icon allows you to edit the notes associated with the status.
If there were files uploaded, you can open the file in a new tab or download any files that you select.
Any assets that have been uploaded to the ticket will be displayed in this table. You'll be able to see information about each asset, including actions to view annotations, submit it for pre-flighting, and marking it as final.
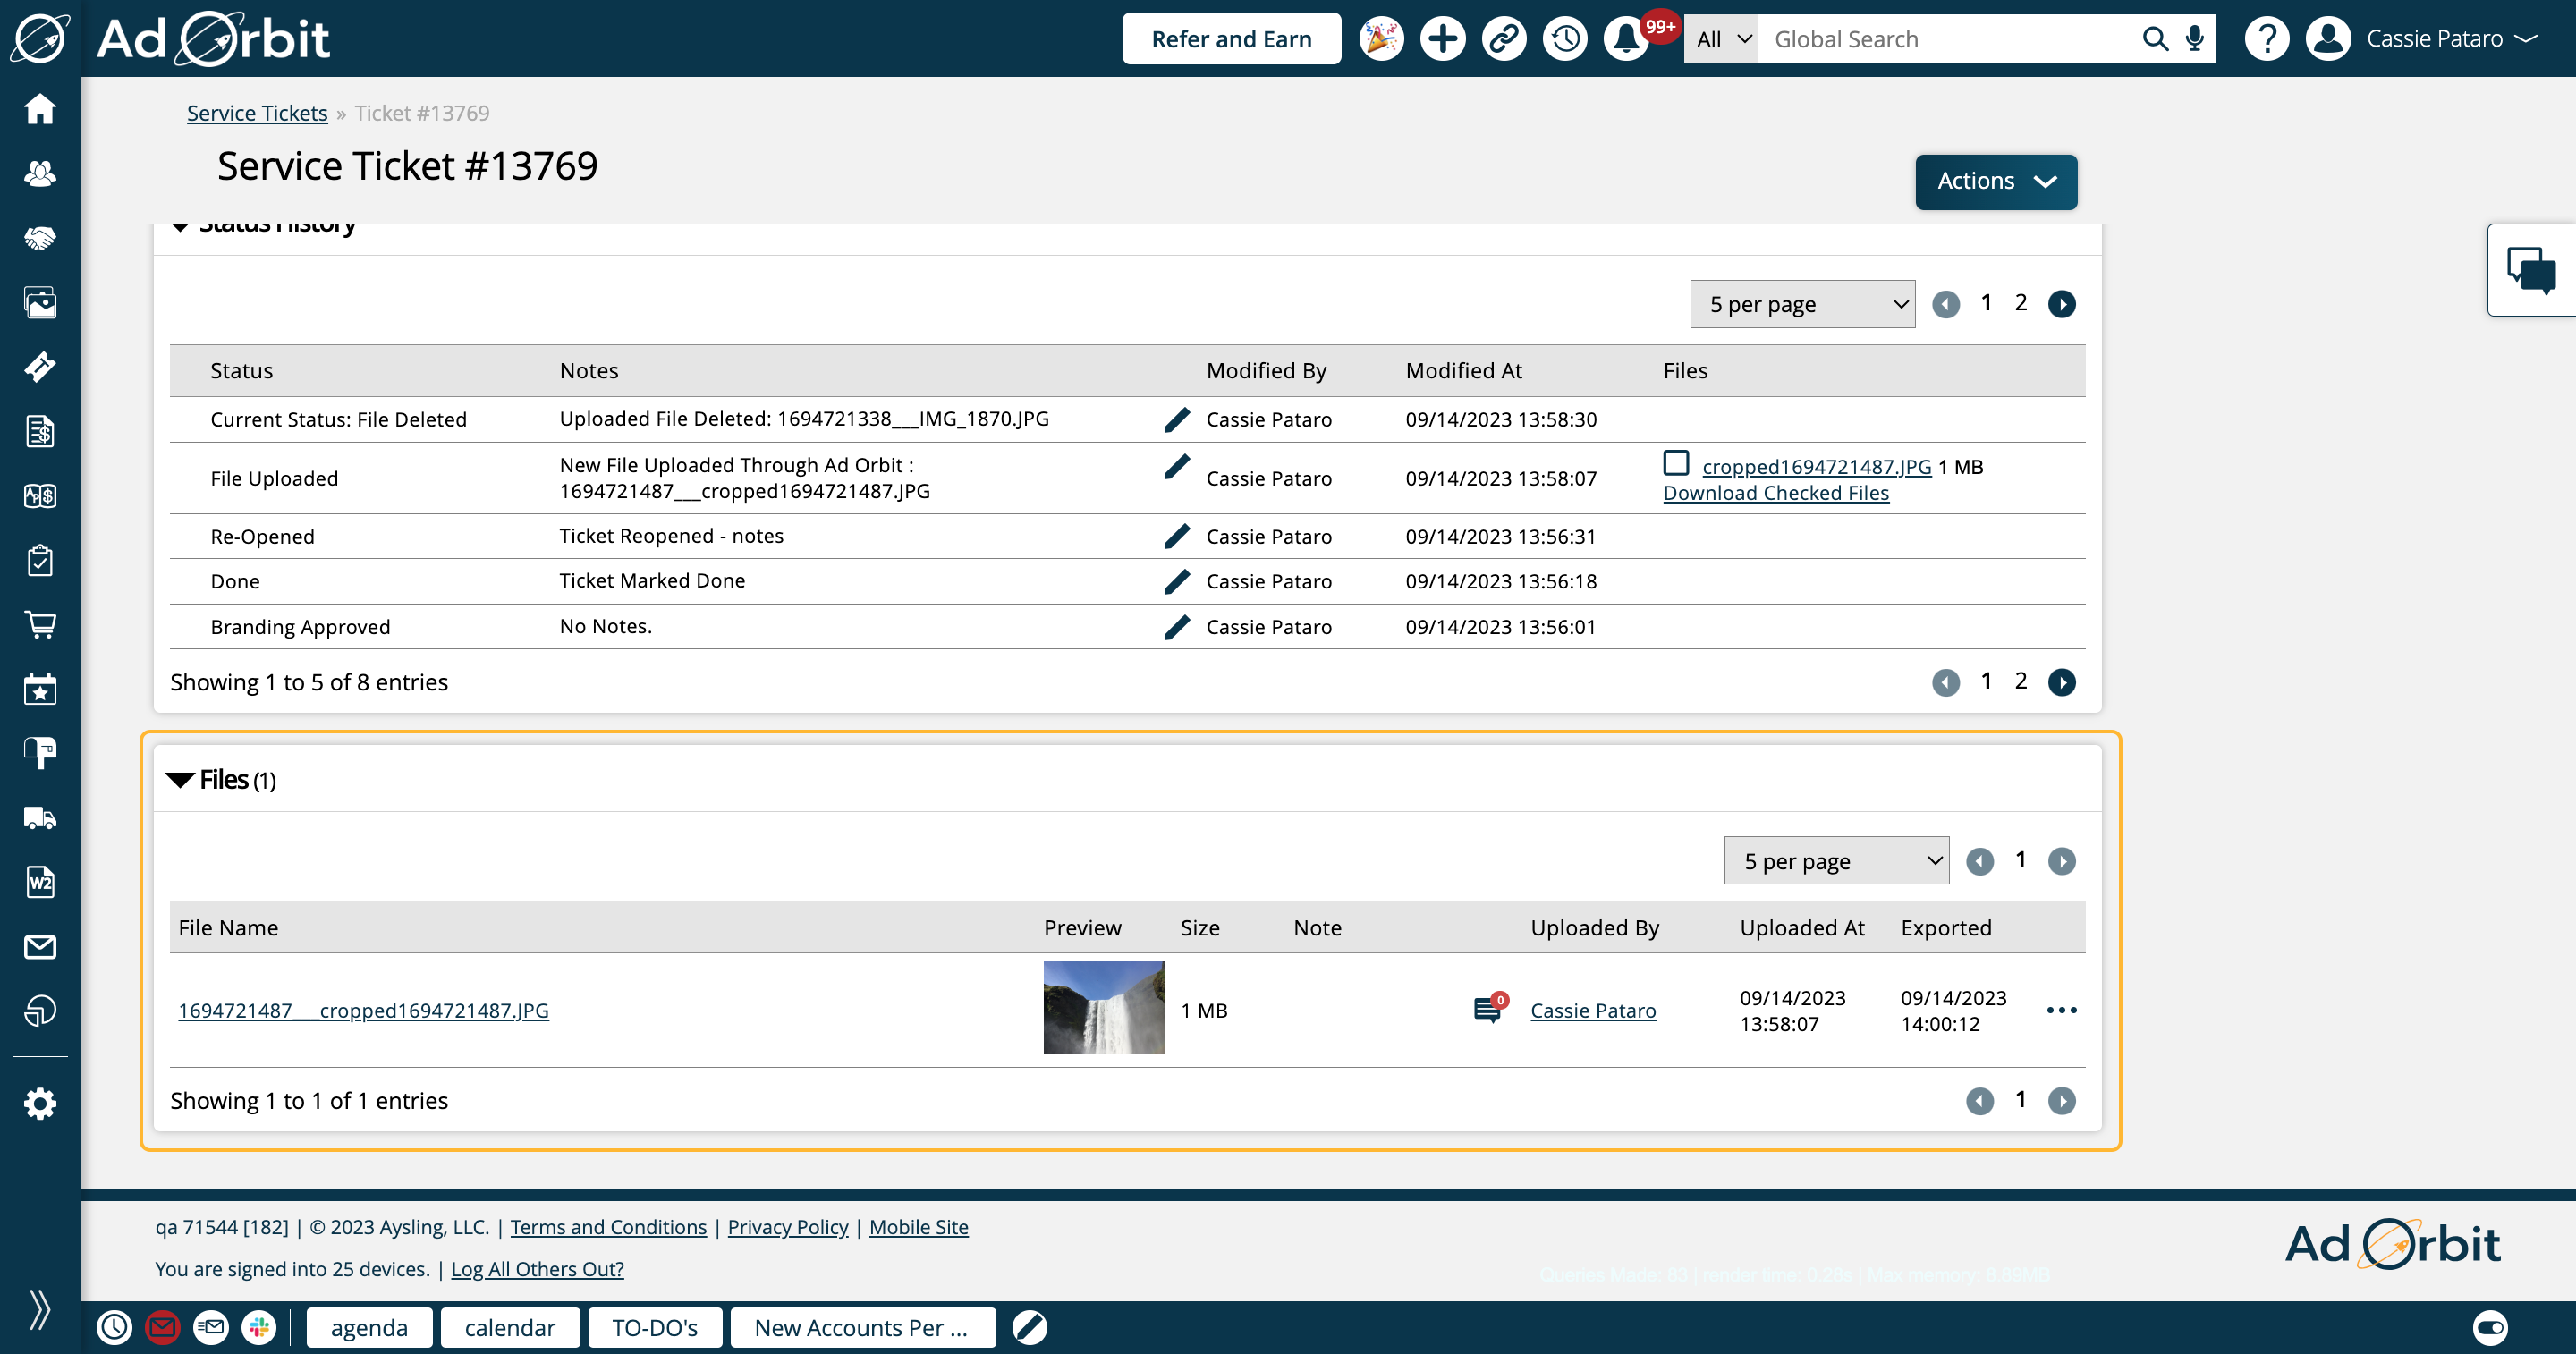
Depending on your permissions, you can take various actions in this section of the ticket.
New assets can be uploaded by clicking the Upload action.
On uploaded assets, you can click on the file name to open the image.
By clicking on the chat icon next to an uploaded file, you can add, edit, and view annotations made on the file.
Clicking the ellipses icon gives you additional actions you can take on the file. Clicking the Edit action opens a popup where you can change the file's note.
The Crop action opens a popup where you can crop the image and it will generate a new file and automatically add it to the ticket.
You can either save your crop changes or discard them in this popup. If you save the changes, a new copy of the file (the cropped version) will automatically be added to the ticket.
And finally, you can Delete an uploaded file using the actions dropdown.
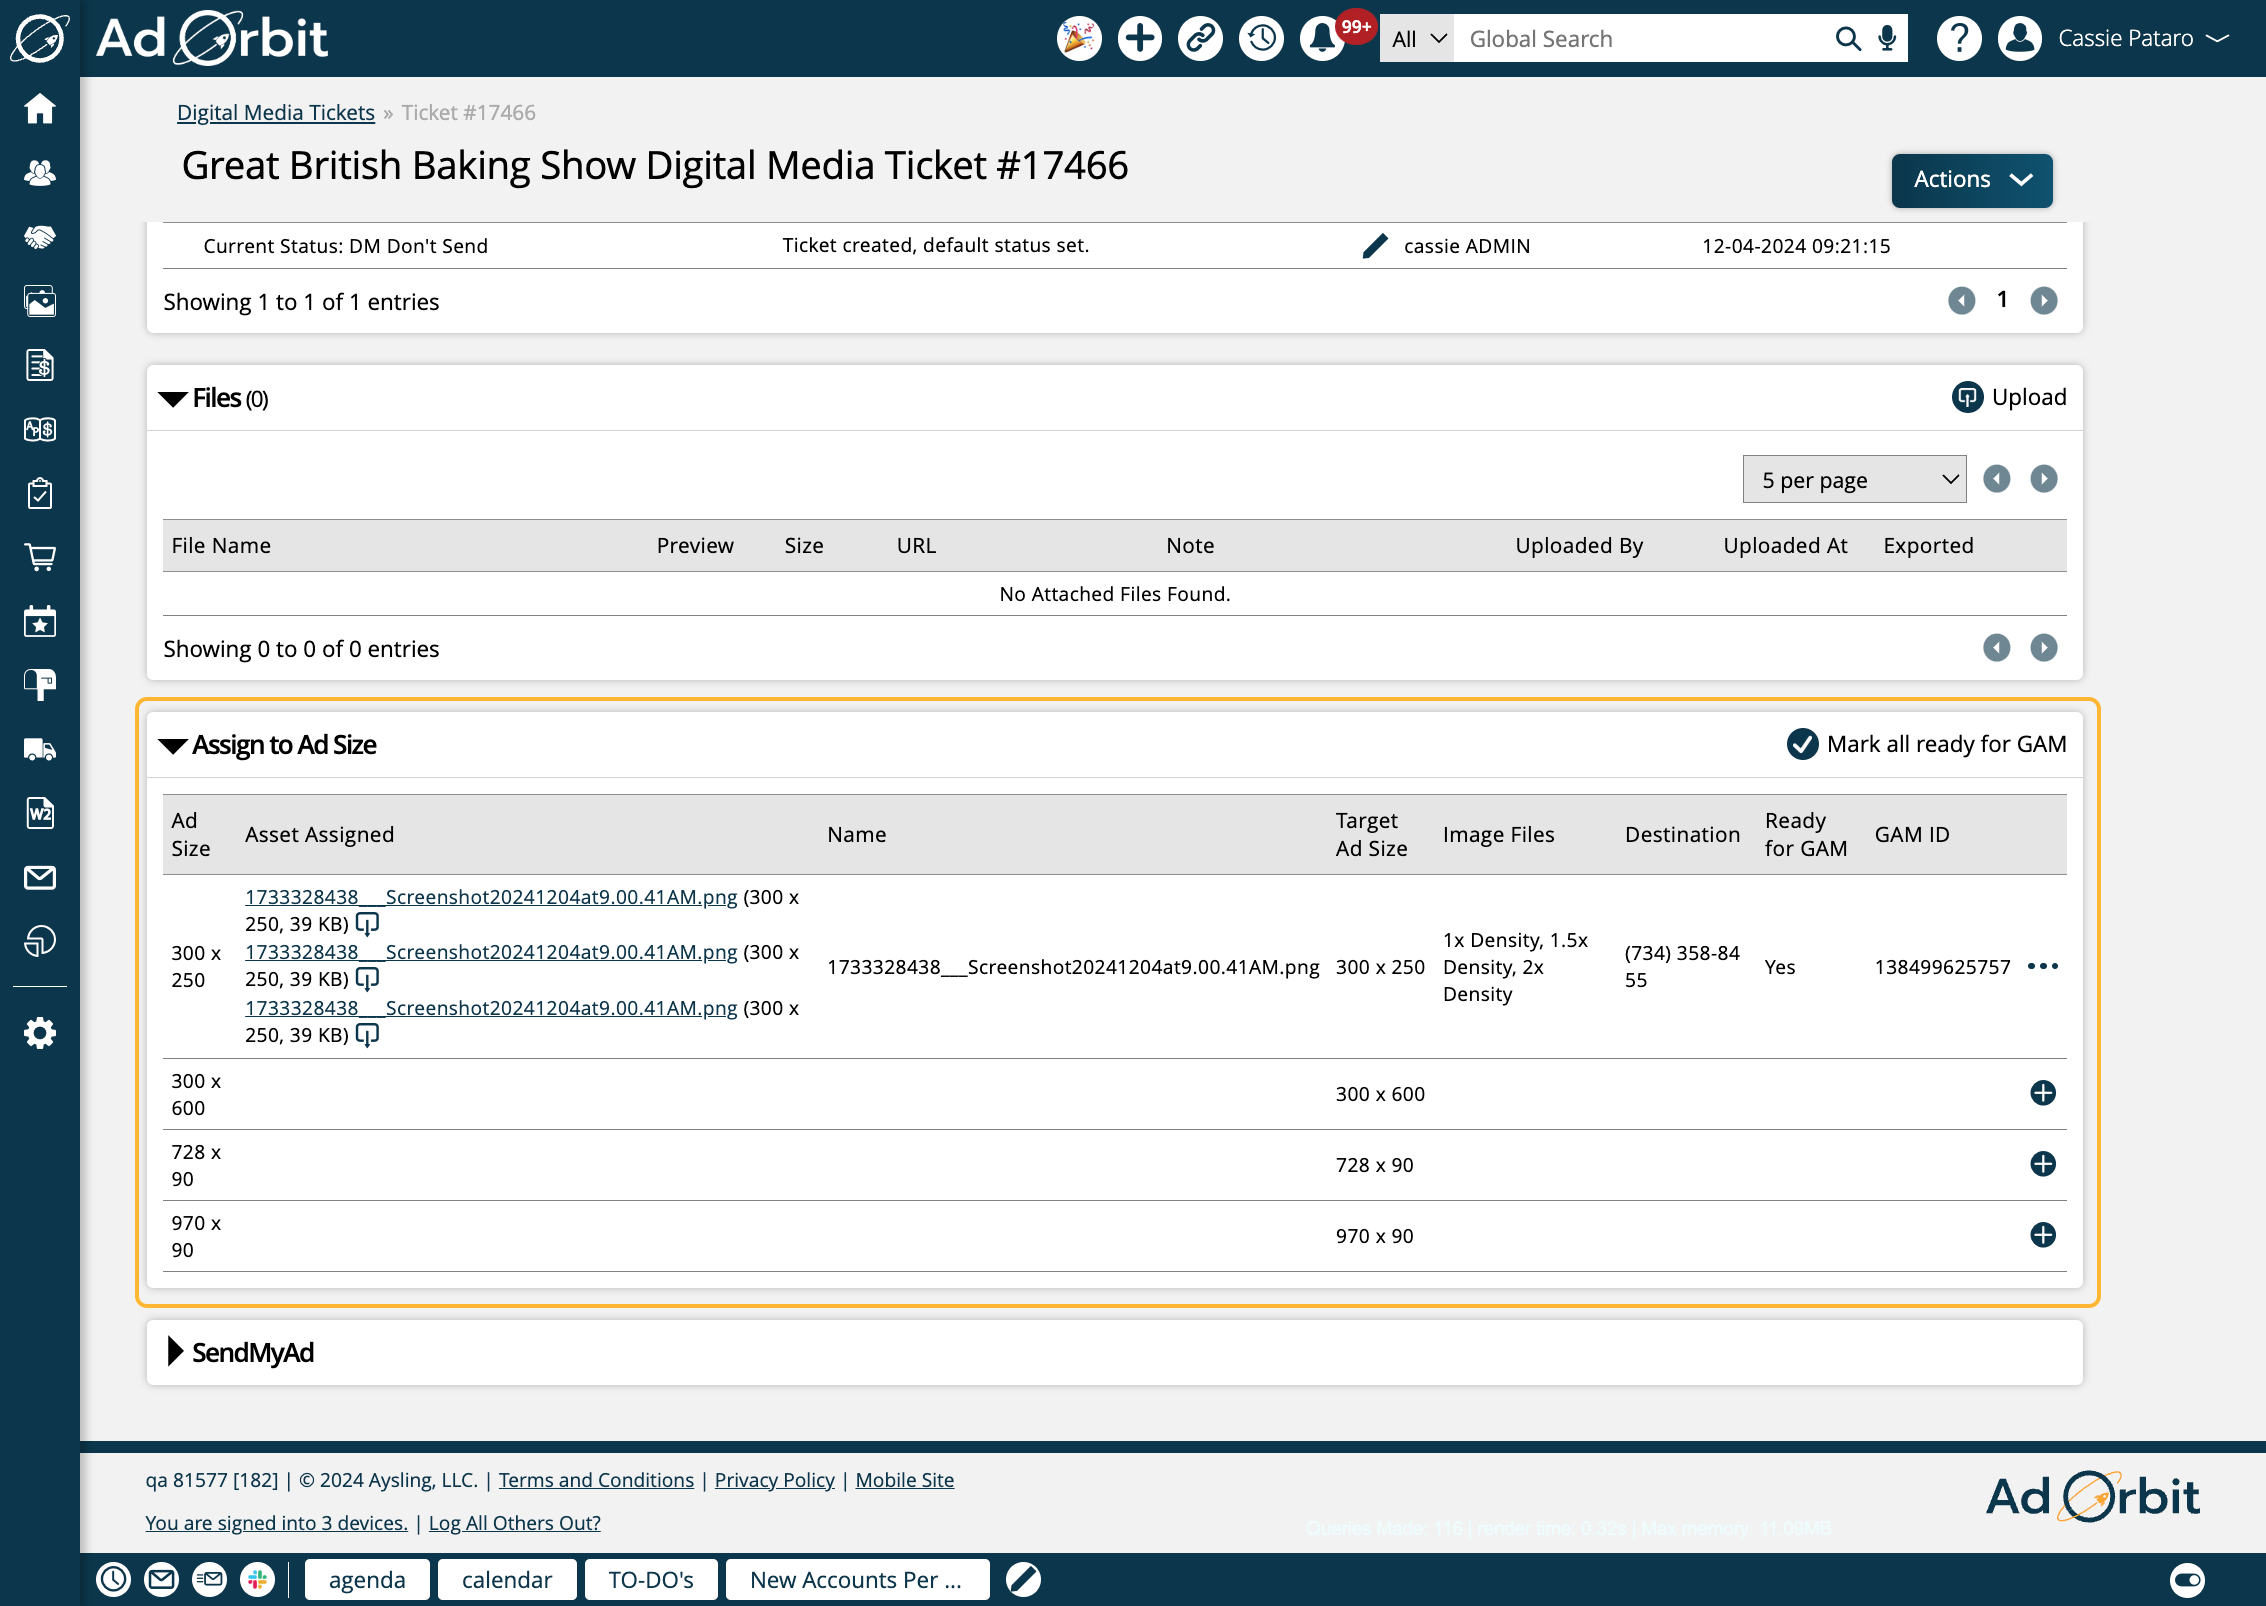
The Assign to Ad Size section on tickets will only display on Digital Media tickets. For information about this section, please click here.
Only applicable if you have the SendMyAd integration enabled, and for certain ticket types, this section of a ticket displays the item's SendMyAd information as well as allows you to perform actions.
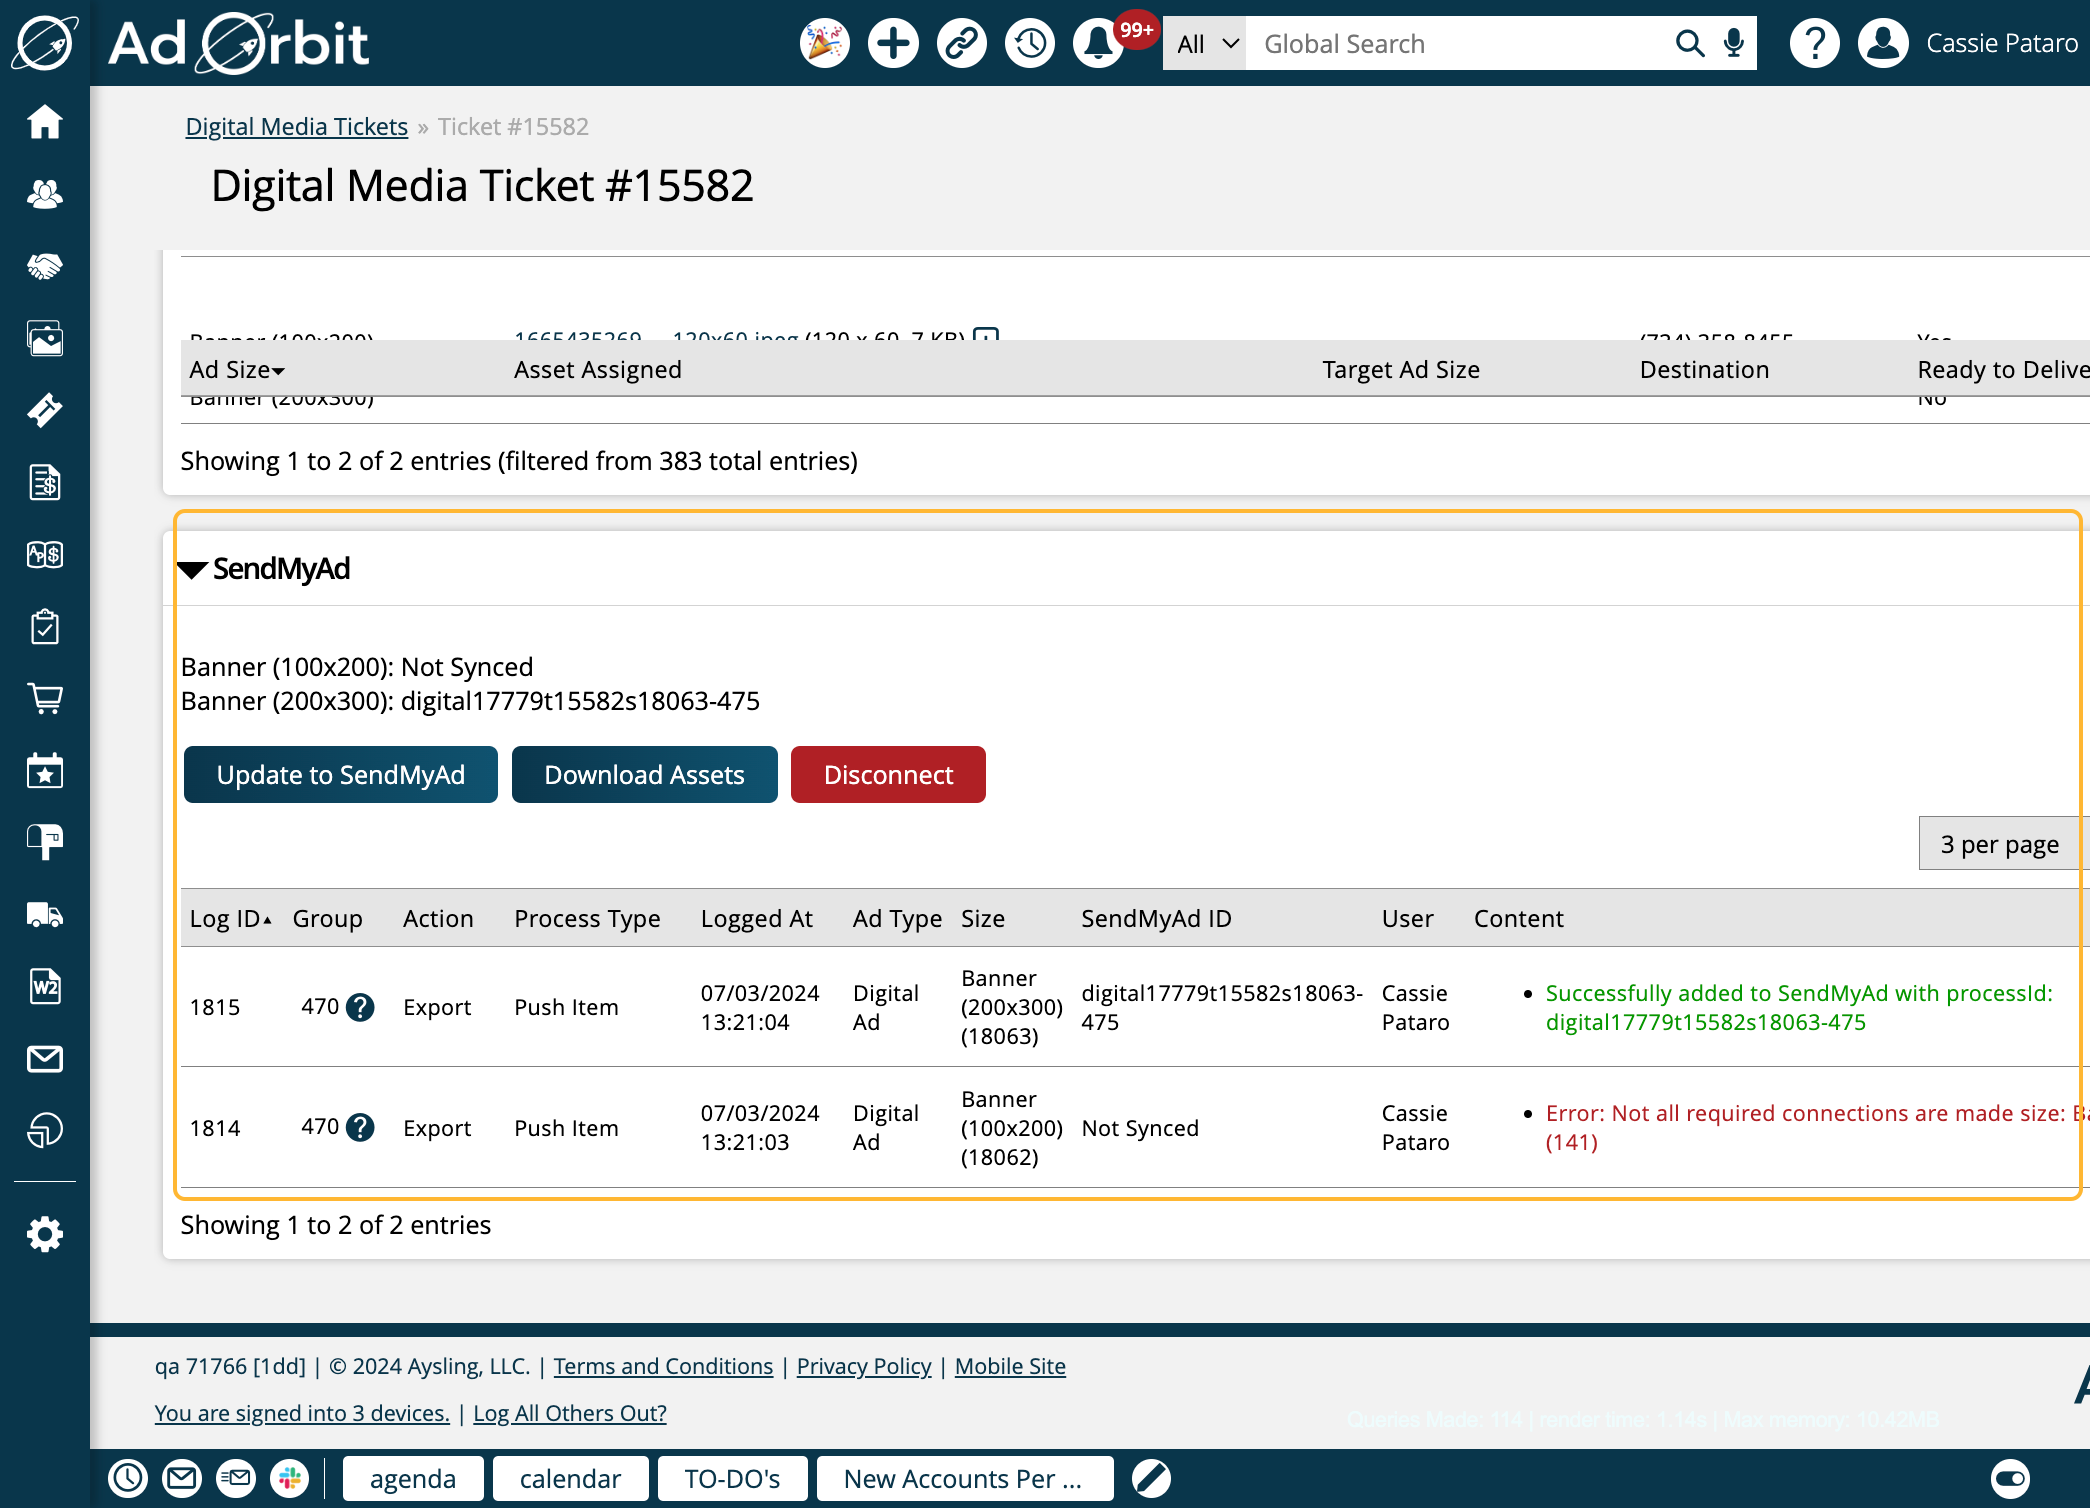
If the line item is synced with SendMyAd, you'll see the SendMyAd ID.
The 'Sync Ad Information' button allows you to manually push any updates on the item to SendMyAd.
Only available on print ad tickets, the 'Download Assets' action lets you bring in any assets uploaded to the SendMyAd item into the Ad Orbit ticket.
The table in this section will show information about SendMyAd actions that have already occurred on the item such as attempts to sync or downloading assets.
Updated 2/8/2025
The checklists are a great way to track the process in completing ads, editorials and services. The ticket checklists are found for both the ad tickets and editorial tickets. Both tickets have 5 categories but each category are very different depending on the type of ticket.The link for the checklist is found in the ticket just below the Change Status / Add Notes drop down menu, labeled Procedural Checklist.
Ad Ticket Checklist
The categories for the ad ticket checklist include Trafficking Approval, Designer, Printer Check (Sales), Printer Check Final, and Trafficking. Each category has it’s own mini checklist to go through. The Procedural Checklist link opens up the Ad Checklist window and displays those five categories and their checklists.
Editorial Checklist
The categories for the editorial ticket checklist include Ticket Setup, Designer, Copy Editor, Editorial Approval, and Art Director Approval. Similar to the ad checklist these categories have their own mini checklist to go through. The Procedural Checklist link opens up the Editorial Checklist window and displays those five categories and their checklists. Now a nice feature we have for the checklist is once a task is completed and checked off it will keep track of who completed it and the time and date of completion.