Offers
Offers in Ad Orbit are a fantastic tool that creates a self-serve option for your customers to find and purchase available inventory items through the Client Center. You can even use our Astro AI to automatically create draft offers to be reviewed, further reducing the amount of work needed by your reps.
To create and manage offers, you need the User Permission 'Offers'. With the permission, you can navigate to Settings > Sales > Offers.

To manually create a new offer, you can click on the Add New Offer button in the upper right corner of the page. When creating an offer, there are a few required and optional fields you should review.
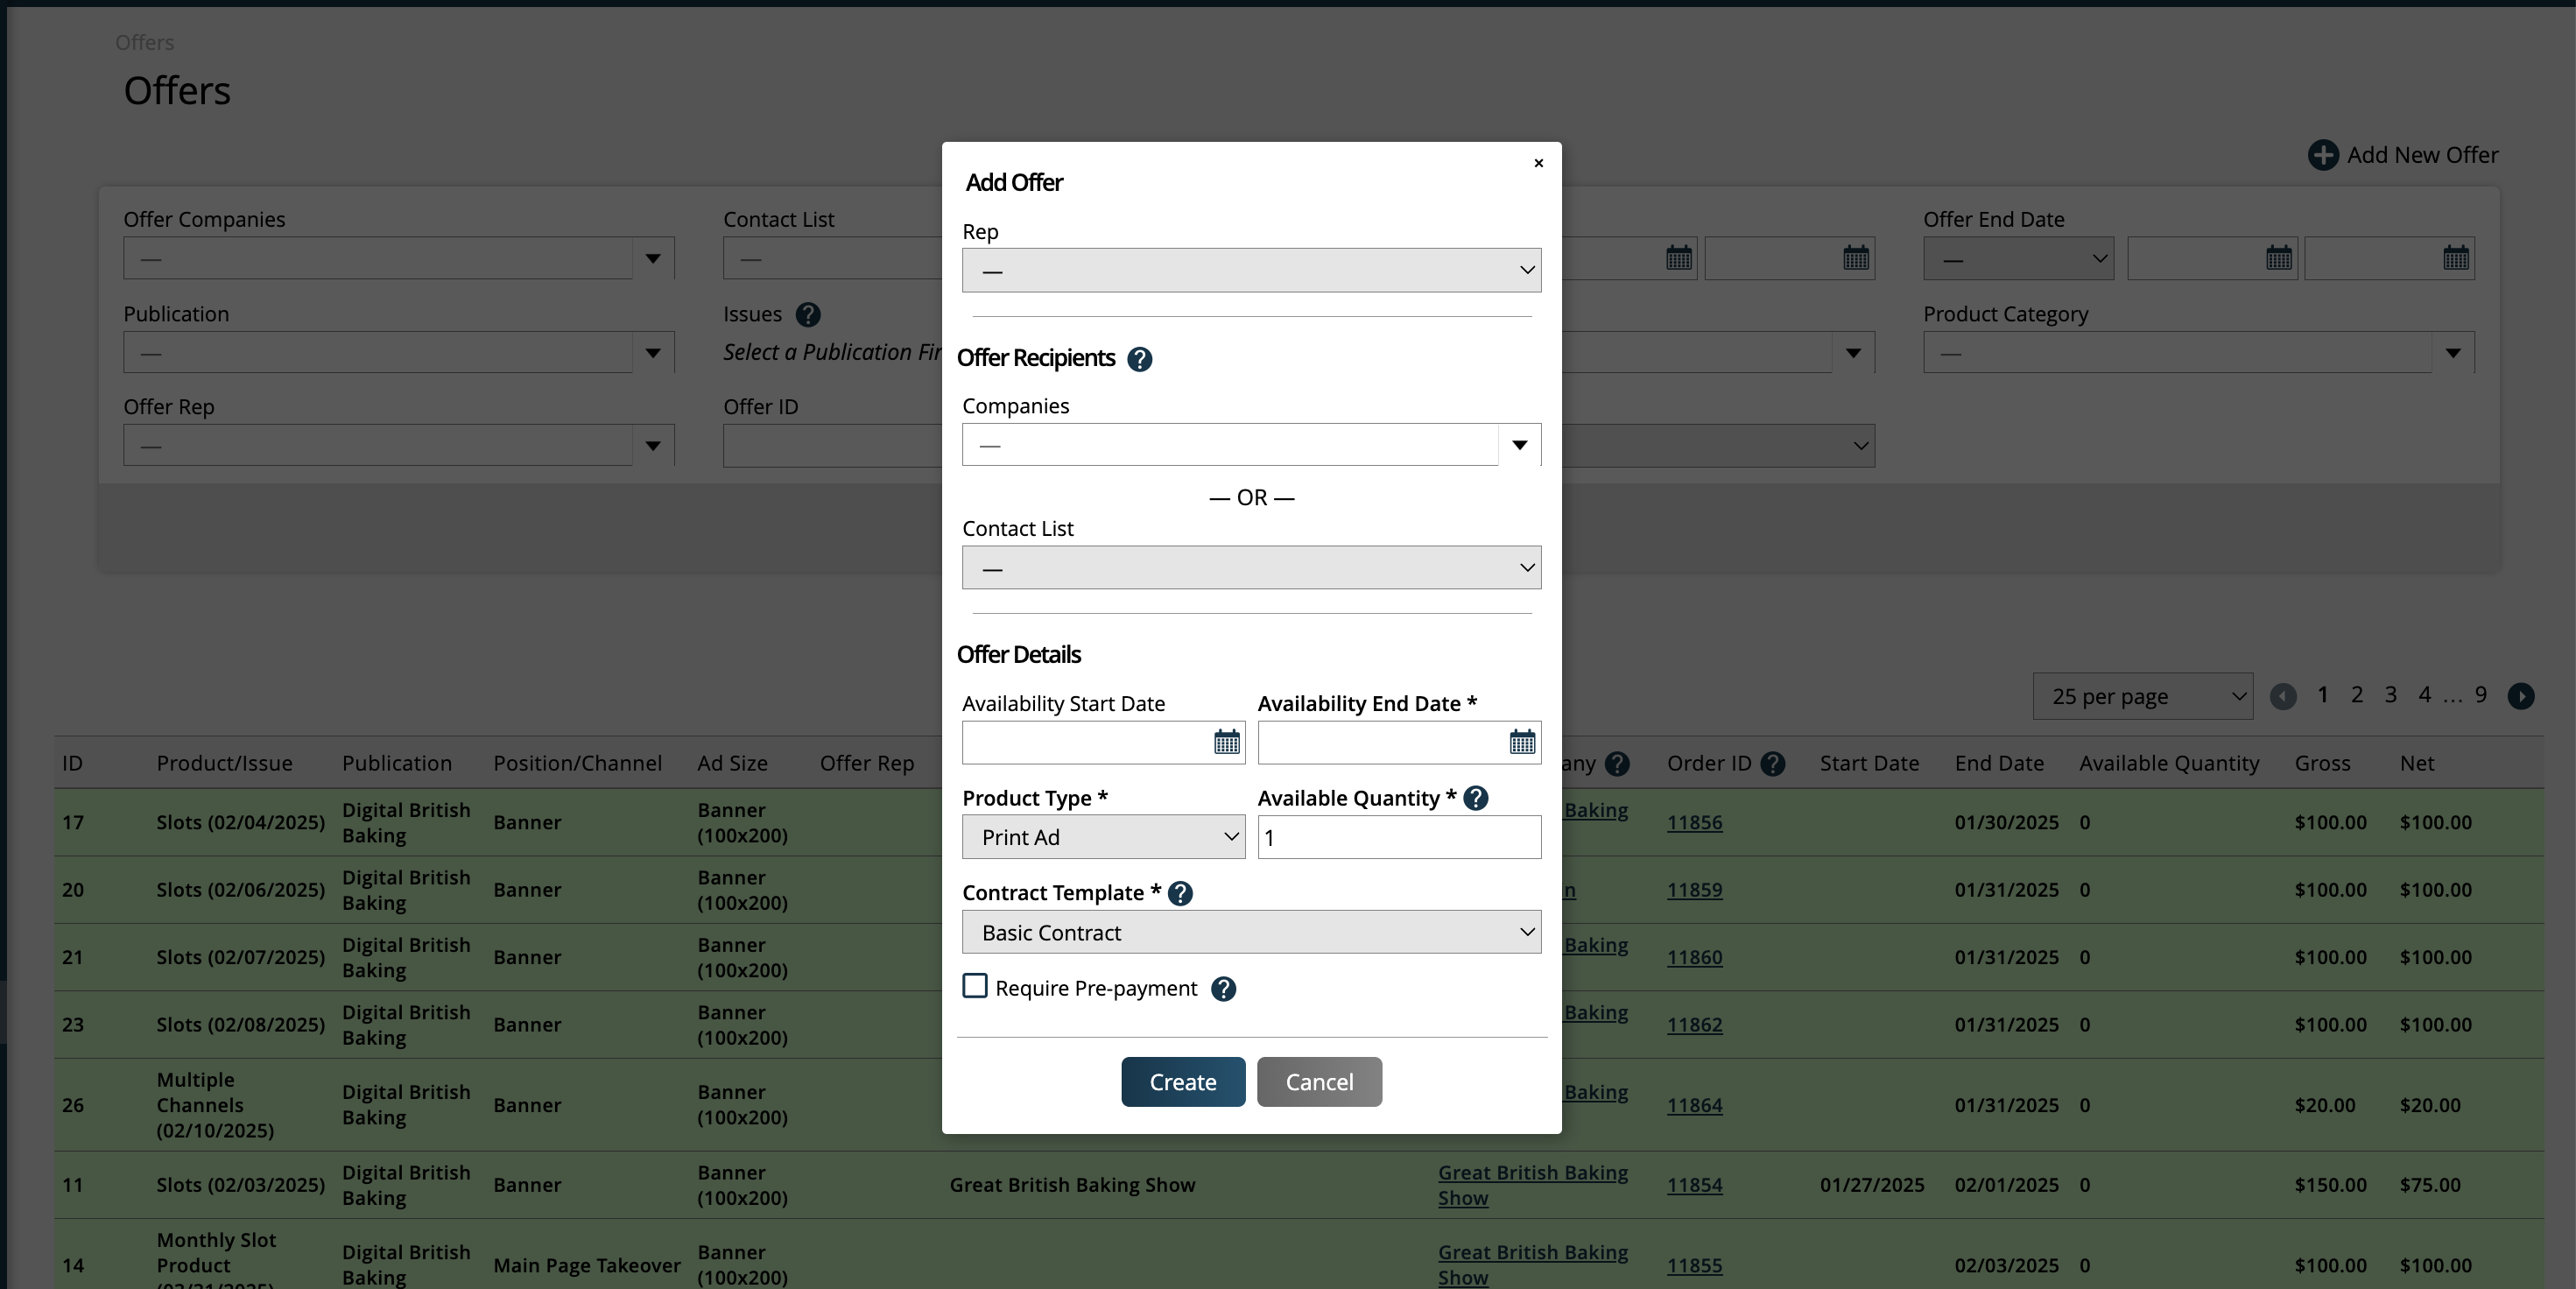
The Rep field is optional. If a rep is selected, the Companies dropdown will automatically update to be a required field, and you will be able to choose from all companies the rep is associated with.
By default, if a rep is not specified, the primary rep on the company is who will be assigned to the order created when the offer is claimed. If a rep is specified, they will be assigned as the order rep when the offer is claimed.
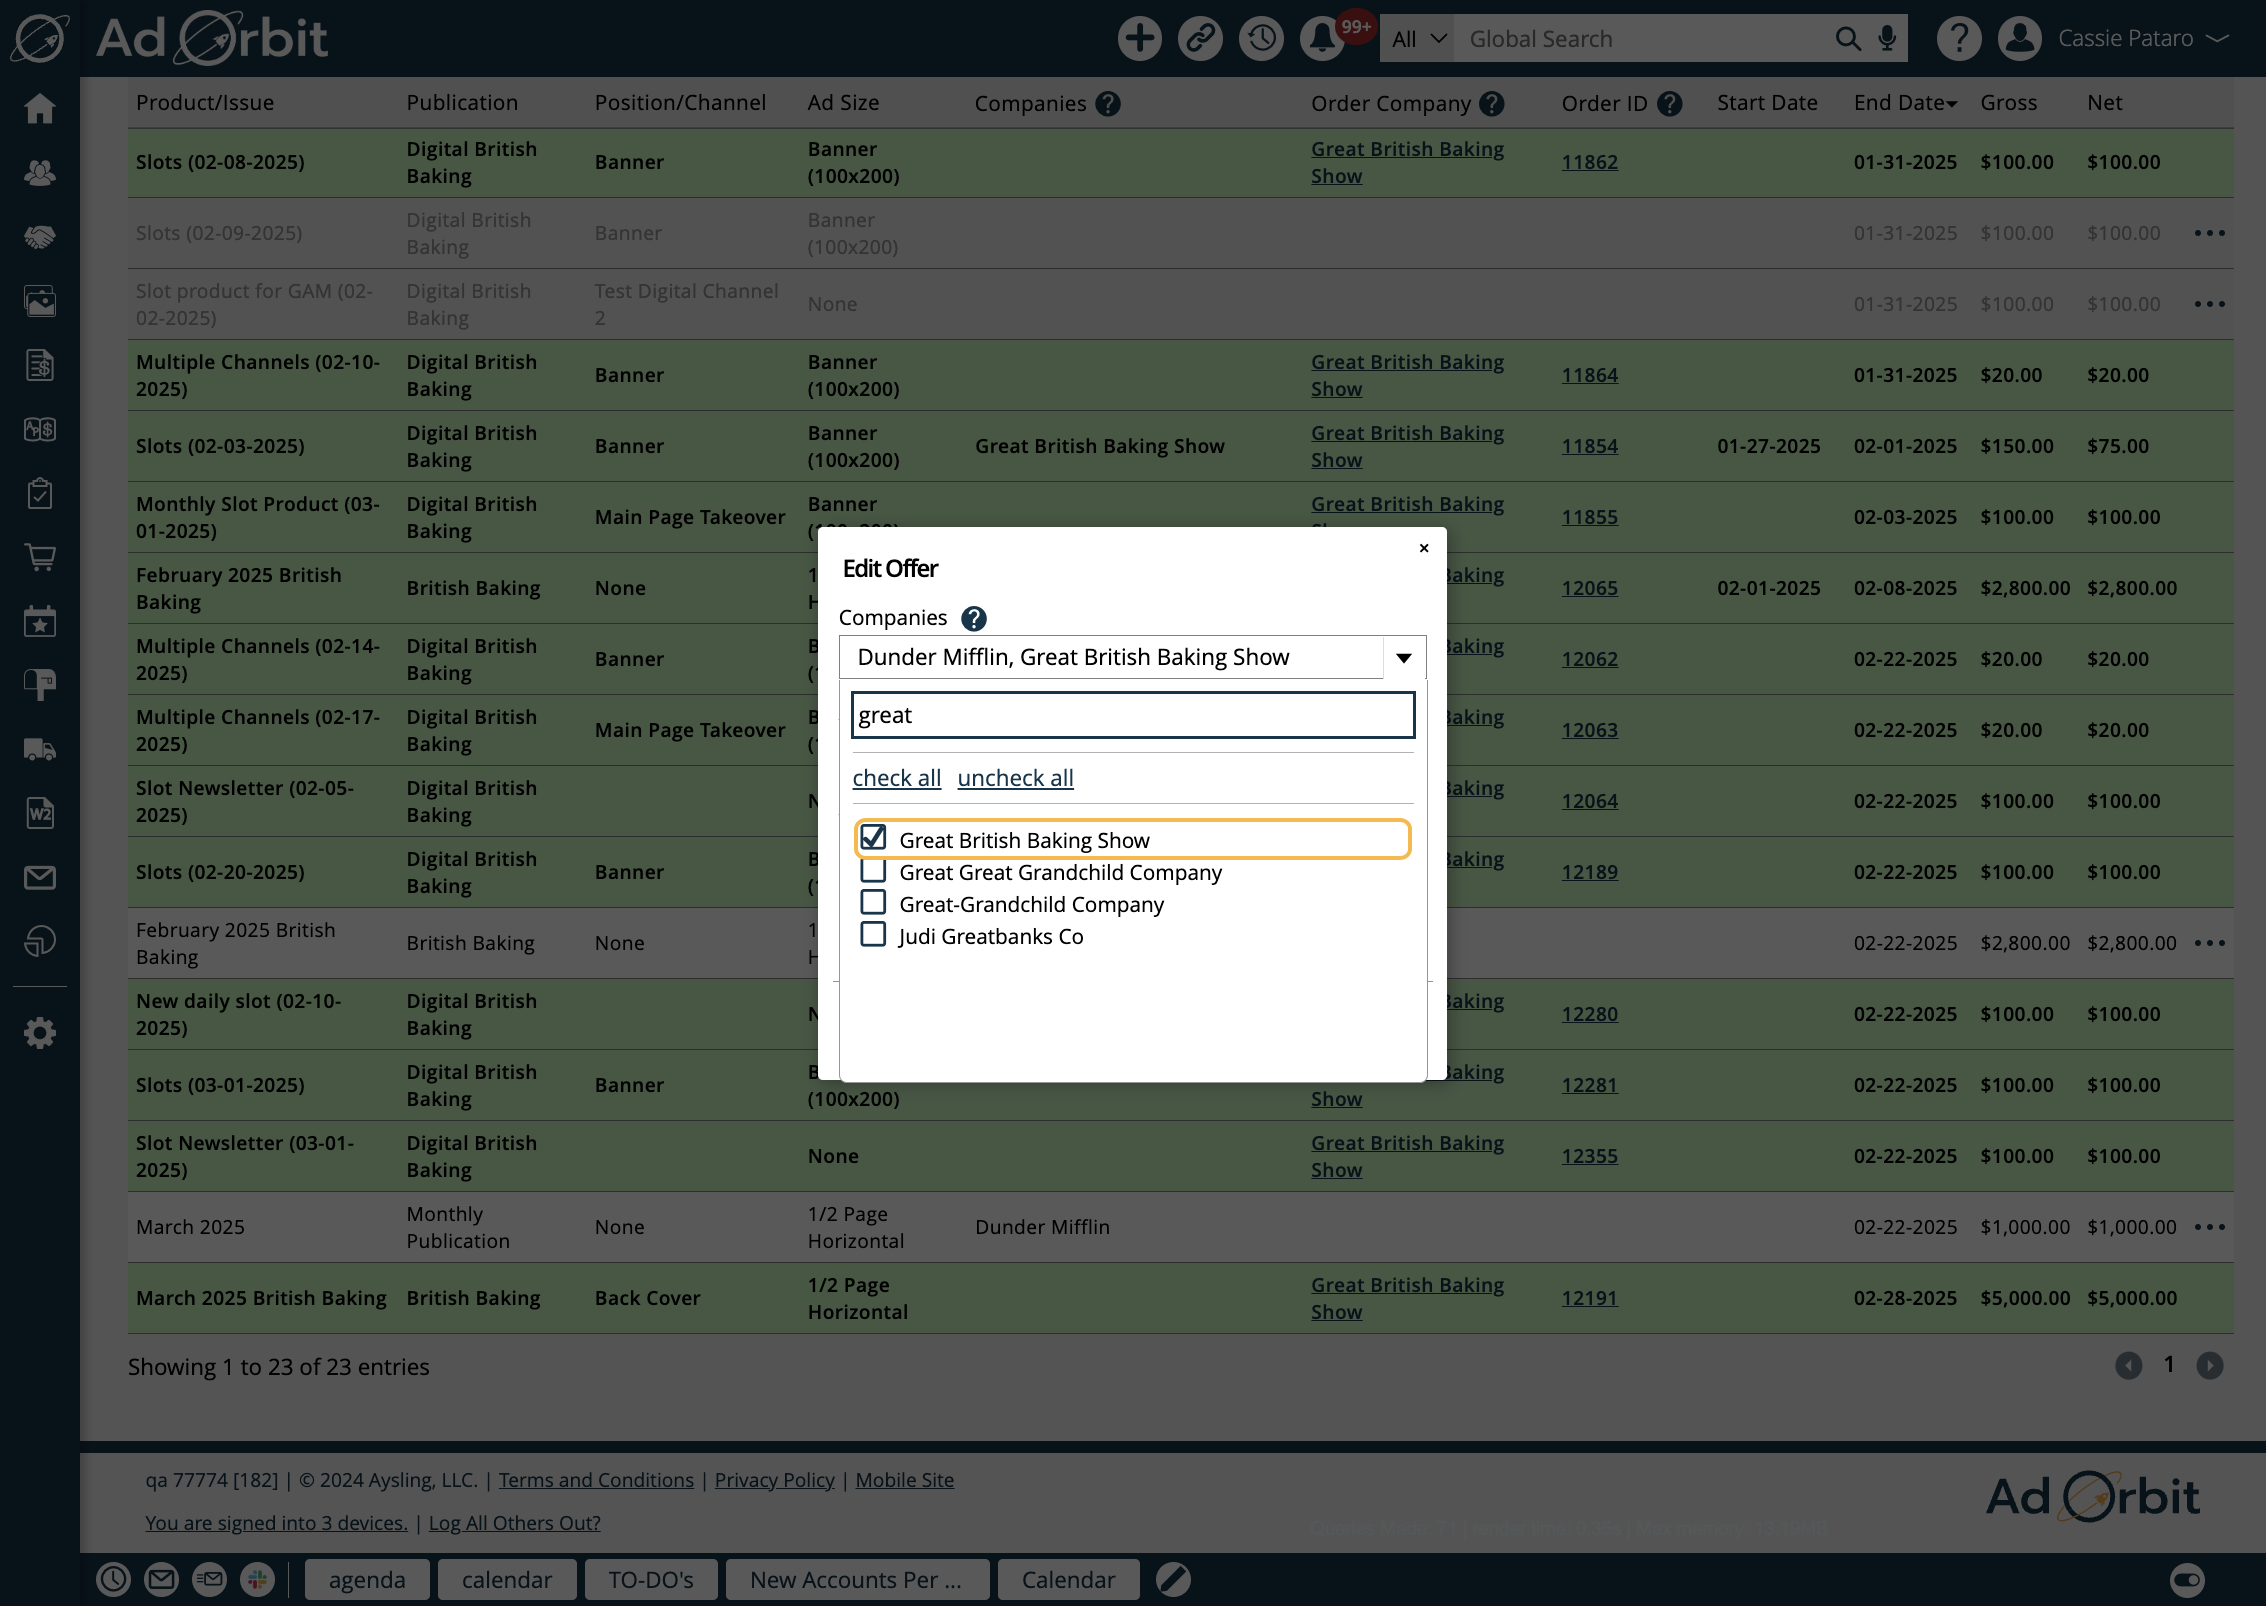
The Companies field is optional unless a Rep is selected. If left blank, the offer will be available to every company. If any companies are selected in this field, the offer will only be available to those companies.
Alternatively, you can choose to make an offer available to a Contact List. This field is also optional, but can be a quick way of making an offers available to a larger group of people.
Any changes made to the Contact List will affect who is eligible to claim the offer.
Note
When emailing an offer associated with a Contact List, you cannot change the recipients of the email like you can if the offer is associated with specific Companies. To change the recipients in this case, you should make changes to the Contact List.
Unlike the rep restriction when Companies are used, you can select any available Contact List to associate with the offer regardless of which Rep is selected.
When claimed, if the offer rep is a rep on the company claiming the offer, they will be assigned as the order rep. If the offer rep is not a rep on the company claiming the offer, the company’s primary rep will be assigned as the order rep instead.
The Availability Start Date is another optional field. If set, the offer will only be visible in the Client Center once the start date is reached. If left blank, the offer will be visible in the Client Center once it's created.
Availability End Date is a required field. You will need to specify the date that the offer expires. Once the end date is reached, the offer will no longer be visible in the Client Center, and will be marked as 'expired' in Ad Orbit.
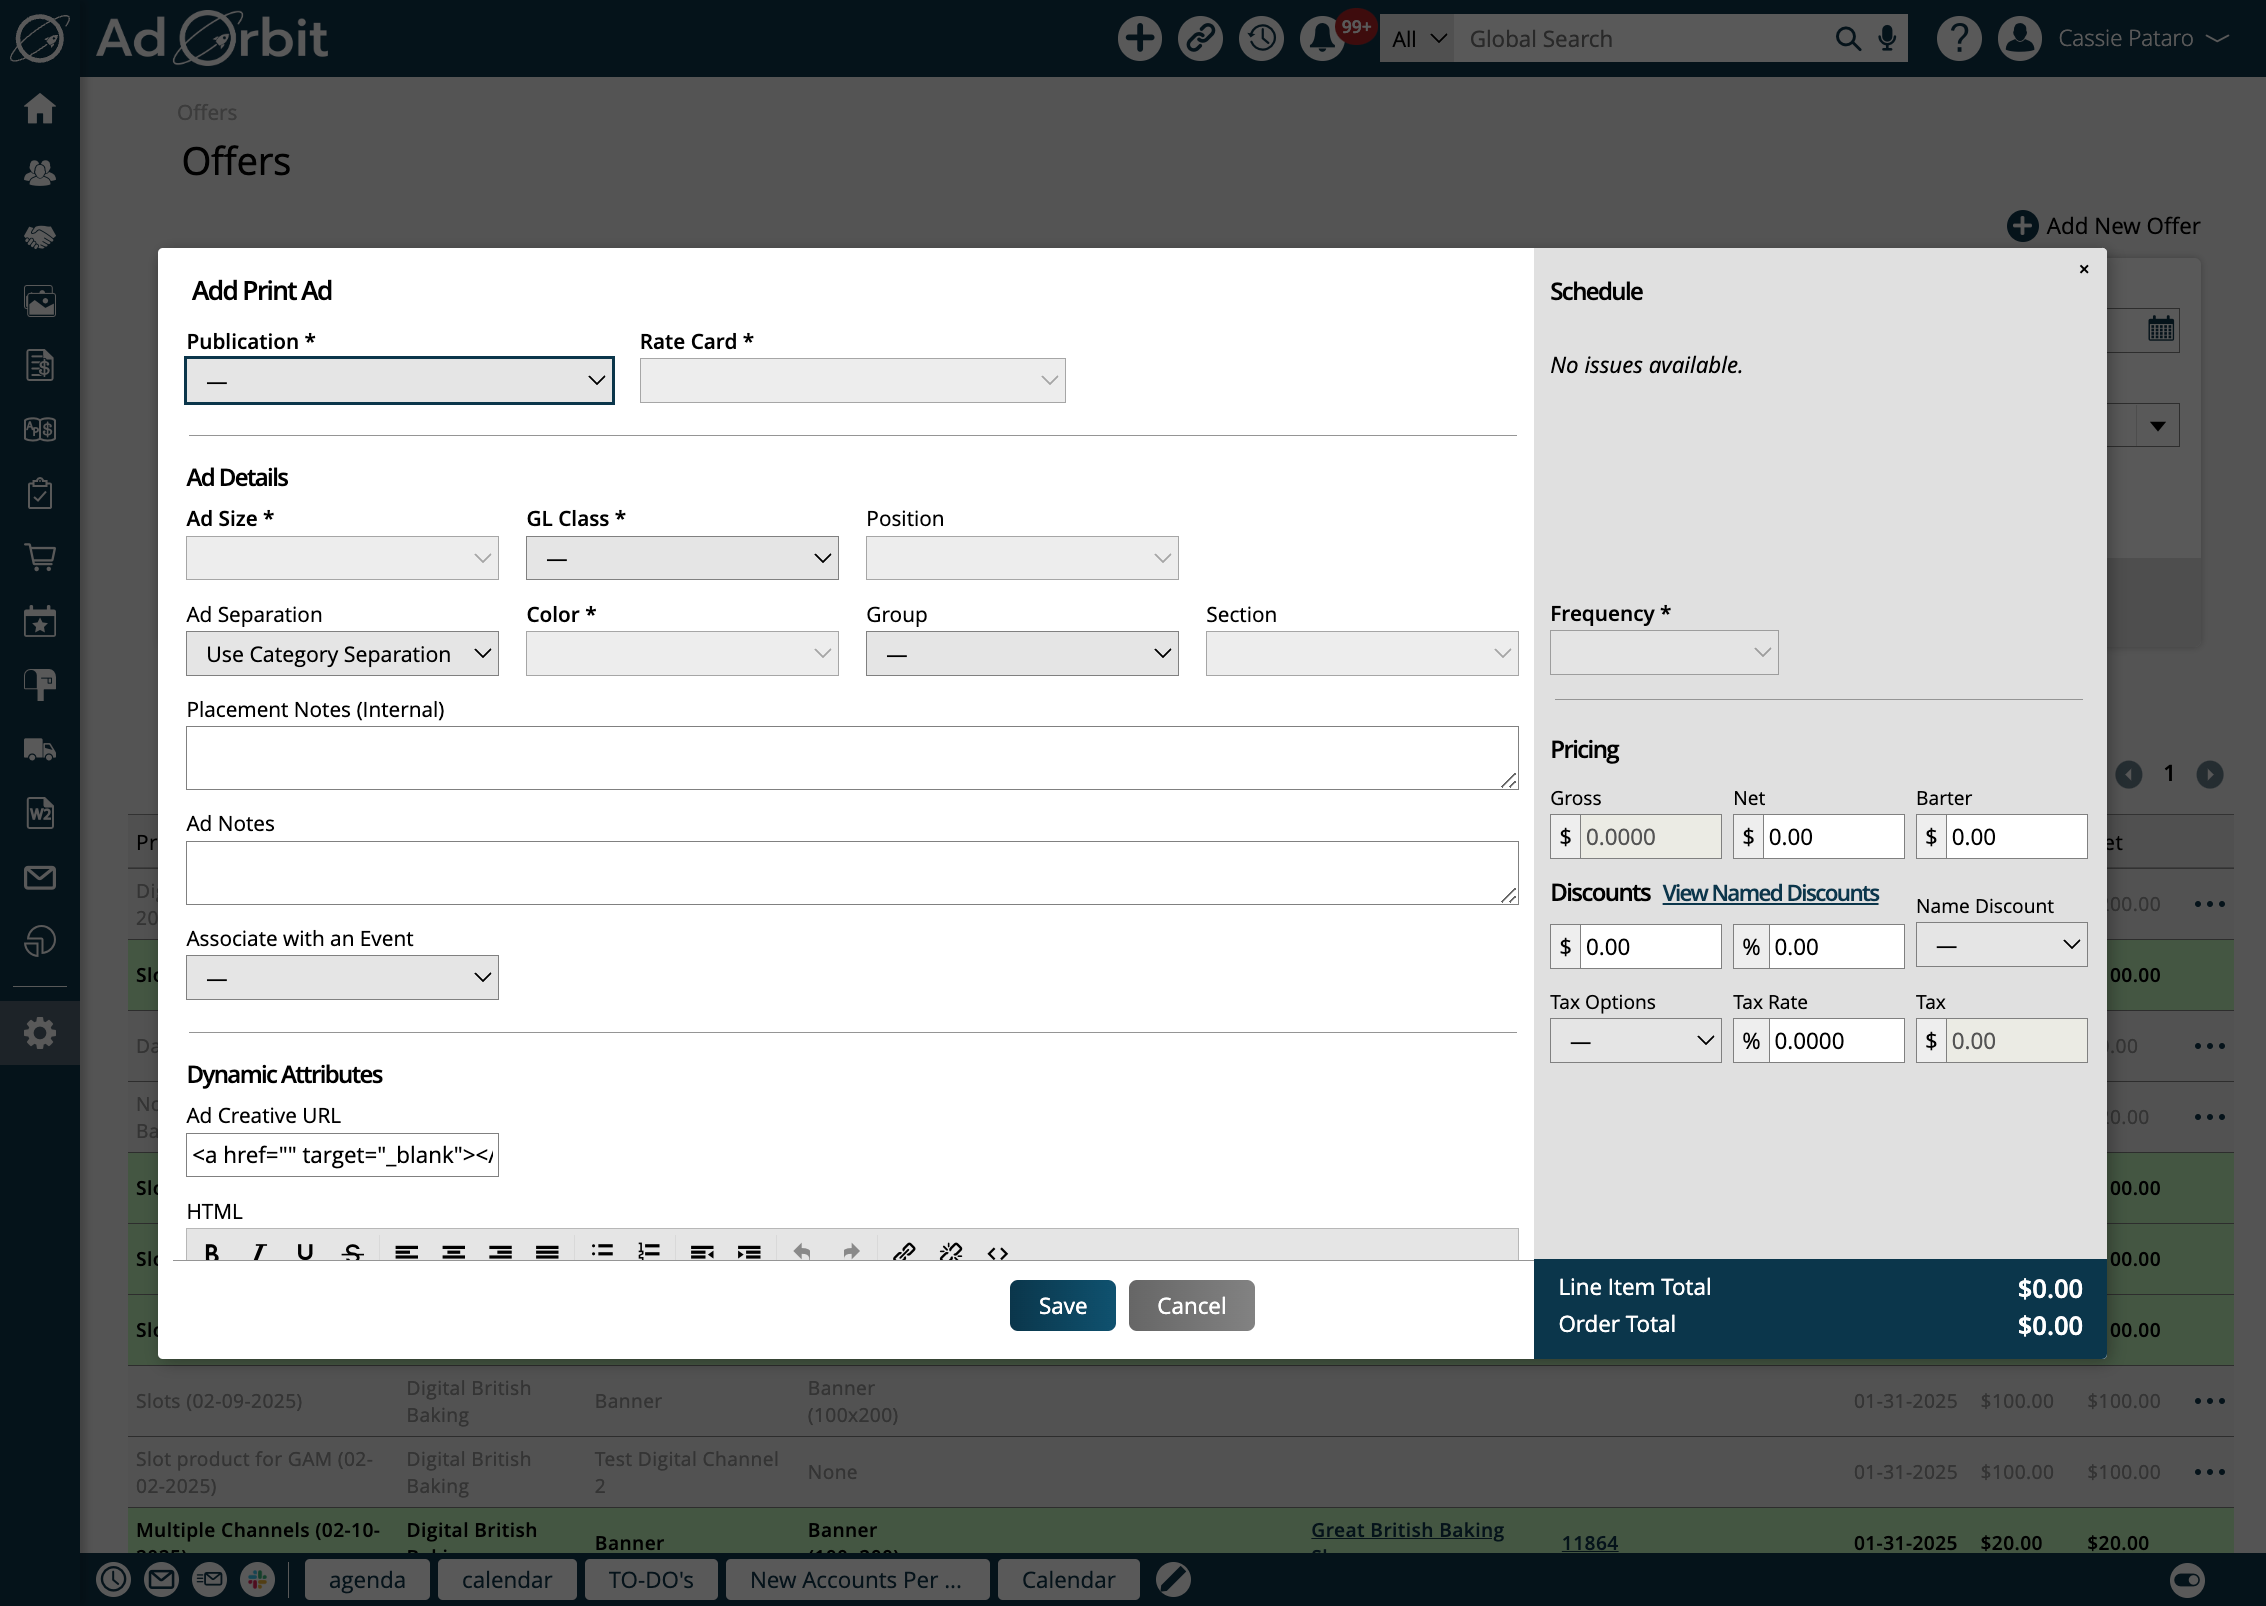
Next, you will need to select the Product Type. The types currently available are Print Ads, Event items and Slot, Targeted Display, and Impression digital media items.
If Print Ad is selected as the Product Type, there's an additional 'Available Quantity' field. Setting a quantity to more than one means there are multiple of the same ad item that can be purchased. Customers will only be able to purchase one at a time, and the quantity will decrease each time the offer is purchased until it reaches zero. If set to more than one, premium positions cannot be set on the line items.
You will also need to select which Contract Template will be used when the offer is claimed, and converted to an order within Ad Orbit. Only contract templates with a valid invoice template configured can be used.
Finally, you can choose to Require Pre-payment for the offer or not. If left unchecked, then when contacts claim the offer they can choose if they wish to pay up-front, or to be invoiced and pay for the offer later. If checked, to claim the offer, the contact must pay up-front.
Click on Create to open the line item popup, which is the next step to creating the offer.
In the line item popup, enter all of the desired fields to create your line item. Once you've entered at least the required information, you can click Save, which will create the offer.
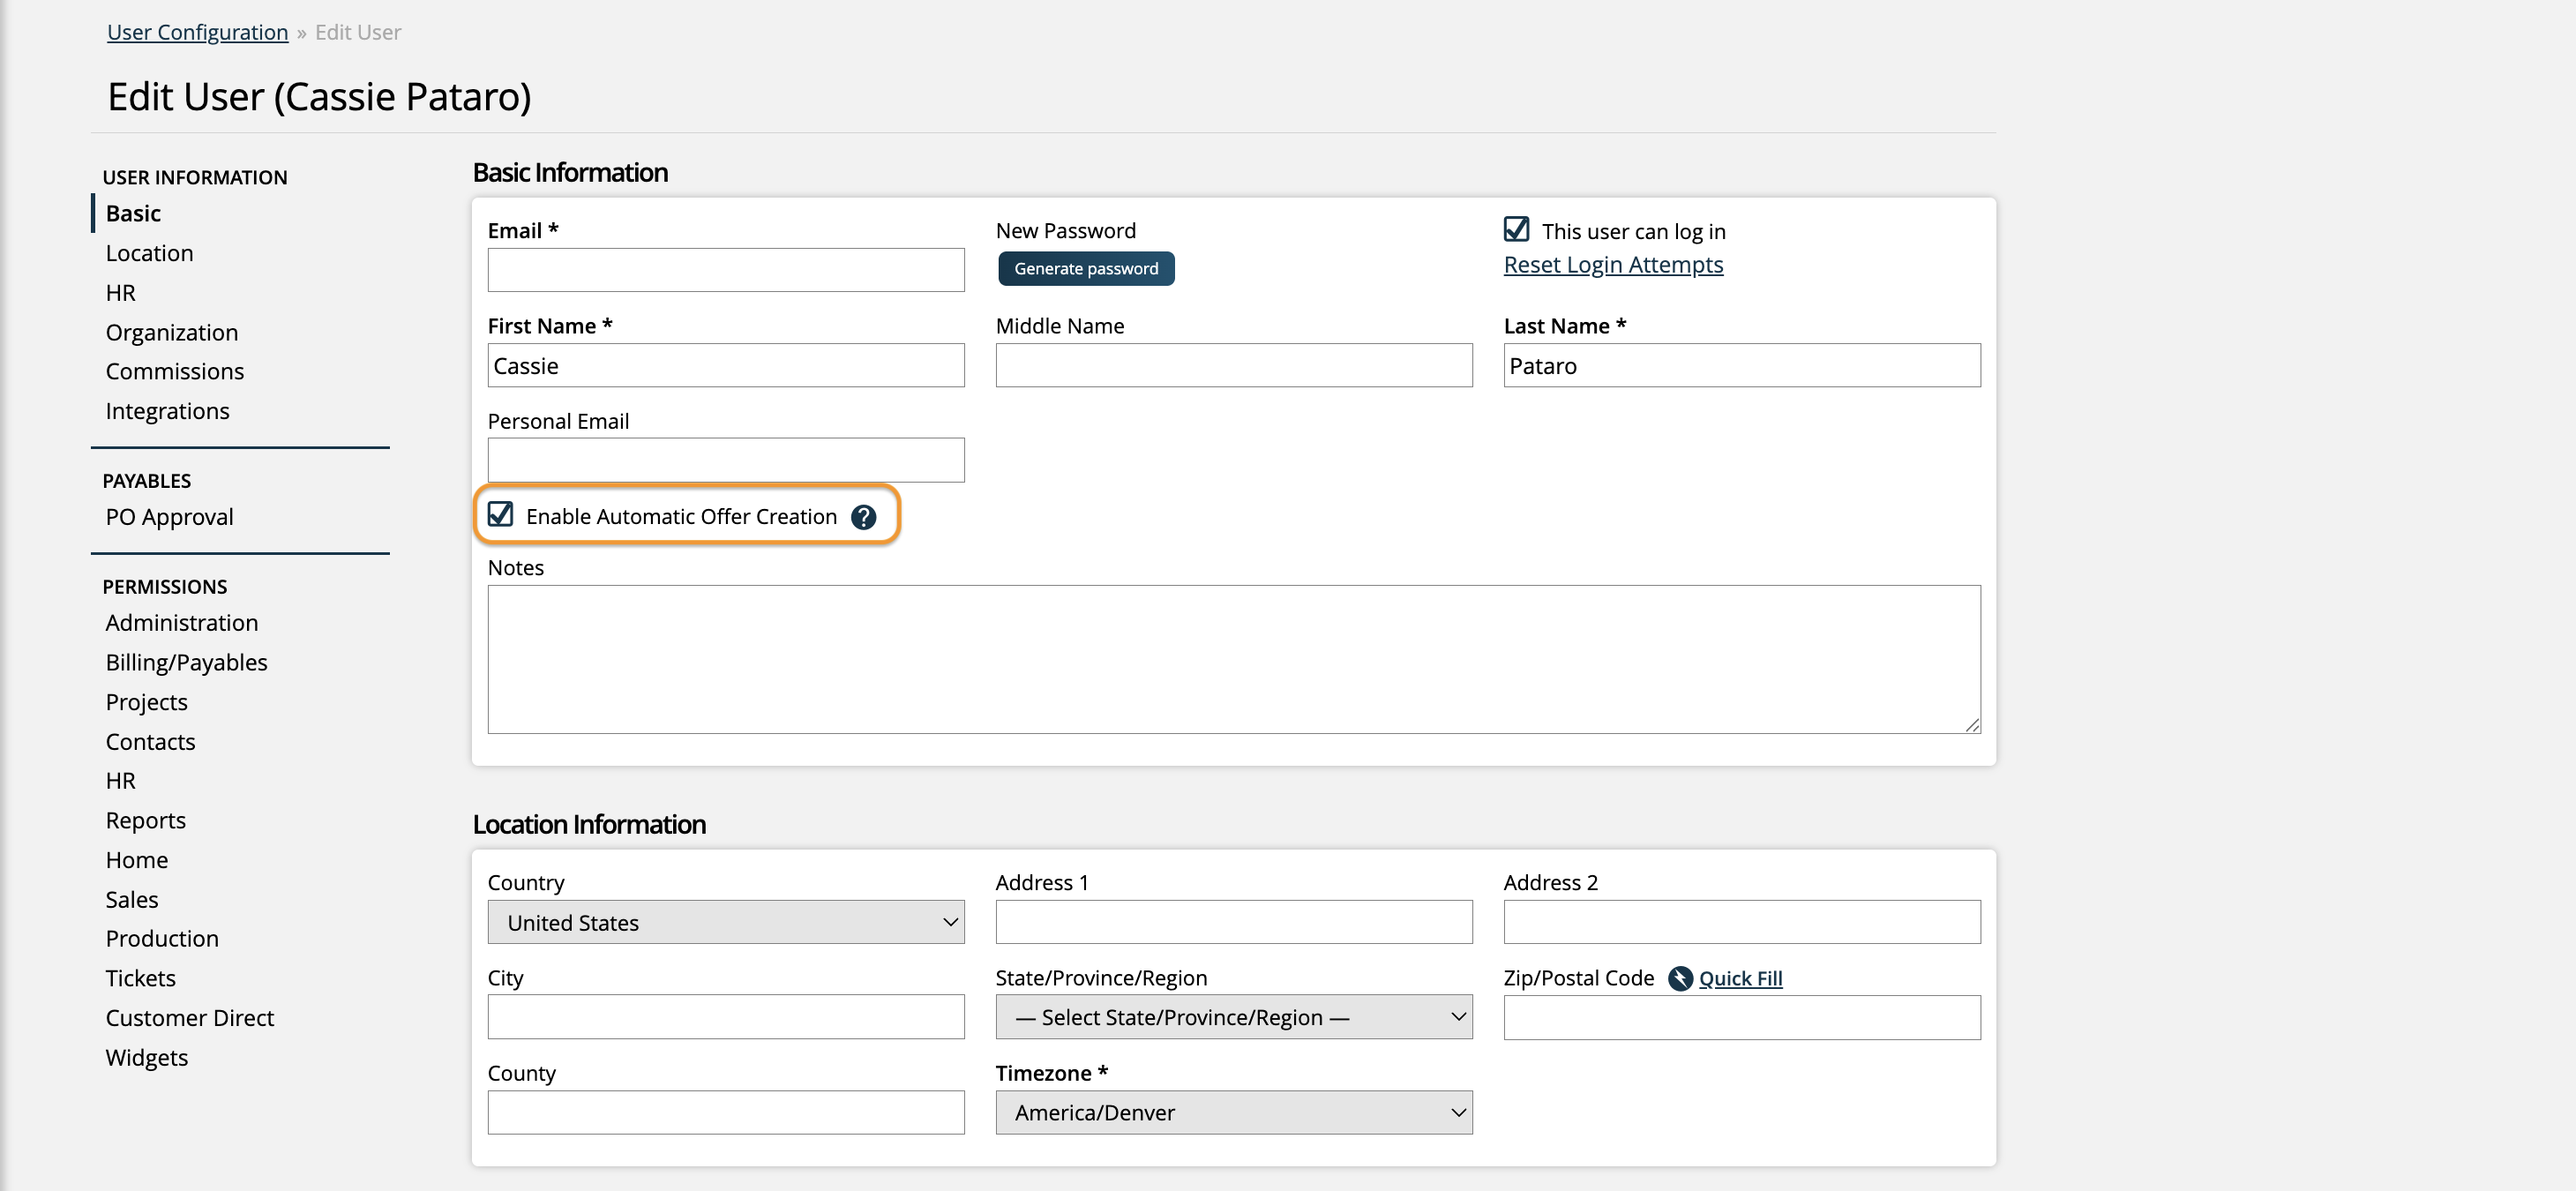
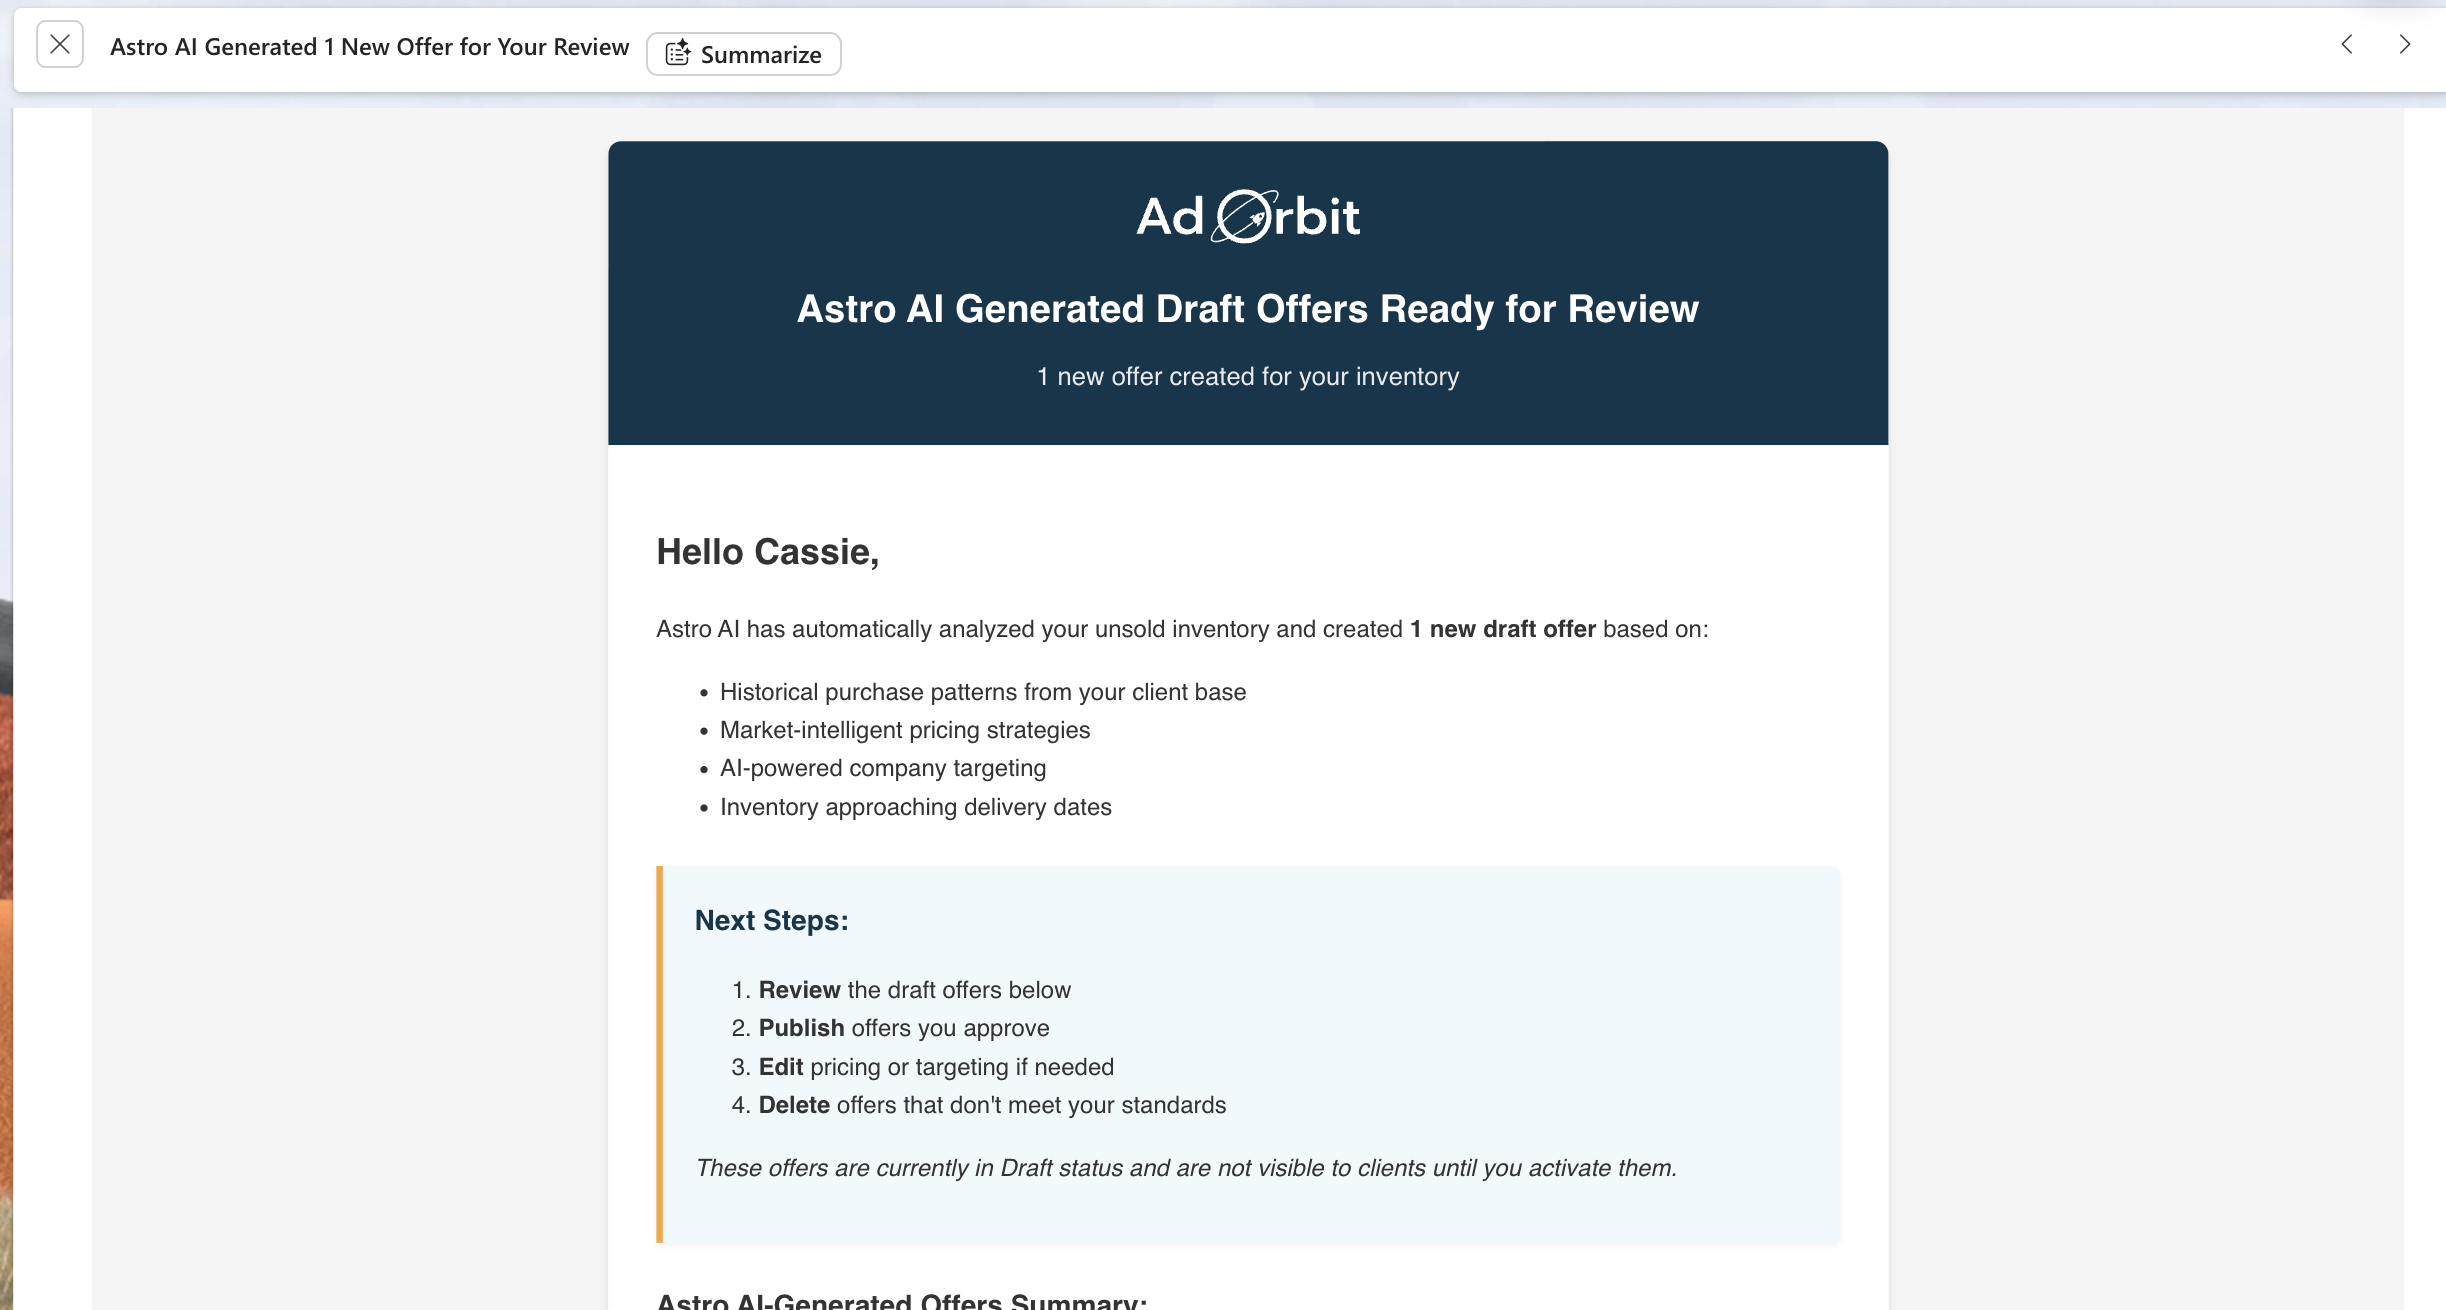
There is also the option to have Astro AI automatically create draft Offers on behalf of your reps. For any reps you wish to have this feature, go to their User Edit page by going to Settings > Users > User Setup. Find the user you want, and click on their name or the edit icon. On the User Information edit page, check the 'Enable Automatic Offer Creation' box, and save the changes.
When this is enabled, Astro will automatically generate draft offers based on the rep's past sales history, and available inventory. Offers will be automatically generated for the rep's top companies and products, and Astro will automatically add discounting to the offer line items as well.
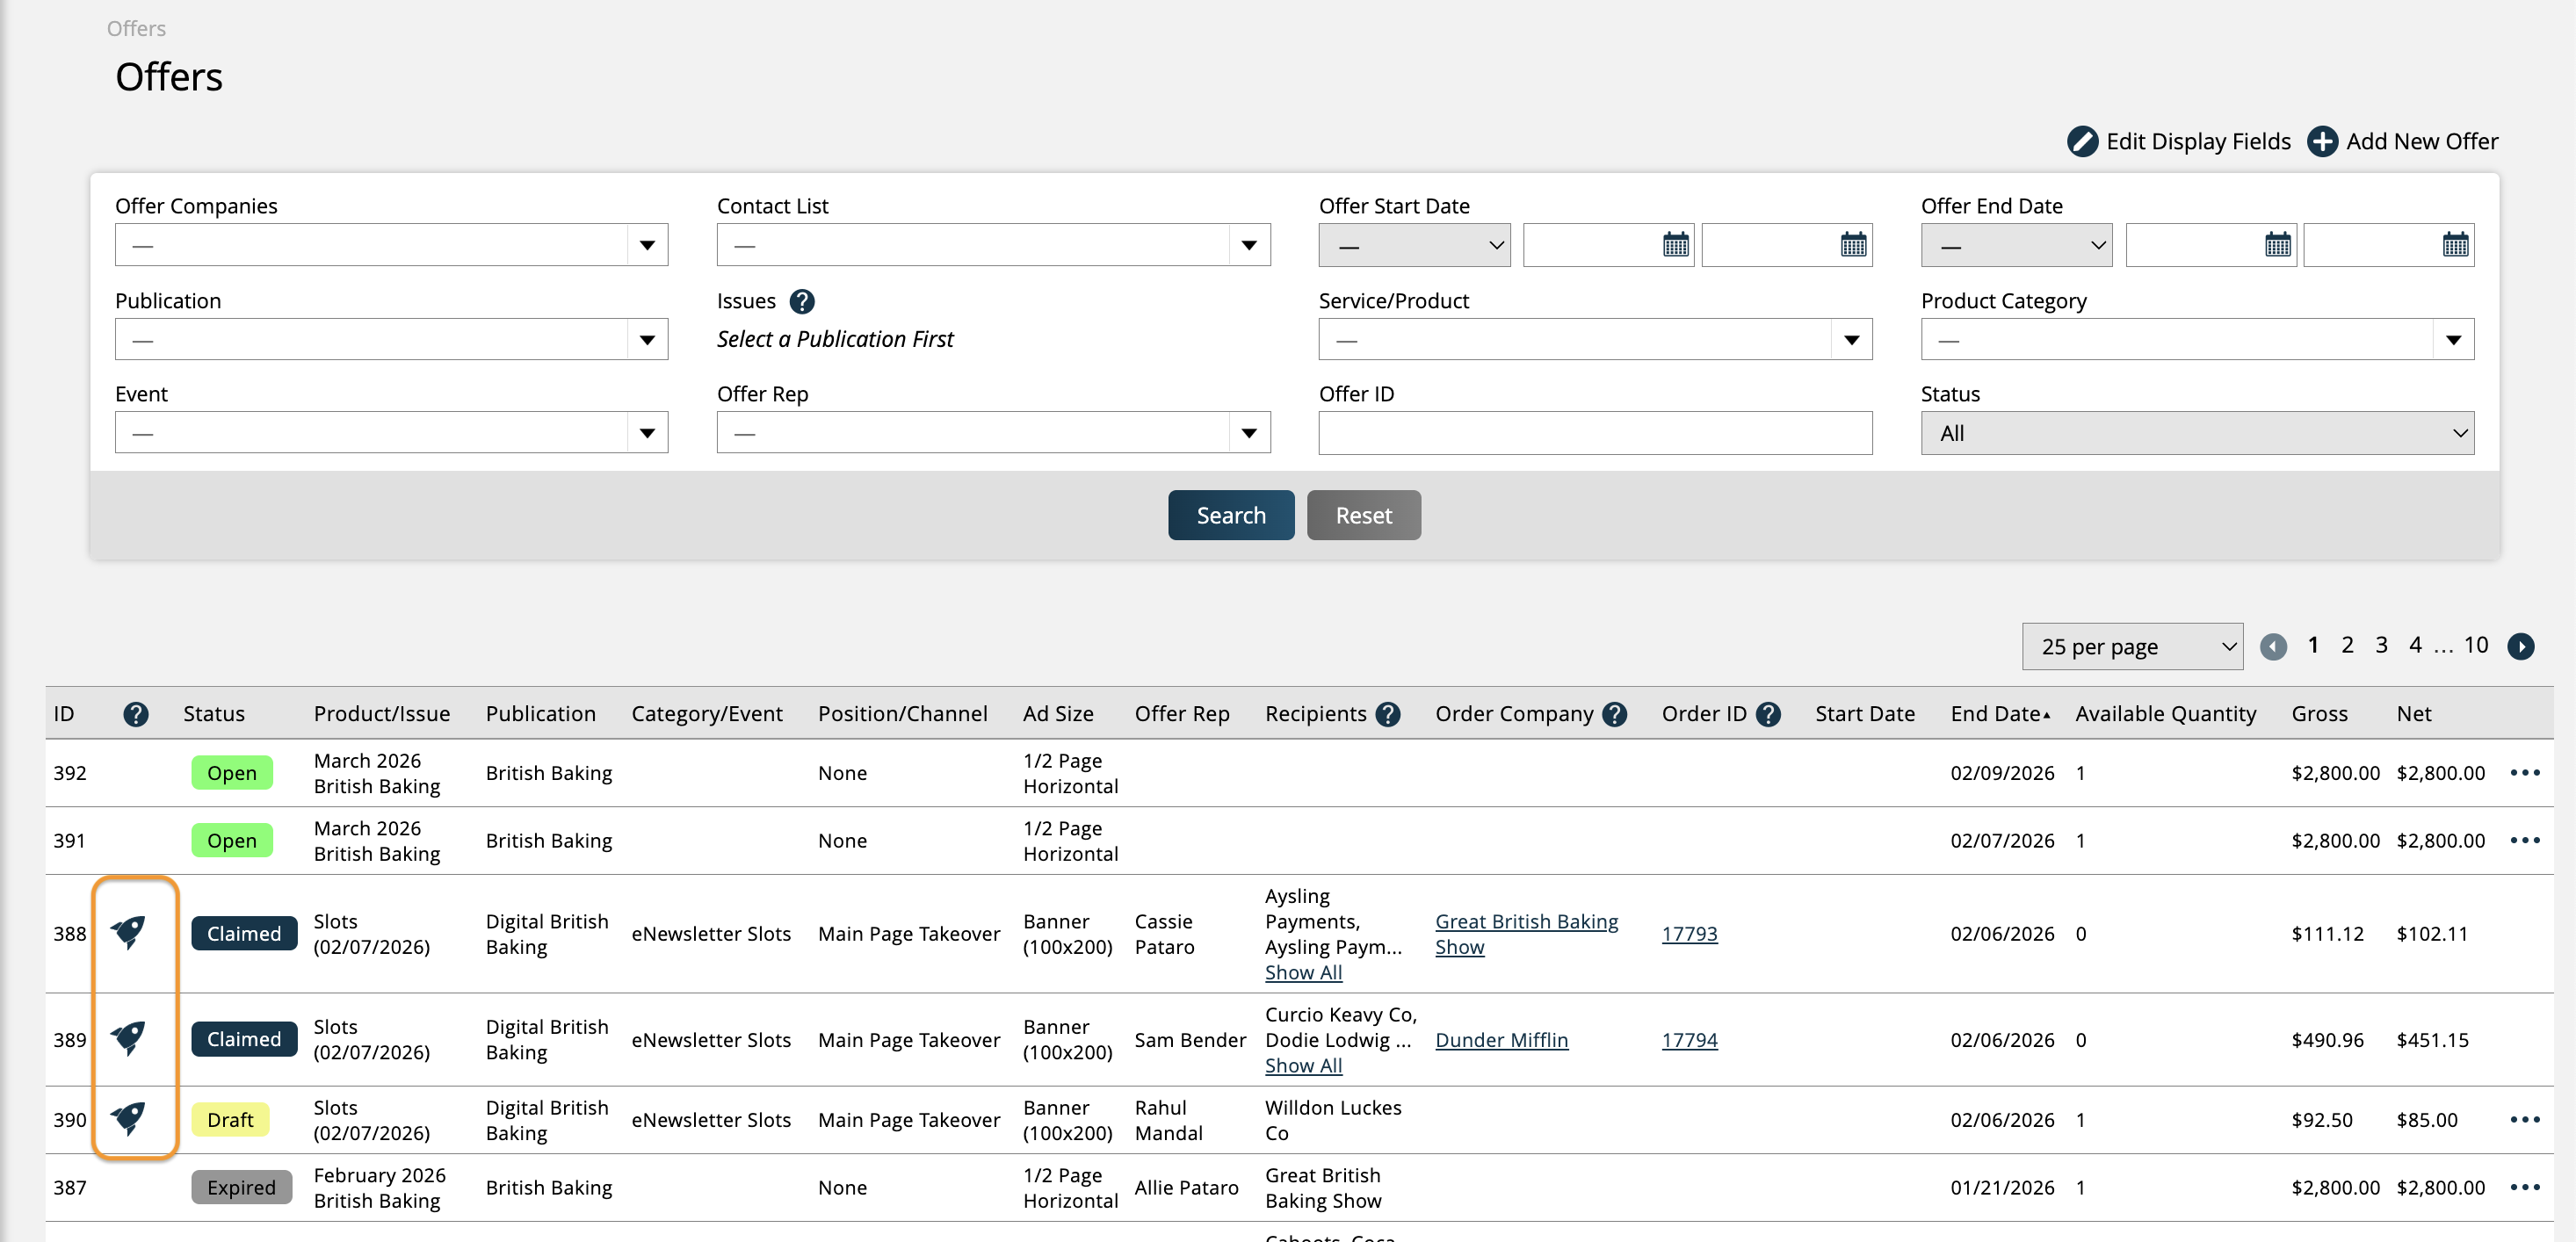
These automatically created offers are indicated within Ad Orbit with a rocket icon.
Any automatically generated offer will be in a 'draft' status, meaning it must be reviewed and published by a user before it is visible to your customers.
When offers are automatically created, reps will receive an email with the information about the offer, that includes links to view the offer within Ad Orbit.
You can review the offer and line item information and make any changes as necessary. If you like the offer and want to utilize it, then click the ellipses icon on the offer, then click the 'Publish Offer' action. This will move it to an Open status where it can be seen and claimed by customers.
You do have the option to revert the status back to Draft if needed, again by using the ellipses icon on the offer, and selecting the 'Revert to Draft' action.
To prevent automatically created offers from just being noise in the system, each rep will have a maximum of three automatically created draft offers at a time.
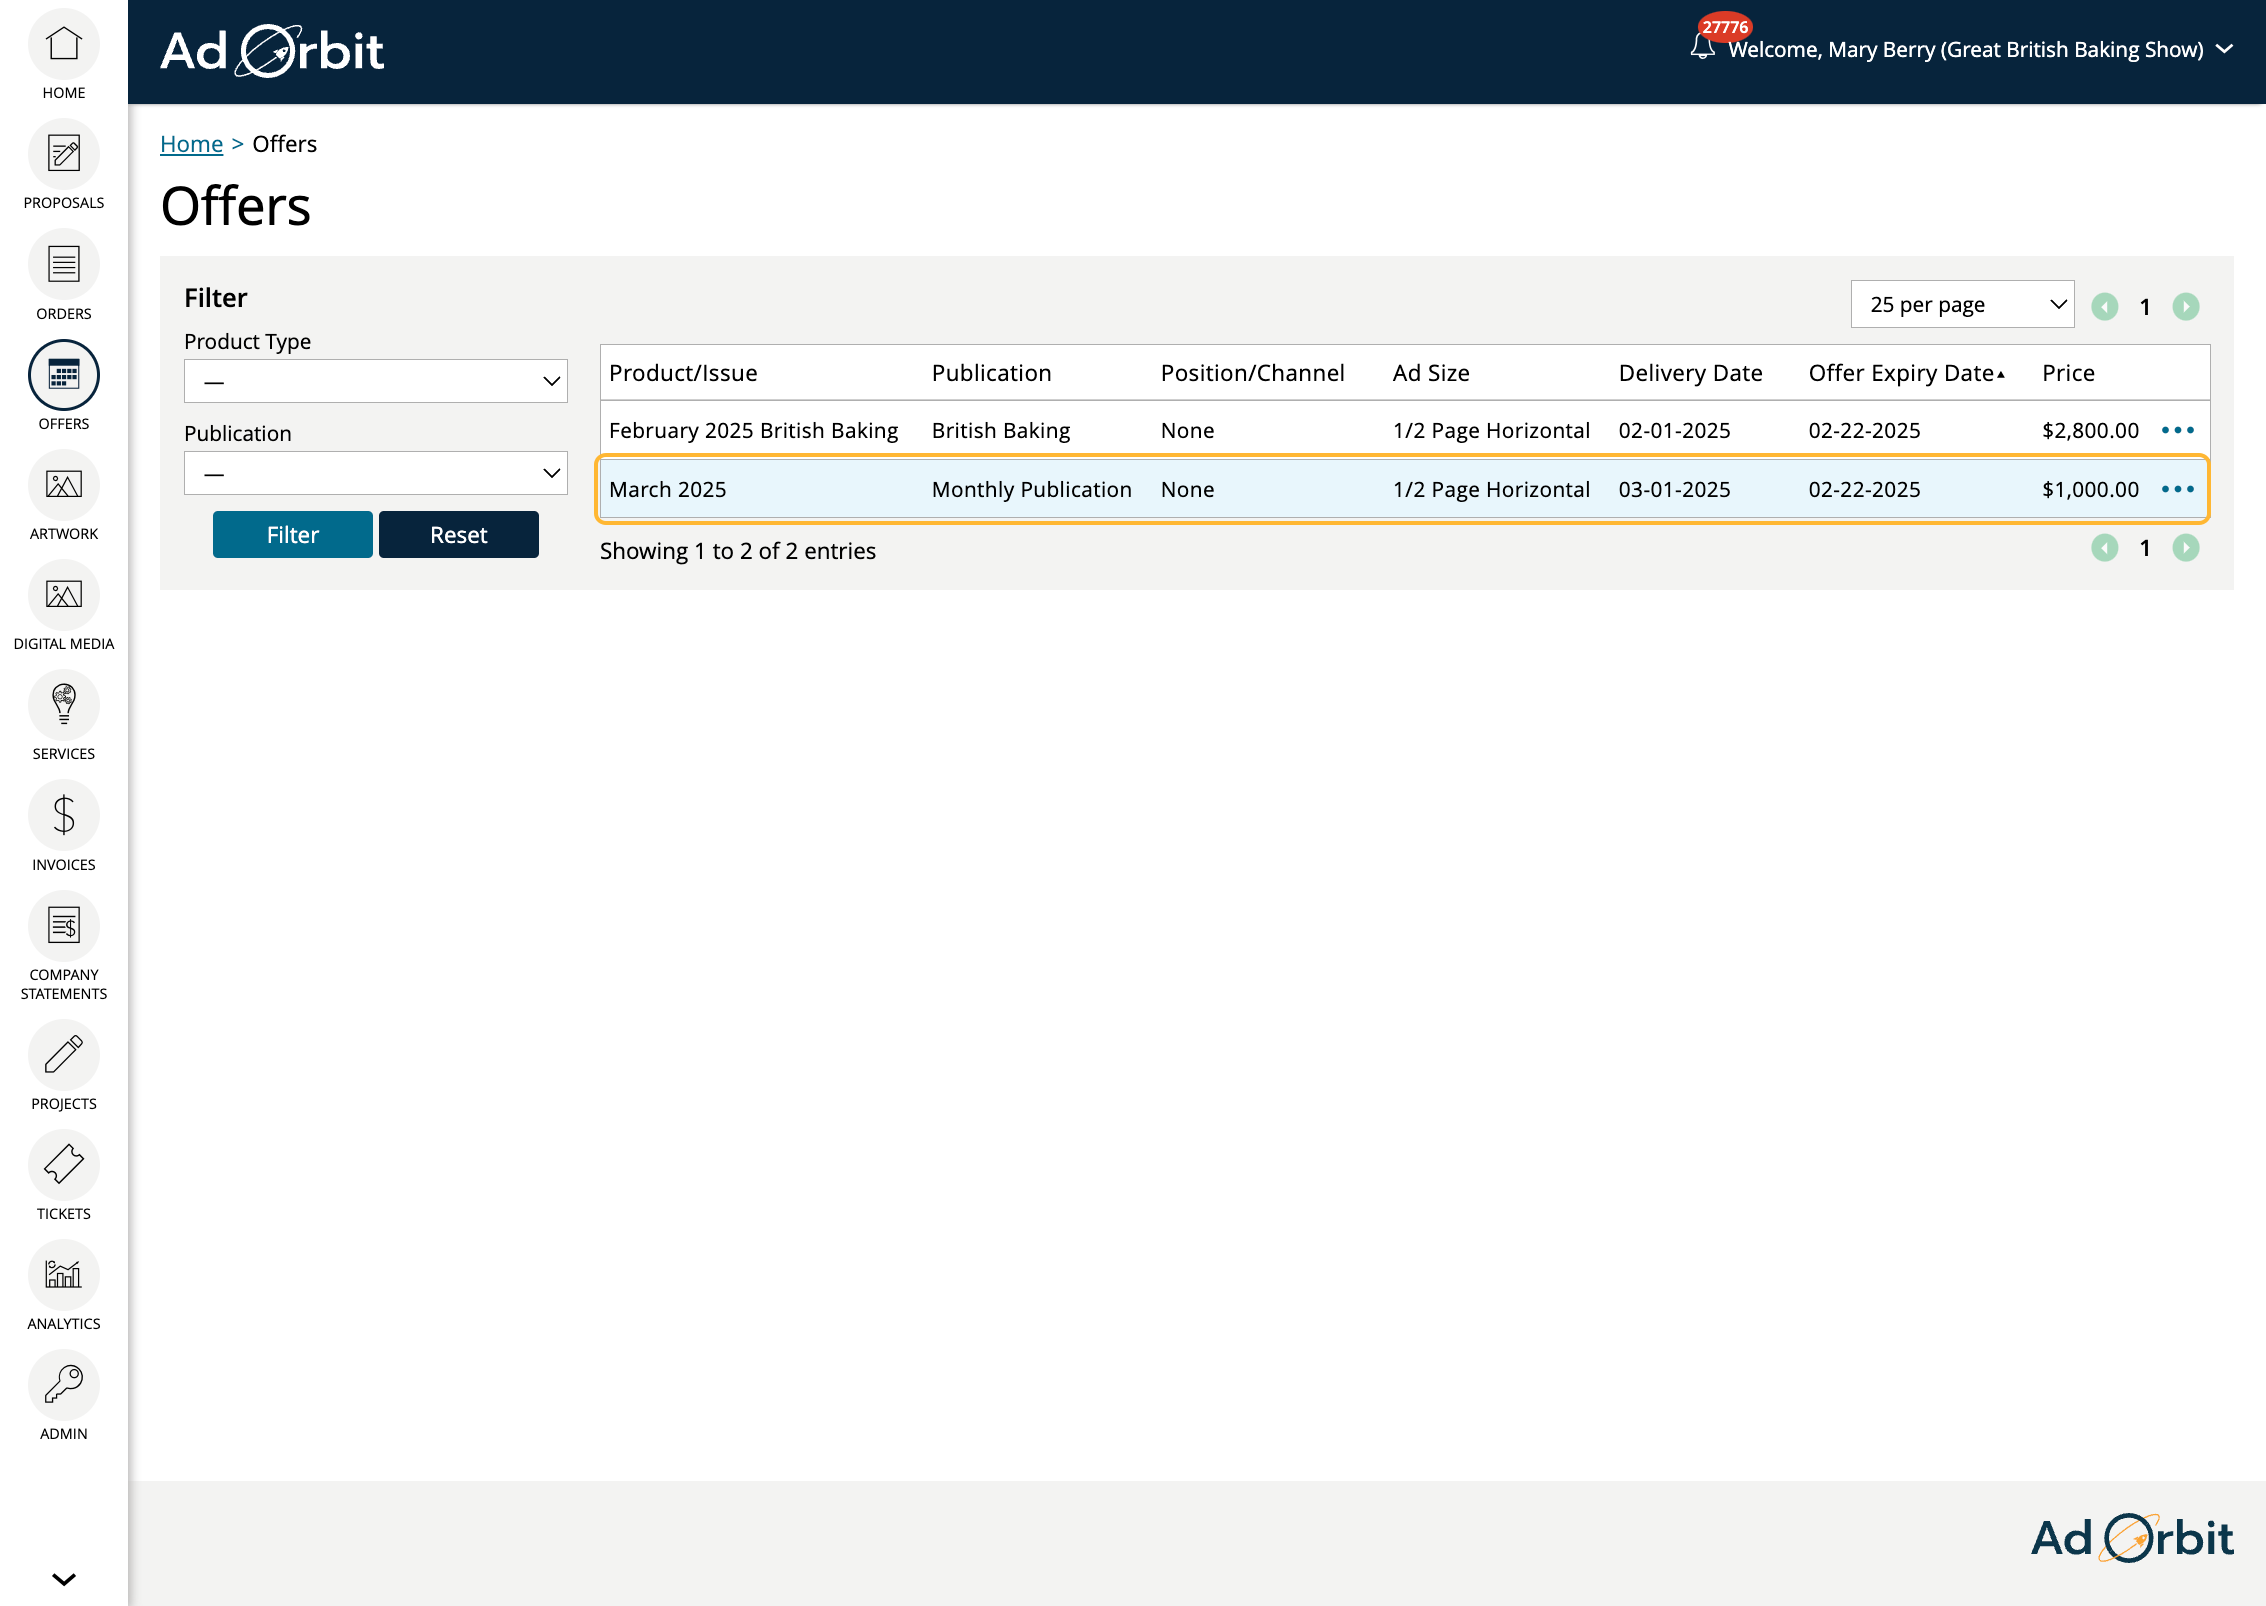
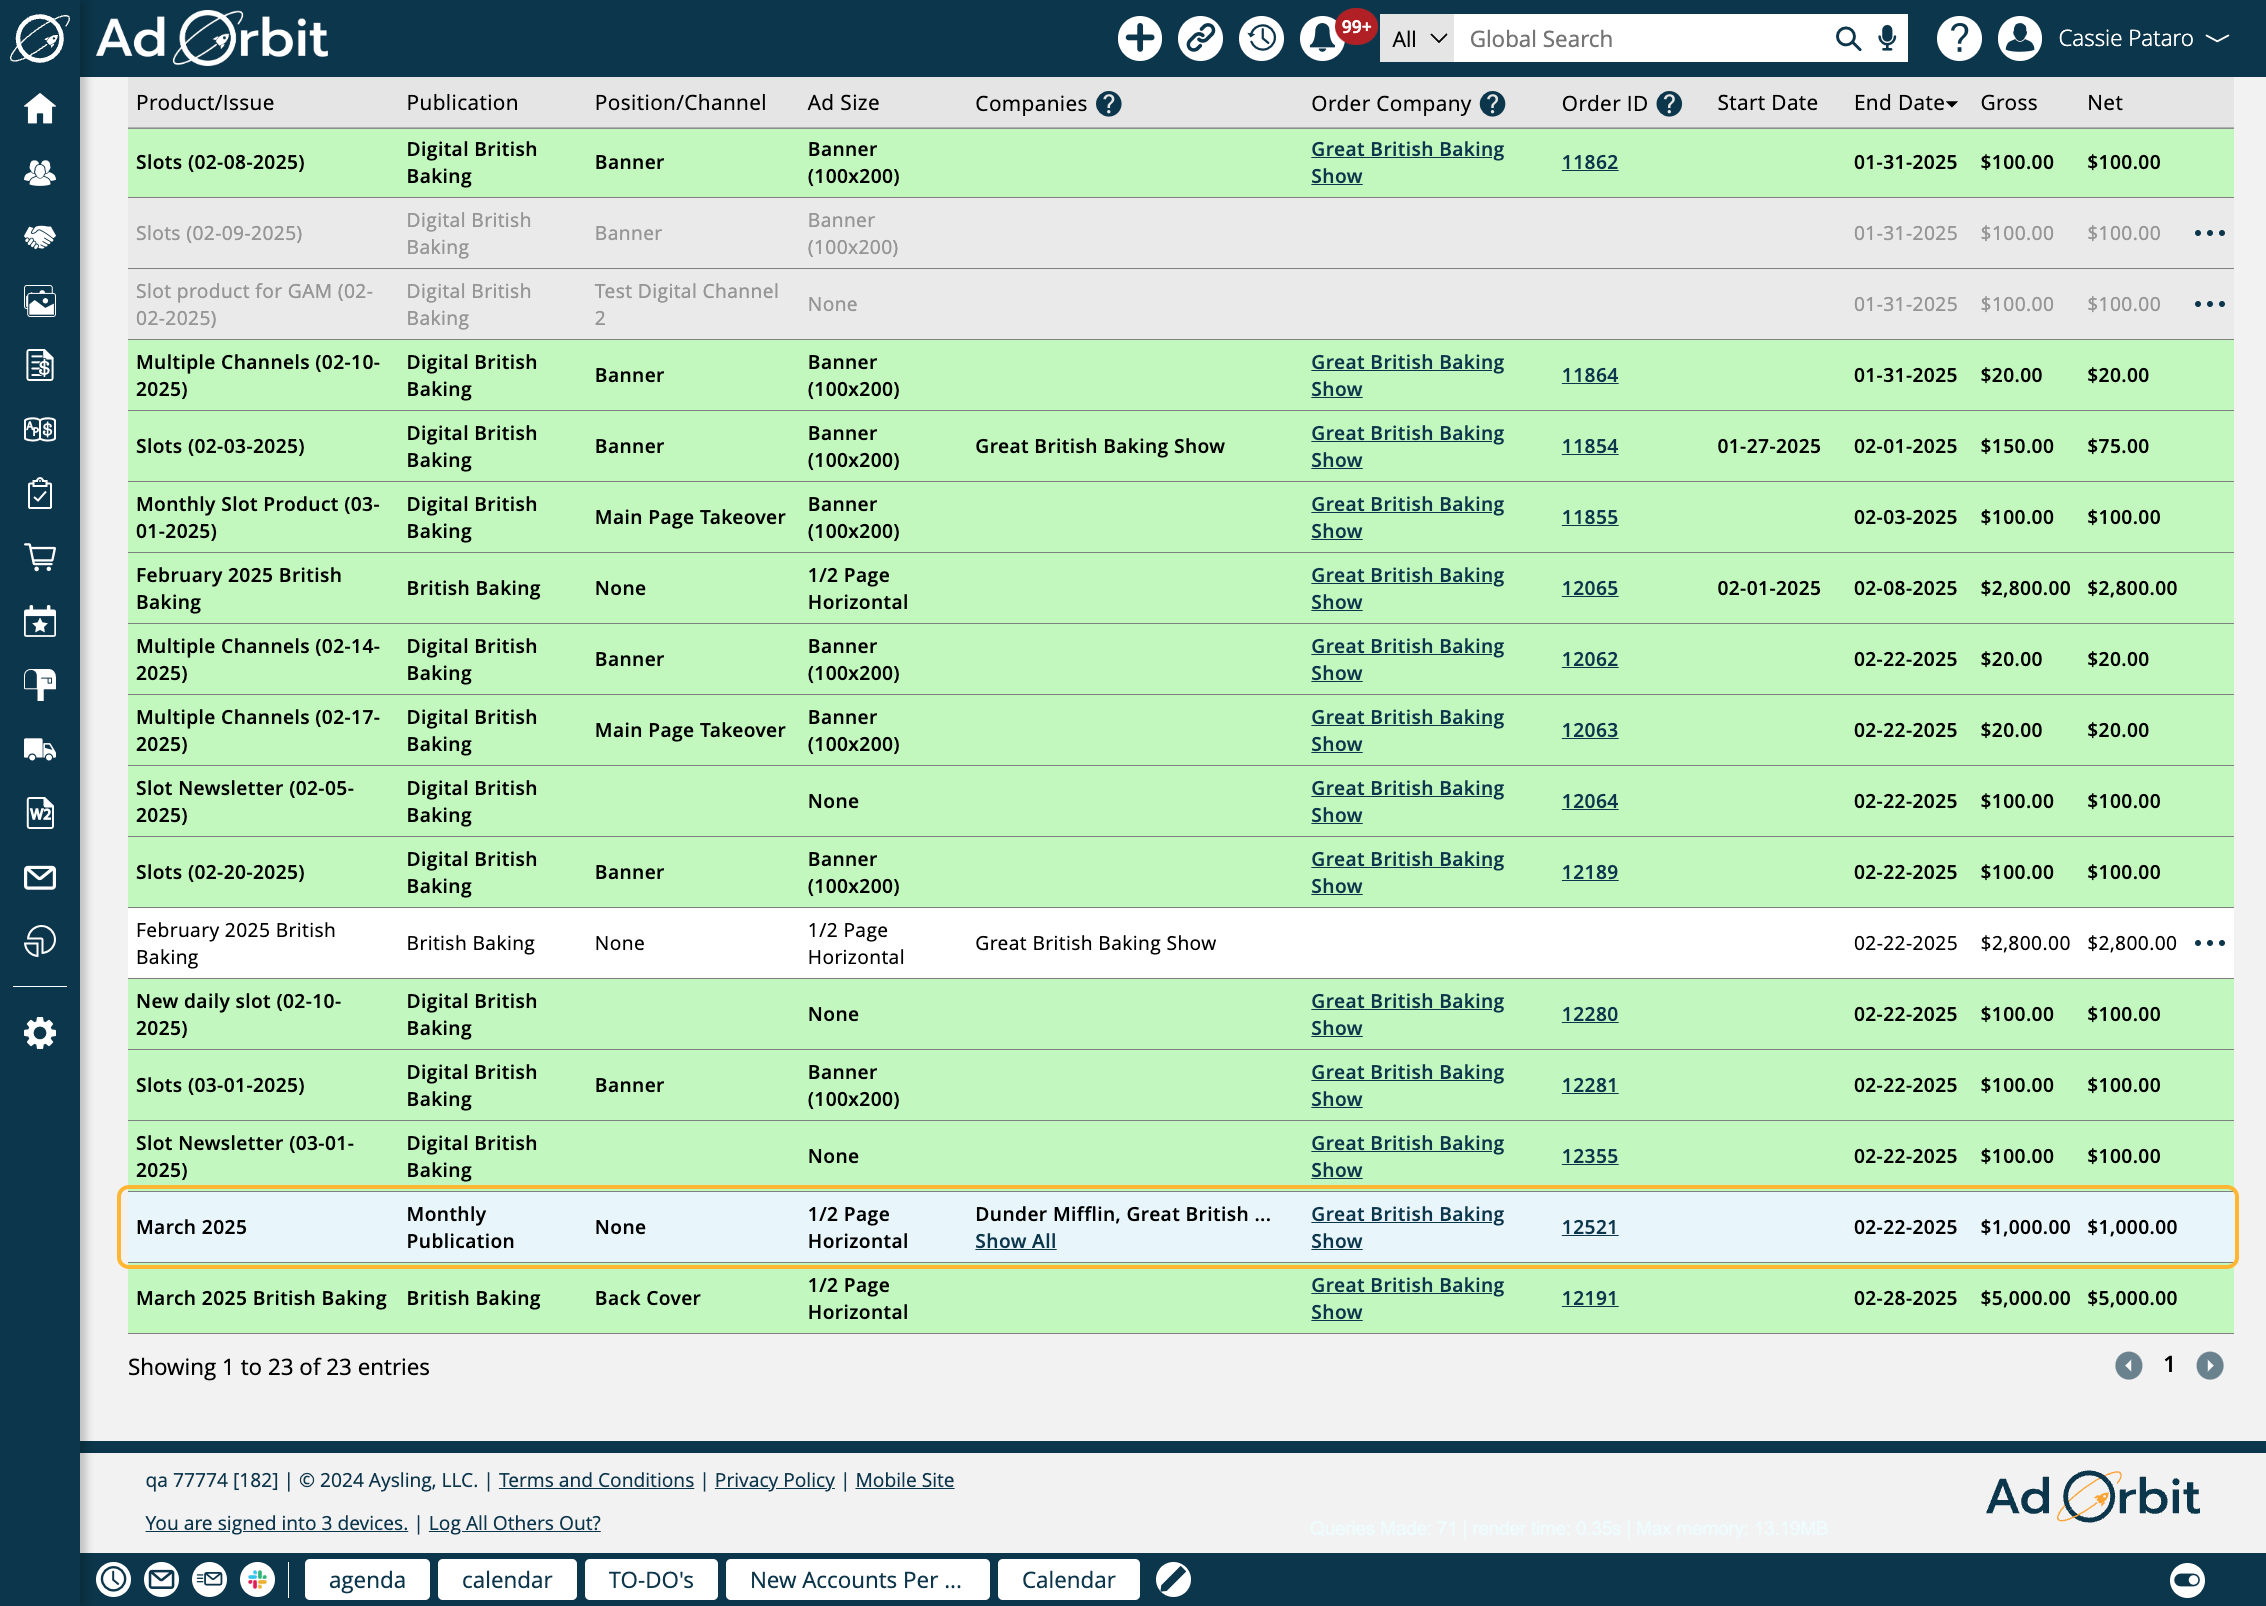
On the Offers page, you can either view all existing offers, or you can use the search fields at the top of the page to narrow down your results.
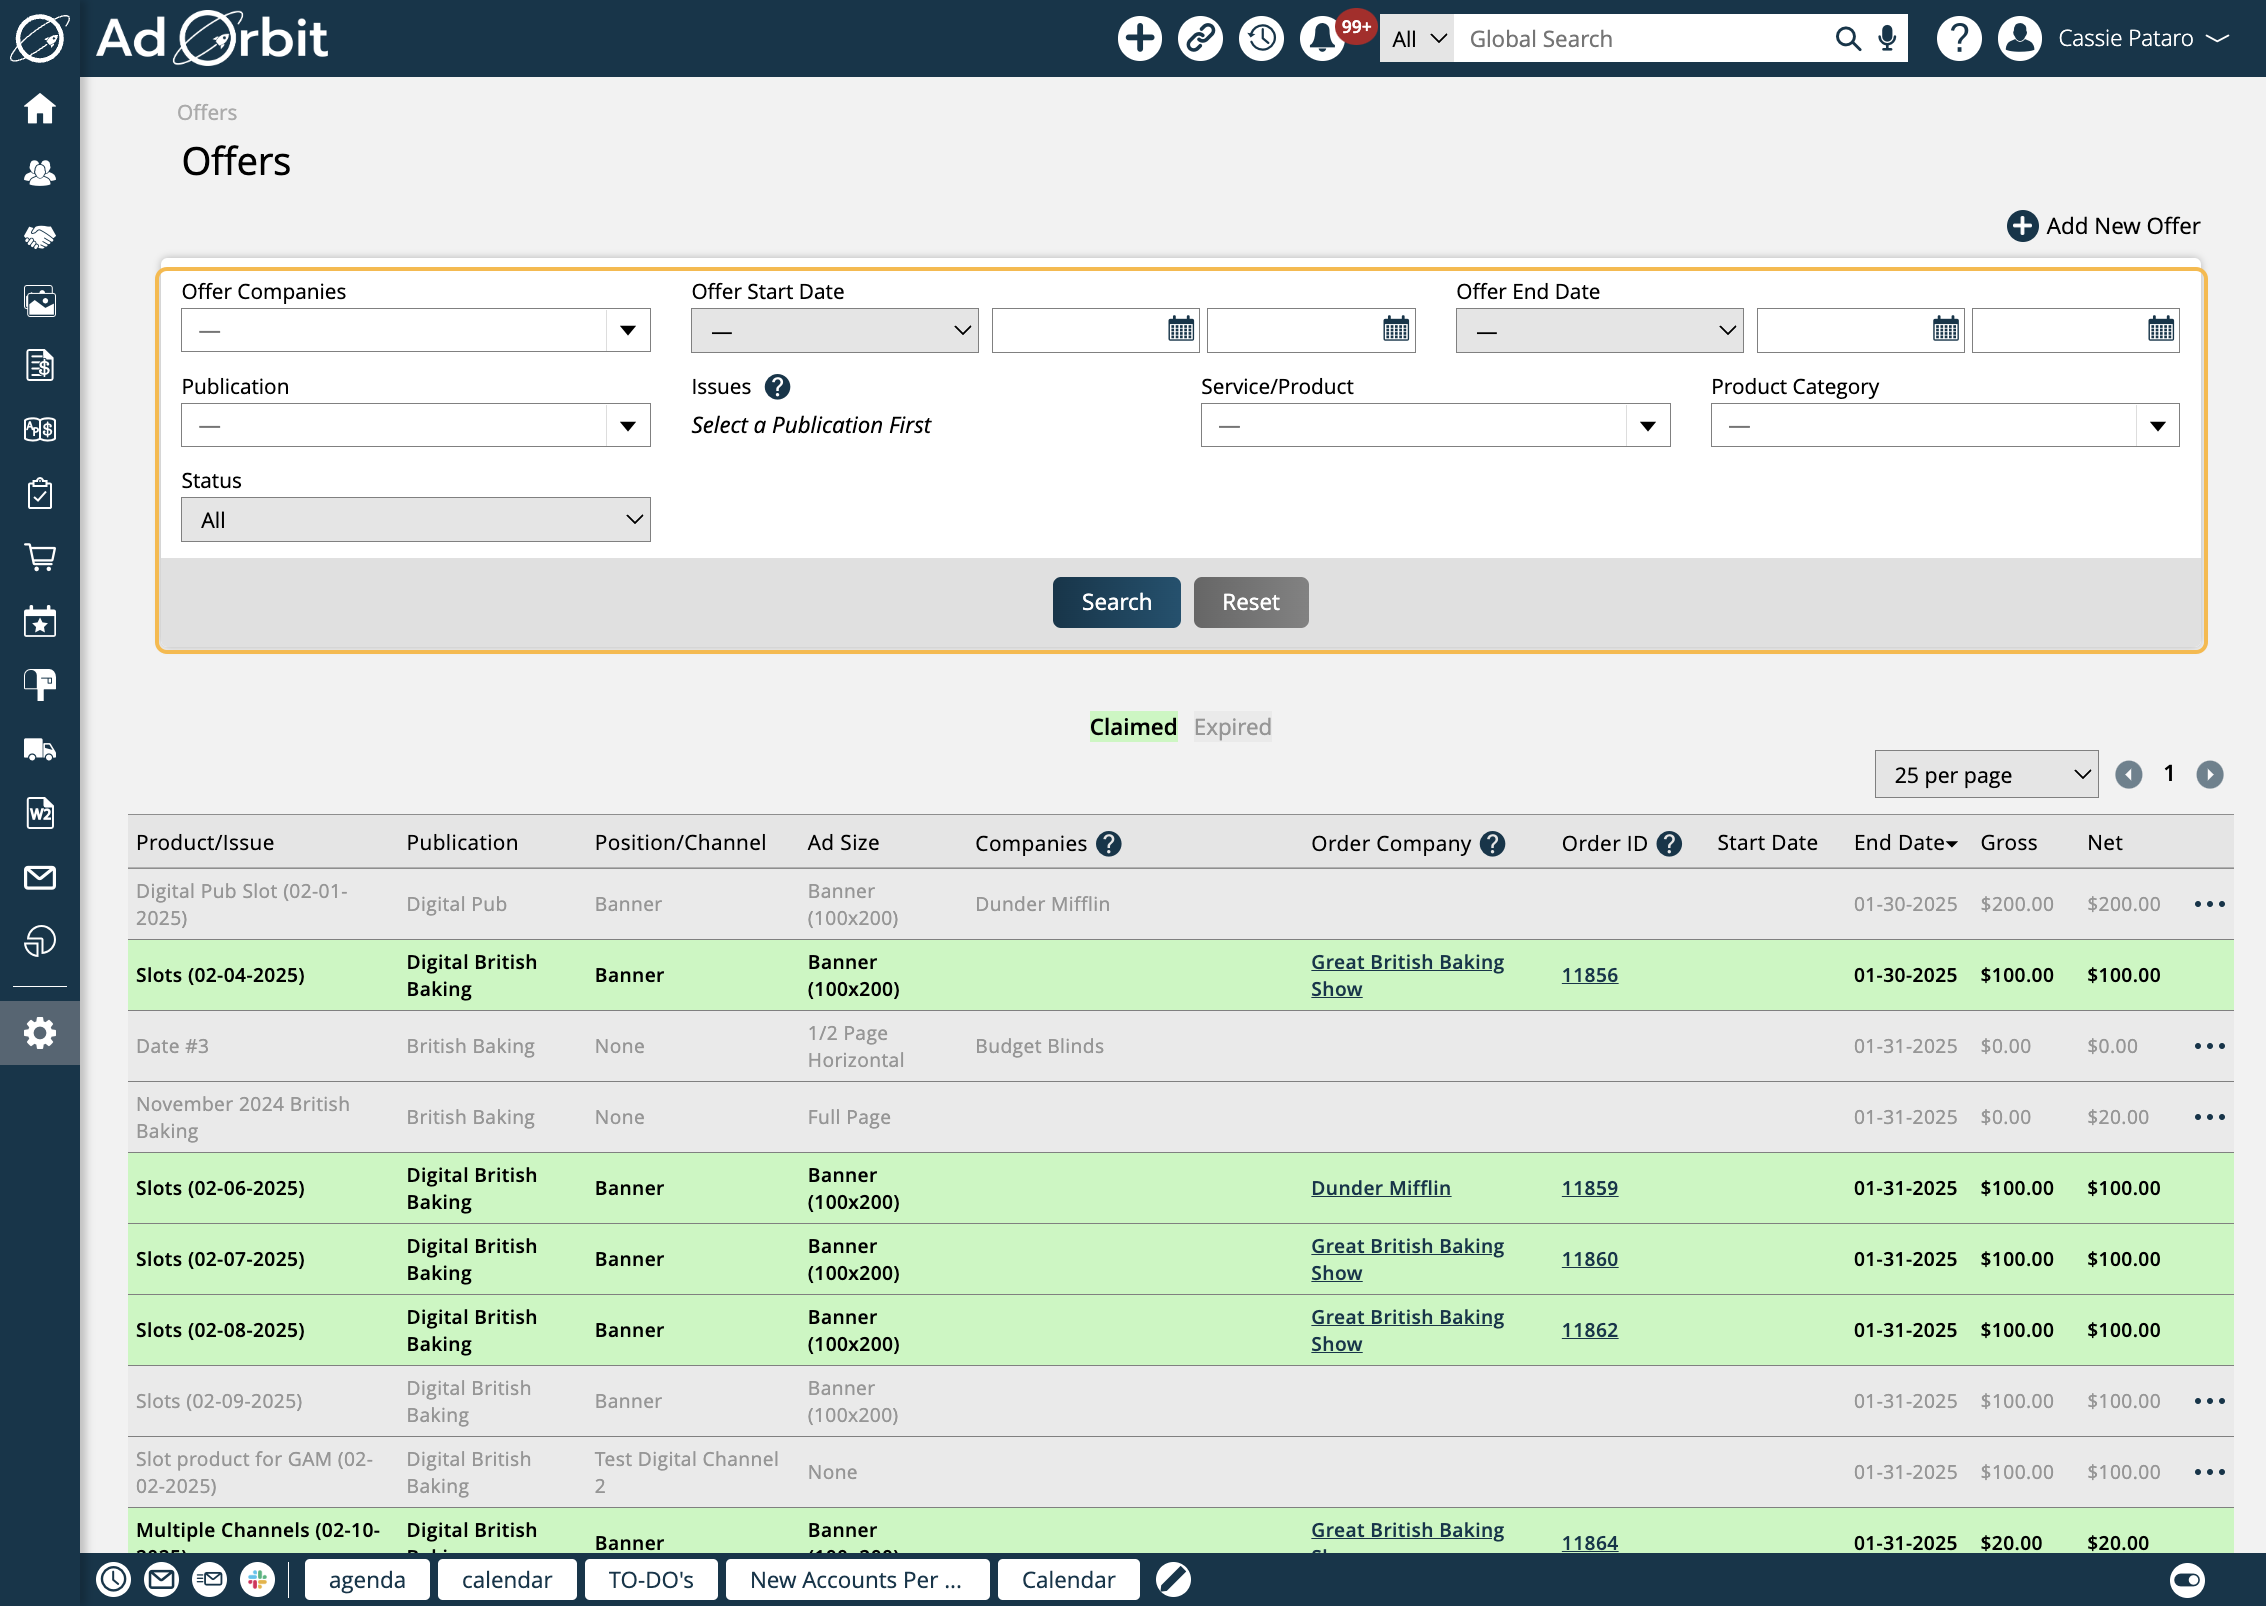
In the table, each offer status is color coded.
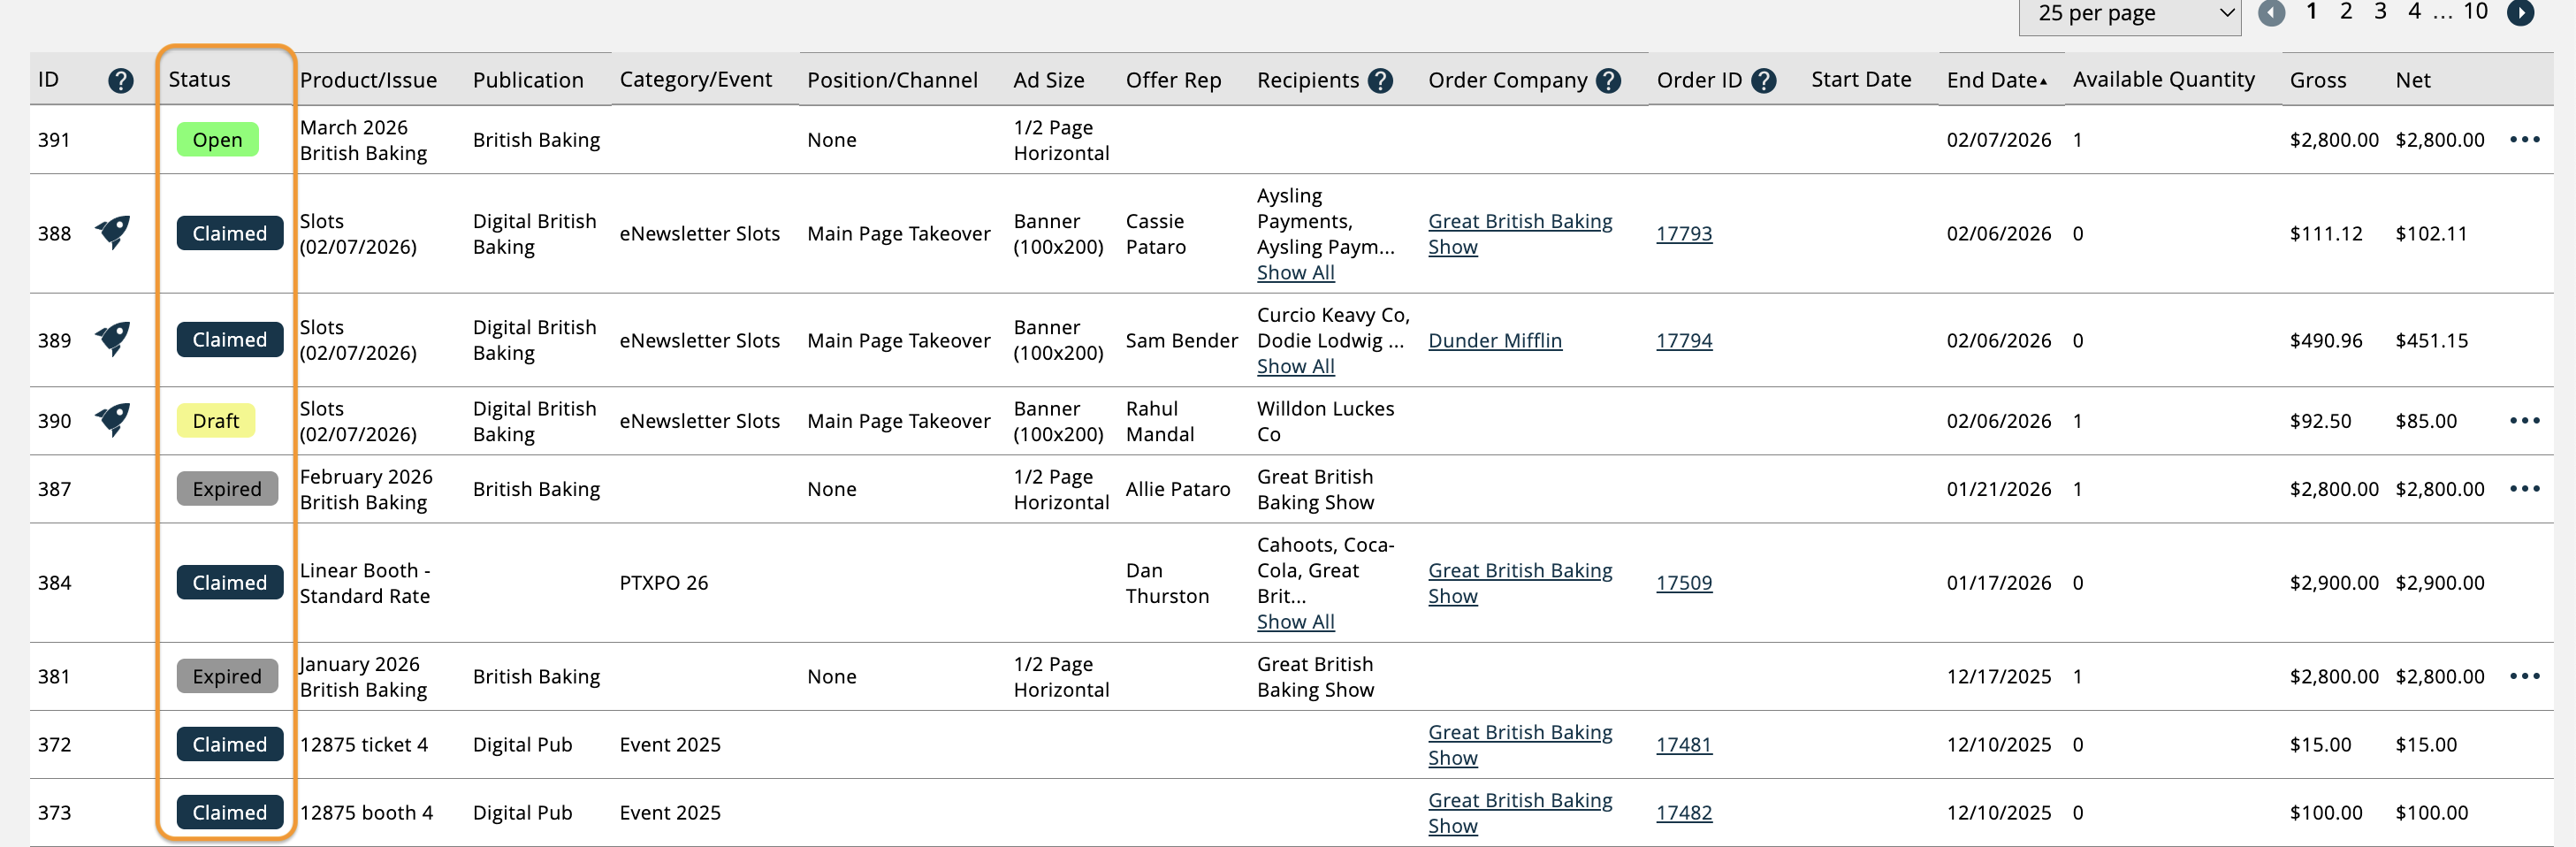
Open: Shown highlighted in green, open offers are those that are active and unclaimed, but are visible in the Client Center and are available to be claimed.
Claimed: Shown with a dark blue highlight, a claimed offer is one that has been purchased by a customer and an order has been created.
Expired: Expired offers are those that passed their Availability End Date without being claimed. These are shown in gray.
Draft: The draft status is specifically for offers created via Astro, and are displayed with a yellow background. Draft offers are not visible to customers until they are published, which moves them to the open status.
Any unclaimed offer can be edited by using the ellipses action on the record. The Edit Offer action will re-open the initial popup, where you can change items such as the associated companies and dates, whereas the Edit Line Item Details action will re-open the edit line item popup, where changes can be made to the item that will be sold. Unclaimed offers can also be deleted.
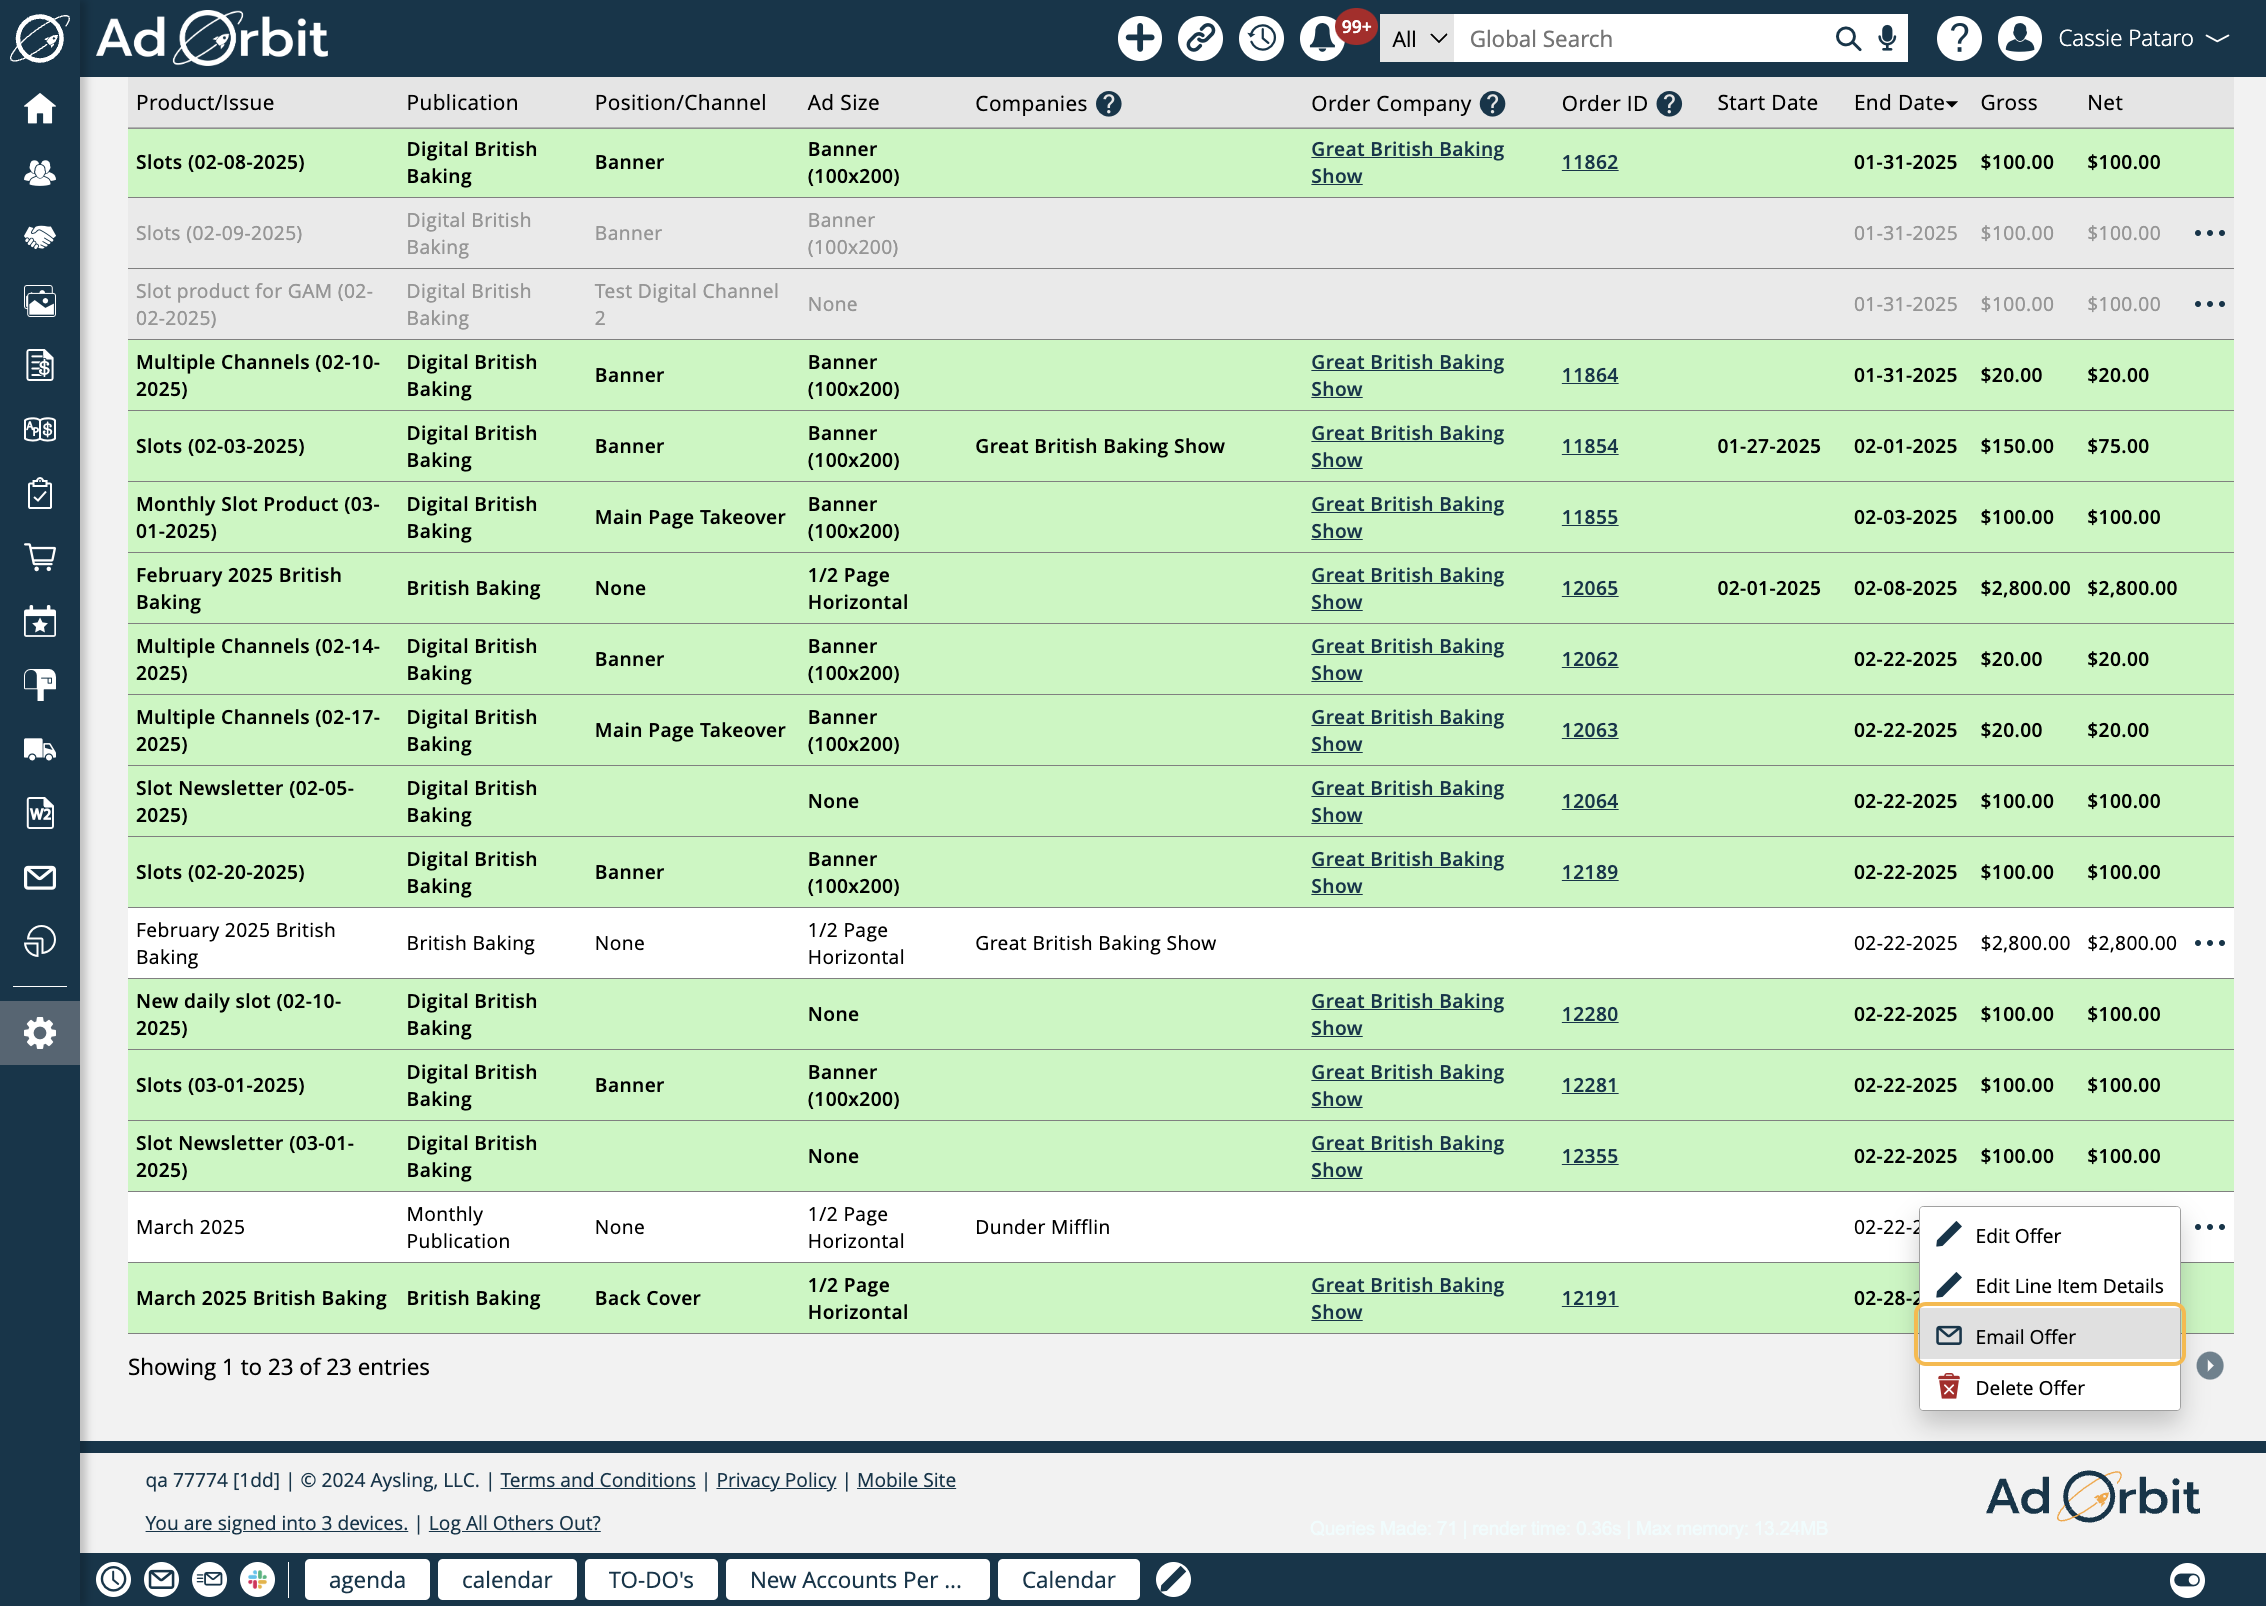
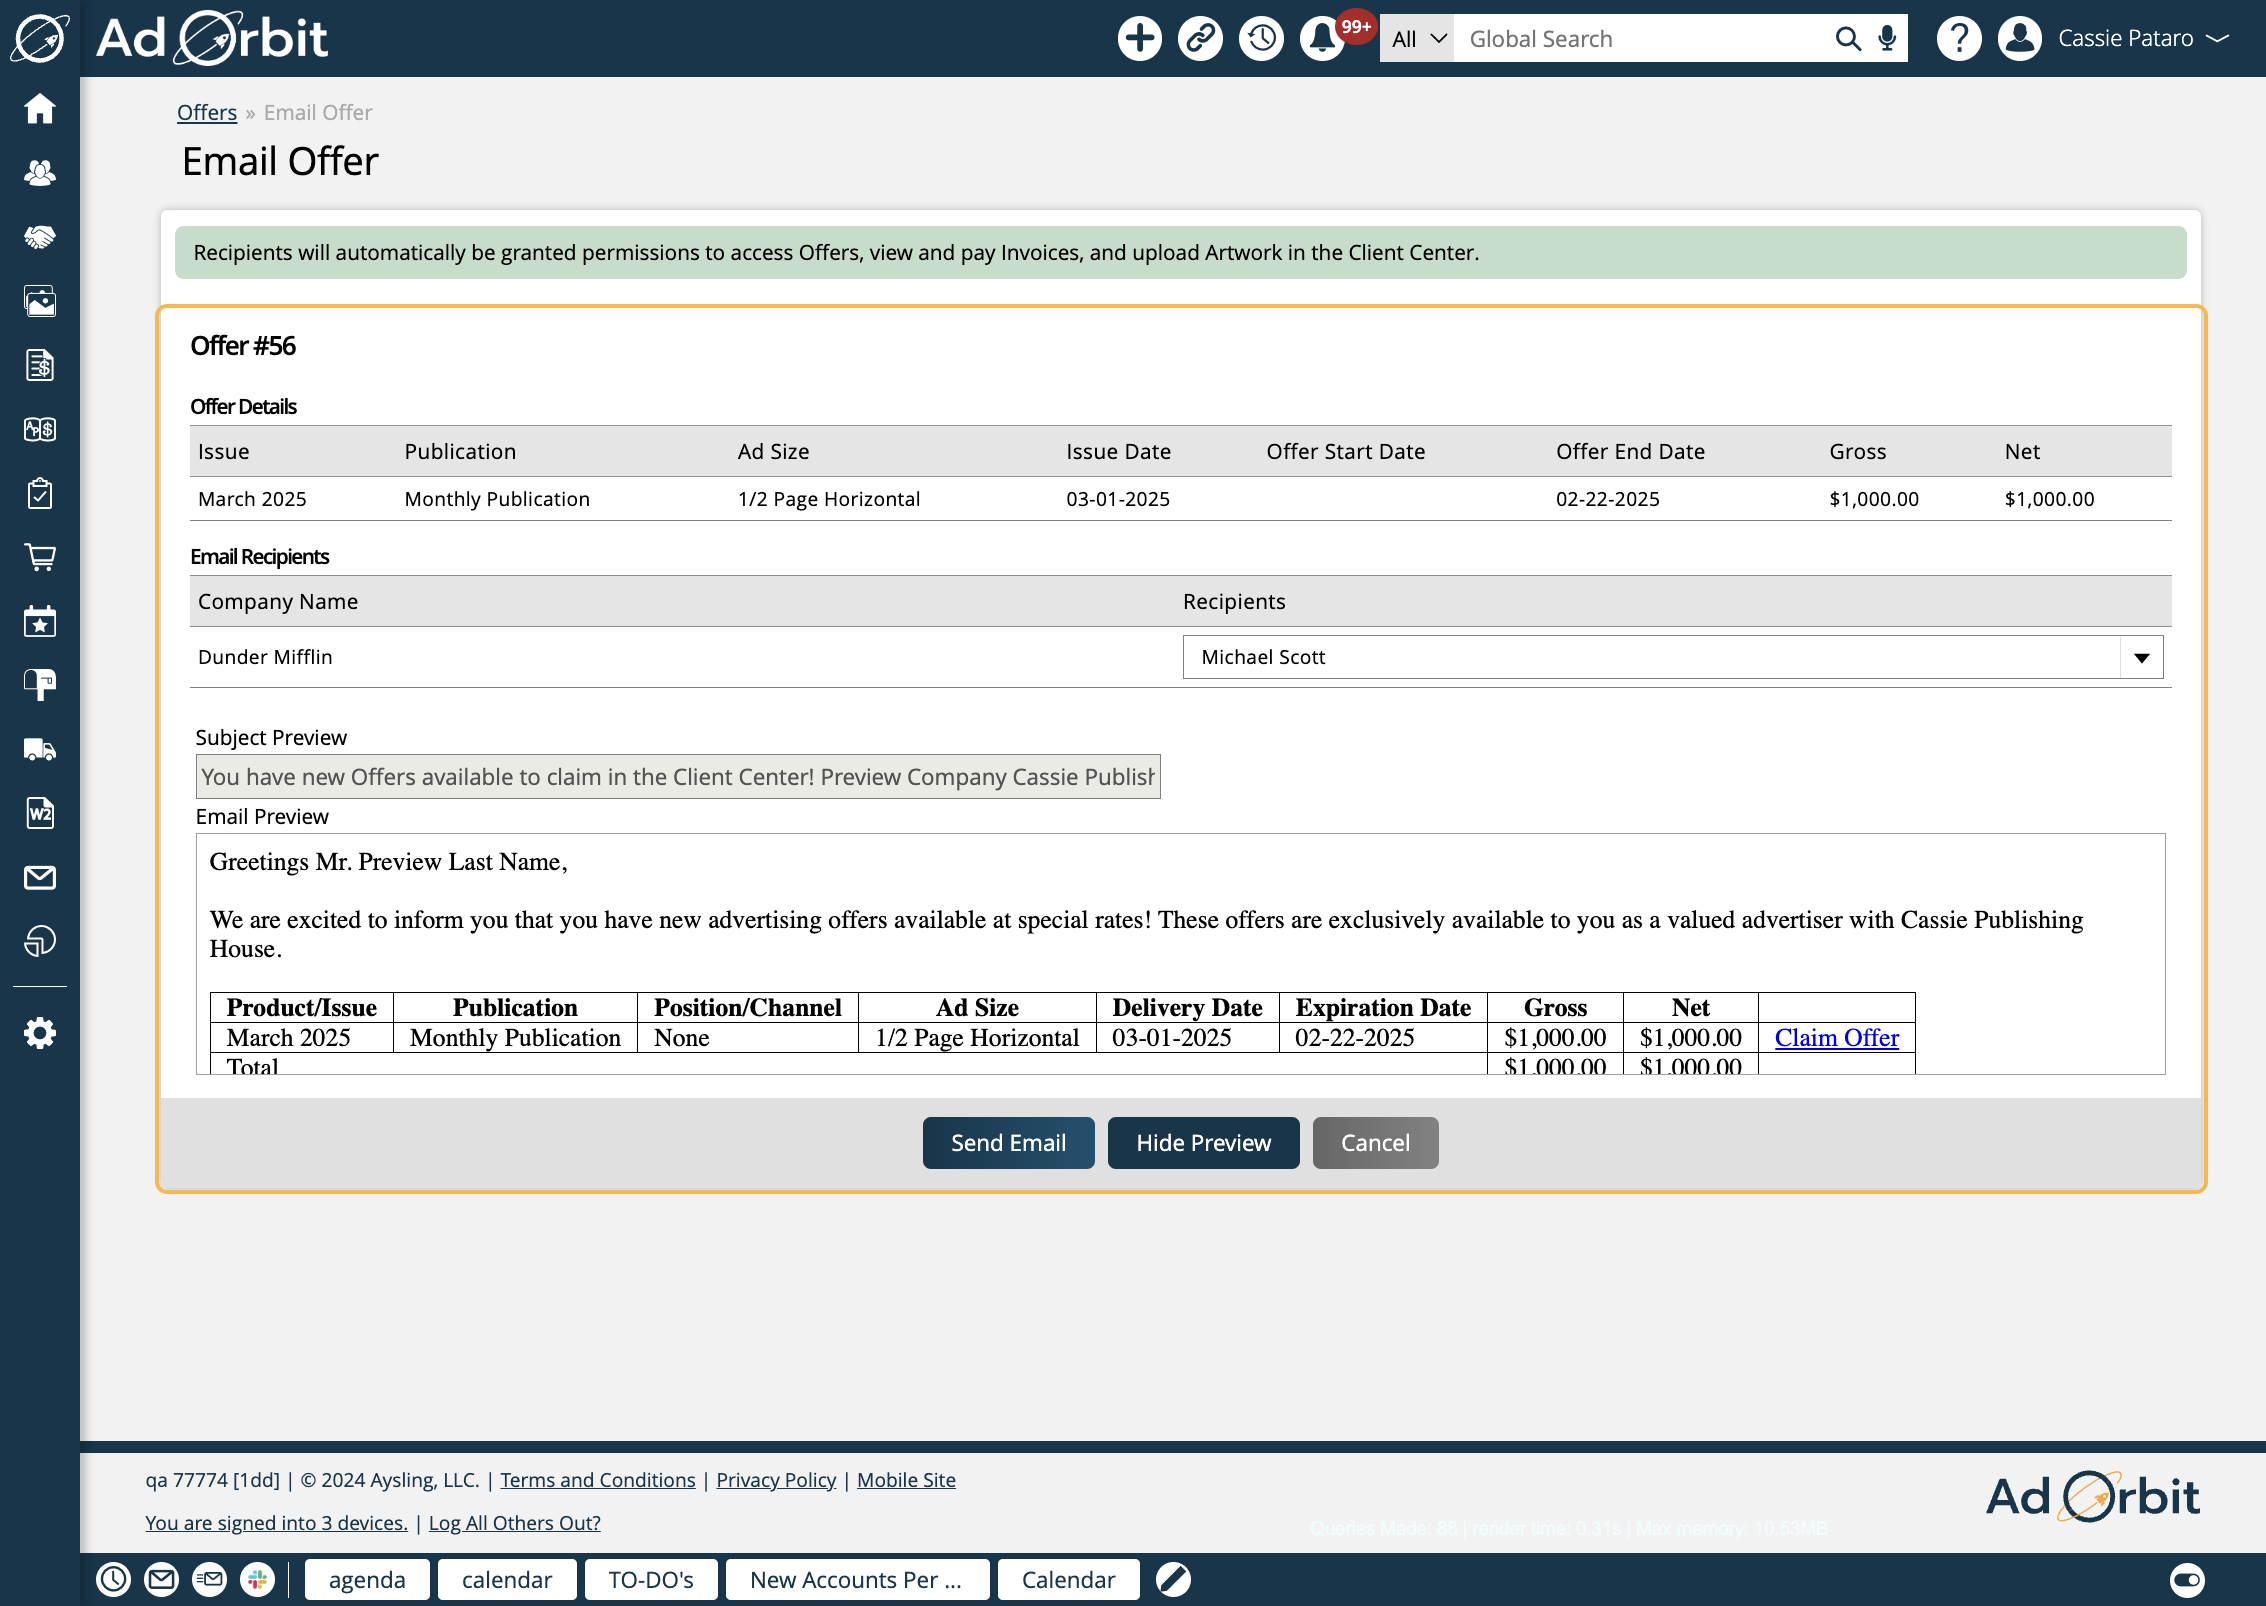
If an offer is associated with a company or contact list, there will be an additional action to email the offer.
When emailing an offer, you will be able to view details about the item, as well as preview and edit the email content before sending.
If the offer associated with a company, then you can select which recipients should receive the email. If the offer is associated with a contact list, then you cannot select the recipients. To change the recipients in this case, you should make changes to the Contact List.
By default, this email will come from the rep set on the offer, but this can be changed to a different email address if needed.
There is a customizable email template for sending offers. Found by going to Settings > Templates > System Emails, the 'Offer Email' can be edited and customized as needed.
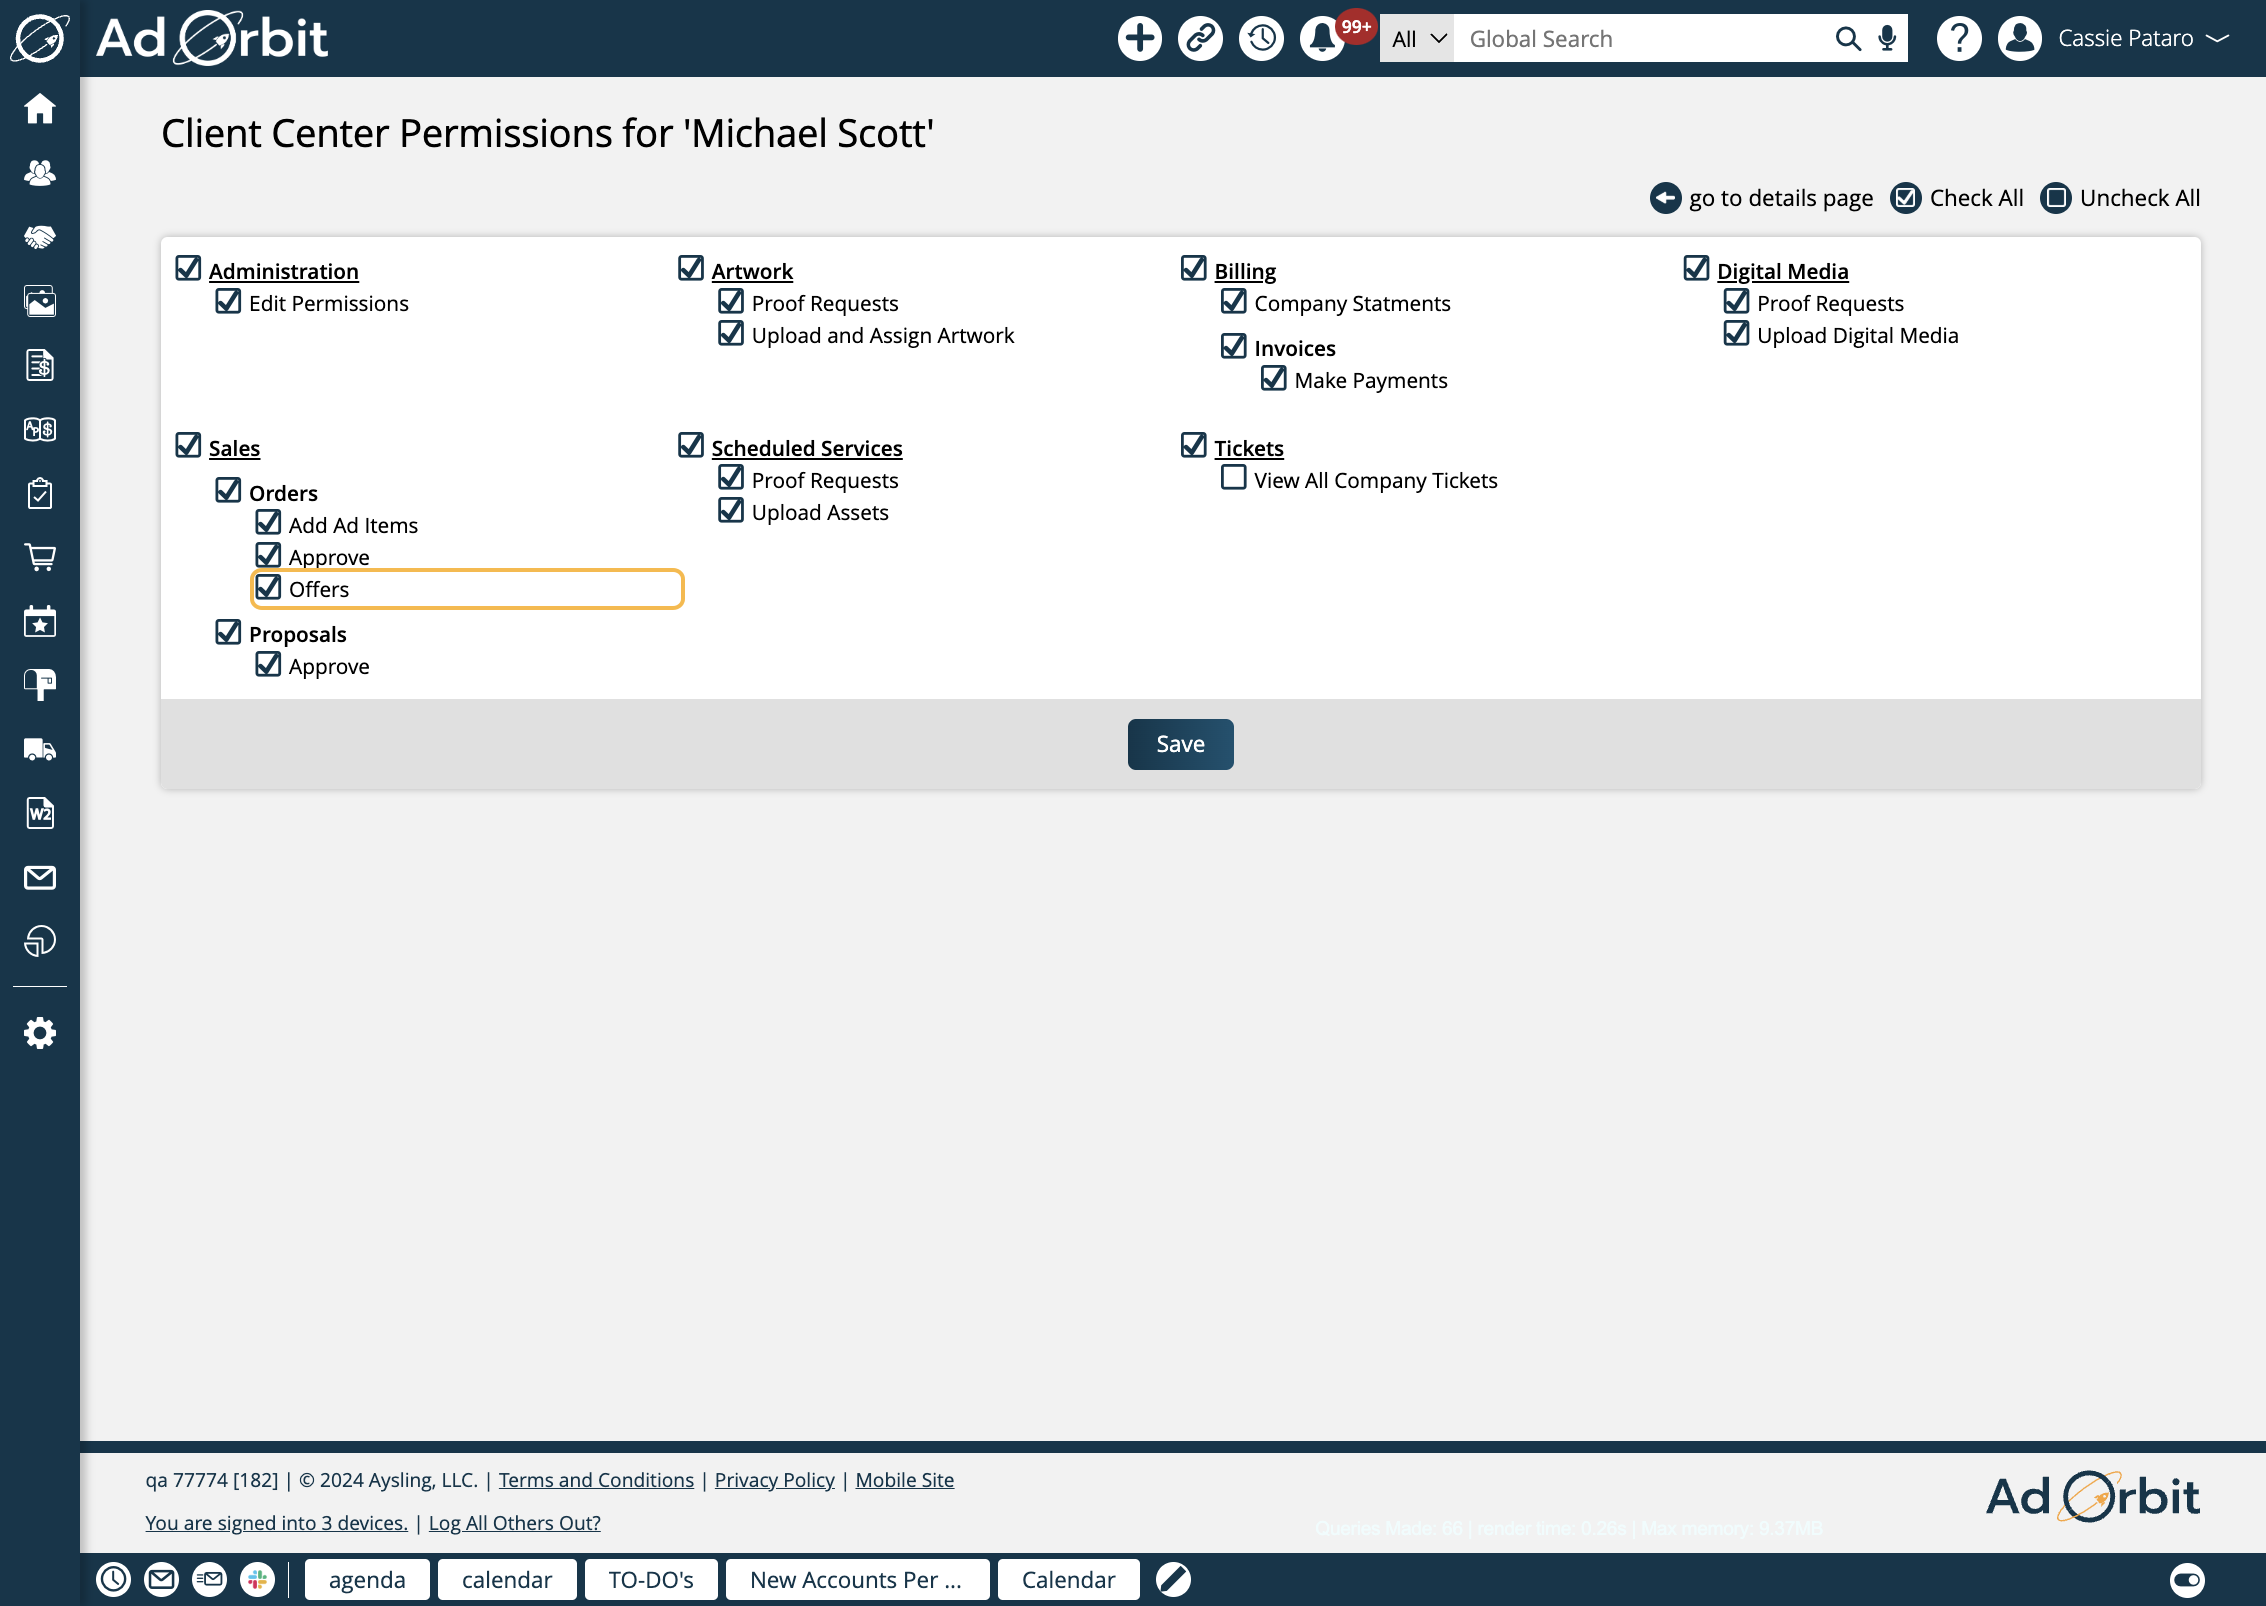
In order to see offers in the Client Center, your contacts will need the 'Offers' Client Center Permission.
If you email an offer to a contact, they will automatically be granted this permission, so they can see the offer. In addition, if an offer is emailed, contacts can claim the offer anonymously, so they will not need to log into their Client Center account to access and claim the offer.
You can also manually set this permission on any contact by clicking the edit icon in the 'Client Center Information' box on their overview page, and granting them the 'Offers' permission.
Once a contact has the 'Offers' permission, they will be able to access the Offers page within the Client Center. On this page, contacts can view all offers that either do not have any companies specified, or offers they are set as a company on.
For instance, this contact can only see one offer currently.
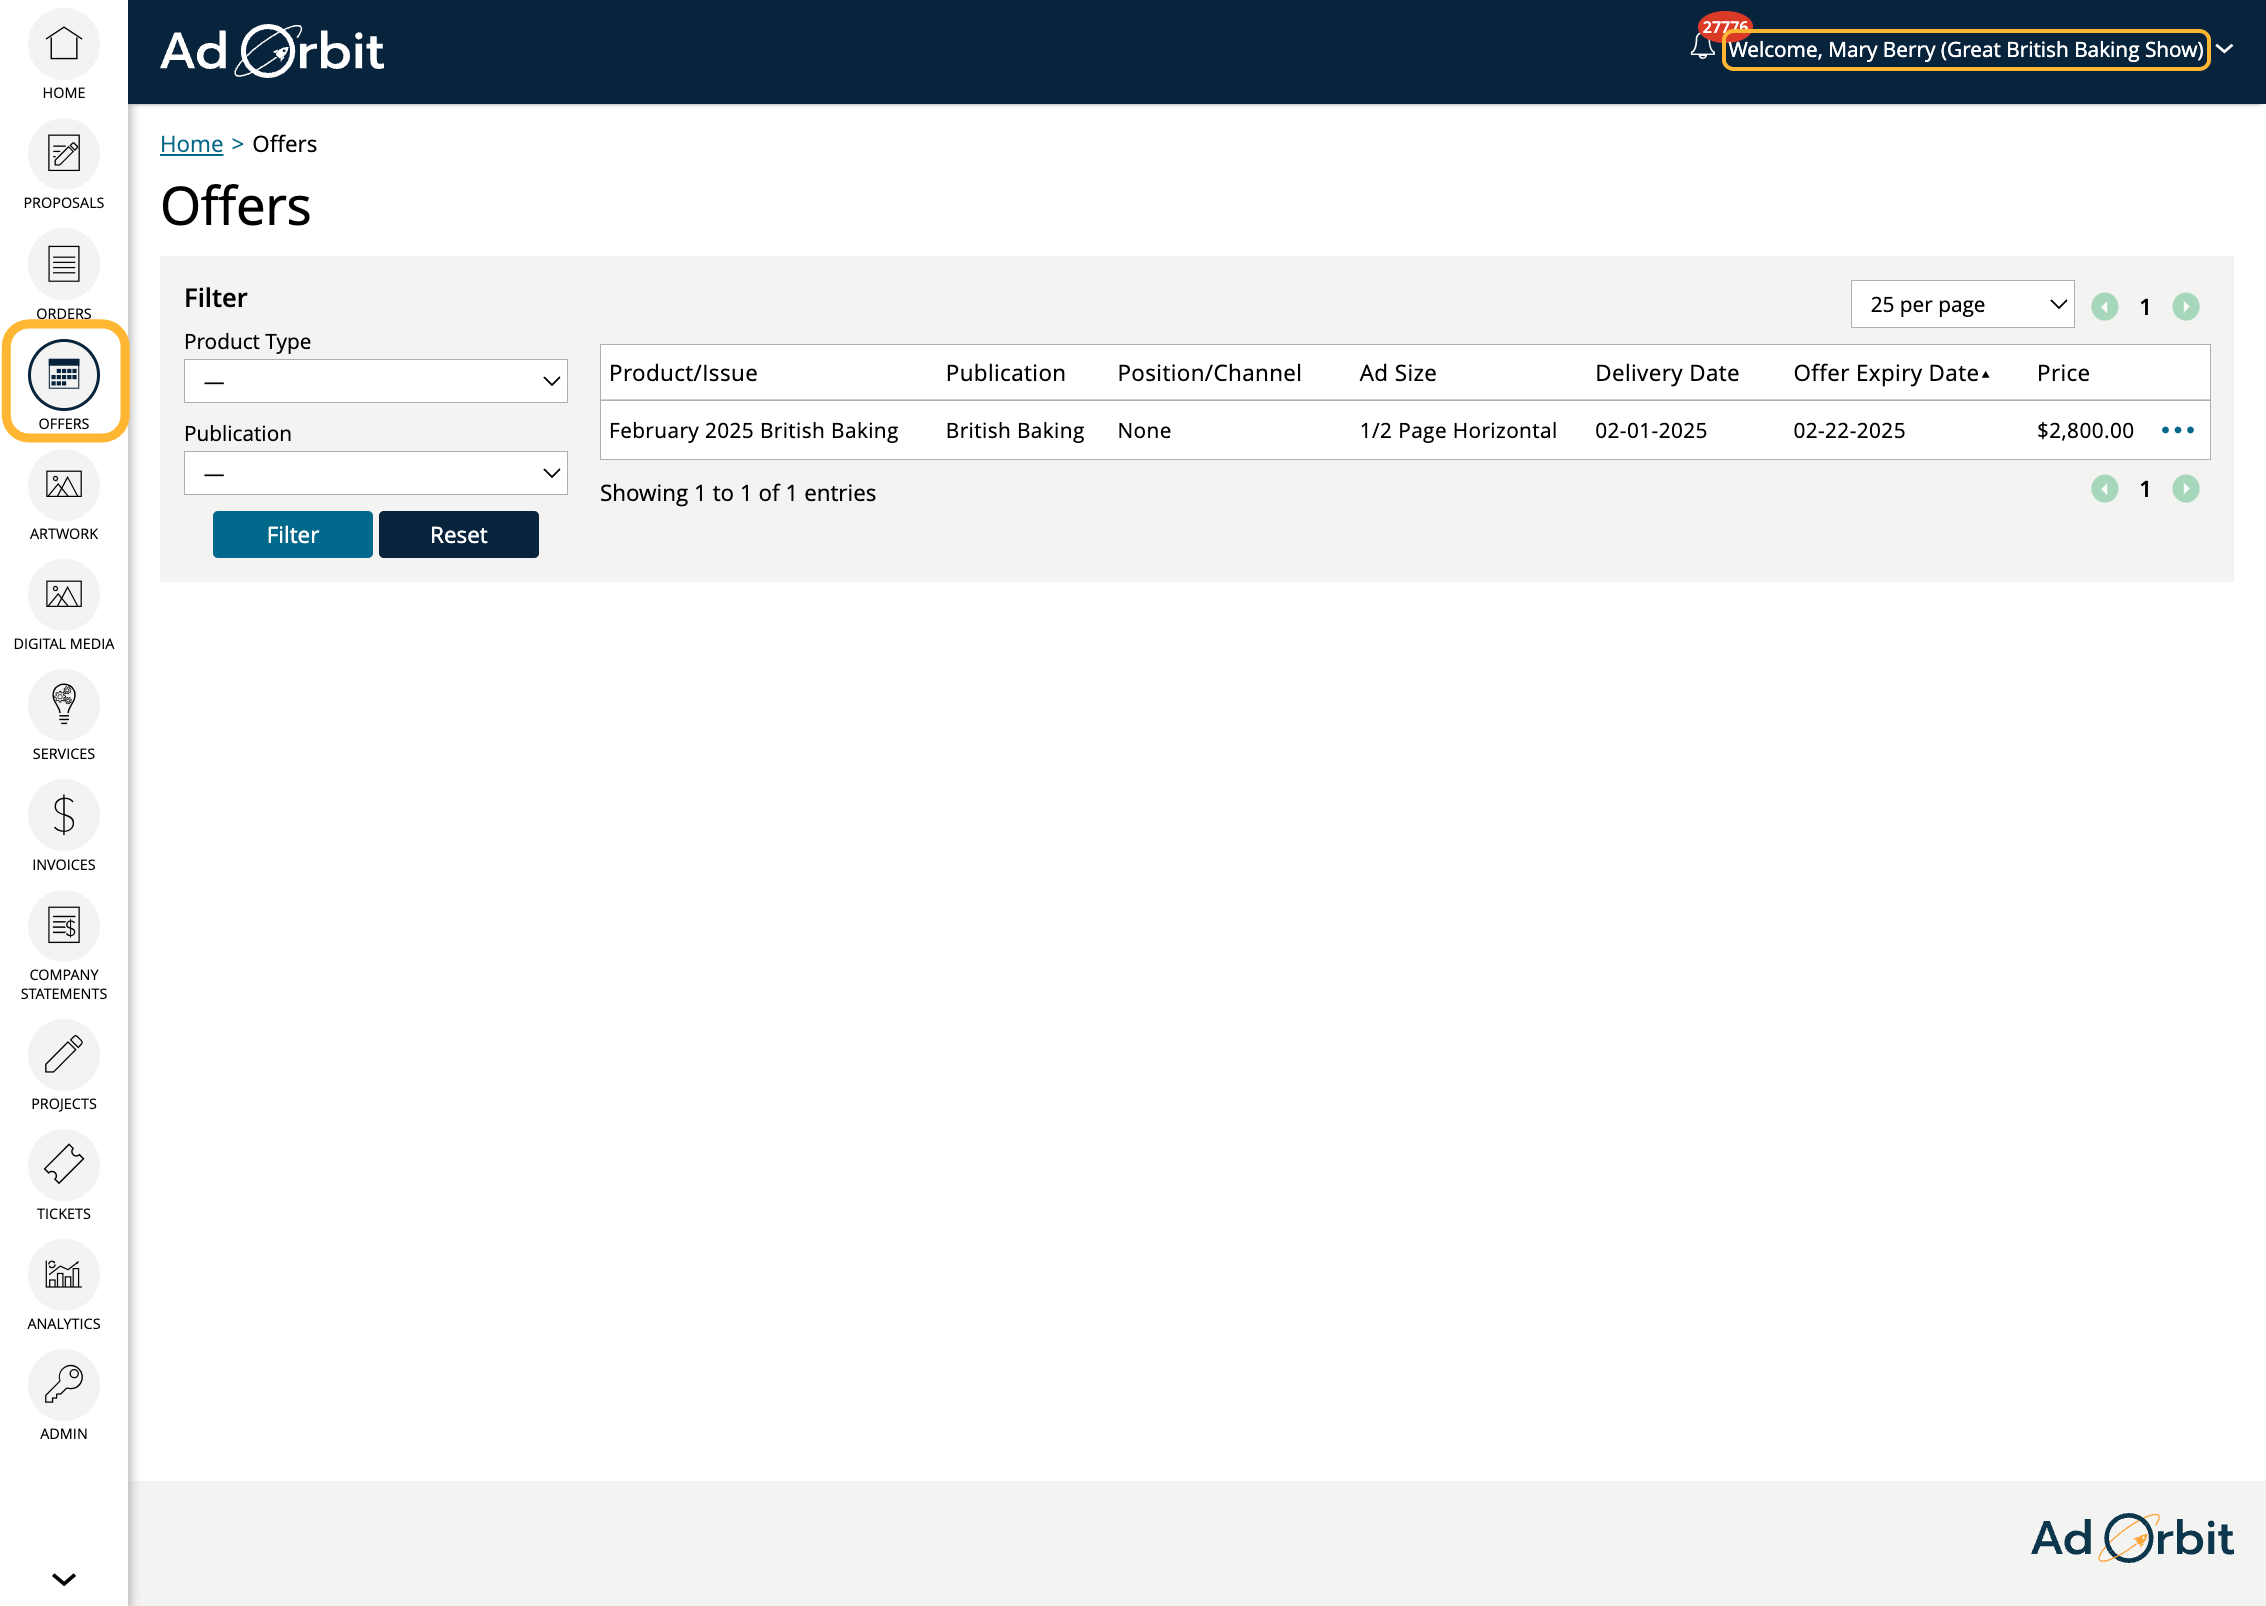
But if they are added as a company on this offer, they can now see that offer in their Client Center account.
Contacts can click on the record in the table, or use the ellipses action on the right side of the table and click the 'Claim' action to claim the offer.
On the Claim Offer page, the contact will see details about the offer item, as well as any order dynamic attributes you have set up as 'Show on Offers'. If any of the attributes are 'Client Facing Public/Required', the contact will need to fill out that field before they can claim the offer.
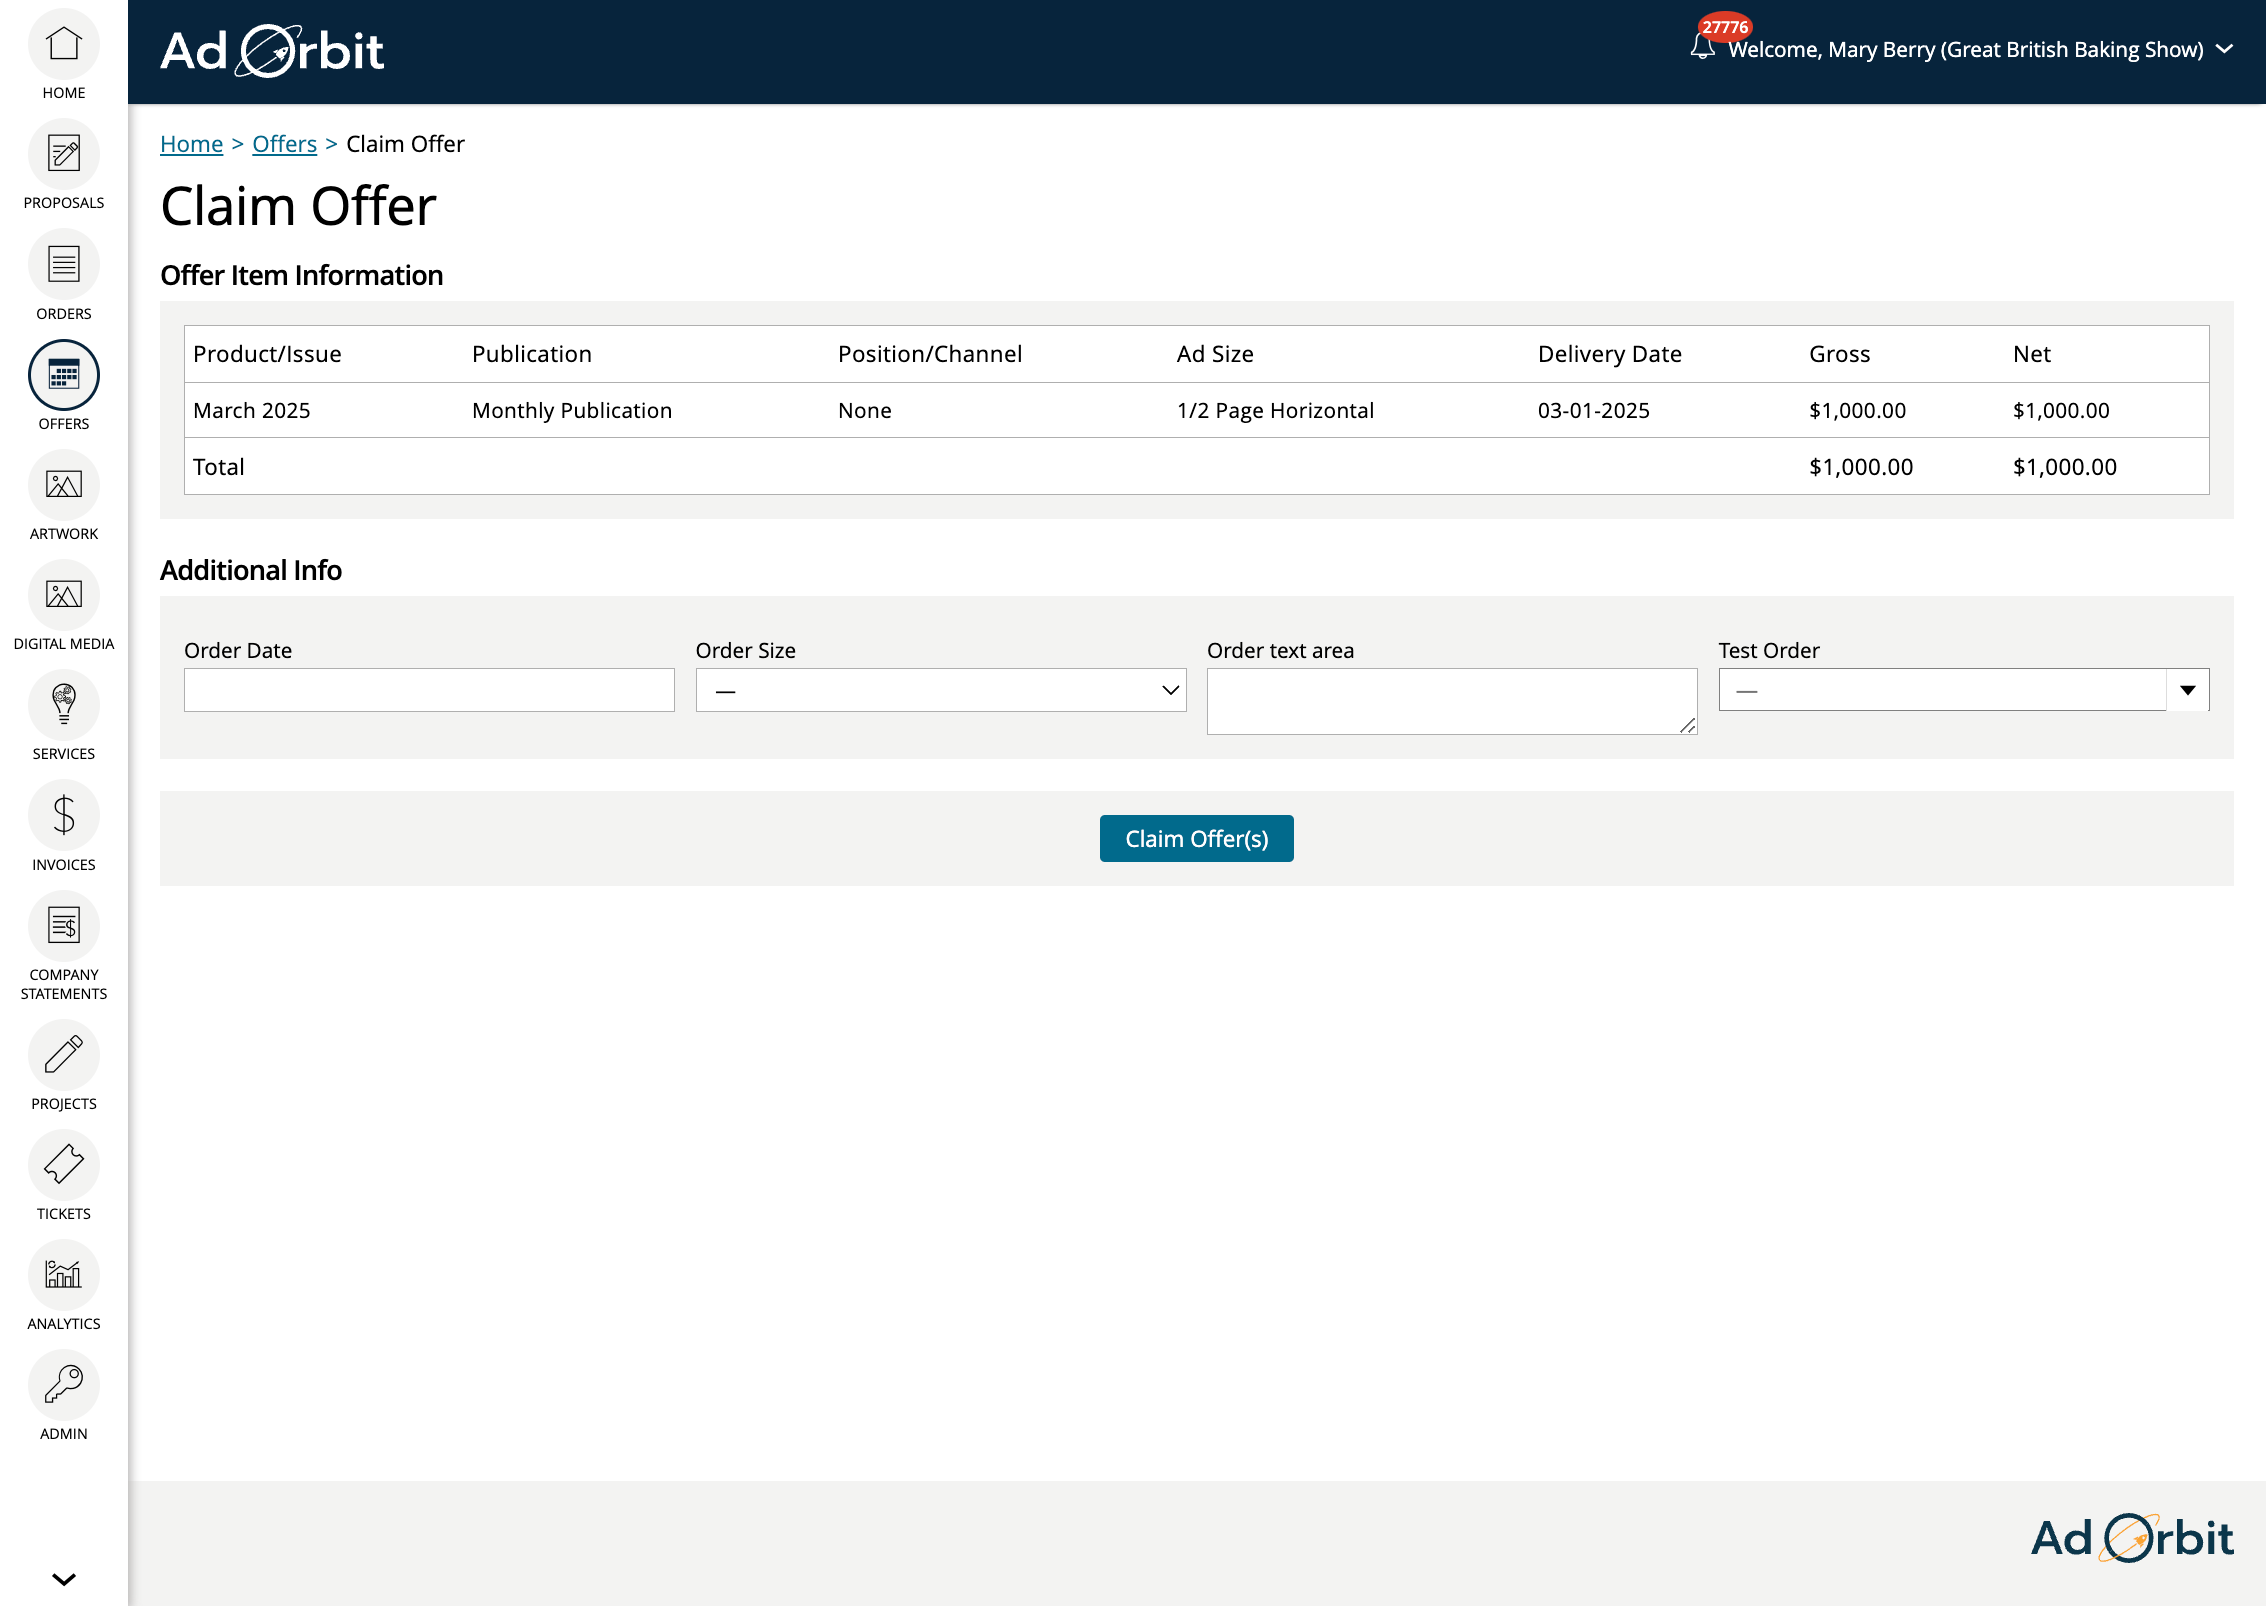
The Claim Offer form will vary slightly depending on if you Require Pre-payment on the offer or not.
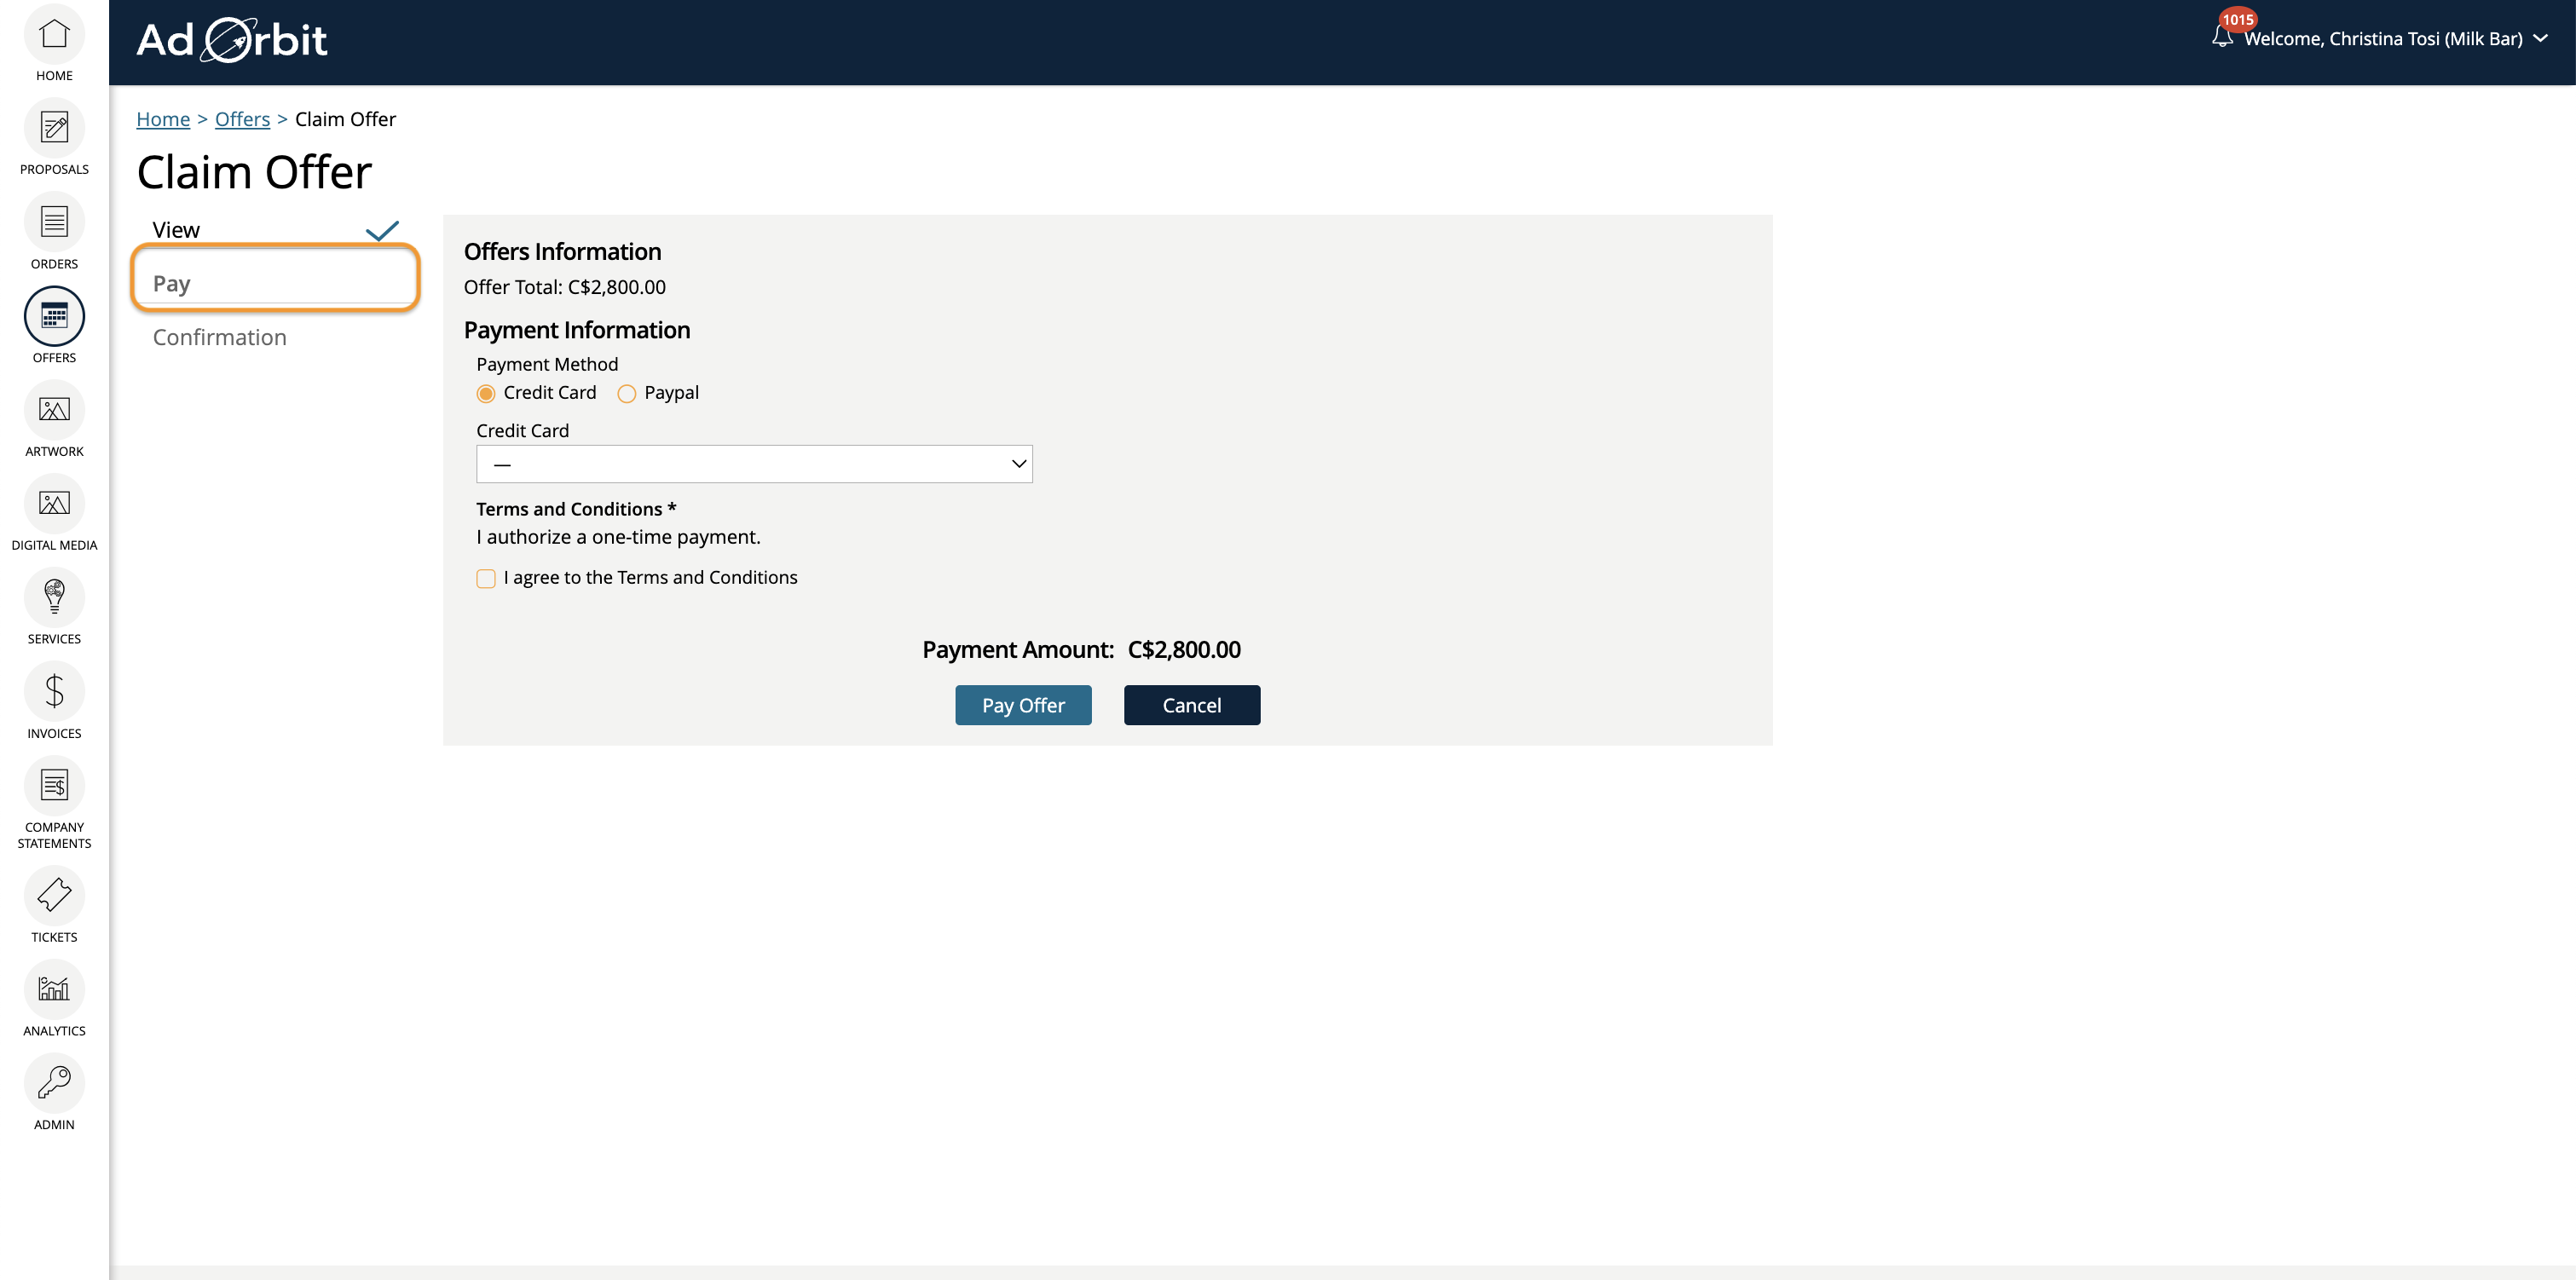
If you Require Pre-payment, when the contact clicks 'Claim Offer', they'll be brought to the next, 'Pay' tab. Payment information will be required to proceed and claim the offer. Once a payment is made, the contact will be brought to the 'Confirmation' tab, where they will see a confirmation message that their offer was claimed, as well as links to view their order and invoice.

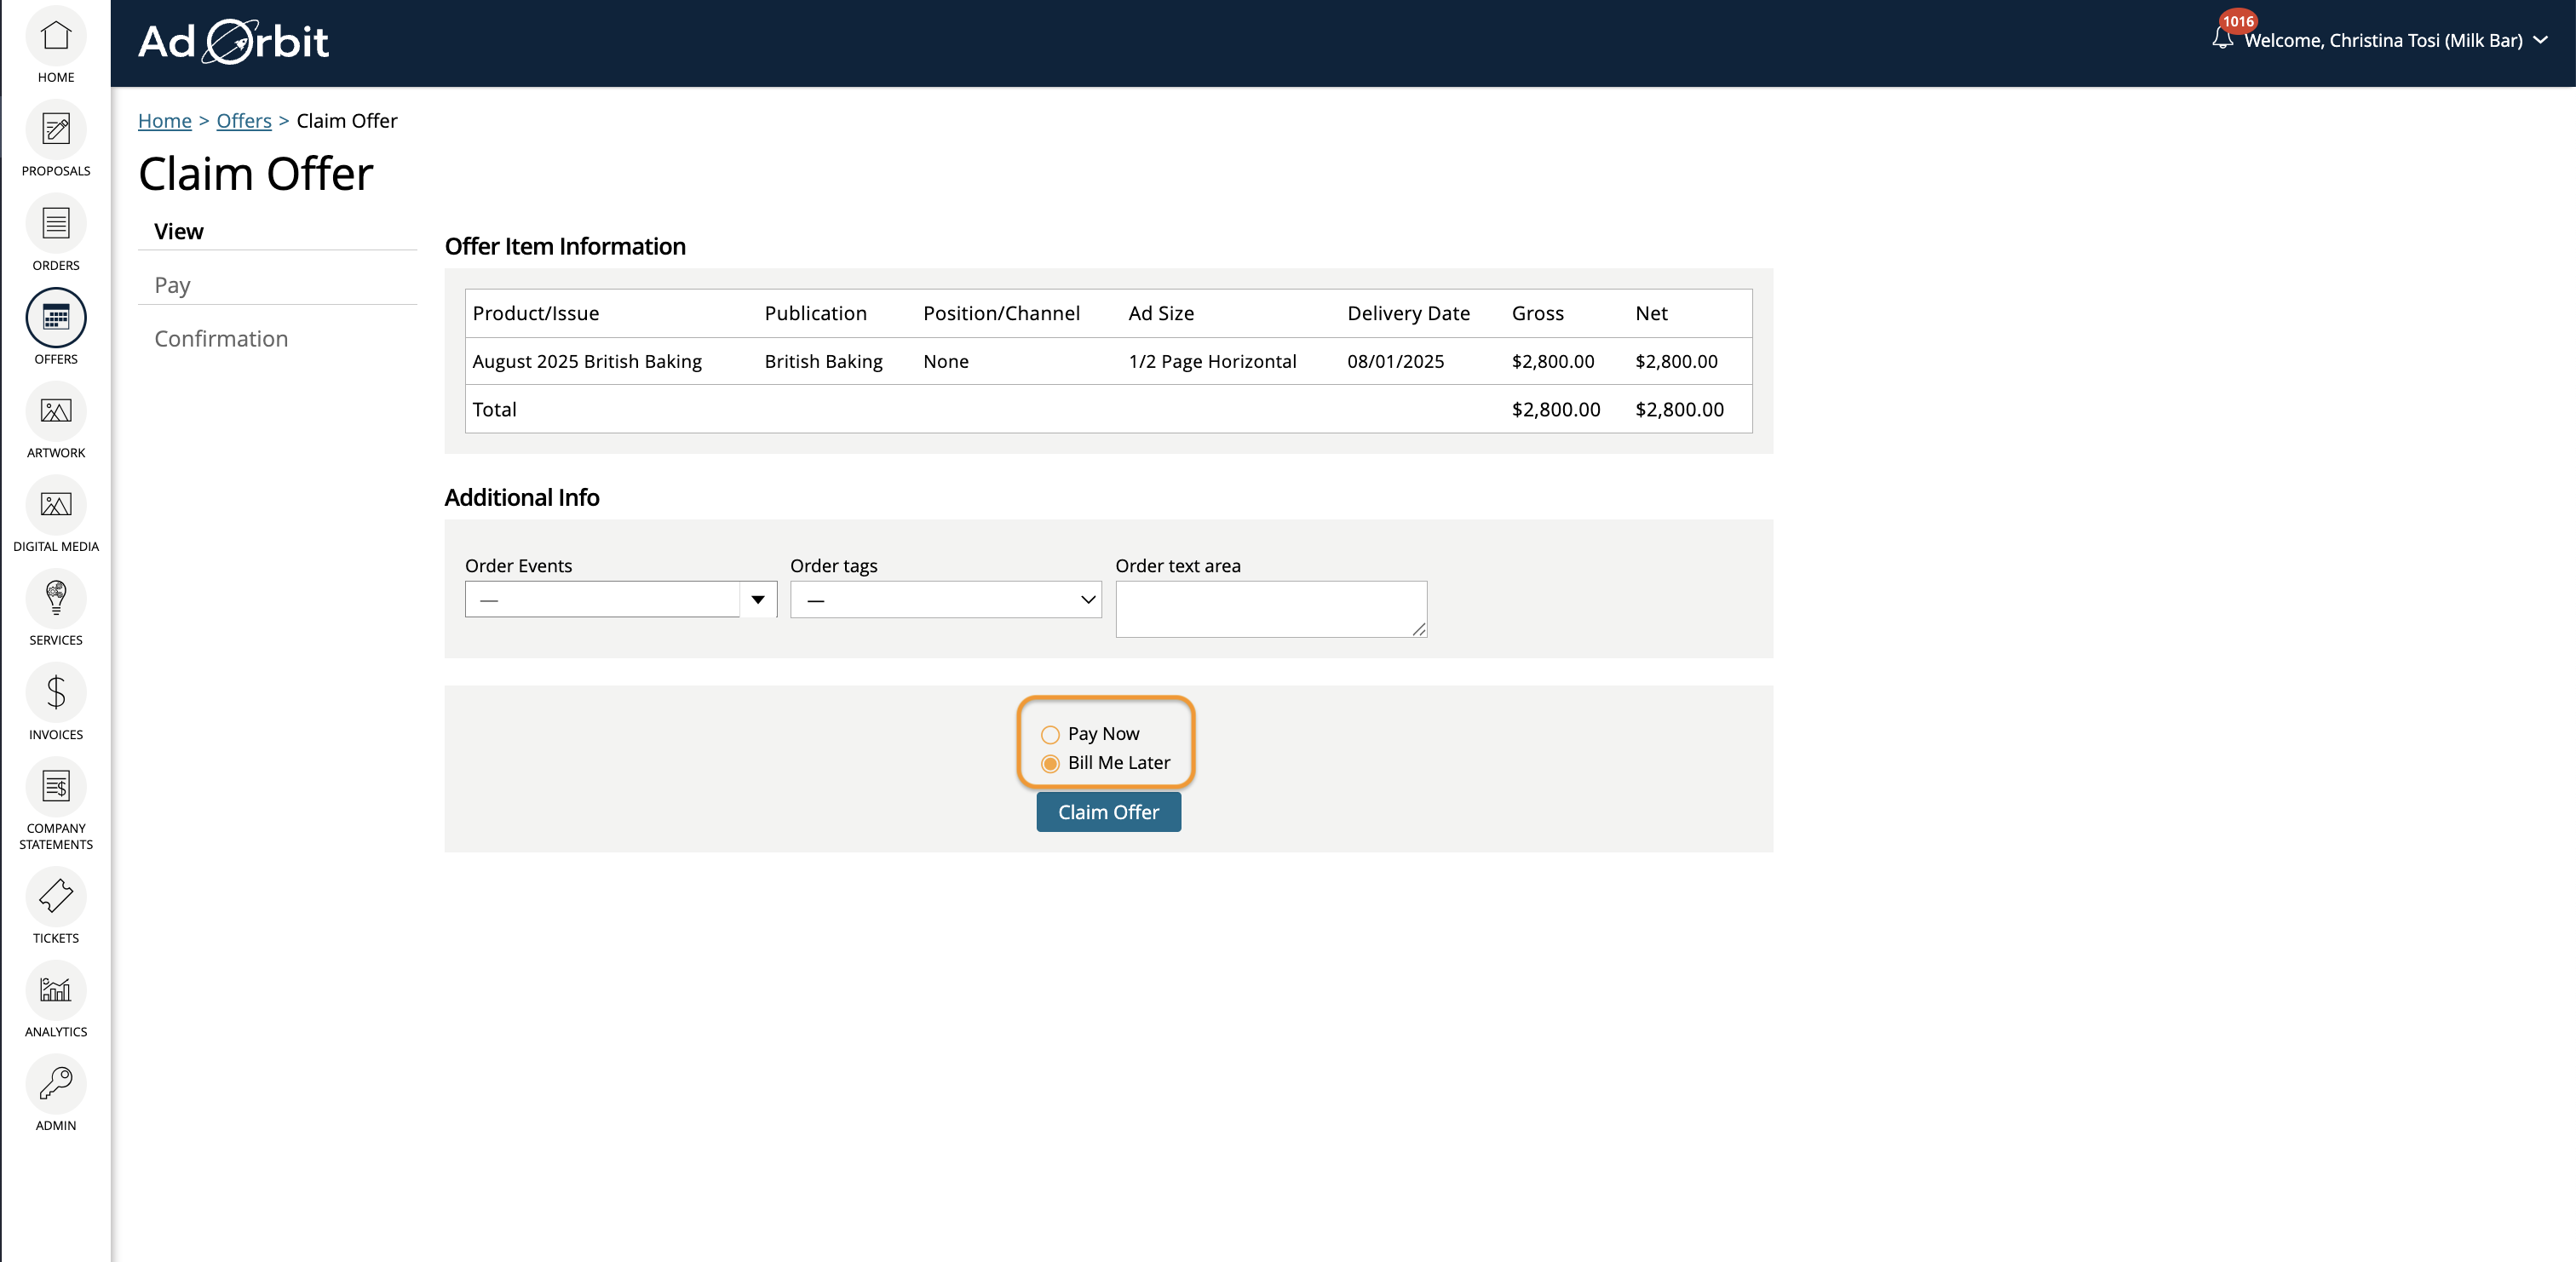
If you do not Require Pre-payment, the contact will have two options. One is to 'Pay Now', which will follow the same workflow as above. If the contact chooses to pay for the offer now, they'll be brought to the 'Pay' tab, and the offer will be claimed once they make the payment. The second option is to 'Bill Me Later'. When this option is selected, the 'Pay' step will be skipped over, and the offer will be claimed as soon as the contact clicks the 'Claim Offer' button.
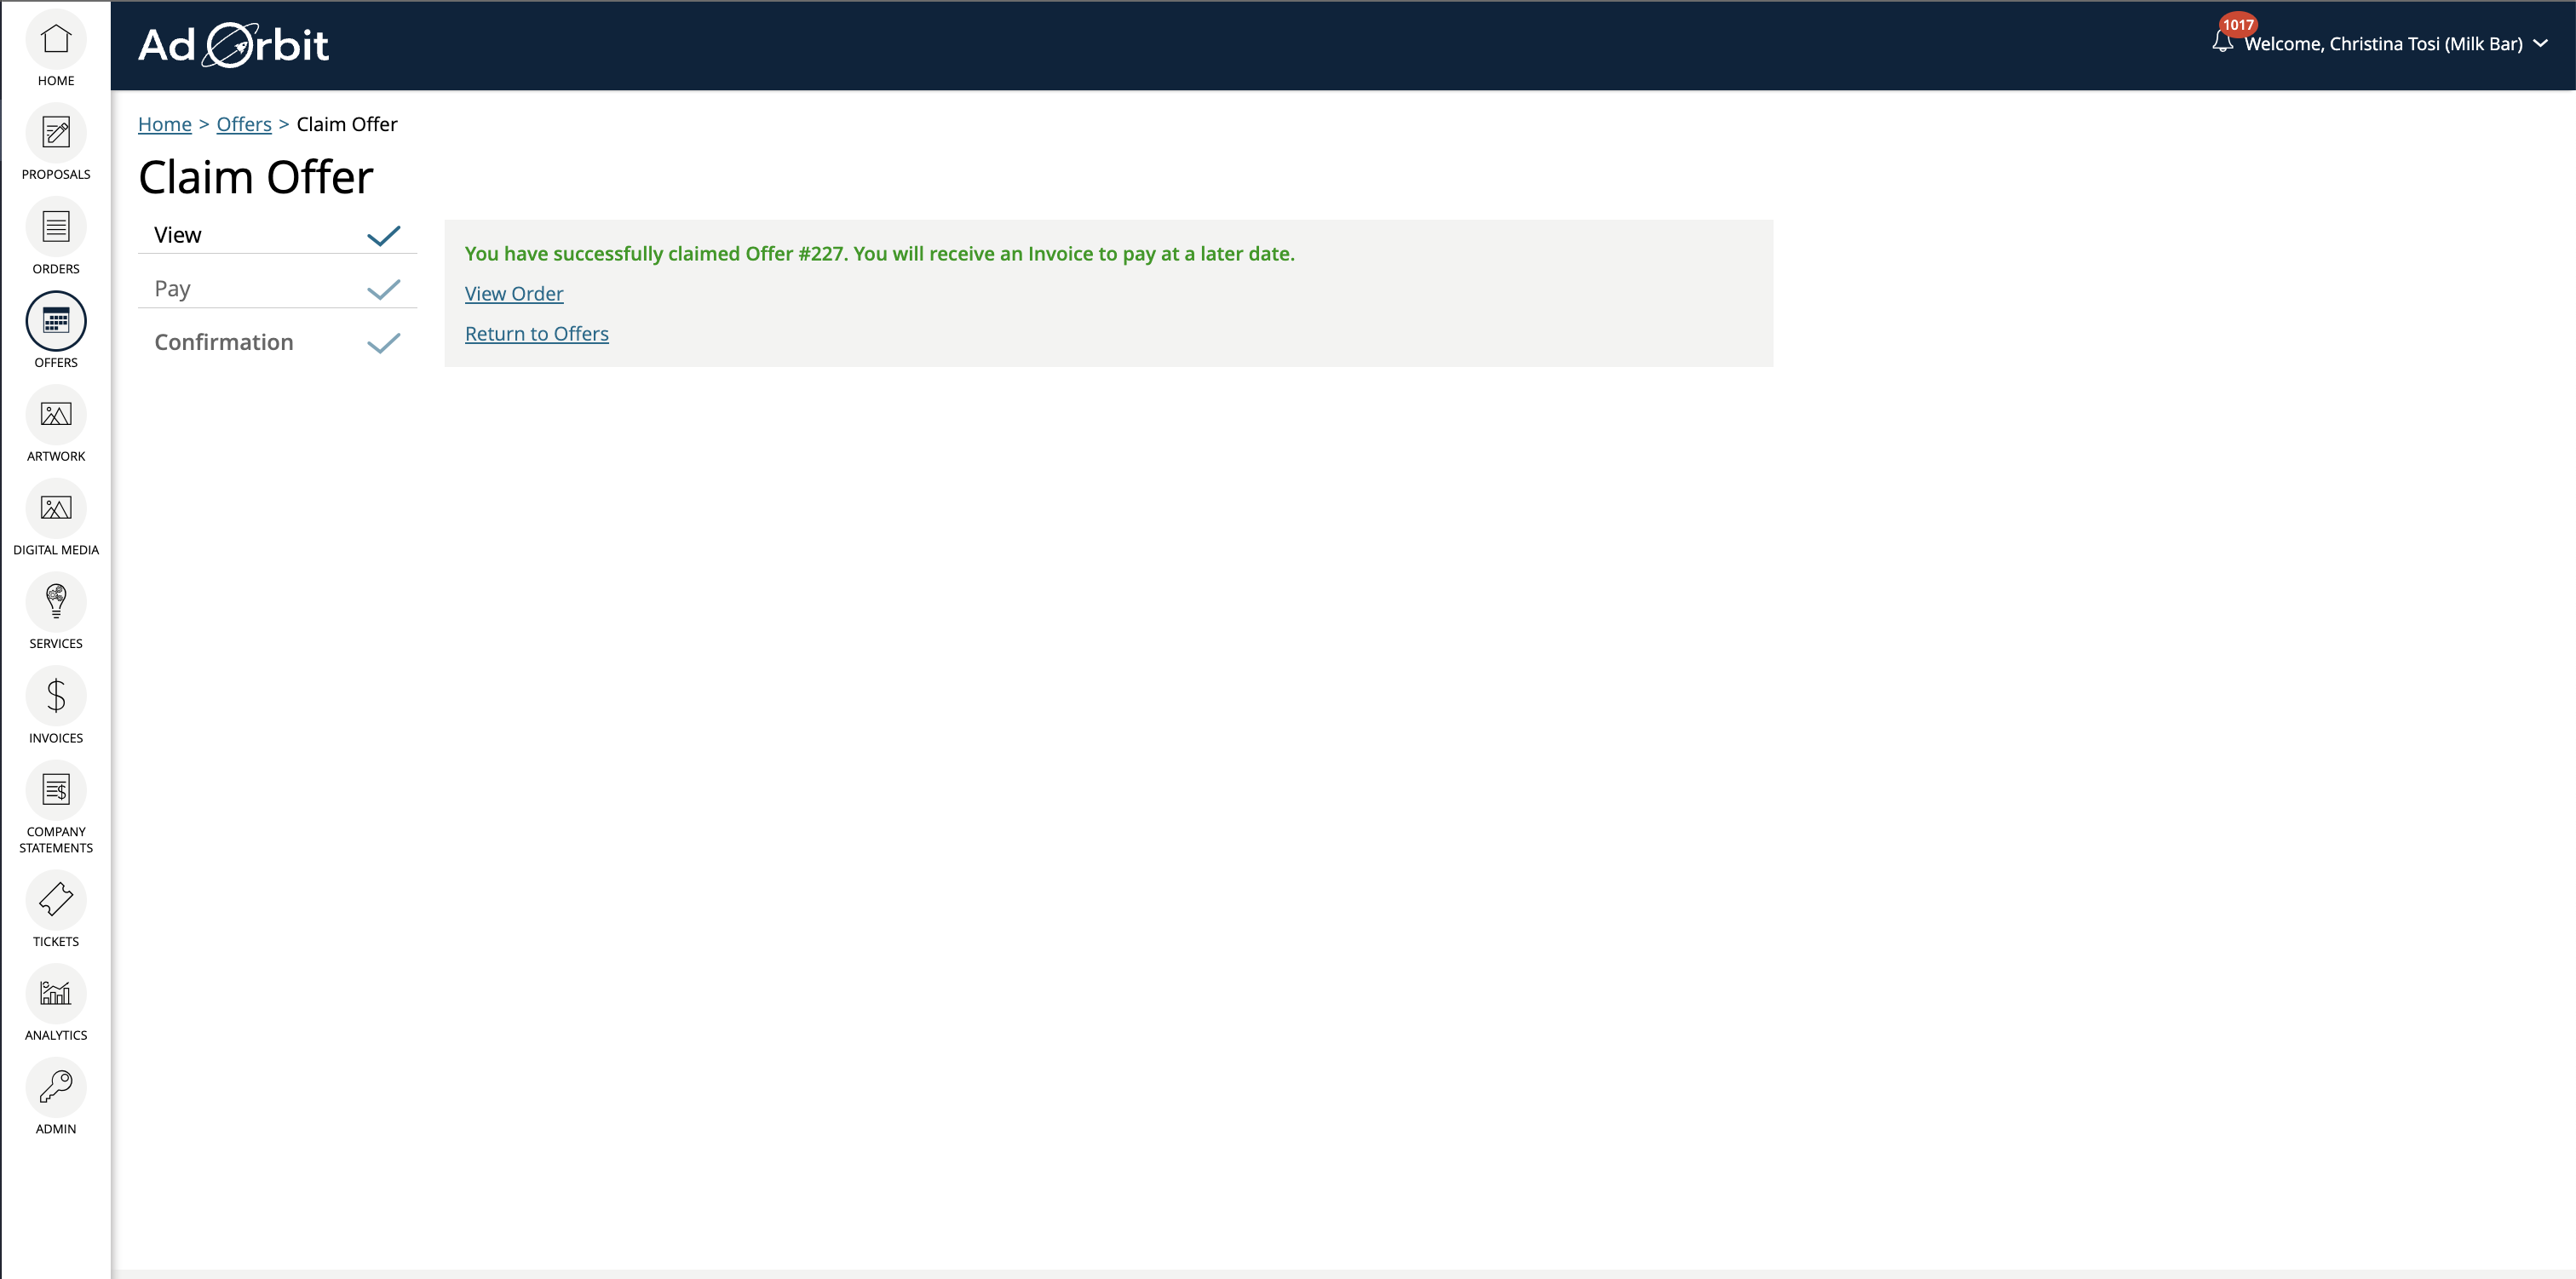
Once claimed, the offer in Ad Orbit will show the Order Company (the company who claimed the offer), as well as the order number. Clicking the order number will redirect you to the Orders tab for that company, automatically filtered for the order.
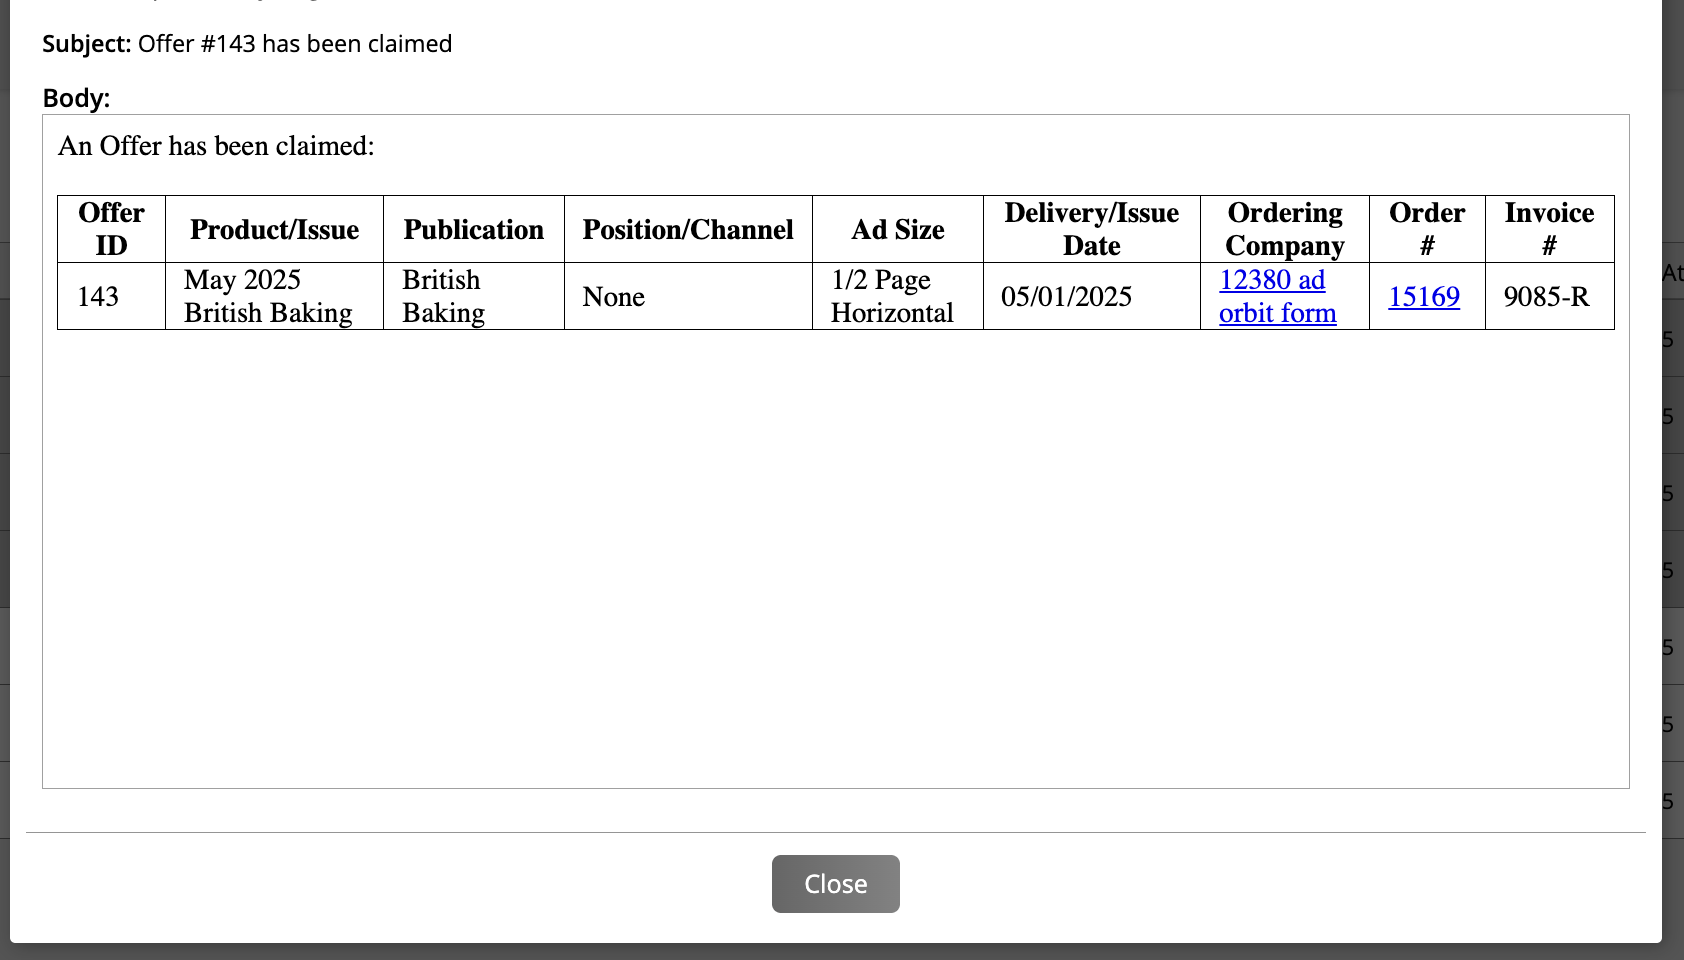
Reps will also receive an email notification when an offer is claimed that contains basic information about the offer, and the company that purchased it.
Please reach out to our team if you need to turn these notifications on or off.
All inventory checks will be applied when using offers.
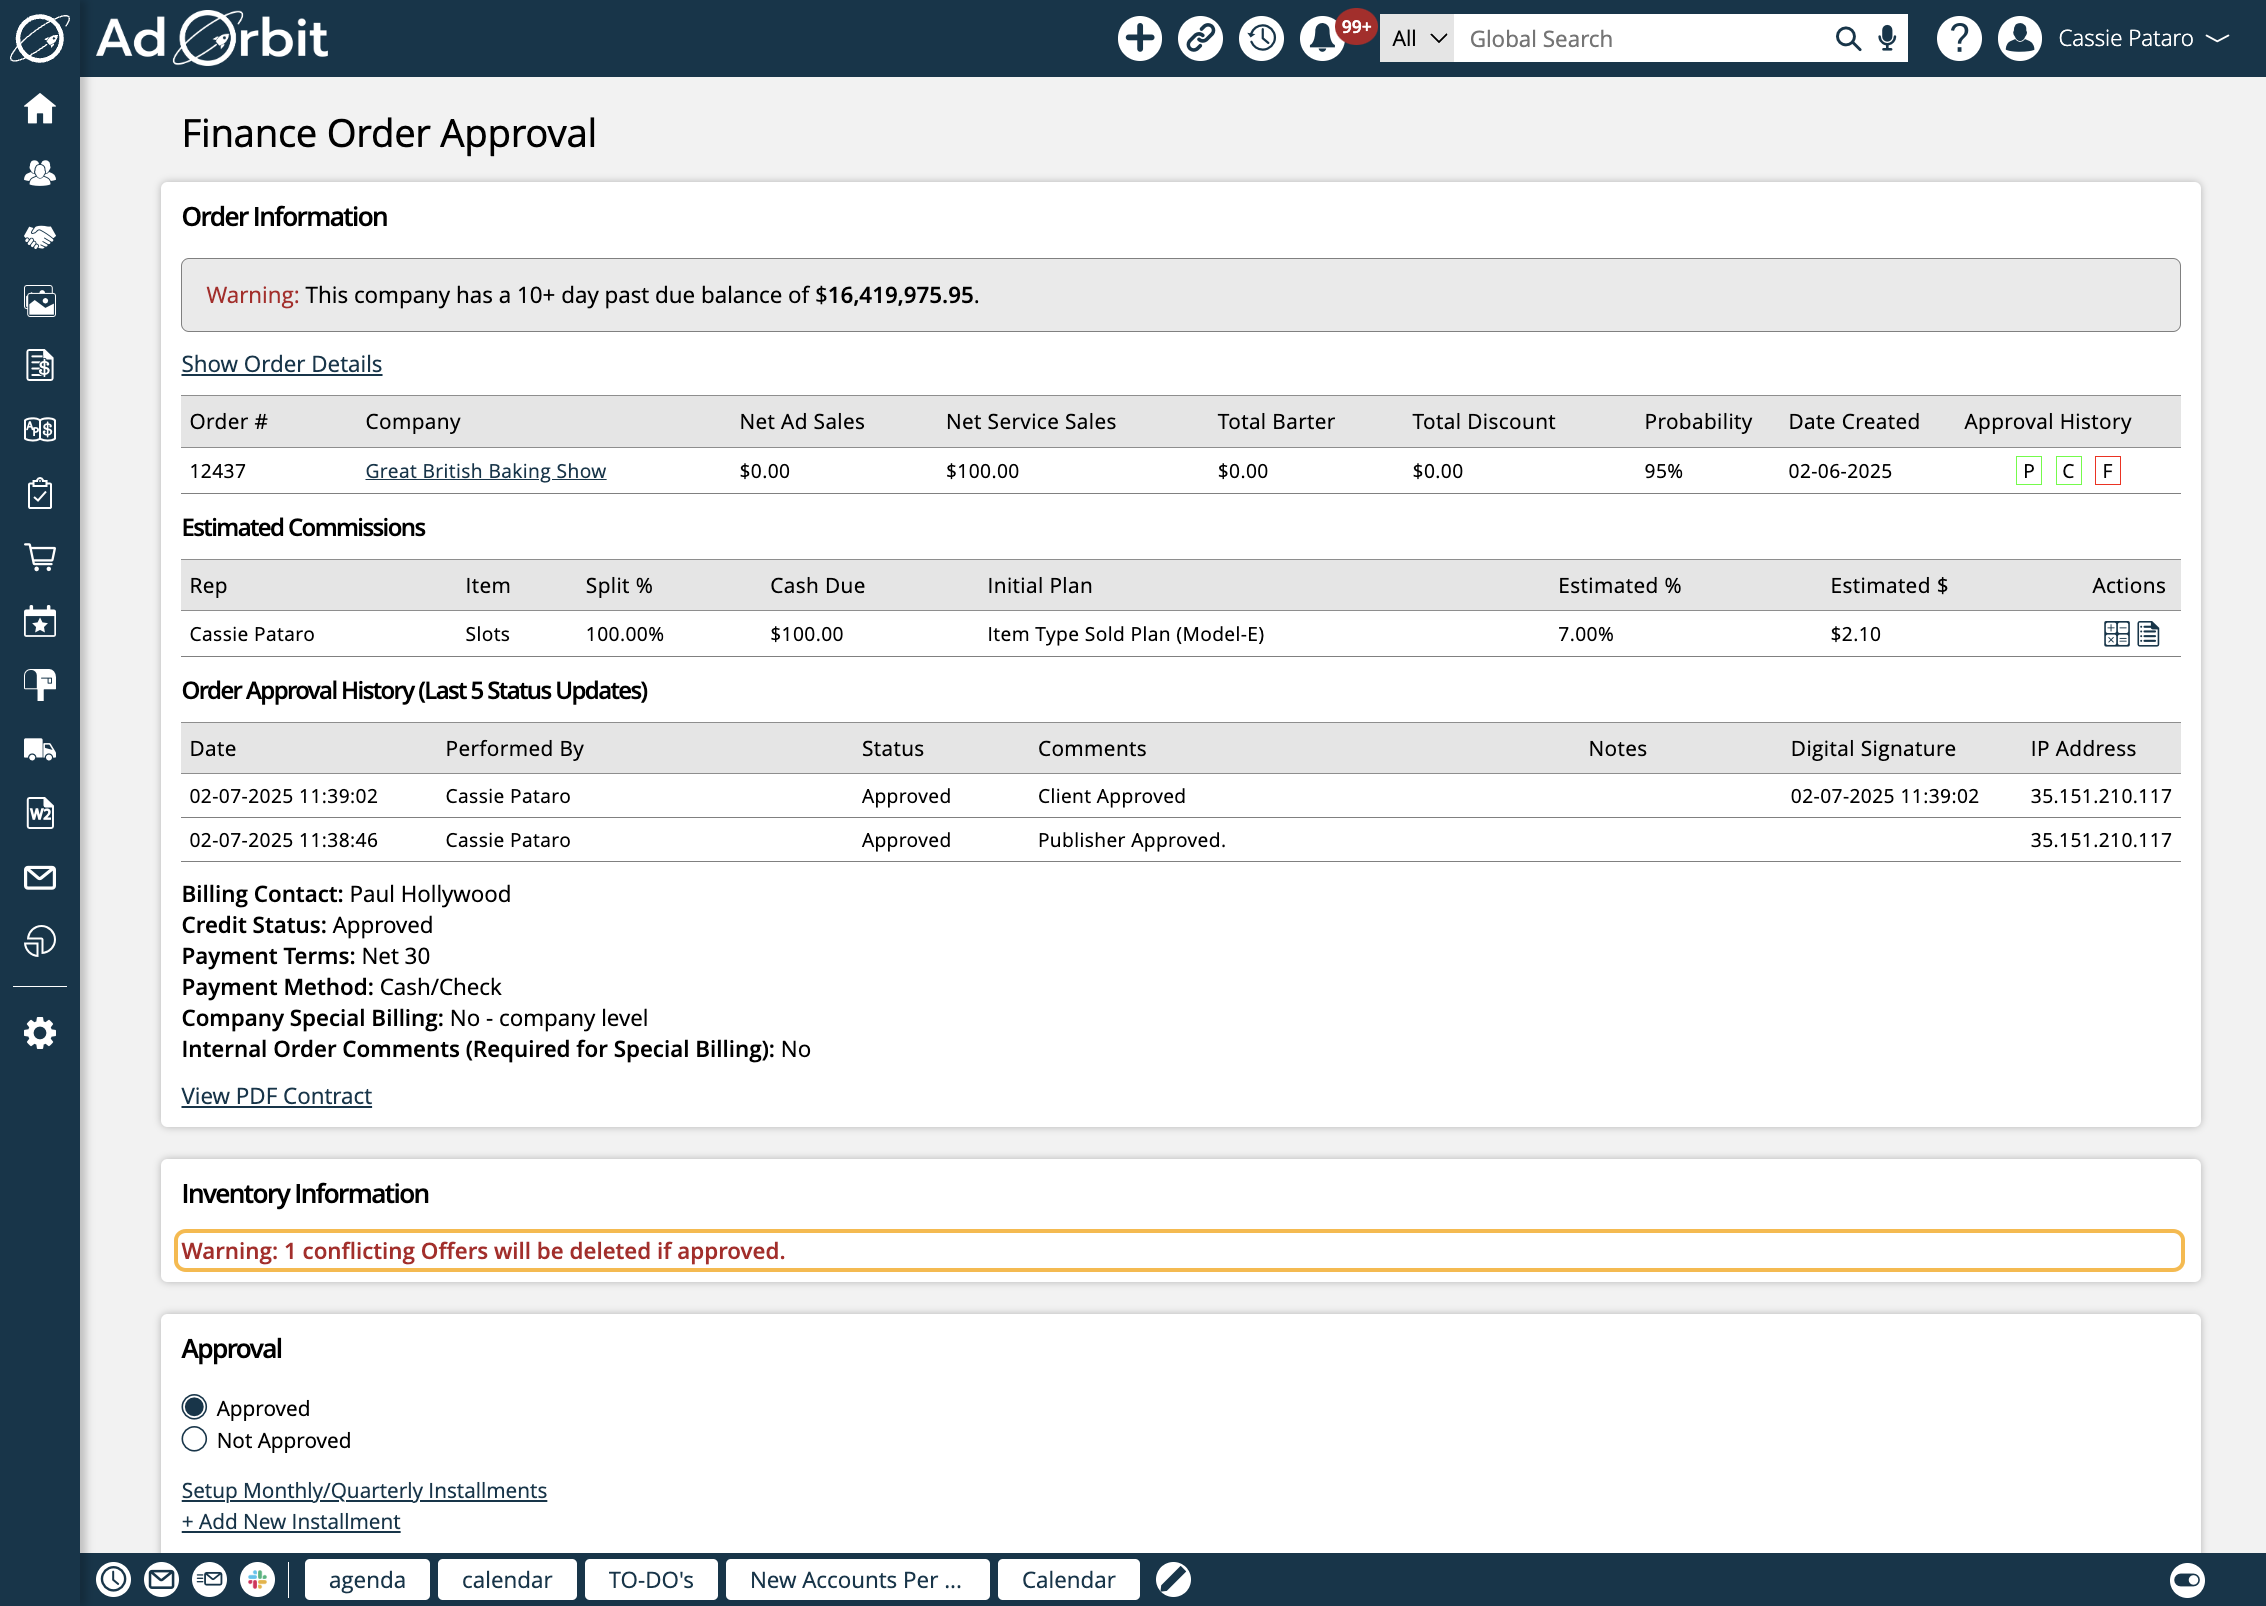
If an order created in Ad Orbit conflicts with an offer item, you'll be notified of the conflicting inventory when finance approving the order. If approved, any conflicting offers will be automatically deleted, so customers cannot purchase the same item, causing oversold inventory.
In addition, if there are offers that conflict with one another, when one offer is claimed, any other offers with conflicting inventory will also be marked as deleted, so the inventory cannot be oversold.
By default, reps will get their full commission rate for orders created via offers. If you wish to change this, you can edit the system configuration Offer Commission Split Percent. For example, if you enter 50 in this configuration, this means the rep will get 50% of their typical commission rate for orders sold through offers.
Updated 2/6/2026