Nylas - IMAP Replacement
Due to changes that Gmail and other email providers are planning on implementing, we have created an integration with Nylas, which provides a new way to connect to and use emails throughout our system. Read through the document below to learn how to set up the email connections and where it can be used throughout the site.
IMAP Accounts
To begin, go to Settings > Integrations > IMAP Accounts. To access this page, you need the User Permission ‘IMAP Accounts’. On this page, you can add new accounts or edit existing accounts.
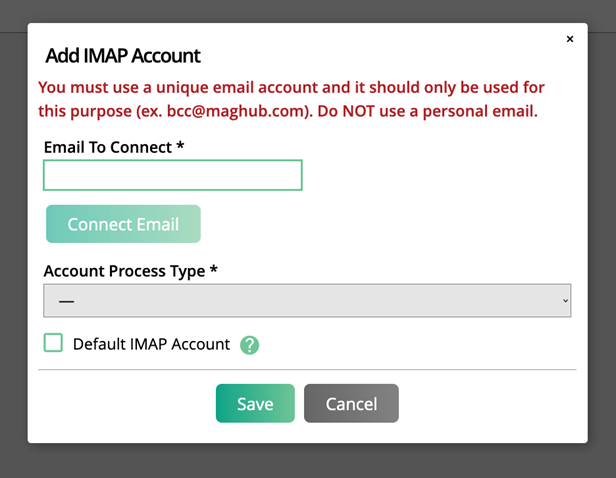
In the Add/Edit popup, enter the email address, and click ‘Connect Email’.
Important
For IMAP accounts, you should use a unique email address and it should be used exclusively for this purpose. Do NOT use a personal email for your IMAP account.
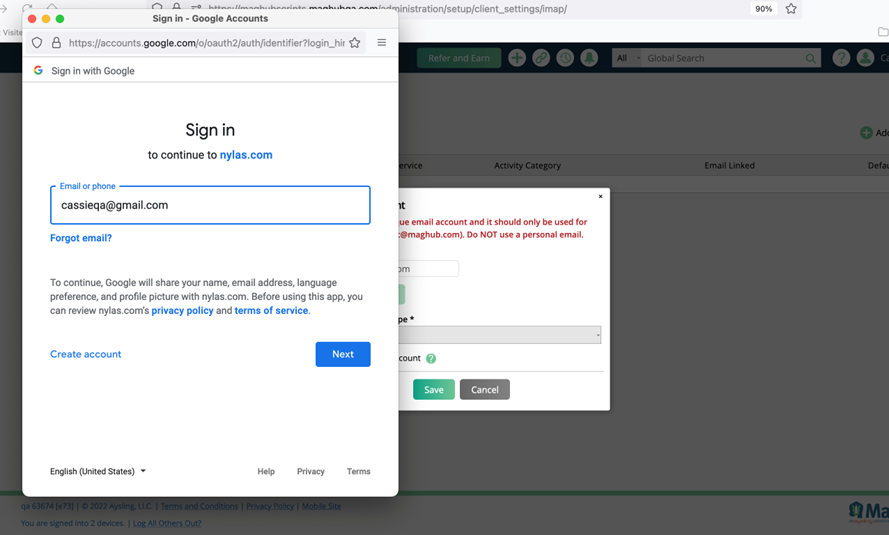
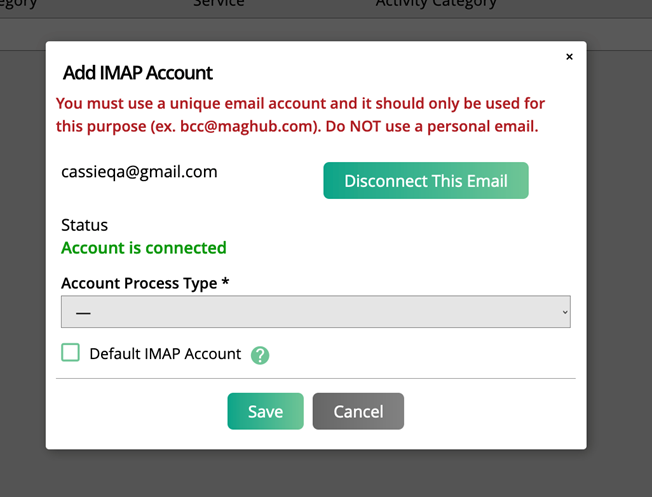
A popup will appear that allows you to login to your email account and grant permissions. Once you complete the information from the authentication popup, you should receive a successfully connected message.
Note
We highly recommend using different email addresses for each process type. There are automated scripts that run for each process type, and if the same email account is used, wires can get crossed so to speak, and things may not work how you would expect them to.
BCC Activity Creation
If this process type is used, when a user sends an email, and they BCC the connected IMAP Account email, the email will be created as an activity within the system.
The activity will be automatically mapped to a contact within the system based on email address.
PMS Discussion Replies
When using our Project module, this process type can come in handy. When a user adds a discussion comment to a project and chooses to email the comment to other users, contacts, or vendors, this connection will be used. The comment will be emailed to the users/contacts selected.
Any replies to the comment through email will be added as a comment to the discussion thread.
Ticket Interaction
For this process type, you will be required to choose a Product Category and default Service for ticket creation.
When an email is sent to the connected email, a ticket will automatically be created in your system.
Tip
We use this functionality for our support tickets. When one of you emails the support email address, a support ticket is automatically generated in our system.
Any replies to the ticket within the system will be emailed to the contacts on the ticket. Replies through email will automatically get added as a ticket comment.
Note
If you are connecting to a new account, follow the steps above. If, however, you are re-connecting an existing IMAP account to use Nylas instead, it will be a two-step process. First, you will need to edit your IMAP account and click ‘Connect.’ You should get a successfully connected message. Save the popup and refresh the page. Then, you will need to edit that IMAP account a second time. This time in the popup, you should see a dropdown with your connected email. Choose that email account and save the changes once more. This second step is what will allow the account to be used through Nylas. Alternatively, you can delete your existing IMAP account, and connect it using Nylas as if it were a new account, if you do not wish to open the edit popup twice.
Connecting a Personal Email Account for Activity Tracking
The above directions were for system-wide settings. However, you are also able to connect to a personal email account for sending direct emails from the system and automatically tracking email activities.
Note
Auto Email Recording requires your system to have a default Email activity. Go to Settings > Sales > Activity Categories, edit one of the Email categories and set it to be the default. Alternatively, you can add a new category with the TYPE of EMAIL and make it the default.

To begin the setup for activity tracking, go to My Preferences, and click on the Email Configuration tab.
Before you connect using the Nylas integration, you may still see the old method of connecting (where you enter port and host credentials). To connect using the new method, you’ll need to enter your email address under the Email Connection section of the form.
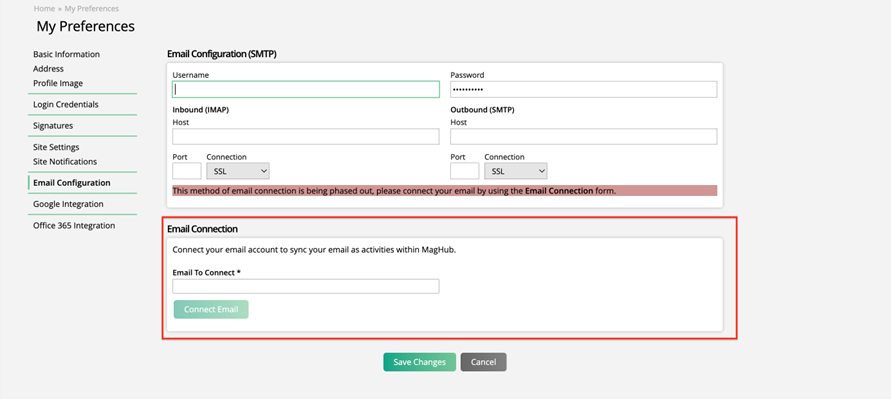
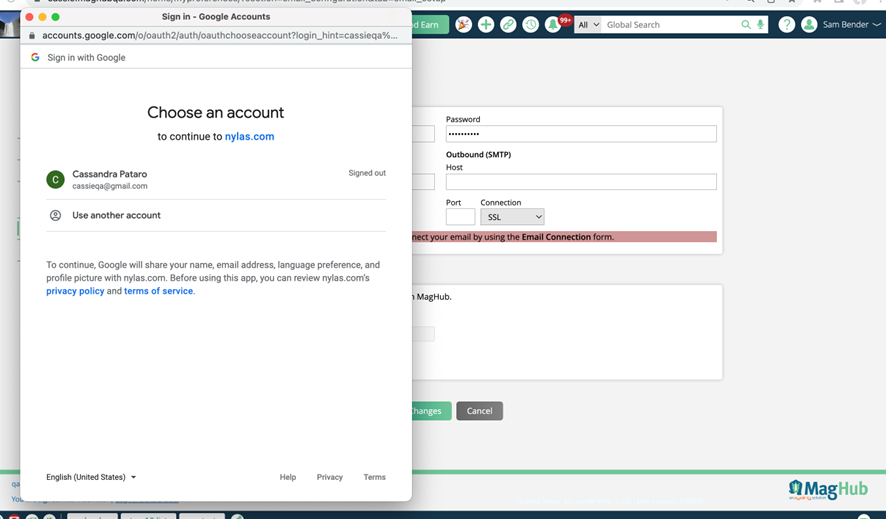
Once you enter your email address, click Connect. A popup will appear that allows you to login to your email account and grant permissions. Once you complete the information from the authentication popup, you should receive a successfully connected message.
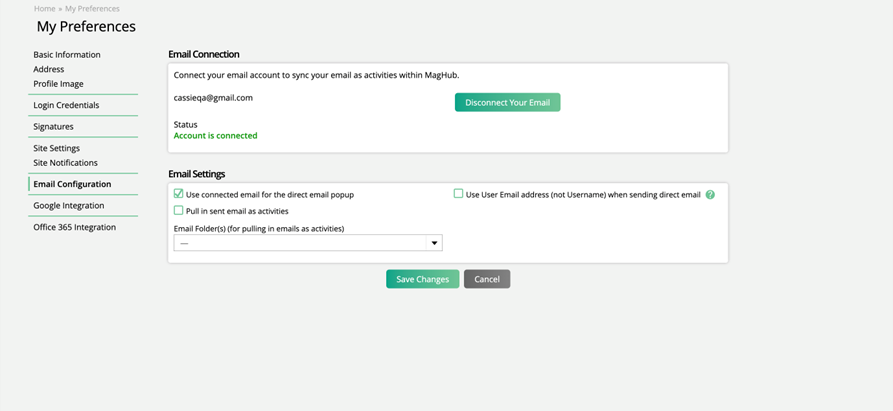
After you’ve successfully connected, there are two relevant settings you should review.
Use connected email for the direct email popup.
When this option is selected, the email account connected here will be used when sending a direct email from within the system. This may be different from the email account associated with your user account.
If selected, the email is sent directly through the connected account – it will not be recorded as a ‘Sent Email’ within the system.
Pull in emails from the folders below as activities
If you choose this option, you will also need to select which folders from your email account will be used to pull in activities.
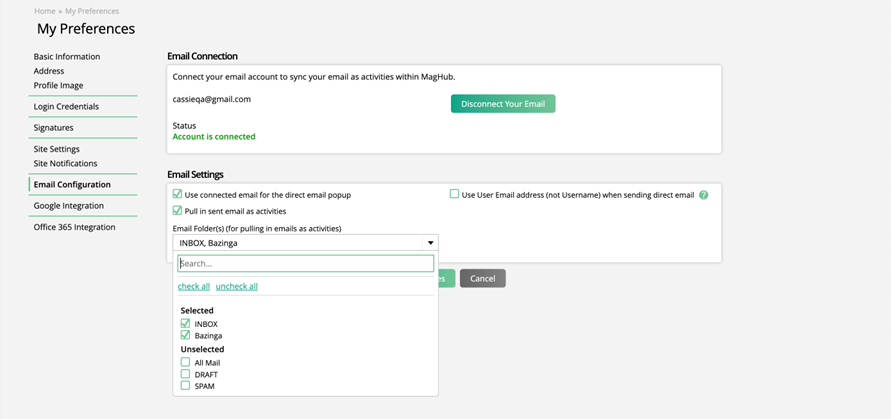
Any emails found within the folders selected will be automatically created as an activity within the system.
The activity will be automatically mapped to a contact within the system based on email address.
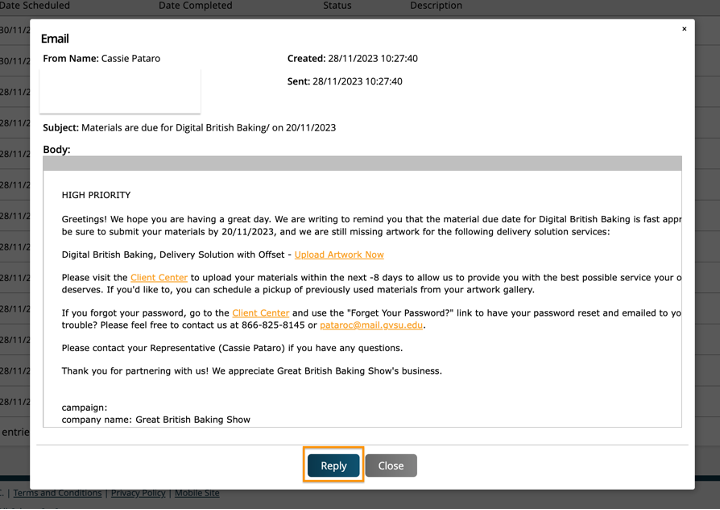
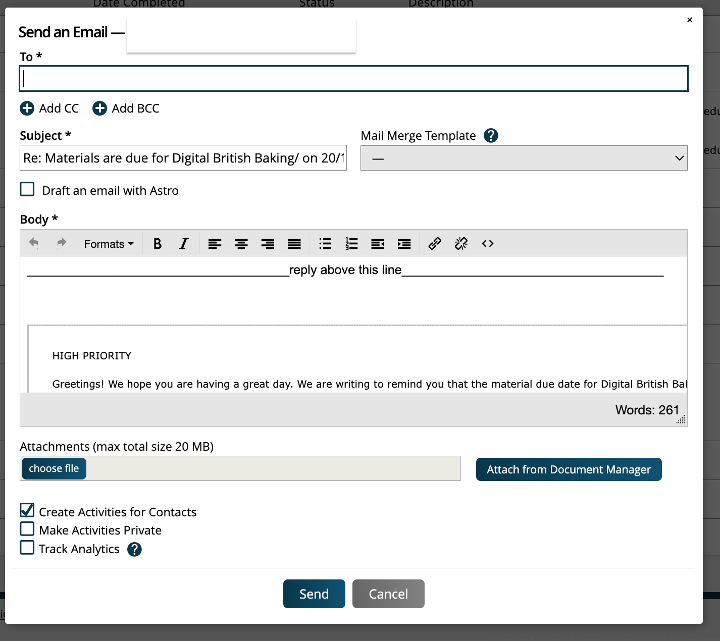
When pulling in emails as activities, you’ll also be able to reply to emails that have been sent to you from within Ad Orbit, as well as replying/resending emails that you created. As long as the To or From email address on the activity is associated with your user account, when you open the email activity, you will see an option to ‘Reply’. This will open the Send Email popup with the original email included in the thread.
If you are pulling in email activities using your Sent Items folder, then you'll also have the opportunity to 'Automatically Create Contacts From Imported Sent Emails'.
Only the Sent Emails folder is used for this workflow. If you do not have the Sent Emails folder checked under the 'Pull in emails from the folders selected as activities', no contacts will be pulled into the system.
When an email is sent through a connected user email and this option is checked, if that email address doesn't already exist for a contact in Ad Orbit, the contact will be put into the Contact Approval queue for review. Some basic information will be displayed about each imported contact.
If the system configuration Review New Contacts is set to No, only the user who imported the contact can approve or reject the record.
If Review New Contacts is set to Yes, then the ability to approve or reject the imported contacts will be based on the 'Approve New Contacts' user permission.
Updated 1/10/2025