Adding Targeted Display Products to an Order
Once you have your Targeted Display Products set up, you can begin adding them to any proposal or order.
On the Products Step of the order, click on the + icon next to Targeted Display Sales to add the product to the order.
Select a Publication to populate the product list, then choose the media product.
Now choose a run date for the item. The system will break up the order into multiple line items for every month in the date range. For example, if you enter an order from 3/15 through 6/30, the system will create 4 line items: March, April, May, and June.
Note
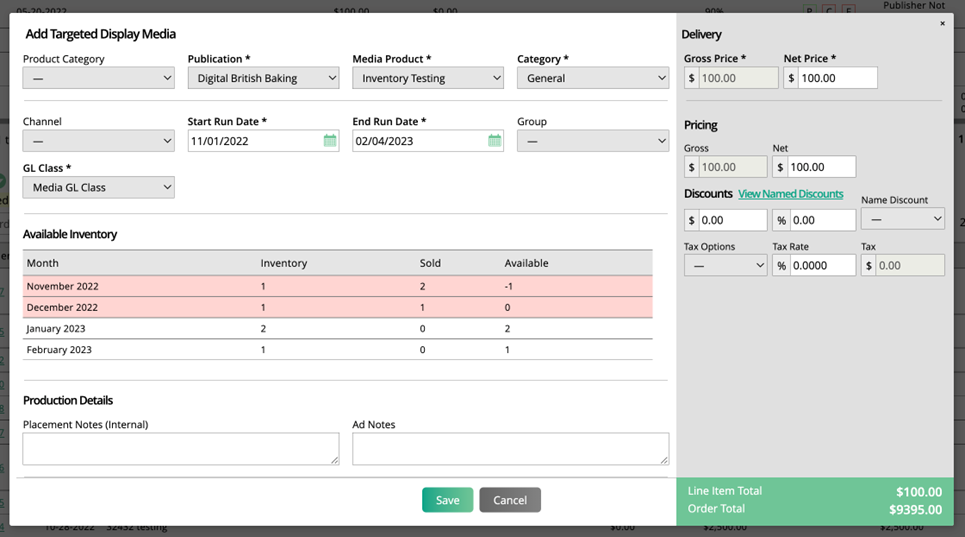
If you have inventory set up on your Targeted Display product, you’ll see an Available Inventory table display after you enter the required fields. This table will show the sold and available inventory for each month the product spans. Depending on your permissions, you may or may not be able to add an oversold item to the order.

The above fields are all you need to add a Targeted Display Product to an order, but you can further edit the product for targeting and billing purposes.
You can use the grouping field to show the line items differently on the order and have the line items all invoiced together. Grouping can be useful if you want to show the customer less details and sum the price.
You can discount the item by changing the unit price, updating the net, or adding a % or amount discount. The system will also divide the price by the number of months in the run date.
If you have ticket dynamic attributes configured, you can use those to track custom fields on the line item entry process.
The Channel field is useful for up-selling your digital media items. You can set channels for different areas of your site or targeted demographics. Channels will usually have an up-tick in price.
There is also the option to enter Placement or Ad Notes. Placement Notes are used for your team internally, whereas Ad Notes can be seen by the customer.
If the product’s Revenue Recognition is set to ‘Front-Load First Month’, instead of evenly breaking out the line item’s quantity and value evenly across each month that the item spans, the quantity, cash value, as well as any discounts or taxes, will all be put on the first month the item is running. The rest of the months will be set to quantities and values of 0, and the tickets will automatically be grouped when the order is created.
If you are adding an item that is set up to sync with GAM or Broadstreet, there will be an additional checkmark labeled ‘Ready for Ad Server’. By default, this option will be checked, which means once the sync criteria for that item is met, it will be pushed to its ad server If you uncheck this option, the item will not be brought into GAM/Broadstreet until the option is checked later on.
In order to see the Targeted Display Products show up on the contract, the contract template must have a Digital Media element. To review your contract templates, go to Settings > Templates > Contracts, and either add a new, or edit an existing template. To make sure you can see Targeted Display Products, the Digital Media Items element either has to be set to ‘All’ for the Type or set to ‘Targeted Display’.
Note
You should also review your invoice templates. The process for invoice templates is the same as contract templates, you need to make sure there is a Digital Media Item element present, that is either set to ‘All’ or ‘Targeted Display’ Types.
Using GAM items?
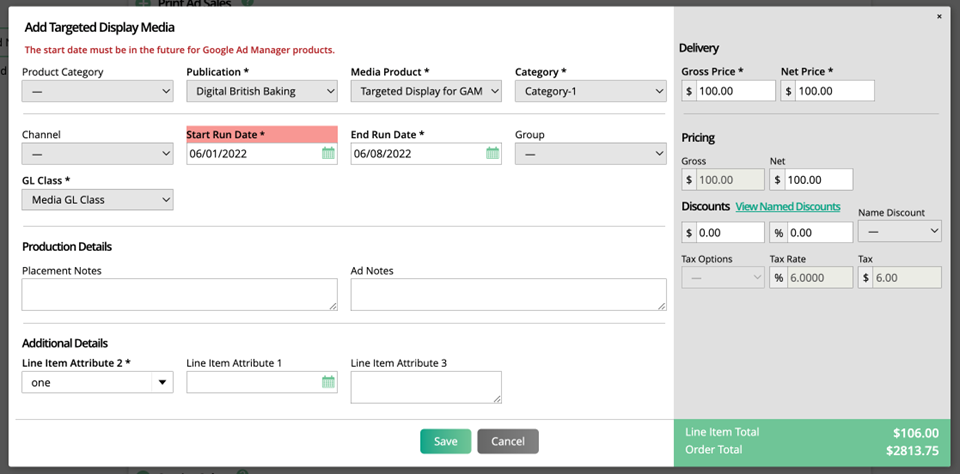
When you are entering an order for GAM items, the run date MUST be in the future. This requirement is only applicable when GAM is enabled and you have set up a GAM Targeted Display product.

Updated 7/11/2023