Contact Automation Workflows
Automation Workflows are a fantastic marketing tool. Our Automation Workflows can be customized to automate common processes and free up your sales reps’ time and energy for more important tasks. Within the Marketing section of Ad Orbit, you can set up Automation Workflows for contacts, contact inactivity, and drip campaigns.
Before you create the workflow, you want to have a purpose in mind. Are you onboarding new clients? Are you trying to reach out to contacts that ended up going with a competitor? Do you want to make sure all new contacts are assigned to a rep?
You should also review your permissions before attempting to create Automation Workflows, to make sure you have the permissions you will need.
The User Permission ‘Automation Workflows’ gives you access to the Marketing Automation Workflows page, where you can see workflow information.
If you will be creating workflows, you should also have the sub-permissions ‘Add/Edit Workflows’, ‘Add/Edit Workflow Actions’, and ‘Publish/Unpublish Workflows’. The first grants you the ability to edit workflow settings such as which days the workflow runs. The second allows you to set up the actual actions within the workflow that you contacts will go through such as sending an email. Finally, the last permission is what lets you publish workflows or move them back into an inactive status. Contacts will only flow through published workflows.
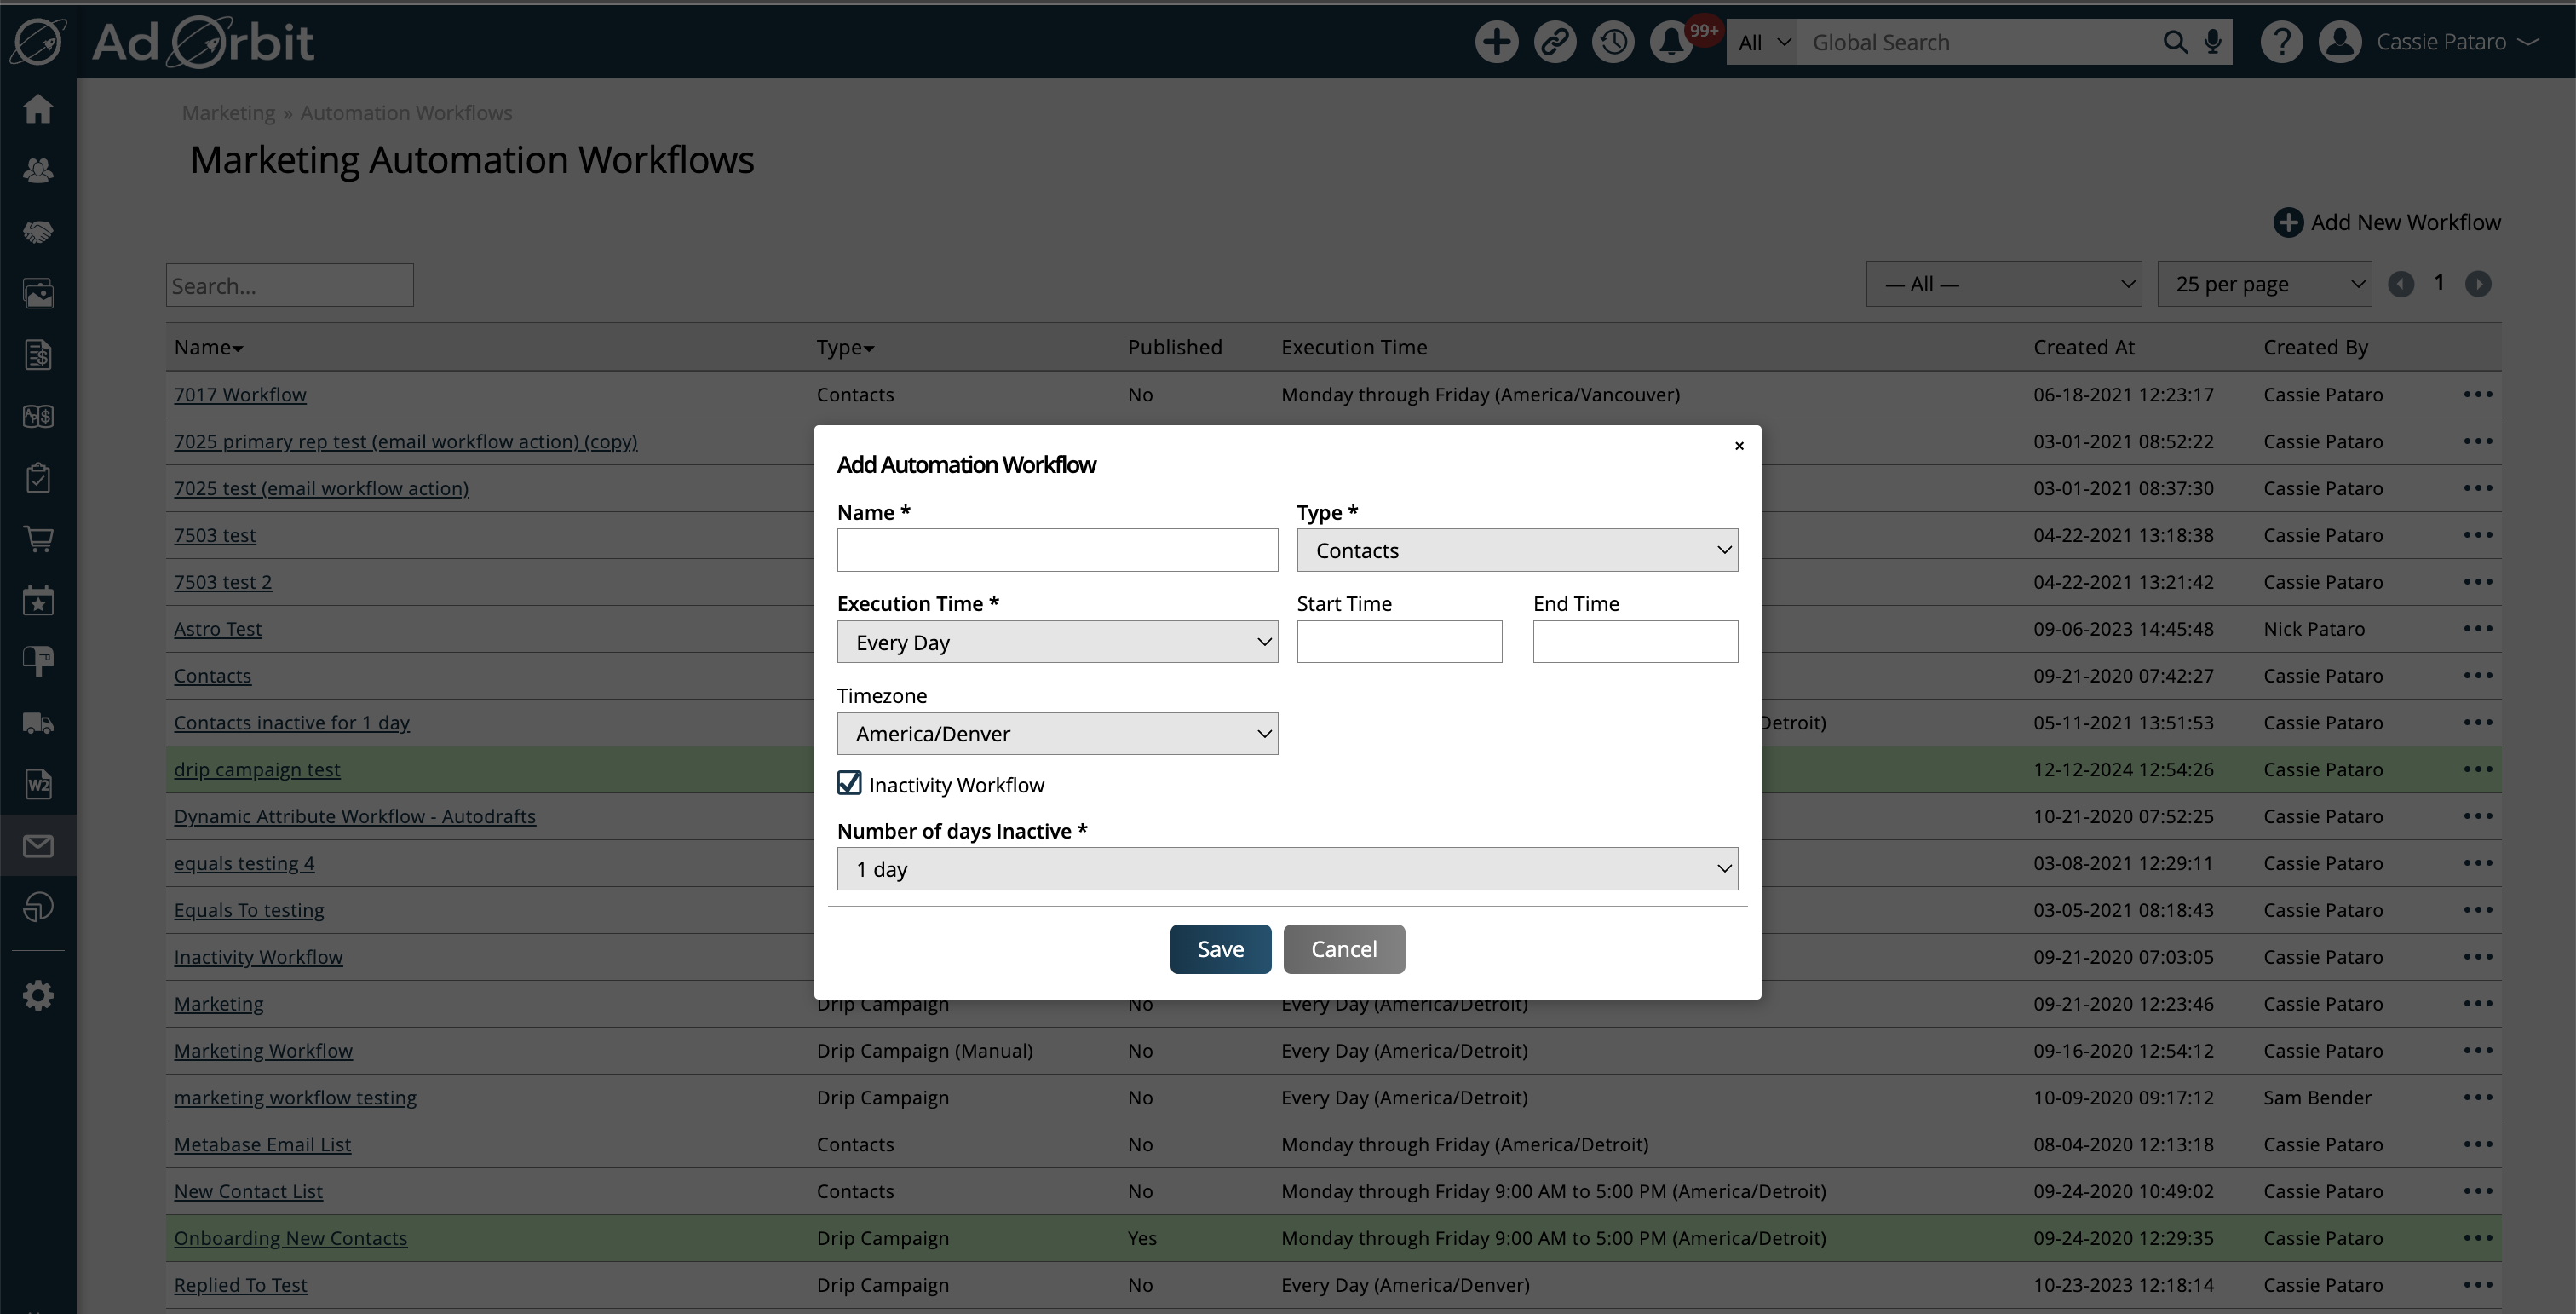
To create a workflow, navigate to Marketing > Automation Workflows and click Add New Workflow.
Fill in the workflow name, type, execution time, contact list, and start date.
Important
You must have your own SMTP account set up in the Email Queue in order to use Drip Campaigns. You can't use the default system setting.
Tip
You may want to think about choosing Monday through Friday for the execution time, so your contacts are not receiving emails from you over the weekend
You also have the choice to fill in start and end time, and time zone.
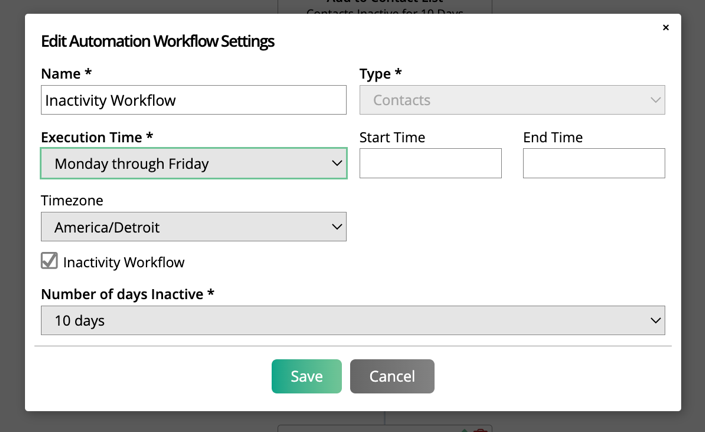
If you are creating an inactivity workflow, choose how many days inactive a contact has to be before they are entered into the workflow.
Now you can start building different Workflows using the system triggers and actions. Below you will find descriptions of the actions/triggers and example workflows.
Actions
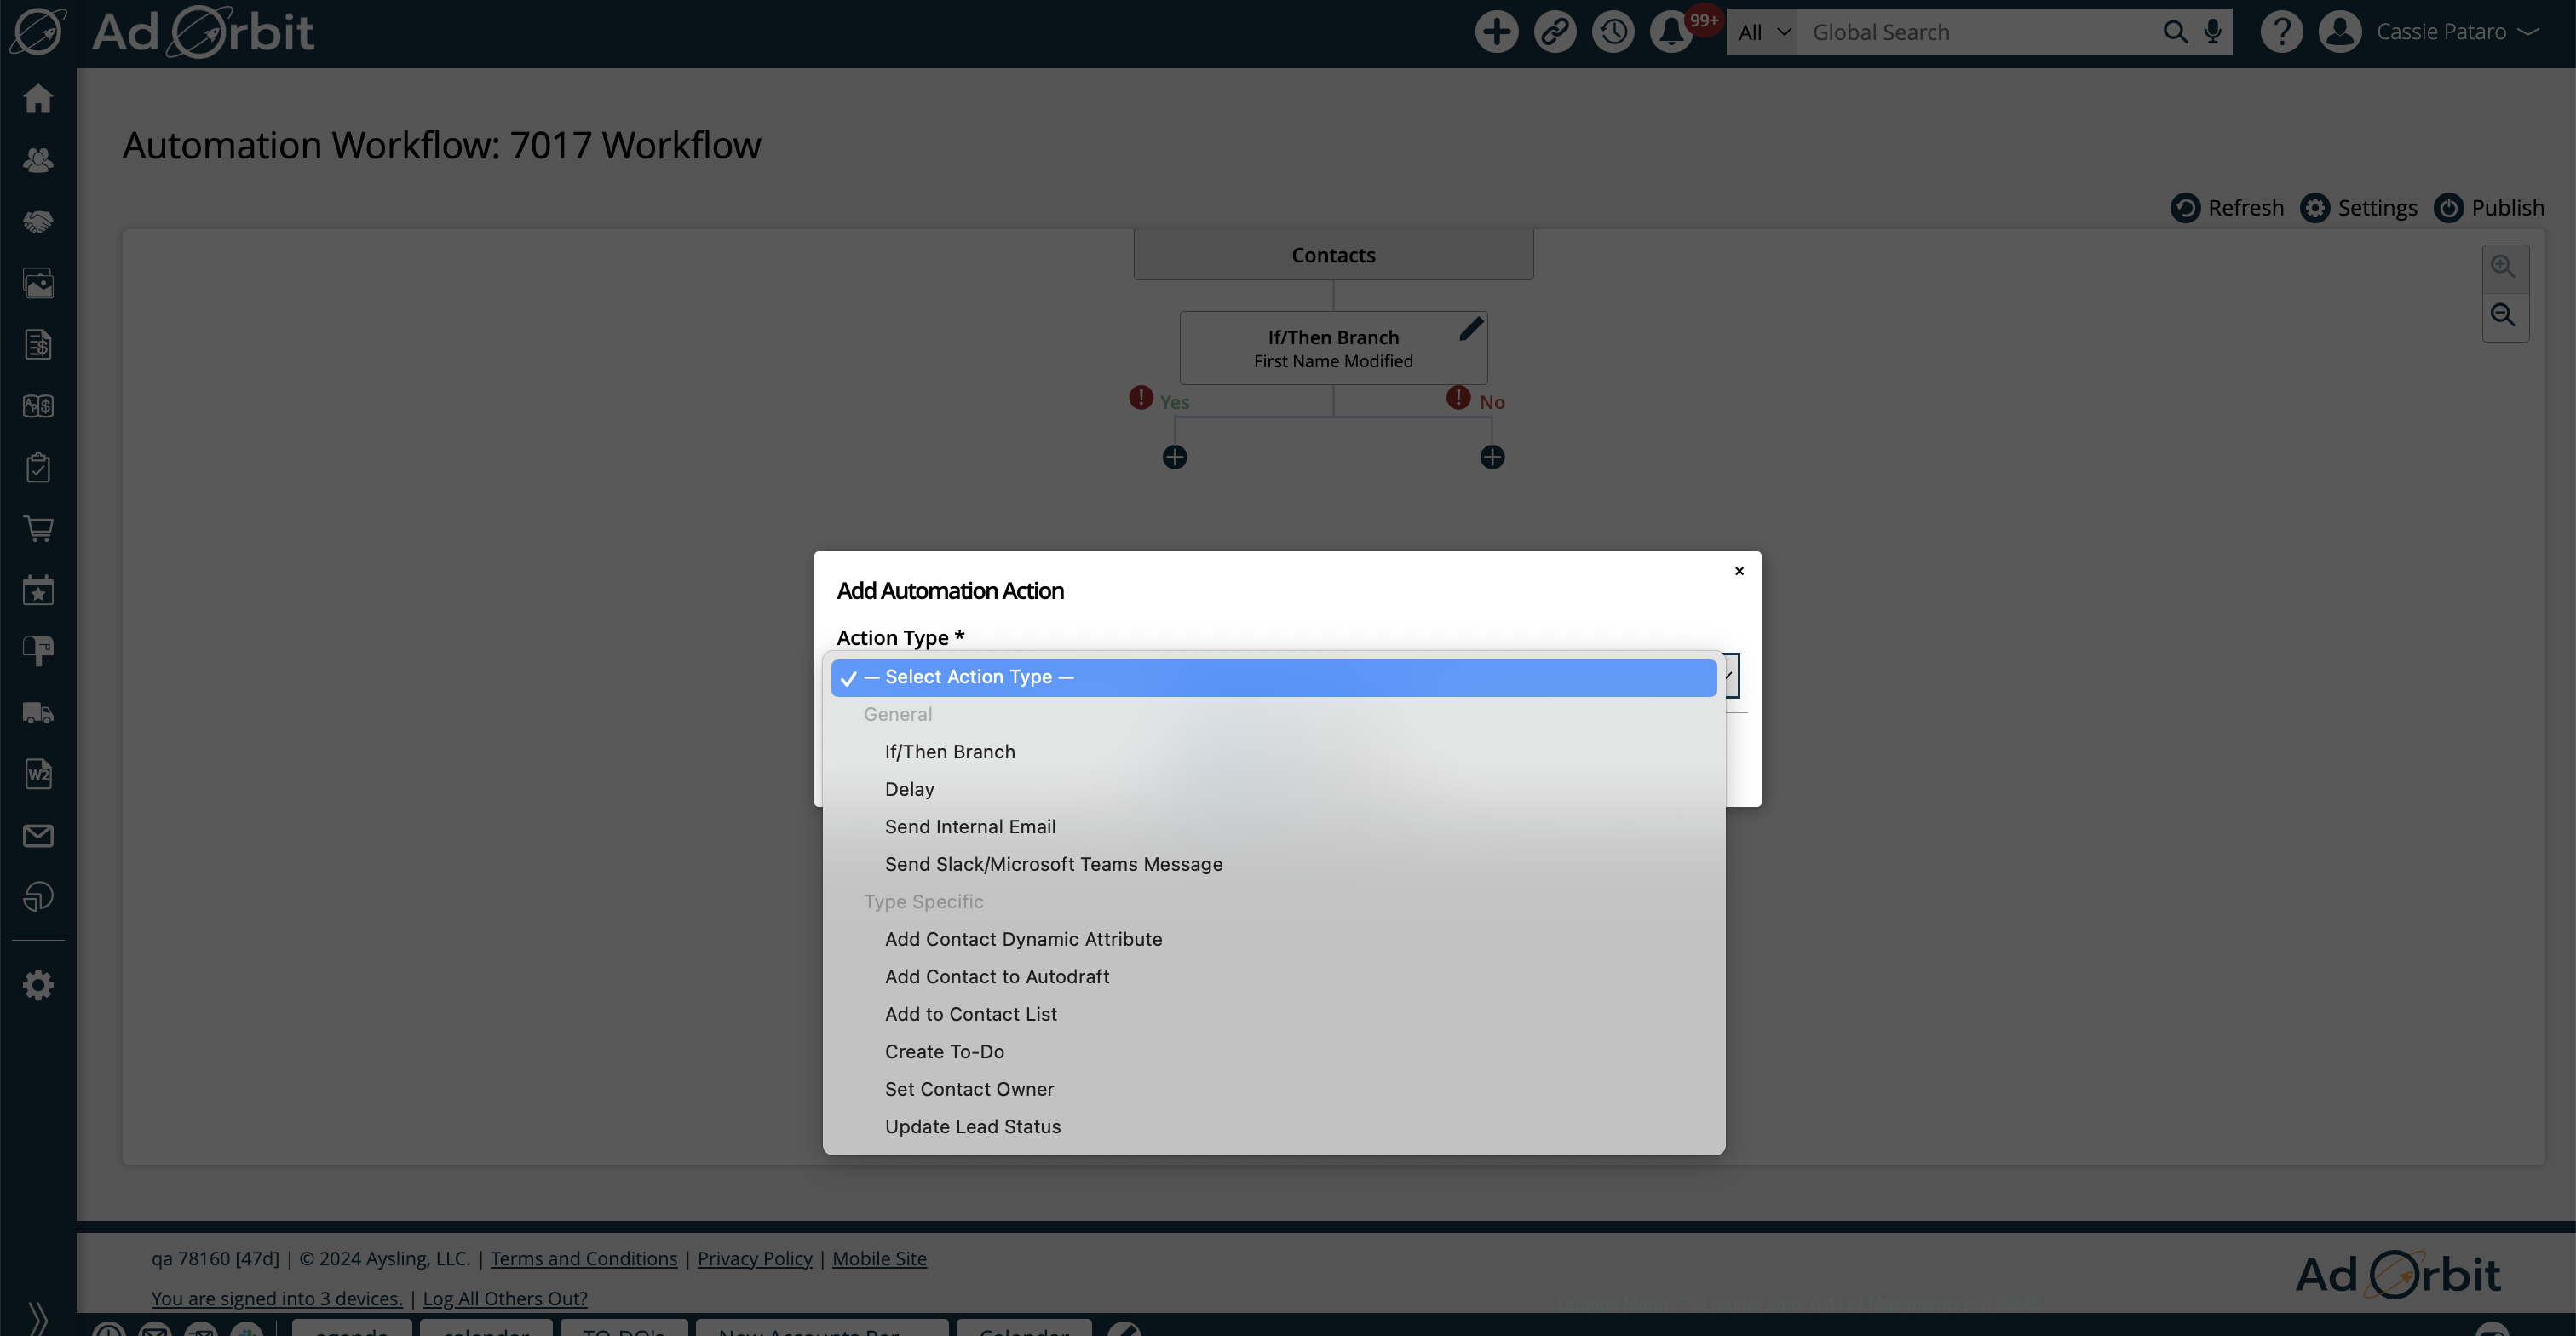
If/Then Branch – If/then branches are perhaps the most complicated action of automation workflows, but they are what allow you to split the workflow based on certain criteria. Depending on what happens to your contact, you can send them down different paths. For example, you could set up an if/then branch where it will find contacts whose lead statuses have been modified. Any contacts whose lead status has been modified will get sent down the ‘yes’ branch, and any contacts whose lead status has not been modified will get sent down the ‘no’ branch. Under each branch, you can set up different actions for these contacts. If you choose an if/then branch for your action, you must choose at least one condition, but you can add multiple to a single action if you wish.
If/Then Branch Conditions:
Contact dynamic attribute, first name, last name, lead source, lead status, or primary email modified
For all of the above conditions, the branch will split contacts based on if a certain field on the contact is changed. Each of the options has additional fields you may be required to fill out, or they may be optional. For instance, if you pick dynamic attribute modified, you’ll need to choose which attribute is modified and what is it modified to in order for the contact to meet the branch criteria.
Current contact dynamic attribute value
Unlike the other if/then branch conditions, this option is based on a current value, not a modified value. This will send contacts down one branch or the other depending on if their current attribute value is what you choose here.
For Drip Campaign automation workflows, you’ll see different available conditions in the If/Then Branches. These include Contact Unsubscribed, Email Clicked, Email Opened, Email Rejected, and Email Replied To.
Each of these conditions will prompt contacts to go through the branch based on how they interacted with the sent email. For example, you could set up an If/Then Branch in a Drip Campaign workflow where if a contact rejects the email, they get their lead status updated to ‘disqualified’.
Note
For the Email Replied To condition to work, you must be tracking emails as activities within your system either by using the BCC functionality, or by connecting an email on the My Preferences page.
Delay – If you do not add delays in your workflows, the contacts will go through your workflow as soon as the system can process them. If you set delays, then it forces the system to wait to perform the next action until a certain amount of time has passed. This can be really helpful if you want to update a lead status every 2 weeks, for example.
Send Internal Email – Have the workflow automatically send an email to one of your users. If you choose this action, you’ll need to choose who the email should be sent to. Currently, you can choose from the contact owner, the primary rep, a specific user, or a user group. You’ll also need to enter a subject line and message.
Send Slack/Microsoft Teams Message – Similar to sending an internal email, this action will only be available if you have either the Slack or Microsoft Teams integration in place (or both). When this action is in your workflow, a message will automatically be sent to the Slack or Teams channel of your choosing. You’ll be required to enter a channel and a message.
Add Contact Dynamic Attribute – Use this action to add a new dynamic attribute to your contact. You’ll be required to choose the attribute, and what value the system should set.
Add Contact to Autodraft - If using Autodrafts in your system, you can use this action to add contacts going through your workflow to specific Autodraft lists. This is a great way to add contacts to Autodrafts once they meet certain criteria, or if they have a specific dynamic attribute set, for instance. You'll also need to specify which Autodraft the contact gets added to.
To see this action, you need the user permission 'Allow Astro Autodraft Actions'.
To see all users' Autodrafts rather than just your own in the popup, you also need the sub-permission 'View All Users Astro Autodrafts in Automations'.
Add to Contact List – Using this action, you can add contacts to any of your existing contact lists. You need to make sure you have at least one contact list created in your system in order to use this action.
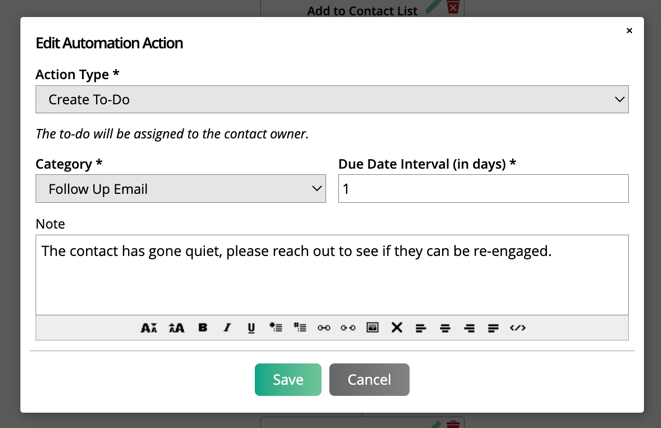
Create To-Do – Create a new to-do for the contact owner. The required fields for this action are the to-do category, and the due date interval. There is also an optional field for note that can be added to the to-do. We recommend adding a note here so your reps understand where the to-do is coming from and what it is for.
Set Contact Owner – You can use this action if you wish to change the owner of the contact. Currently, you can only select a specific user to get assigned.
Update Lead Status – Use this action to change a contact’s lead status. All that is required for this action is to choose the new status that should be assigned.
Sample Workflow
This is an example of a contact inactivity workflow. I’ve setup the workflow so contacts that have been inactive for 10 days will go through the workflow. The workflow is also set up to only run on weekdays.
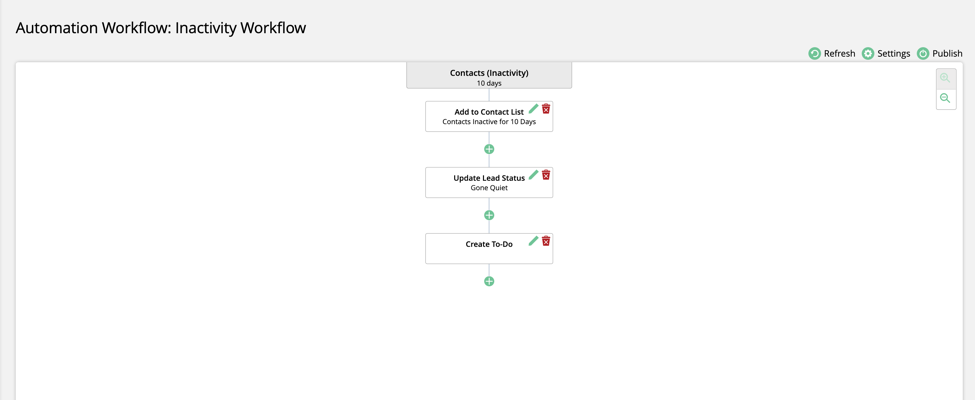
The first action in my workflow is to add these contacts to my contact list called ‘Contacts Inactive for 10 Days’. This allows me to easily view and communicate with all of the contacts that meet the criteria. I can send mail merges from this list to reach out and get them to re-engage.
The second action, which happens immediately after the first, is to update their lead status to ‘Gone Quiet’.
Thirdly, the workflow will create a to-do for the contact owner to send an email to the contact, due in 1 day.
While this is a simple workflow, it’s helpful in making sure your inactive contacts are not being overlooked and are still communicated with. It also takes pressure off of your reps to remember when every contact should be reached out to.
Updated 3/12/2025