Tracking Emails Sent from your System
Sent Emails Page
To keep track of all emails sent from your system, navigate to the Sent Emails page by going to Settings > Marketing & Emails > Sent Emails.
To access this page, you need the User Permission ‘Sent Emails’. To perform certain actions on this page, you will also need the sub-permission ‘Resend Sent Emails’.
Tip
Don’t have access to this page? Try using the ‘My Emails’ page. It contains all the same information and actions as the ‘Sent Emails’ page but will only show your emails. This can be found by going to Home > My Emails. For more information, continue reading below.
Use the search fields to narrow down the results. As there could be thousands of emails sent from your system, these search fields can be extremely helpful to find the records you need. You can filter by to and from email addresses, subject, error, or date range. Click search to view the results.
The Sent Emails page shows every email sent from the system – including every email sent by each user, and the automated emails generated by the system. There are a few categories of emails that these can fall into.
Direct Email: Direct emails are simply those that are sent from a user in the system to another email address, typically by using the Send Email action on the system dock. These emails do not fall under another specific category.
Orders: The order category captures order approval emails sent by the user or automated by the system. The system can also send oversold inventory notifications, pending order reminders, and thank you for ordering emails.
Artwork: Artwork emails can include manually sent artwork reminders, both individual and grouped, as well as automated artwork reminders generated by the system. These can also include email notifications of when artwork is uploaded to the system, or proof requests.
Invoices: This category includes both statements and invoices that are mailed to the client. Invoices can be manually sent from the Invoice search page or a company’s Invoices tab, and statements can be sent to the client from either the company’s Overview page or the Invoices tab. The system can also send out deferred invoice generation notifications, and emails when an invoice is created. If your system has the vendor module enabled, the system will also generate emails when a vendor invoice is uploaded.
Payments: Both upcoming and past due payment reminders are included in this category. Users can manually generate these emails by using the checkboxes on the invoice search page to choose invoices, and email payment reminders. The system can also automatically send both upcoming and past due payment reminders, as well as send payment confirmation emails once a payment has been processed. These can include payments for subscription and cart invoices.
Mail Merge: Mail merges are emails that are sent from a Contact List, and all of the contacts on the list will receive the mail merge email. Any mail merges sent from the system will show up on the Sent Emails list.
System Emails: The Sent Emails page also includes all system generated emails, such as scheduled reports, shared dashboards, credit card transaction summaries, project reports, assigned activities, emails generated from automated workflows, etc.
The table will display information about each email sent that meets your search criteria, including to and from email addresses, CC and BCC information, and created and sent dates. You can change the results displayed per page, as well as sort by column by clicking on that column’s table header.
Note
You will only see analytics data (total opens, total clicks, etc.) if you are using a Mandrill account in your Email Queue. We do not track analytics for other SMTP services at this time.
ID: Each email generated by the system is assigned a unique ID. By clicking on the ID, you can see the body of the email that was sent. The popup will also show similar information to what is in the table, including sent date, and to and from email addresses.
Subject: The subject of each email can be helpful when trying to find specific sent emails. Many of the system generated emails will have very similar subjects, such as ‘Order Approval for...’
Error: Notifies you as to whether there was an error with the email being sent.
Attempts Left: The system is set up to allow each email to be resent up to 6 times, if the original email failed to be sent. Most of the emails sent will show a 5 in this column, as they will have been successfully sent one time. If an email fails to send, the system will attempt to resend it, and the attempts left will update accordingly.
Total Opens: This column reflects the total number of times the email was opened. If the email was sent to multiple recipients, this column will show the total number of opens between all of them.
Total Clicks: This column shows the number of times a link within the email was clicked on.
Any email that has been rejected will be displayed in the table highlighted in gray, so that it is easily identifiable.
There are actions that can be taken for each sent email, by clicking on the ellipsis icon. If you have access to the Sent Emails page, you will be able to see the actions View Scheduled Email Group, Cancel/Reinstate Email, View Analytics, and Force Update Analytics. If you have the additional User Permission to 'Resent Sent Emails’, then you will also see the actions Edit Attempts Left and Resend Email.
Edit Attempts Left: The system is set up to allow each email to be resent up to 6 times, if the original email failed to be sent. By using this action, you can edit the number of attempts left, to allow for more than 6 total attempts. This action would be useful if an error was preventing an email from being sent, and you only caught the error once the email ran out of attempts.
Force Update Analytics: You can force an immediate update of a specific email’s analytics by using this action.
View Analytics: The View Analytics action will show a popup that breaks down the email analytics by recipient. If the email was sent to multiple people, this action lets you view the number of email opens and clicks per person. The popup also shows if the email was rejected by the recipient. An email could be rejected for a variety of reasons, it could be that the email address was incorrect, or the message was marked as spam.
If using the Nylas integration to pull in emails as activities (connecting your email on the My Preferences page and selecting folders to pull from), and you have the System Configuration Use Email Reply Tracking set to yes, you can also view whether contacts have replied to your emails when viewing the analytics. In this scenario, when a contact replies to an email, you’ll see ‘Yes’ under the Replied To column in this popup.
Resend Email: To resend an email that has already been sent once, you can use this action. When this action is clicked on, you will see a confirmation popup that you would like to resend the email. The action can be helpful if a situation pops up where a client cannot locate their order approval email, for example.
View Scheduled Email Group: To see this action on emails, you need the User Permission ‘Scheduled Email Groups’. The permission grants you access to the Scheduled Email Groups page in the system, and the action on an email brings you to that page. This is only applicable for emails that are in a scheduled group.
Cancel/Reinstate Email: Relevant for items in a Scheduled Email Group, this action allows you to either cancel an individual email or reinstate an email that has been cancelled. Cancelling a scheduled email means that the email will not be sent along with the rest of its scheduled group.
My Emails Page
The My Emails page is nearly identical to the Sent Emails page, with the exception being it will only show data about your own sent emails, not emails sent from every user in the system. Go to Home > My Emails to view this page. This page is not permission based.
My Emails include similar search fields, and the same actions that are available on the Sent Emails page. For learn about the data shown, as well as what actions you can perform, please read the above ‘Sent Emails Page’ section of this document.
Sent Emails from your Dock
The Sent Emails page allows you to track information for every email sent from the system, including system emails and emails from other users. There is also the option to track emails on an individual user level, by utilizing the system dock. The system dock will only display data about emails sent from the logged in user, but because of that, you do not need the User Permission ‘Sent Emails’ to view the data.
Note
You will only see analytics data (total opens, total clicks, etc.) if you are using a Mandrill account in your Email Queue. We do not track analytics for other SMTP services at this time.
To view your system dock, click on the toggle in the bottom right corner of the page. Once your dock is being displayed, click on the Show Emails icon, to open the Email Dock.
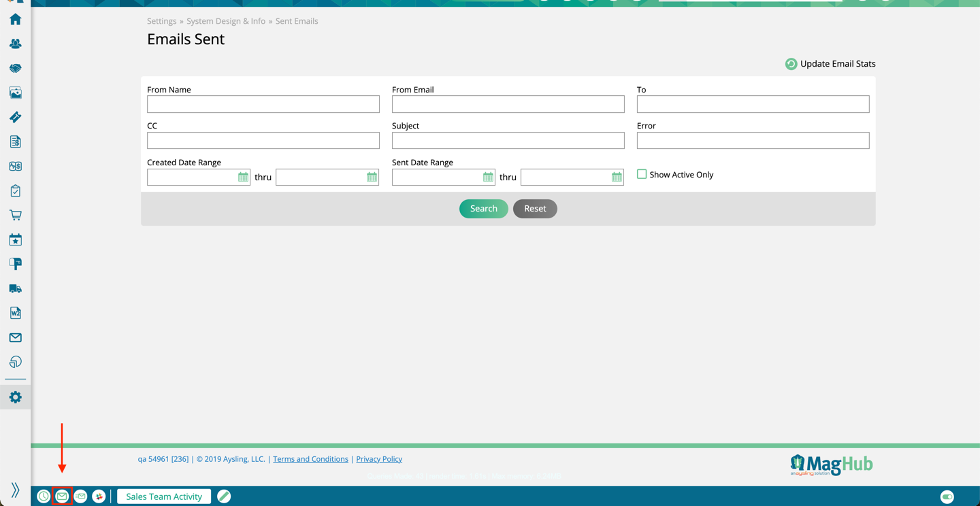
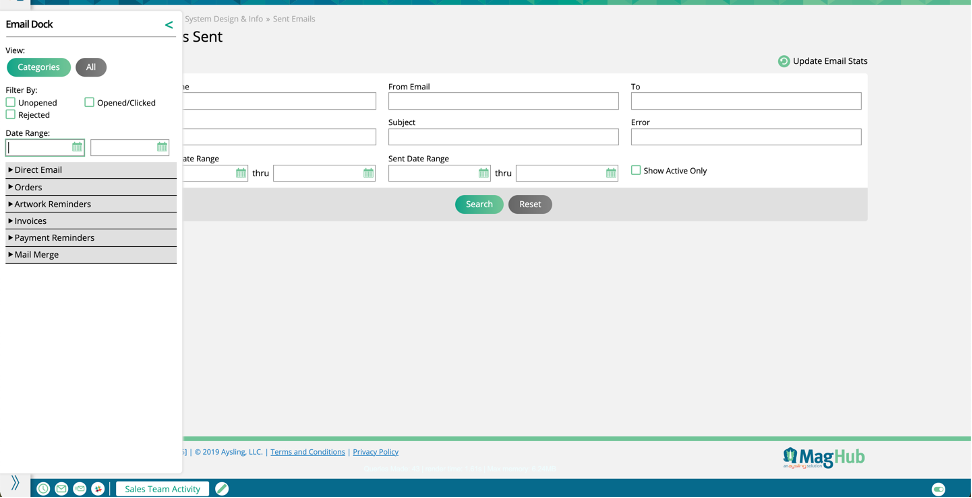
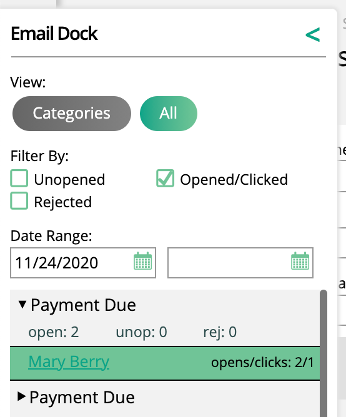
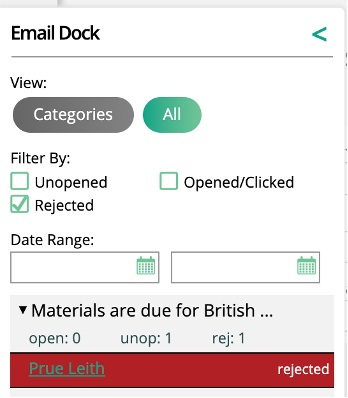
The Email Dock displays similar email analytics as the Sent Emails page. You can either choose to view the sent emails by category such as Orders, Invoices, and Payment Reminders, or you can view all sent emails. There is also the option to filter the emails by those that are unopened, those that are rejected, and those that have been opened or clicked, as well as by sent date range.
If you are choosing to view emails by category, click on the category to view the emails that fall under that group.
Direct Email: Direct emails are simply those that are sent from a user in the system to another email address, typically by using the Send Email action on the system dock. These emails do not fall under a particular category.
Orders: The order category captures order approval emails sent by the user. These would be sent when a user emails a PDF contract of the order from either the pending orders tab or the orders tab of a company.
Artwork Reminders: The artwork reminder emails shown here are those that are manually sent by a user, such as from the Production Report.
Invoices: This category includes both statements and invoices that are mailed to the client from a user. Invoices can be sent from the Invoice search page or a company’s Invoices tab, and statements can be sent to the client from either the company’s Overview page or the Invoices tab.
Payment Reminders: Both upcoming and past due payment reminders are included in this category. While there are automated system payment reminder emails, the emails that are included in a user’s dock are those that are manually sent, by using the checkboxes on the invoice search page to choose invoices, and email payment reminders.
Mail Merge: Mail merges are emails that are sent from a Contact List, and all of the contacts on the list will receive the mail merge email. Any mail merges that the logged in user has sent will show up under this category.
Each sent email will show its analytics underneath the subject line, including the number of opens, clicks, and rejects. If you hover over the email, you will see two available actions: Resend Email, and View Email.
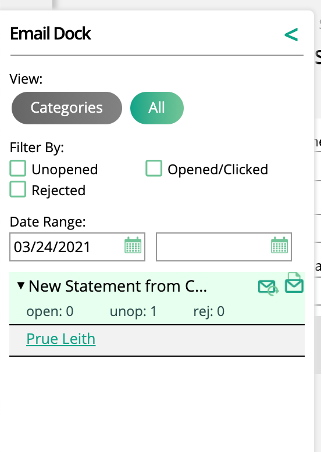
Clicking View Email will prompt a popup that shows the body of the email, along with additional information about it, including sent date and any attachments. Unlike from the Sent Emails page, there is no confirmation after clicking the Resend Email action, so be sure you want to resend the email prior to clicking the icon.
For each sent email, you can choose to show or collapse information about the email recipients by clicking on the email. Each contact name is a quick link which will bring you to the contact’s page in the system. If you hover over the recipient’s name, you will see whether they have unopened, opened, or rejected the email.
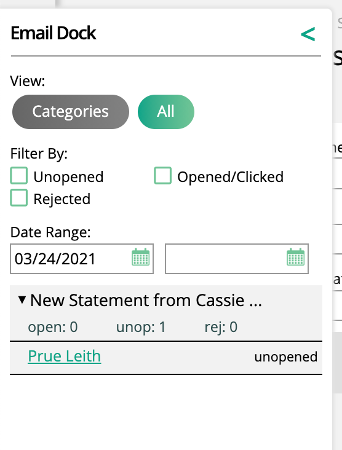
Unopened, opens/clicks, and rejects are also color coded. Any recipient who has opened or clicked the email will be displayed in green, and any email that has been rejected will show up in red.
Updated 2/9/2024