Contact Widget
The Activity To-Do List widget shows all of your to-do items in a convenient and easy to read list.
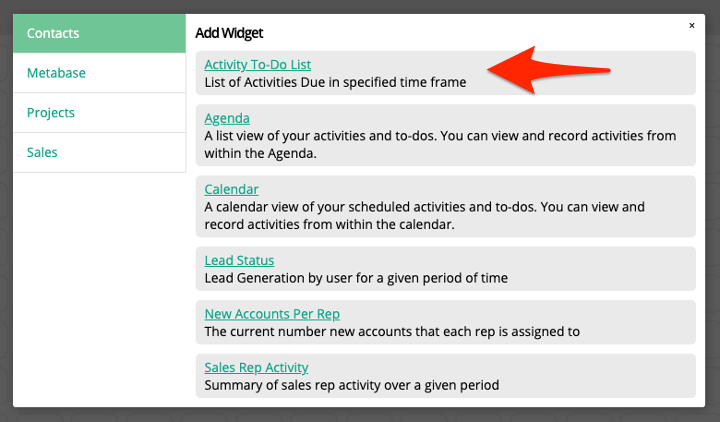
To add the widget to your dashboard, make sure you are in edit mode. Click Add Widget in the upper right corner. You will get a window that shows widget types. View the Contact type and select Activity To-Do List.

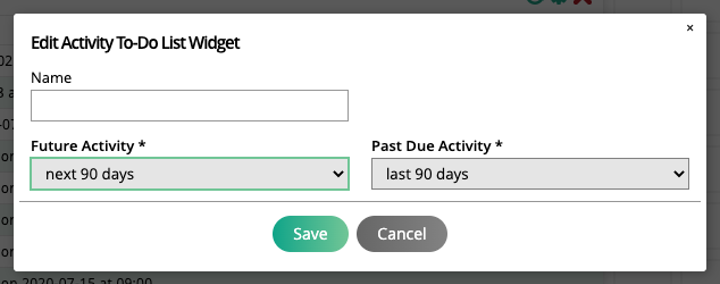
The widget is configurable by clicking on the gear icon in the upper right corner. You can name your widget, and choose how much future activity and past due activity you would like to display.

Tip
Keep yourself organized by adding multiple widgets to your Dashboard; one for today's activities, one for the past, and one for the future.
From the Edit pop-up, you can also add this widget to your dock for easy access. When you are done editing, click Save.
The Lead Status widget shows the leads owned by the user for a given period of time. The widget gives you a snapshot of information about your leads, in addition to being able to perform actions directly from the widget, such as sending your lead an email.
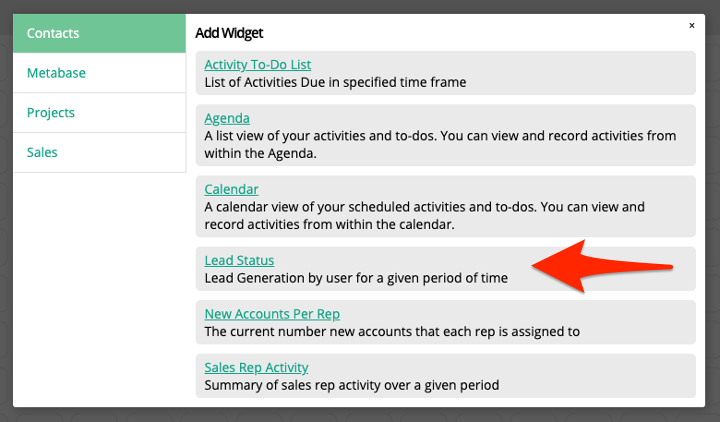
To add the widget to your dashboard, make sure you are in edit mode. Click Add Widget in the upper right corner. You will get a window that shows widget types. View the Contact type and select Lead Status.

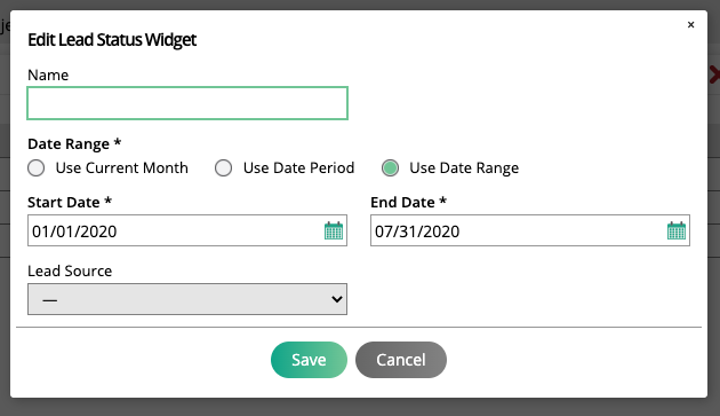
The widget is configurable by clicking on the gear in the upper right corner. You can name your widget and choose from various date ranges. You can also filter by lead source, and are able to add this widget to your dock for easy access. Click save when you are done editing.

There are two different views for the widget, depending on how large you make it in your dashboard.
The smaller view will display the date range and total number of leads.
The larger view will display the date range, name of the contact and their information, lead status and source, and duration you have had the lead.
From the widget, you can navigate to the contact page by clicking on the contact name.
You can also email the contact directly from the widget by clicking on the email icon next to the contact’s email.
If you have permission to access the Lead Status Report, you can easily navigate to it by clicking on the ’view details’ icon in the upper right corner of the widget.
The New Accounts Per Rep widget displays the current number of new accounts that each rep is assigned to, in an easy to read list format. An account is considered new based on the settings in your system configurations.
To add the widget to your dashboard, make sure you are in edit mode. Click Add Widget in the upper right corner. You will get a window that shows widget types. View the Contact type and select New Accounts Per Rep.
You can then choose to name the widget by clicking on the gear icon in the upper right corner. You can also add this widget to your dock for easy access. Click save when you are done editing.
Whether or not you can view this dashboard is based on your user permissions.
The Sales Rep Activity widget shows a summary of sales rep activity over a given period of time. You can view the results in a list view or chart view. This can be especially useful as a manager, if you want to see how your sales reps are performing.
To add the widget to your dashboard, make sure you are in edit mode. Click Add Widget in the upper right corner. You will get a window that shows widget types. View the Contact type and select Sales Rep Activity.
The widget is configurable by clicking on the gear icon in the upper right corner. You can choose to name your widget, and choose the date range. Dependent on your permissions, you can also choose which users you wish to see. You can also add this widget to your dock for easy access. Click save when you are done editing.
You can change how the information is displayed in the widget, by clicking the display chart option. If you choose the display chart, you can see the value for each bar by hovering over it.
The data for this widget is pulled from the Sales Rep Activity Report, which you can navigate to from the widget by clicking on the ‘view details’ icon in the upper right corner.
The Saved Search and Reports widget displays a list of saved searches and reports created by yourself or shared with you. The widget displays the name of the search, the type, the report name (if applicable), and who it was shared by. This allows you to have access to all of your saved searches in one location. You can also perform actions directly from the widget. Add the widget to your dock to have access to all your data from anywhere in the site.
To add the widget to your dashboard, make sure you are in edit mode. Click Add Widget in the upper right corner. You will get a window that shows widget types. View the Contact type and select Saved Search and Reports.
The widget is configurable by clicking on the gear icon in the upper right corner. You can name your widget, filter by type and who the search was created by, and select a default sort order. From the edit pop-up, you can also add this widget to your dock for easy access. Click save when you are done editing.
You can further sort your results by clicking on any of the table headers.
By clicking on a search name, you can navigate directly to the saved search or report.
You can perform actions by clicking on the ellipses on the right side of the table. From there, you can edit, share, or delete the search.
The Approval Queue widget allows you to approve rep requests for company access, new contacts, and contact ownership requests. The widget essentially takes the information from the Contact Approval page and brings it to your dashboard for easy access. It displays the information in an easy to read list format, and you are able to approve or deny requests directly from the widget. This widget will be the most useful if you have permissions to approve new contacts and approve contact owners.
To add the widget to your dashboard, make sure you are in edit mode. Click Add Widget in the upper right corner. You will get a window that shows widget types. View the Contact type and select Approval Queue.
No information will display on the widget until you configure it by clicking on the gear icon in the upper right corner. You can name your widget and choose which type of approval you would like to see, including company, contact creation, and contact ownership. From the edit pop-up, you can also add this widget to your dock for easy access. When you are done editing, click Save.
The other actions you can perform from this widget are dependent on your permissions. If you have permissions to approve new contacts and approve contact owners, then you will see the following for each of the different types:
Company - If you filter by company type, you will see a list of all of the requests from reps who want access to a specific company. The table will show the company name, the rep who requested access, any current reps, and when the request was made.
Contact - If you filter by contact creation type, you will see a list of all of the contacts reps have created who do not have permissions to approve contacts. This can be helpful to prevent duplicate contacts. The table will show the contact name, their email, the company name, the rep who made the request, and when the request was made.
Contact Ownership - If you filter by contact ownership type, you will see a list of all of the contacts reps have requested ownership of. The table will show the contact name, the company name, the rep who made the request, and when the request was made.
If you do not have the permissions to approve new contacts or approve contact ownership, then you will see either a list of the contacts you have requested ownership of or have created. This can still be helpful, however, as it takes your contact approval queue and displays it in your dashboard for easy access. For the company type, you do have the option to delete the request.
The Calendar Widget includes Team Activity functionality. You can now display activities for multiple reps at once, and can choose to show Daily Sales Activity on the widget. There is the option to show sales activity based on either contract or reporting/billing dates.
The Rep multi-select will display any users who Report To you, allowing you to view your whole team’s activity. If you choose to show more than one user in the widget, then the activities in the daily panel will show which user the activity is assigned to.
To show Daily Sales Activity, in the widget’s edit popup, select either Show Sales by Contract Date, or Show Sales by Reporting/Bill Date. When viewing your Calendar Widget, you will see a $ icon in the top right corner of each date that has a sale.
Note
When you use the Show Sales by Contract Date option, the sales will be displayed on the date the sale was made. When the Show Sales by Reporting/Bill Date setting is used, the sales will show up on the calendar based on the type of product sold. Print and digital ads will use the Issue’s Reporting Date, any digital media impressions or slots will show up based on their Start Run Date, and service and event products will show up on their Billing Date.
When the daily details panel is open on the right side of the widget, if there are sales for that date, the Daily Sales information will display at the top of the panel, above the user’s activities. Each date will show the number of line items sold by the rep(s) selected in the widget, and they will be broken out into the following categories: print ads, digital ads, impressions, slots, services, and events. There will also be a total for that date’s sales.